
Listings
The Listing management tab comes next to Category Template Tab. This tab gives a comprehensive real-time status of the operations performed on the products. The tab enables bulk importing, bulk syncing, bulk uploading on Michaels. You can also perform several actions on individual products like Publishing, Activating, Deactivating and Deleting them per business needs.
Let’s understand each feature and functionalities in detail:
Side Top Bar
The right top bar just opposite to listings(heading) serves three options.

- Import products from Shopify store to Michaels App
- Sync status of already uploaded products
- Bulk Publish on Michaels
By clicking on these options, you can perform the respective activities. All you have to do is to select a product from the ones listed below and click on the required option to complete an activity.
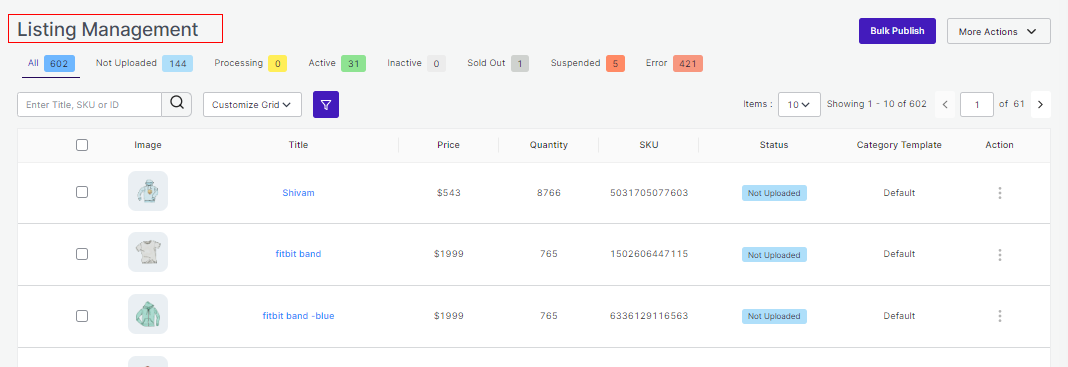
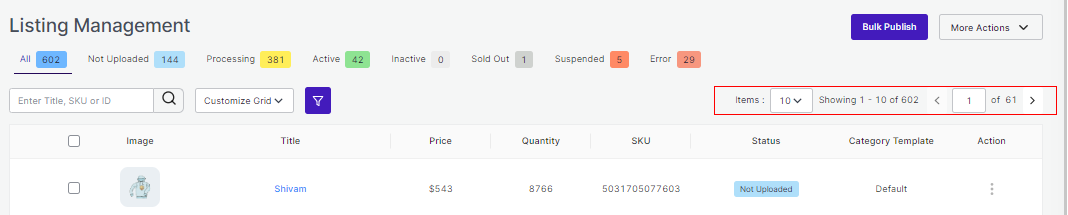
Product Status
It shows the statuses of the products. Here are different statuses, you will find your products categorized under:

- All: Total no. of products uploaded.
- Not Uploaded: Those products which are simply imported from Shopify to the app and not yet uploaded on Marketplace.
- Processing: The status changes to ‘Processing’ when the products are being uploaded. Once the task is completed, the status changes to Active.
- Active: This status comes from the marketplace. Once the product is uploaded from the app to the marketplace, the status changes to Active on the app.
- Inactive: The status changes to ‘Inactive’ when the product is uploaded from the app to the marketplace but is either out of stock or has been manually made Inactive from the app.
- Sold out: Total no. of products completely sold out on Michaels.
- Suspended: Product delisted by Michaels due to inappropriate information.
- Error: It shows the total no. of products with errors that are not uploaded and need correction.
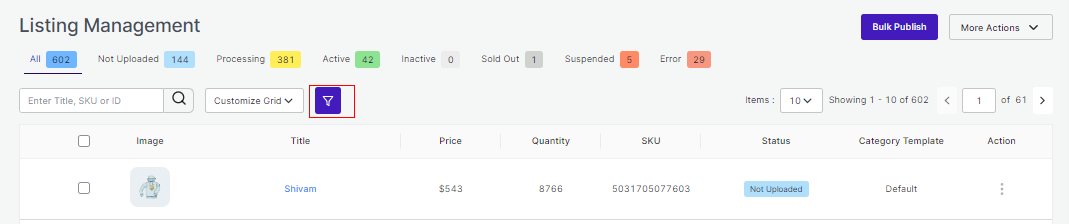
More Filters
Below the Products status lies the option of More Filters. These are extra filters through which products can be filtered out in the grid.
Just after clicking on the More Filter option, you will get a box opened on the right of the screen with listed filters. In addition, each of these options has further options to choose from.
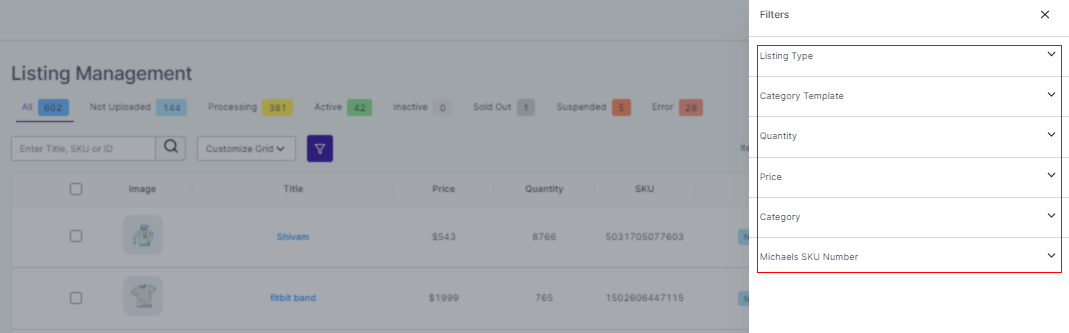
Once selected all the options, click on the option Reset or Apply (as per the case).
Customize Grid
Just next to the ‘More Filters’ option, you can see ‘Customize Grid.’ The option of Customize Grid helps you to customize the columns you want to see for your products.
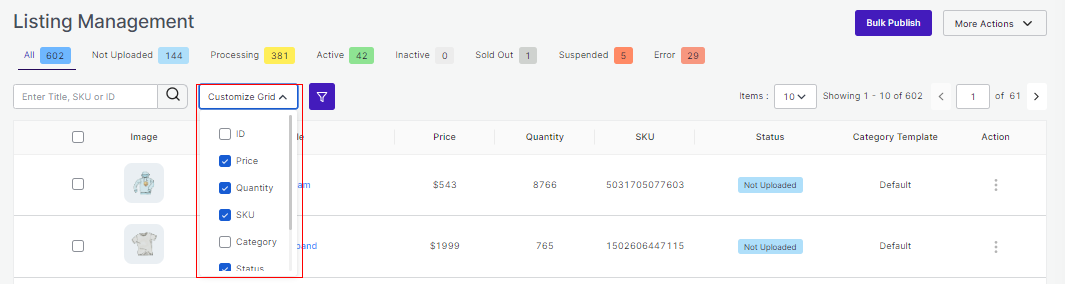
With the help of Customize Grid, you can see the following details: id, Image, Title, Price, Quantity, SKU, Status, Tags, Profile, Category, and Action. Each of the options will show the desired result on the list of products.
Just next to the Customize Grid and More filters is Listing Per Page, where there are two boxes with numeric values.
- The first value enables you to show the number of products you want to be listed on your screen. For instance, if you choose 5, there will be a list of 5 products visible, if put 10, then a list of 10 items will be visible, and so on and so forth.
- The second value is the multiple pages of listed products. If there are a total of 14 pages of listed products, with the help of this option you can easily choose which listed page you want to see out of the total 14 listed pages.
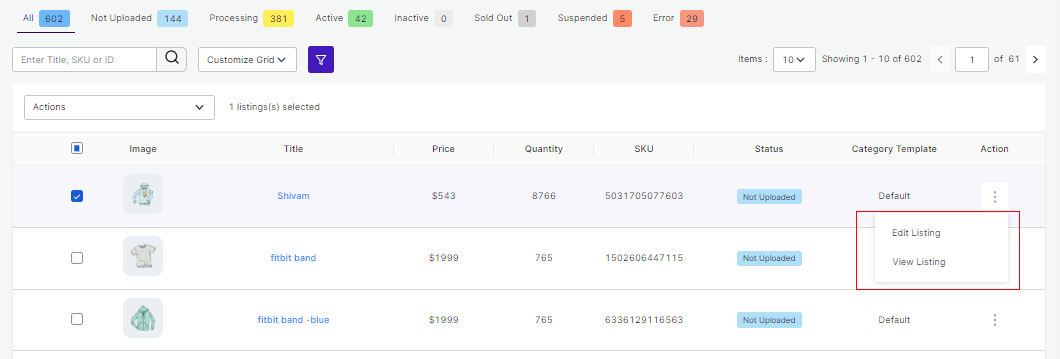
Also, you can Edit or View the listing by clicking the three dots under Action button on Menu.
Actions
In case you want to perform actions like Publishing an individual product, active or deactivate it or even delete it, you simply have to click on the listing, and you will see a new feature displaying on the screen. You can see it below:
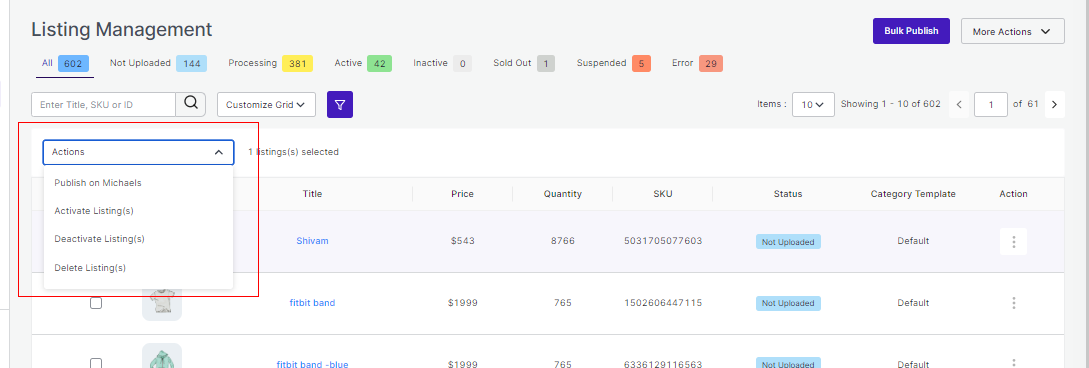
By selecting any option, you will be able to perform and see the desired result.
Here we come to the end of the Listing Management Tab. Hereafter, we shall be exploring Order Tab in detail.


