
Configuration Setting
After installing the Vendor Support System extension for Magneto 2, the admin has to set up the configuration settings to enable the features of the extension.
To set up the configurations
- Go to Admin panel.
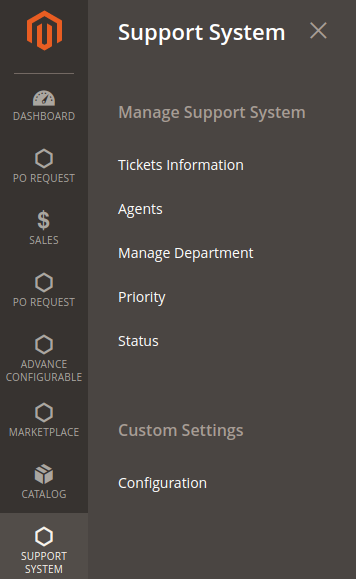
- On the left navigation bar, click the SUPPORT SYSTEM menu.
The menu appears as shown in the following figure:
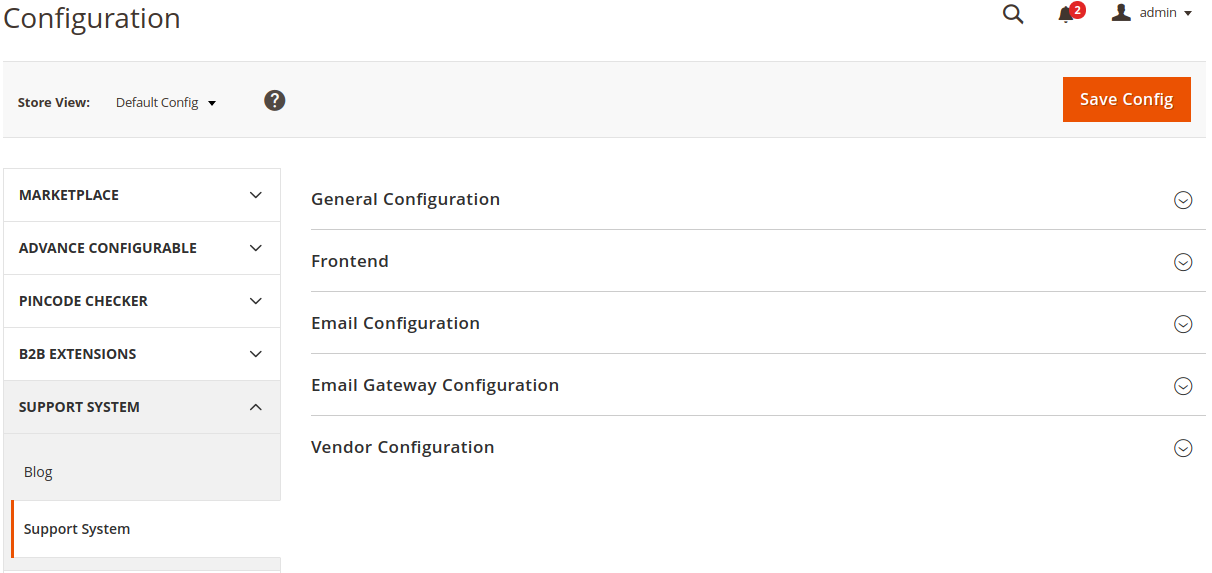
- Click Configuration.
The Configuration page appears as shown in the following figure:
- In the right panel, click the General Configuration tab.
The tab is expanded, and the corresponding fields appear as shown in the following figure:
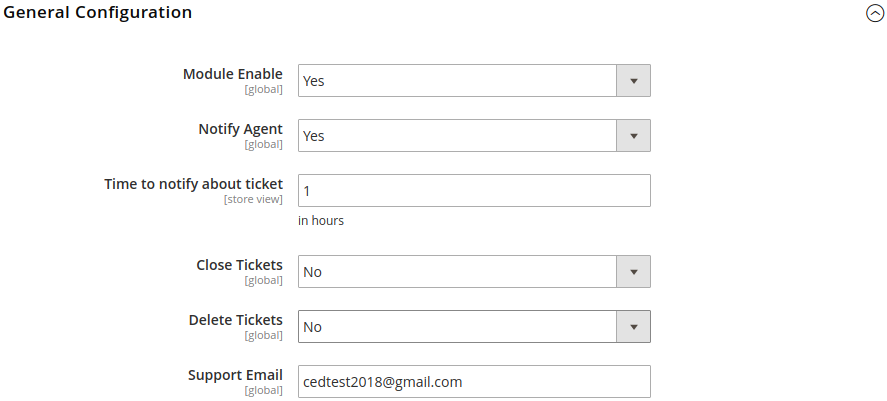
- Module Enable: Select Yes to enable the Support System extension.
- Notify Agent: Select Yes to notify the Vendor and agent about the ticket if required.
The Time to notify about ticket field appears if selected Yes.
In the Time to notify about ticket box, enter the time interval for the number of hours to set the auto notification. - In the Close Tickets, select Yes to change the status of the ticket to close automatically after a certain interval of time.
The Time to auto close the ticket field appears if selected Yes.- In the Time to auto close the ticket box, enter the time interval in the number of days to set the auto close the ticket.
- In the Delete Tickets list, select Yes to automatically delete the expired ticket.
The Auto delete ticket after certain period field appears if selected Yes.
- In the Autodelete ticket after certain period box, enter the time interval in the number of days to automatically delete the expired ticket.
- In the Support Email box, enter an email address through which the admin can manage the tickets between the organization and the client.
- Scroll down to the Frontend tab, and then click the tab.
The tab is expanded and the corresponding fields appear as shown in the following figure:
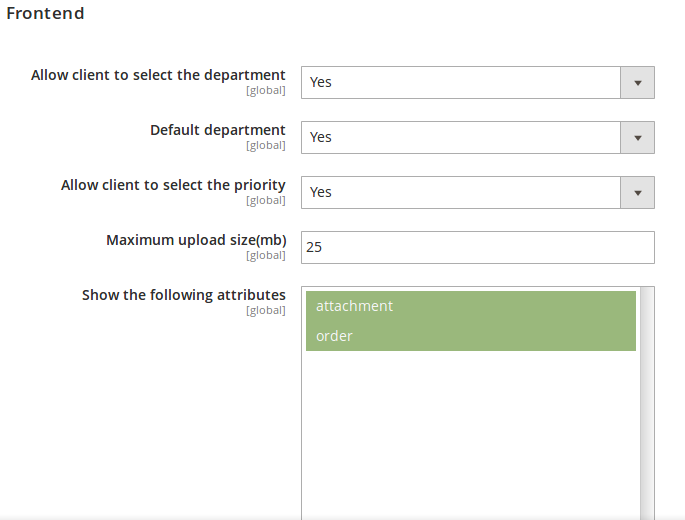
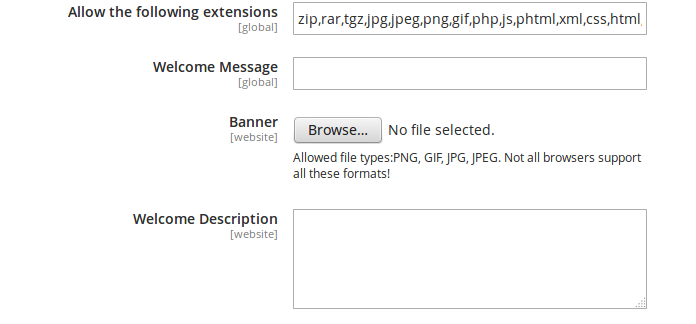
Under Frontend, do the following steps:- In the Allow client to select the department list, select Yes to allow the Customers to select the department so that the ticket is directly assigned to the selected department.
- In the Default Department list, select Yes to assign the tickets to the default department, that is, Admin.
- In the Allow client to select the priority list select Yes so that the users can set the priority of the ticket while creating a new ticket.
- In the Maximum upload size (MB) box, enter the size in MB so that users can upload a file of the specified size.
- In the Show the following attributes list, select the required option.
- order: Users can submit a ticket with some specific order number mapping to the ticket.
- attachment: Users can send the attachment with the ticket
- In the Allow the following extensions box, enter the specific set of file types.
With this setting, the users can upload an only specific set of files as mentioned by admin. - In the Welcome Message box, enter the Support System home page Welcome title if required.
- Click the Browse button next to the Banner field to change the banner of the Support System home page.
- In the Welcome Description box, enter the description of the Support System home page.
- Scroll down to the Email Configuration tab, and then click the tab.
The tab is expanded and the corresponding fields appear as shown in the following figure:
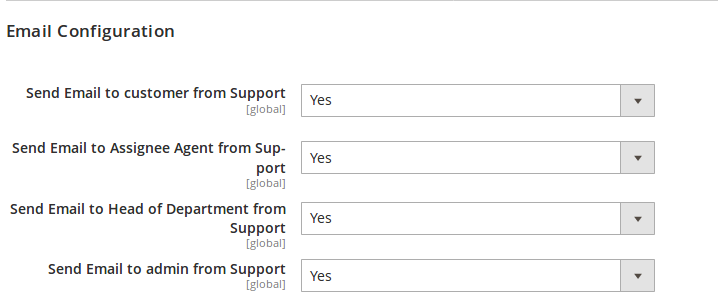
Under Email Configuration, do the following steps:- In the Send Email to Customer from Support list, select Yes to enable the users to receive the Support emails.
- In the Send Email to Assignee Agent from Support list, select Yes to enable the assignee agent to receive the Support emails.
Note: Assignee Agent is the one who has been assigned the ticket. - In the Send Email to Head of Department from Support list, select Yes to enable the head of the department to receive the Support emails.
- In the Send Email to Admin from Support list, select Yes to enable the admin to receive the Support emails.
- In the Send Email to Customer from Support list, select Yes to enable the users to receive the Support emails.
- Scroll down to the Email Gateway Configuration tab, and then click the tab.
The tab is expanded and the corresponding field appears as shown in the following figure:
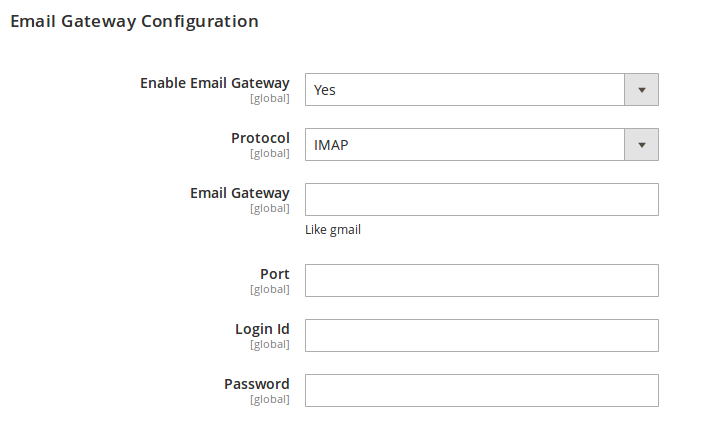
Under Email Gateway Configuration, do the following steps:- In the Enable Email Gateway list, select Yes to enable the email gateway configuration.
- In the Protocol list, select the required option.
- In the Email Gateway box, enter the email gateway such as Gmail, Yahoo, outlook, and so on.
- In the Port box, enter the gateway port.
- In the Login Id box, enter the support email Id.
- In the Password box, enter the password value.
- Scroll down to the Vendor Configuration tab, and then click the tab.
The tab is expanded and the corresponding field appears as shown in the following figure:
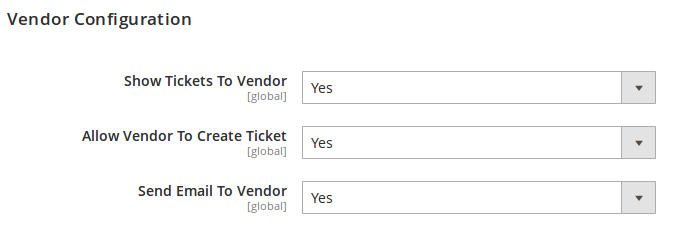
Under Vendor Configuration, do the following steps:- In the Show Ticket To Vendor, Select Yes So that ticket is automatically when assigned to a vendor can be seen by them.
- In the Allow Vendor To Create Ticket, select Yes so that even vendor can also create the ticket.
- In Send Email to Vendor, select Yes now the vendor will receive the email notification too for all the ticket created.
- Click the Save Config button.
×


