
Fetch, View, Ship, and Delete the Cdon Orders
The Magento 2 store owners can fetch the new orders and view all the order details fetched from Cdon. They can also ship the required orders and can delete the orders those are no more required.
To fetch and view new orders
- Go to the Magento 2 Admin panel.
- On the left navigation bar, click the CDON INTEGRATION menu.
The menu appears as shown in the following figure:
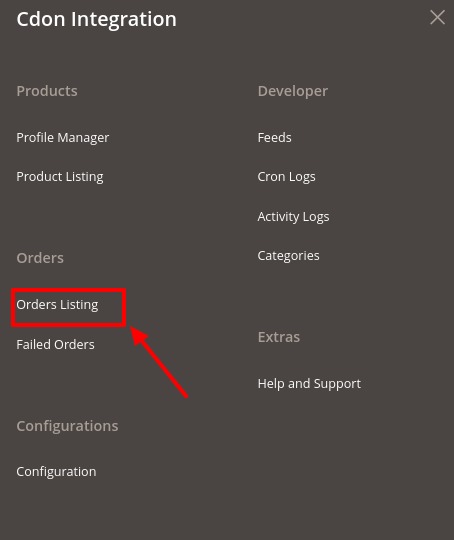
- Click Orders Listing.
The Cdon Order List page appears as shown in the following figure: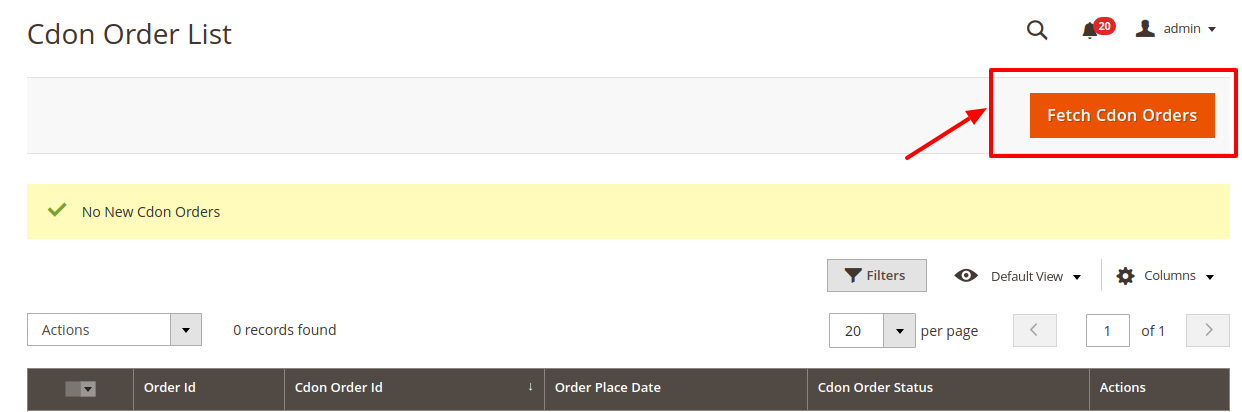
- Click the Fetch Cdon Orders button.
If the order is imported successfully then, a new record is found in the Orders Grid table as shown in the figure.
Notes:- Orders are automatically imported through CRON in every 10 minutes.
- Whenever the latest orders are imported from Cdon, a Notification appears in the notification area of the Admin panel for those orders and they are Auto-Acknowledged as soon as they are imported into the Magento store admin panel.
- If no Order is imported, then check the Failed orders listed on the Cdon Failed Order page.
- Order are auto-rejected on Cdon in the following conditions:
- When Cdon Product SKU does not exist in Magento store.
- When Product is Out of Stock in Magento store.
- When a product is disabled in Magento store.
To ship the order
- Go to the Magento 2 Admin panel.
- On the left navigation bar, click the CDON INTEGRATION menu.
A menu appears. - Click Orders Listing.
The Cdon Order List page appears as shown in the following figure:(!@#$%^&*() PICTure Cron Order List !@#$%^&*() - Scroll down to the required row of the order to ship.
- In the Actions column of the respective row, click the Edit link.
The Order view page appears - In the left navigation panel, click the Cdon menu.
The page appears in the right panel as shown in the following figure:
(!@#$%^&*() PICTure Cron Order !@#$%^&*() - Under the Cdon Order Information section, do the following steps:
- In the Shipping Provider list, select the required carrier.
- In the Tracking Number box, enter the required value.
- Scroll down to the Shipment Order Items section, and then do the following steps.
- In the Quantity to Ship box, enter a value.
The number of a quantity that the user can ship. The value cannot be greater than the Qty Available for Ship value. - In the Quantity to Cancel box, enter a value.
The number of a quantity that the user wants to reject. The value cannot be greater than the Qty Available for Ship value.
- In the Quantity to Ship box, enter a value.
- Click the Submit Shipment button.
The success message appears if the order is shipped successfully.
To delete the Cdon Orders
- Go to the Magento 2 Admin panel.
- On the left navigation bar, click the CDON INTEGRATION menu.
A menu appears. - Click Orders Listing.
The Cdon Order List page appears as shown in the following figure: (!@#$%^&*() PICTure Cron Order List !@#$%^&*() - To delete the single order, do the following steps:
- Scroll down to the order row no more required.
- In the Action column of the respective row, click the Delete link.
A confirmation dialog box appears. - Click the OK button.
The order is deleted from the Cdon Marketplace.
- To delete the selected Cdon orders in bulk, do the following steps:
- Select the check boxes associated with the orders those are no more required.
- Click the Arrow button in the Actions list.
A menu appears as shown in the following figure:
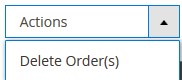
- Click Delete Order(s).
A confirmation dialog box appears. - Click the OK button.
The selected orders are deleted from the Cdon Marketplace.
×


