
Manage Accounts
To add the account,
- Go to the Magento 2 Store Admin
- On the left navigation bar, click the FBA INTEGRATION
A menu appears as shown in the following figure:
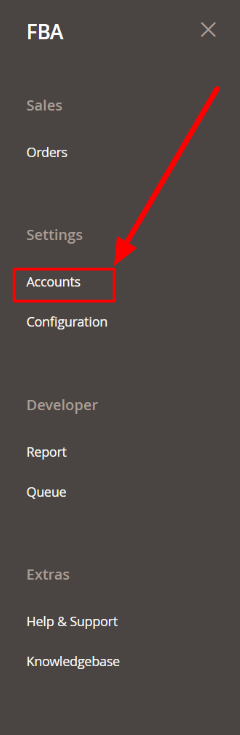
- Click Manage Accounts.
The Manage Accounts page appears as shown in the following figure:
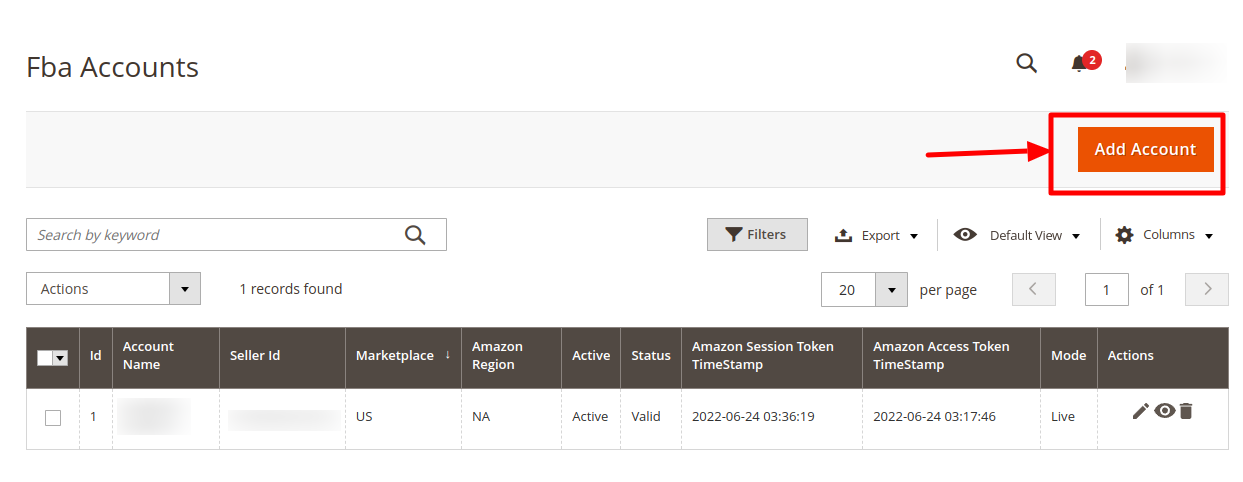
- Click the Add Account
The page appears as shown in the following figure:
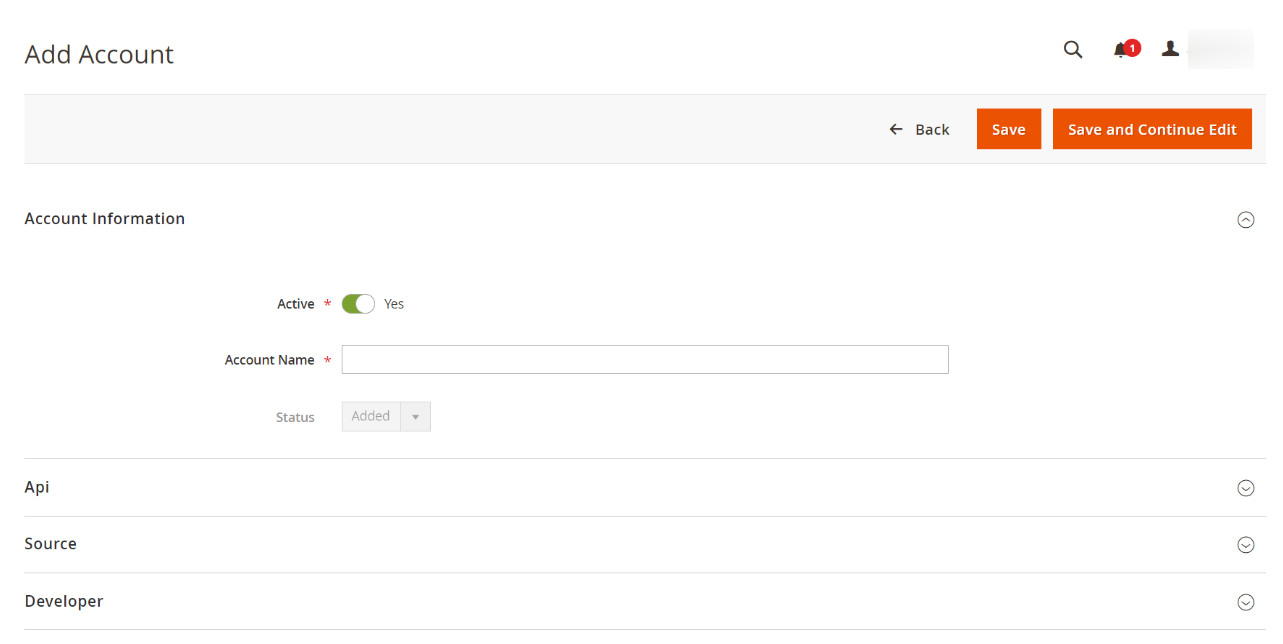
- In Active, select Yes
- Enter the Account Name in the corresponding field.
- Now scroll down and click on Api Information. The section will expand as:

NOTE: There are 2 options to do so –
(1) Authorise Via CedCommerce – If you don’t have an SP API developer account on Amazon
(2) Authorise by Yourself – If you have an active SP API developer account on AmazonCase 1: You Do Not Have an Amazon SP API developer account.
- Under API Information do the following steps:
- In Authorize Via CedCommerce, select Yes if you want the authorization to be done from our end.
- You can notice that after selecting yes, additional options open up as shown below:
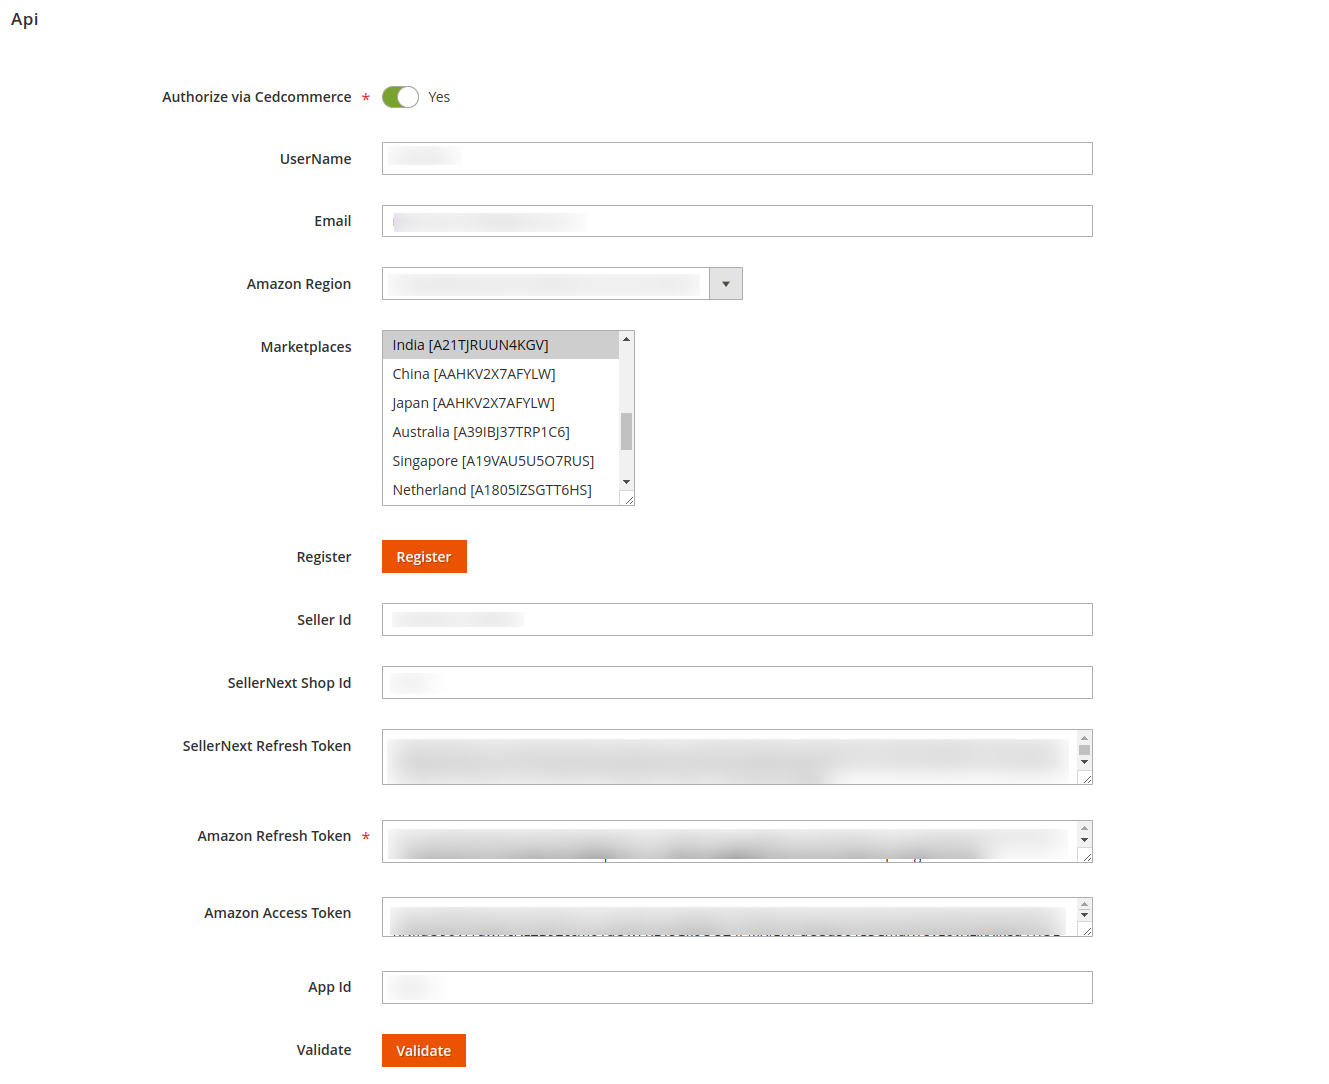
- In the UserName, option enter a Unique Username for your account
- In the Email section, mention the email you wish to associate with your account.
- In the Amazon Region, from the drop-down choose the region you are selling
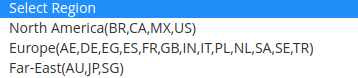
- Once you select the region then move on to the marketplace where you can select the exact Amazon marketplace you are selling on.
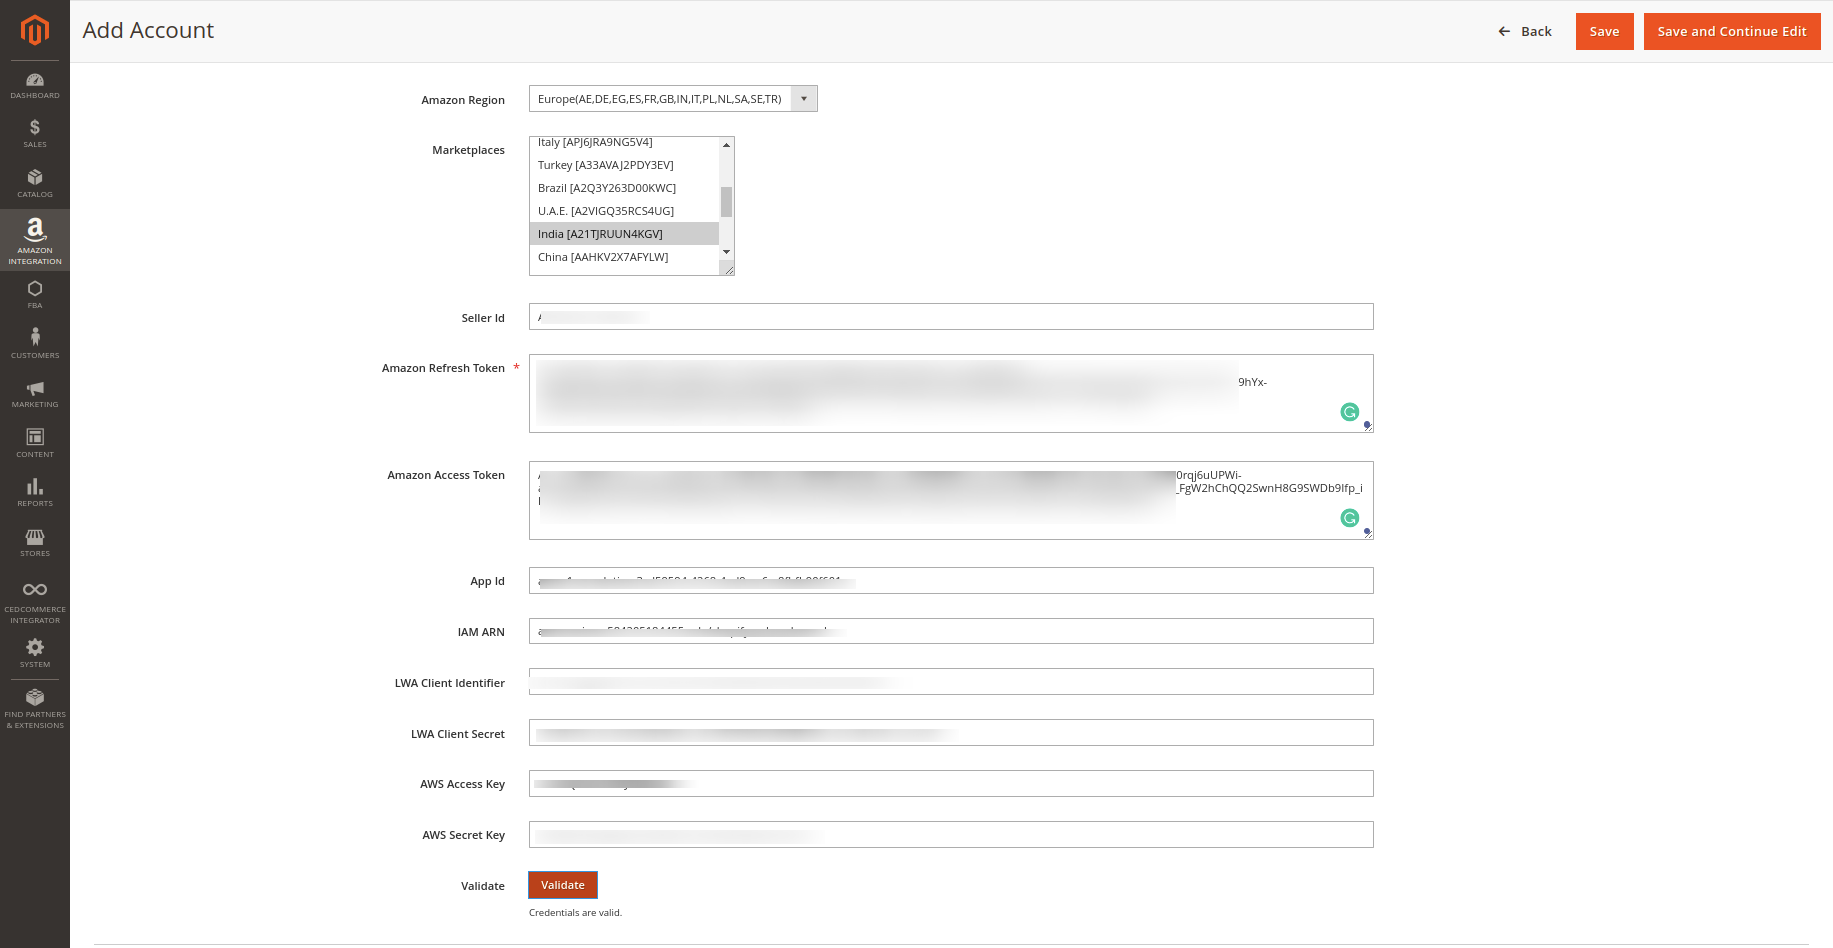
- You will be redirected to a new page containing the following details
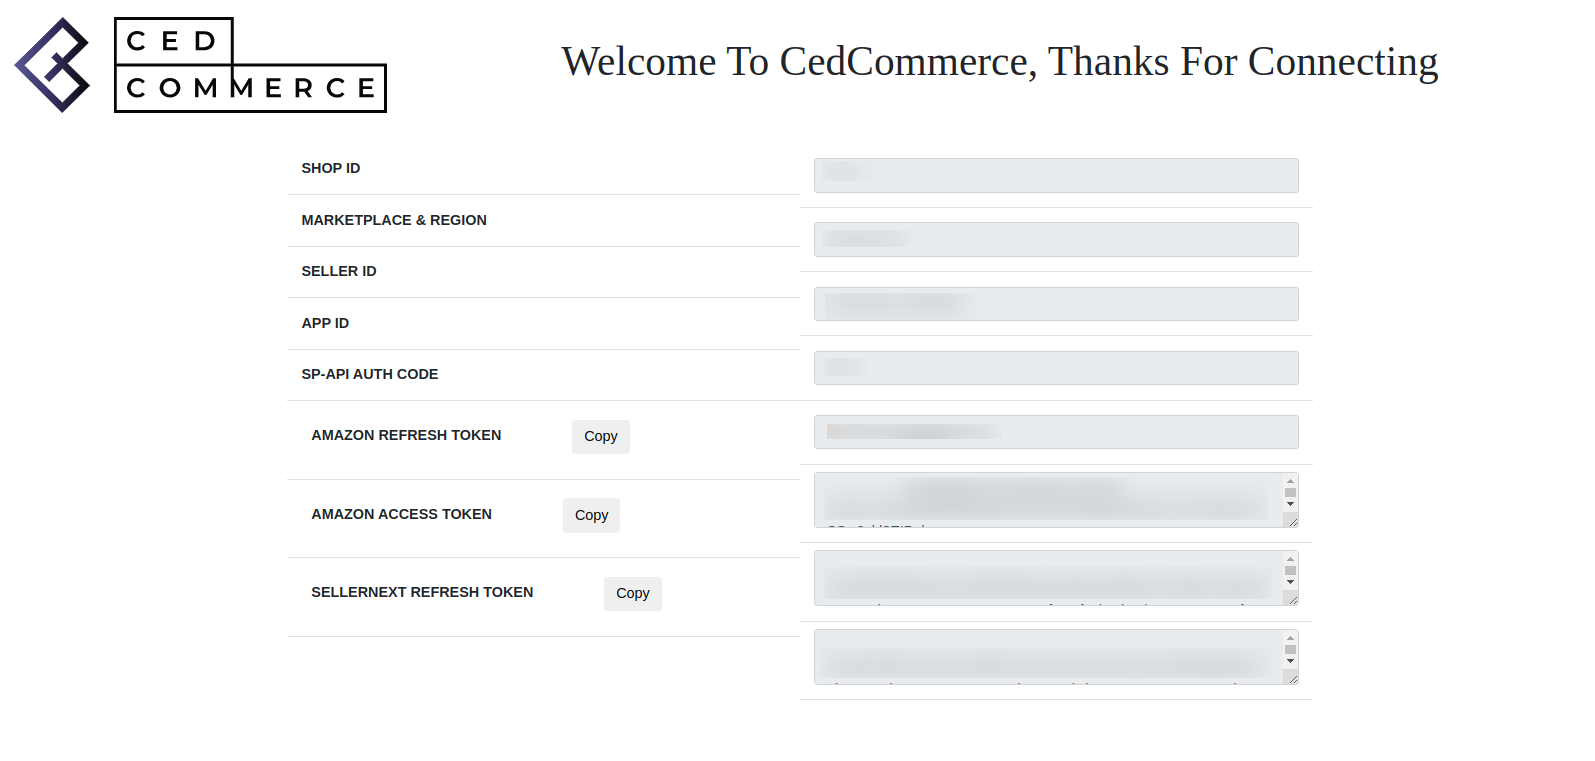
- Now you can fill out the remaining 6 fields with details available from here:
- Seller Id
- App Id
- SellerNext Shop Id
- SellerNext Refresh Token
- Amazon Refresh Token
- Amazon Access Token
- When all the above fields are filled click on Validate.
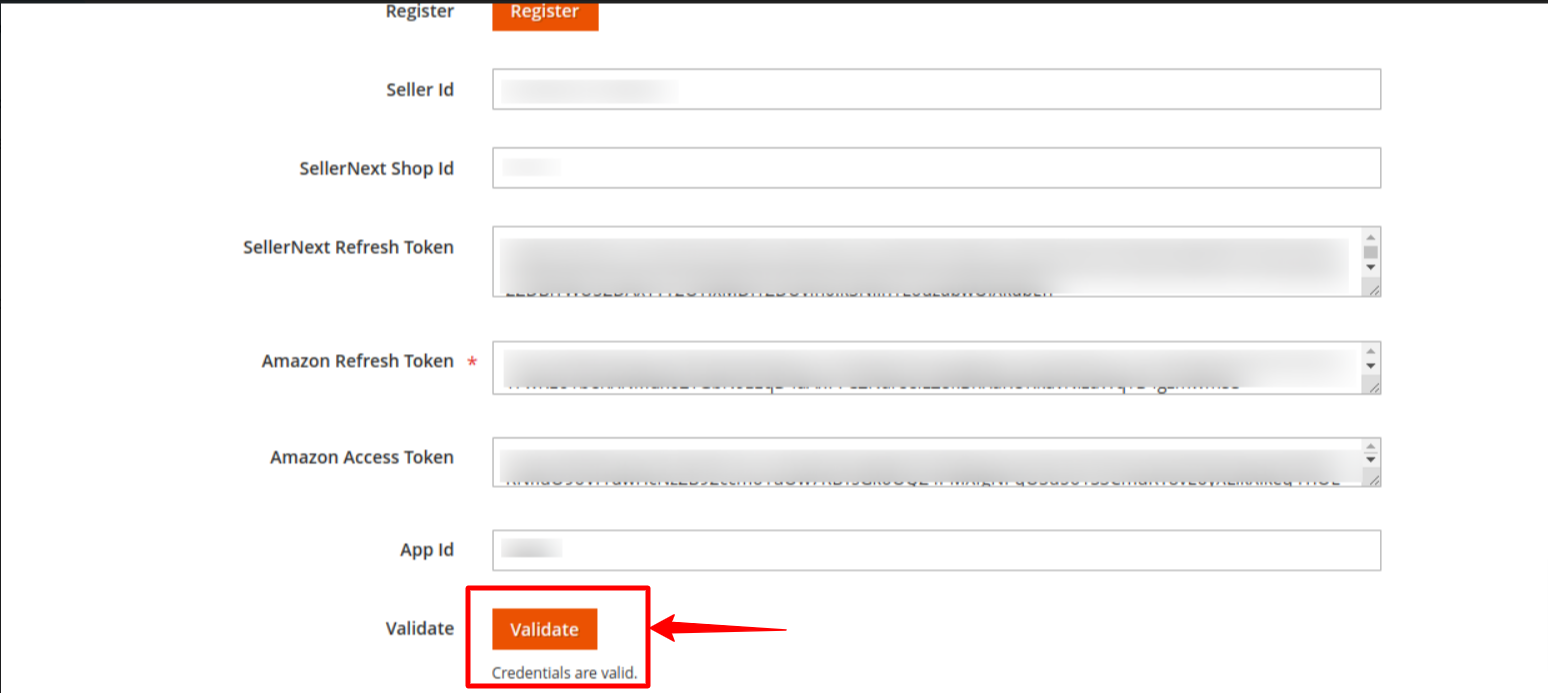
- A success Message Appears saying that the Credentials are Valid.
- Click on Save.
Case 2: You already have an Amazon SP API developer account.
-
-
- Choose No in the Authorize via CedCommerce section
- Now the menu will appear like this:

- The first 2 fields are the same as in Case 1
- In the Amazon Region, from the drop-down choose the region you are selling.
- In the Marketplace, select the Amazon marketplace you are selling on.
- To know the information that you need to fill in this section (Seller Id, Amazon Refresh Token, Amazon Access Token, App Id, etc), you need to go to the Amazon seller account. For that,
- Log in to the Amazon seller account.
- On the top right side of Amazon seller central, place the cursor on Settings.

- When the menu appears, click User Permission.
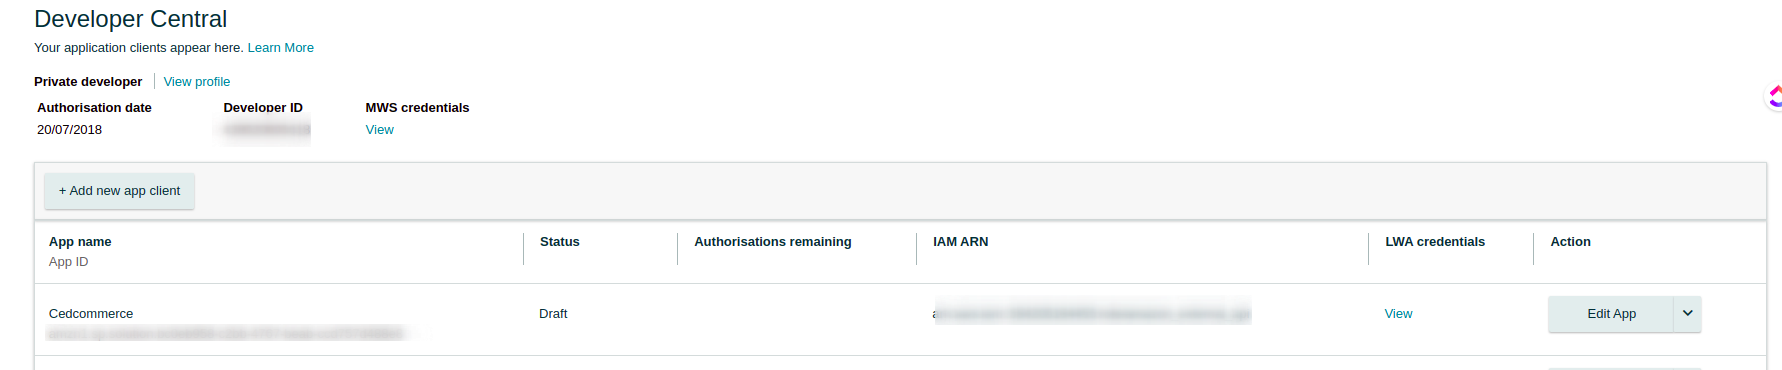
- You will be navigated to the User Permission page which looks like this:
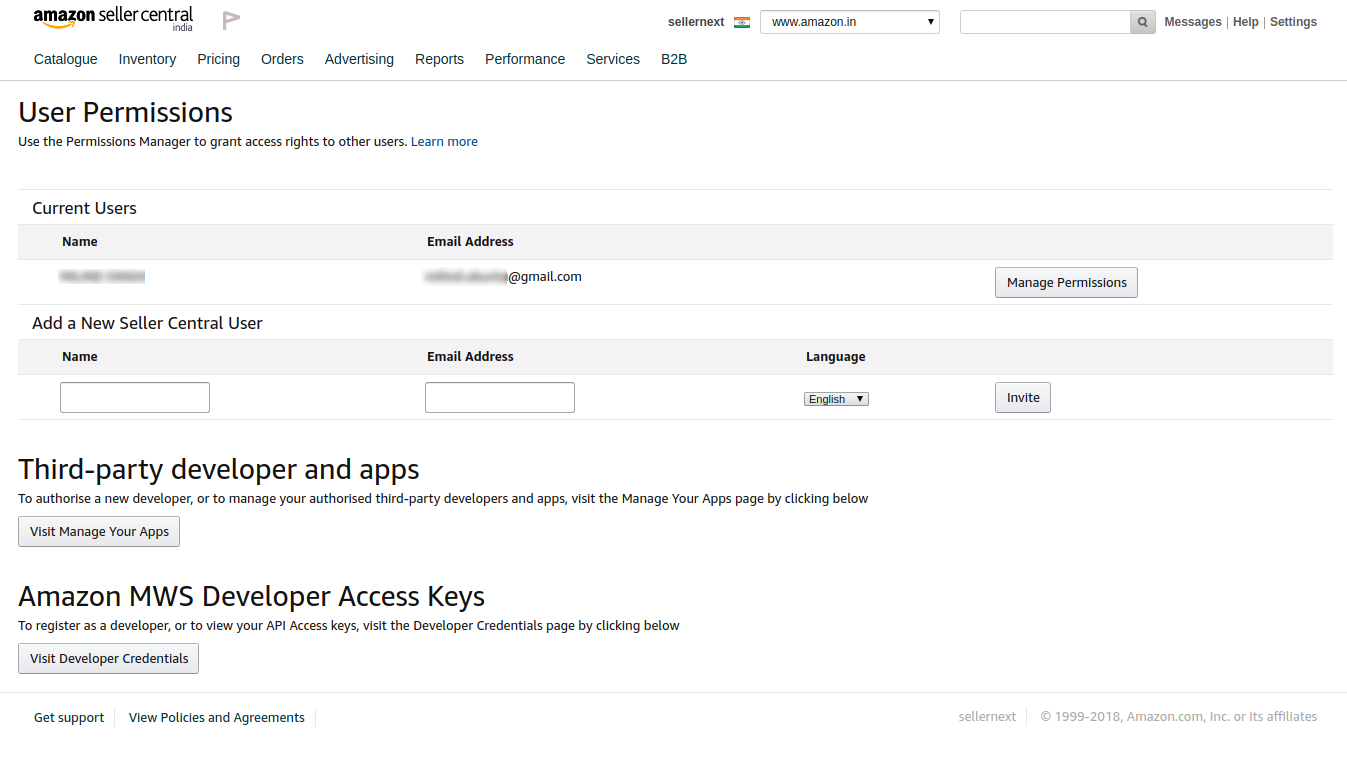
- Scroll down to the Amazon MWS Developer Access Keys section and click on View Developer Credential Buttons.

- On clicking you will be redirected to the Developer Central Page where all the desired info is listed:
- The LWA details can be viewed by Clicking on View Button under the LWA credential heading:
- Now comes the last 2 sections
- AWS Access Key
- AWS Secret Key
- Here you have 2 options:
- (1) Use Details from an existing AWS account
- (2) Create a new AWS account
Note: Watch these Reference Videos For APP creation and For AWS Creation
- Once the information has been filled, Now click on the Validate button.
- The message Credentials are valid will appear.
-
Source and Developer Settings,
- Now click on the Source tab and it expands as:
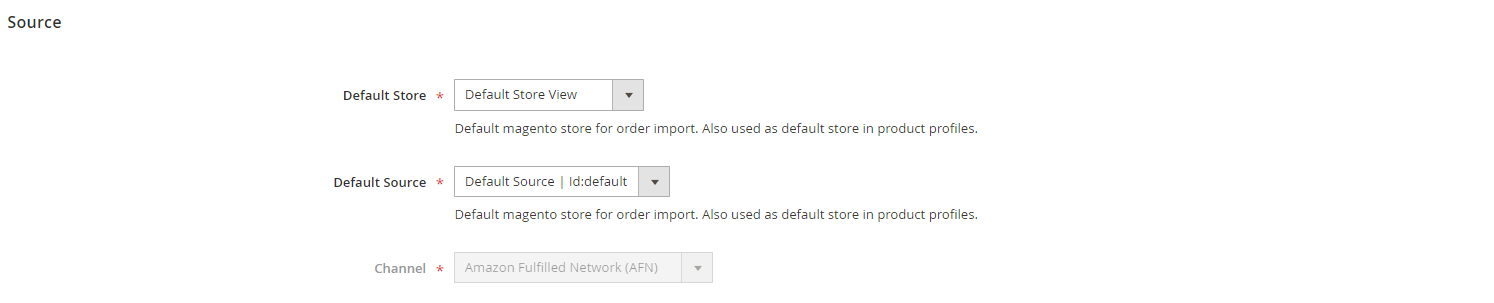
- In Default Store, select the store view for product profiles.
- In the Default Source option, select the Source.
- In Channel, the source channel will appear.
- Now click on the Developer tab and it expands as:
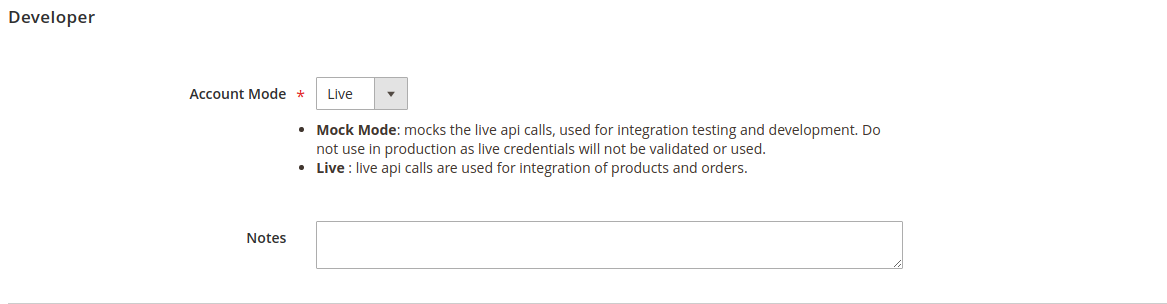
- Select Account Mode.
- Add Notes if you want any.
- Click on Save on the top right side of the page.
- The account will be created.
To view the account,
- On the Fba Accounts page, click the view button for the account that you want to see, as highlighted in the image below:
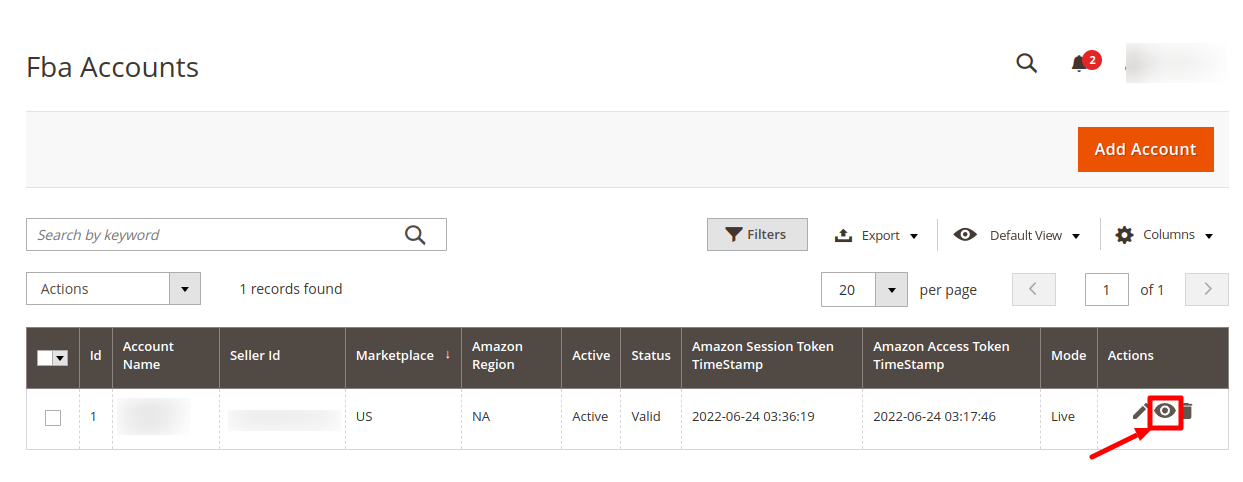
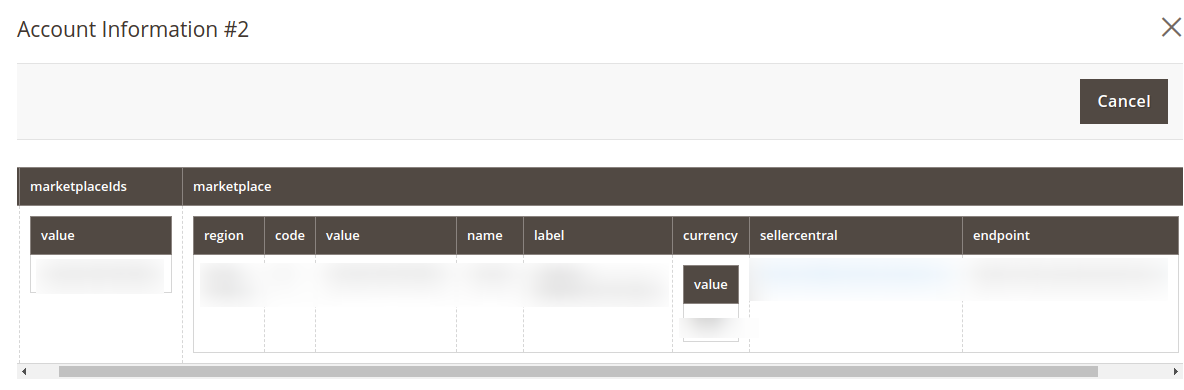
- On clicking it, the details would appear on the page as shown:
To Edit the account,
- On the Amazon Accounts page, click the edit button for the account that you want to edit, as shown in the image below:

- The page will appear as:
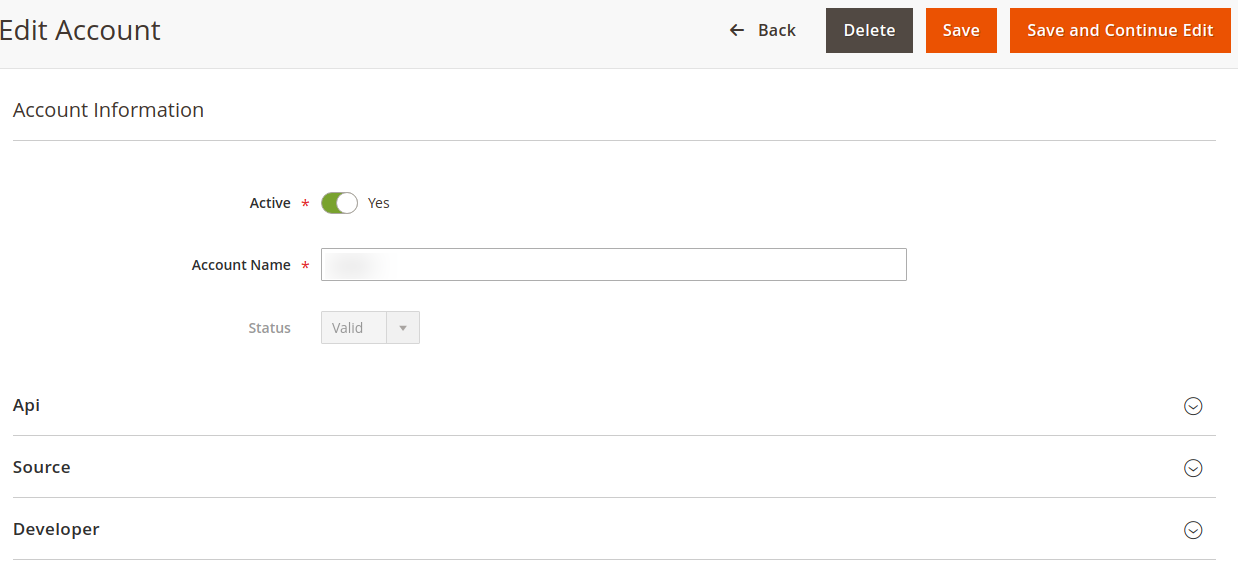
- Click the required section, and then make the changes as per requirement in the respective section.
- Click the Save button.
The edited account will be saved.
To Delete the account,
- On the Amazon Accounts page, click on the delete button as highlighted in the image below, for the account that you want to delete.
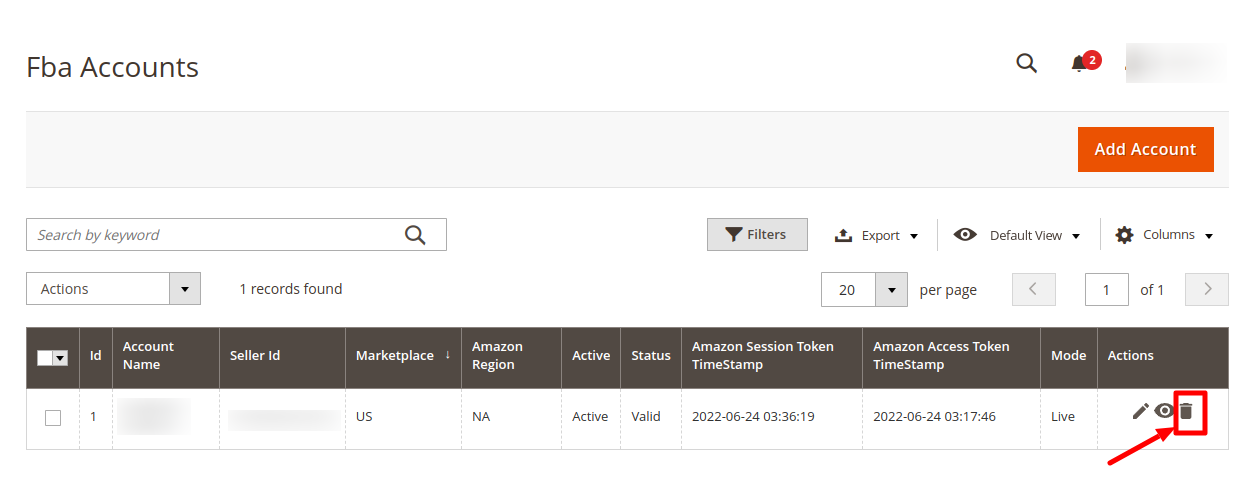
- On clicking it, the Amazon account will be deleted and the message will appear on the same page.
×


