
7.3.4.5.6.Product Templates ↑ Back to Top
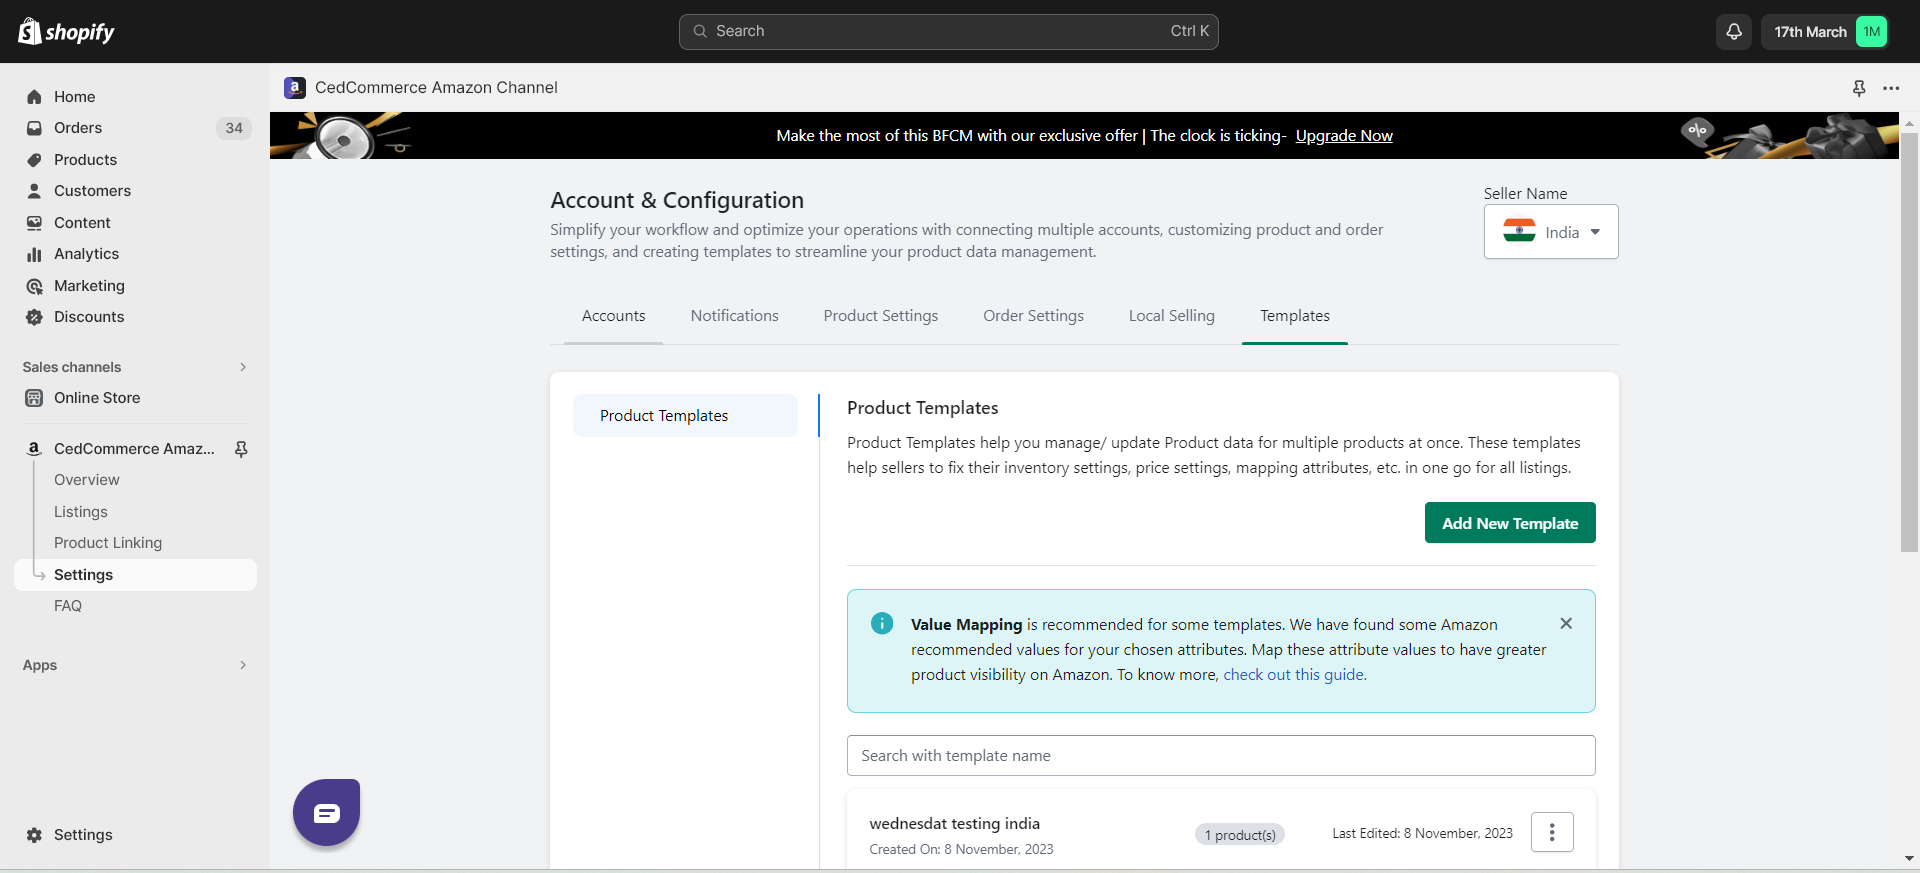
Product Templates in the CedCommerce Amazon Channel App serve as an efficient way to manage and update product data for multiple listings at once. These templates are a tool for bulk product editing, streamlining inventory settings, price configurations, attribute mapping, and more.
Why This is Important?
Product Templates eliminate redundancy and save time when uploading new products. They allow you to predefine metrics like inventory and price, which can be applied as defaults to all products. These templates offer a one-stop solution to manage and update product data for numerous listings simultaneously.
What can you do?
- Access Product Templates:
Locate the “Product Template” section right next to the “Local Selling” option. Click on it to proceed.
- Creating a New Product Template
To set up a new Product Template in the CedCommerce Amazon Channel App, follow these clear steps:
Step 1: Accessing New Template For
Click on the “Add New Template” option to initiate the creation of a new Product Template. This will lead you to a form where you can define the template details.
Step 2: Filling the Template Form
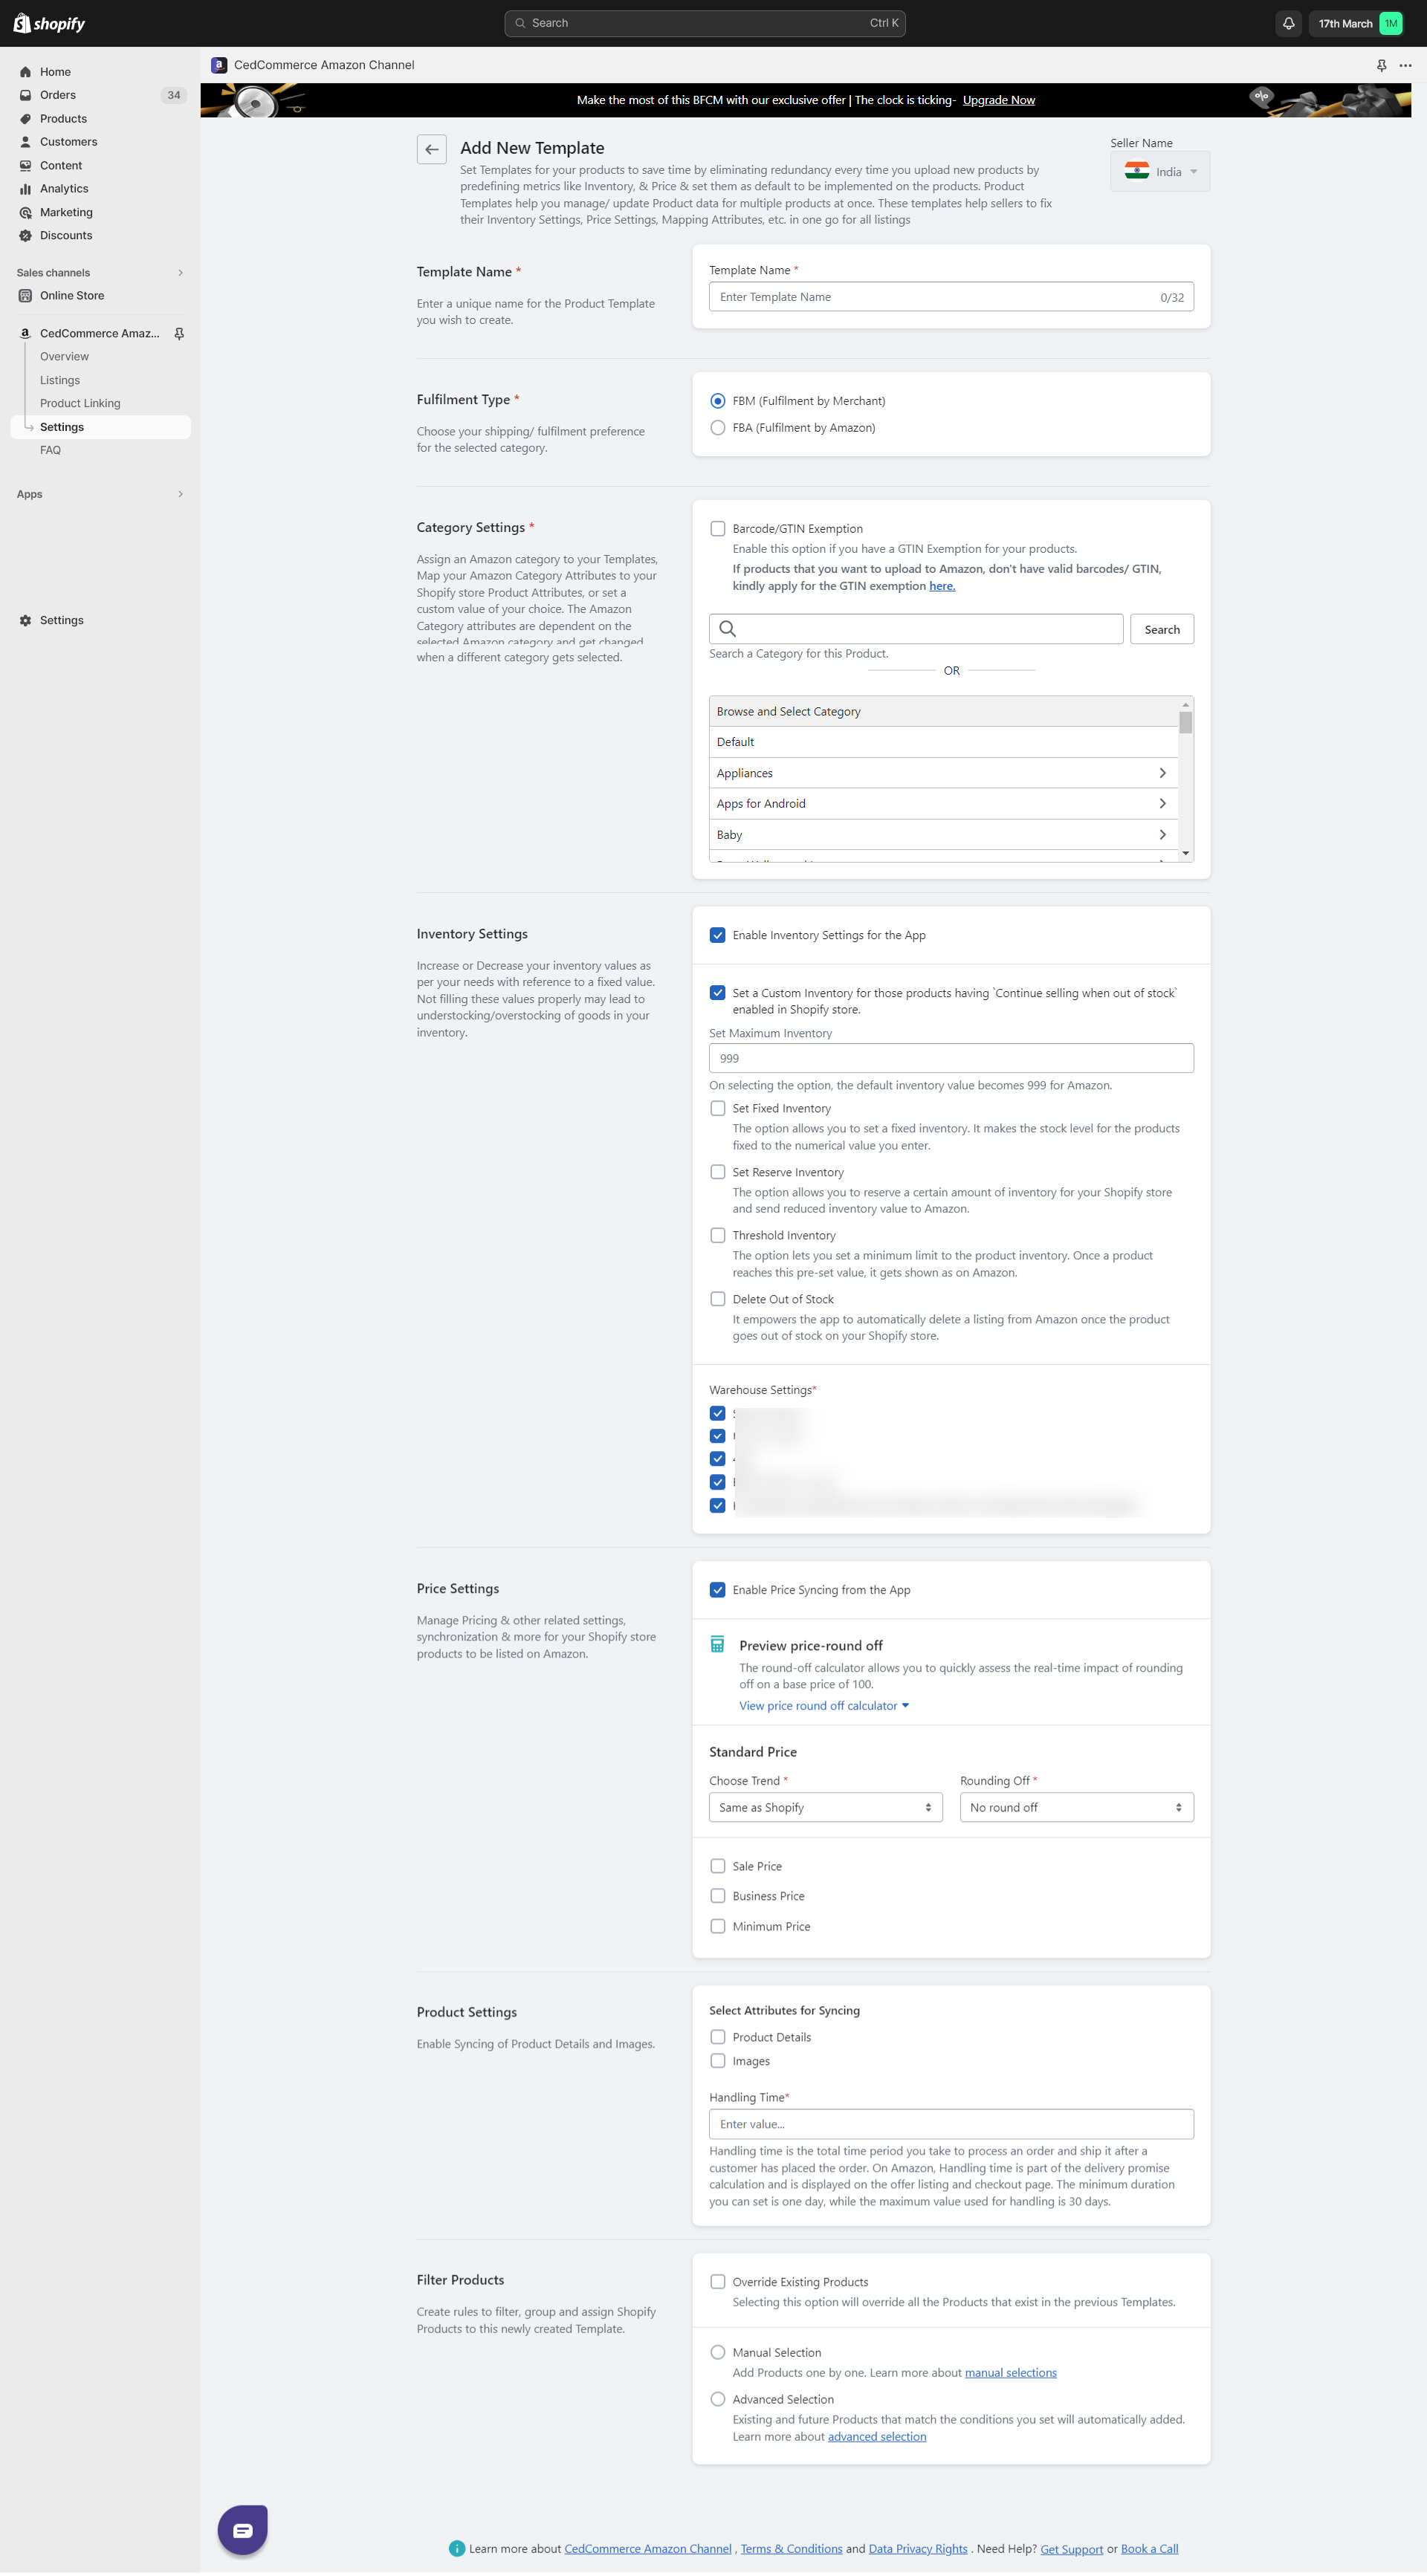
Template Name

Provide a unique name for the Product Template you’re creating.
Fulfilment Type

Choose the fulfilment type for Amazon i.e. FBA or FBM.
Category Settings:

- Choose if you have a Barcode/GTIN Exemption for your products.
- Enable this if your products lack valid barcodes/GTIN.
- Apply for GTIN exemption if needed.
- Then Assign an Amazon category to your template.
Map Amazon Category Attributes to your Shopify store Product Attributes.
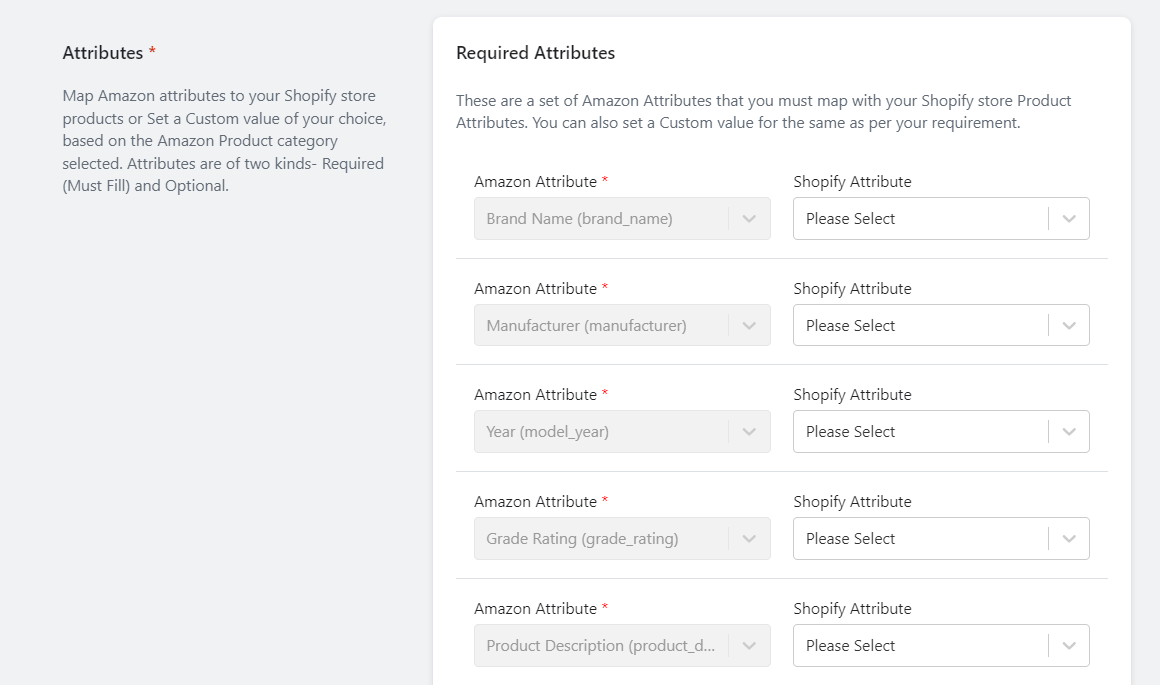
- Find the category that fits your template.
- You can also set custom values. These attributes depend on the selected Amazon category and change when you switch categories.
Inventory Settings:
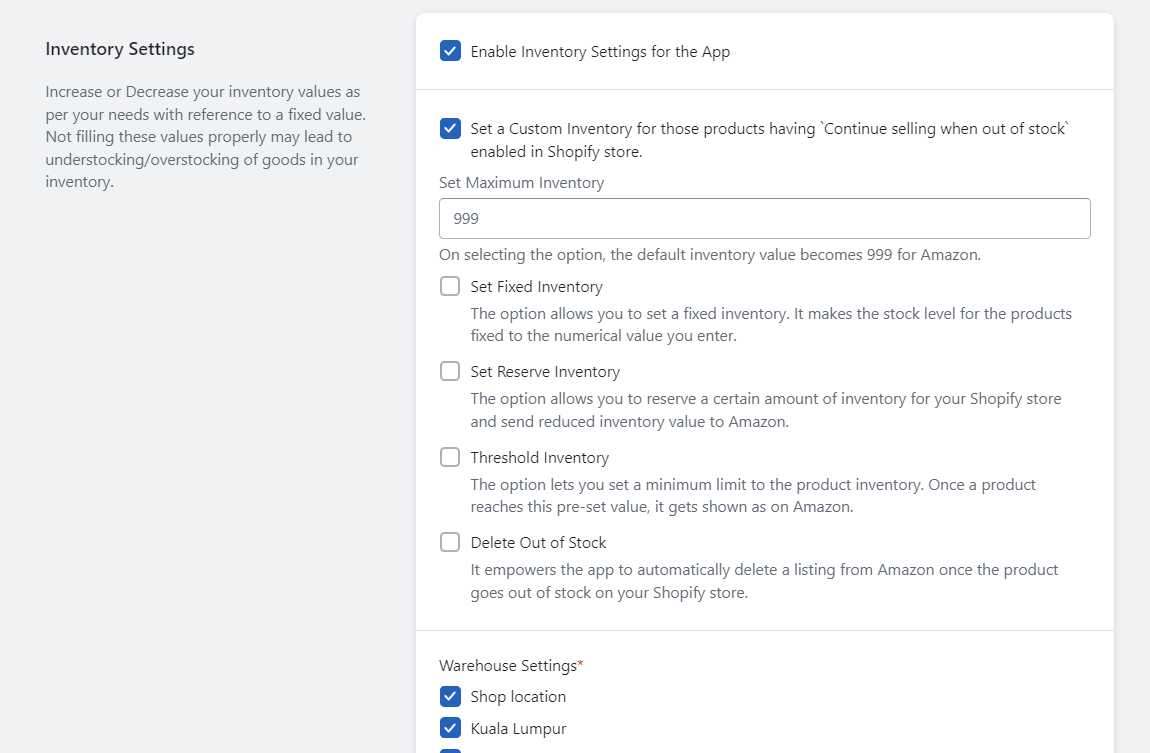
- Enable Inventory Settings for the app.
Configure different inventory settings:
- Set Custom Inventory for products with ‘Continue selling when out of stock’ enabled in Shopify.
- Set Maximum Inventory to a default value (e.g., 999).
- Set Fixed Inventory to a specific value, keeping stock consistent.
- Set Reserved Inventory to allocate inventory for promotions or special use.
- Threshold Inventory sets a minimum limit; products reaching this are marked ‘out of stock’.
- Enable “Delete Out of Stock” to automatically remove Amazon listings when Shopify stock is empty.
- Warehouse settings can also be managed here.
Price Settings:
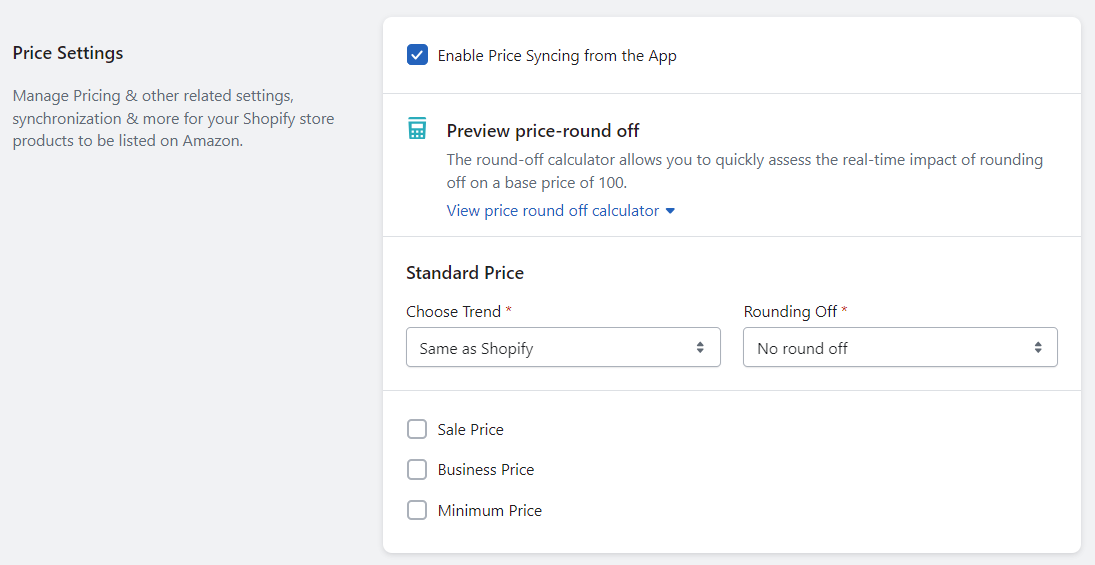
- Enable Price Syncing from the app.
- Preview price-round off effects.
- Choose a pricing trend (e.g., same as Shopify).
- Set rounding off preferences.
- Configure standard, sale, business, and minimum prices for synchronization.
Product Settings:

- Enable Syncing of Product Details and Images.
- Select Attributes for Syncing (Product Details, Images, etc.).
Handling Time:
- Enter the time you take to process and ship orders.
- Handling time affects Amazon’s delivery promise calculation.
Filter Products:

- Create rules to filter, group, and assign Shopify products to this template.
- Choose between “Override Existing Products,” “Manual Selection,” or “Advanced Selection” based on your needs.
Working with Existing Templates:
Scroll down to find your existing templates. Locate the template you want to work with.
Template Actions:
Click the three dots on the right side corresponding to the template. Choose from three actions:
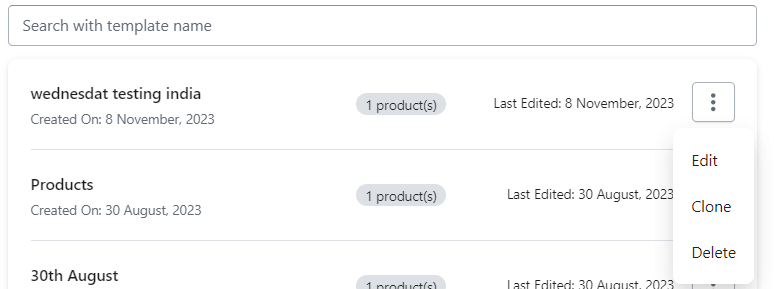
- Edit: Modify the existing template according to your needs. A form same as the one you see in Add new template will be displayed for you only with pre-filled details of this template. Make changes wherever you see fit and click save once done.
- Clone: Create a copy of the template. Useful for templates with minor differences. Simply edit the template later on if you need to.
- Delete: Remove the template.
Value Mapping:
For templates allowing Value Mapping, you’ll find a “Map Attribute Values” link underneath them. Click this link to map value attributes.


