
Onboarding
Step 1: Connect your Shopify account
- Log in to the application and click on the connect button.
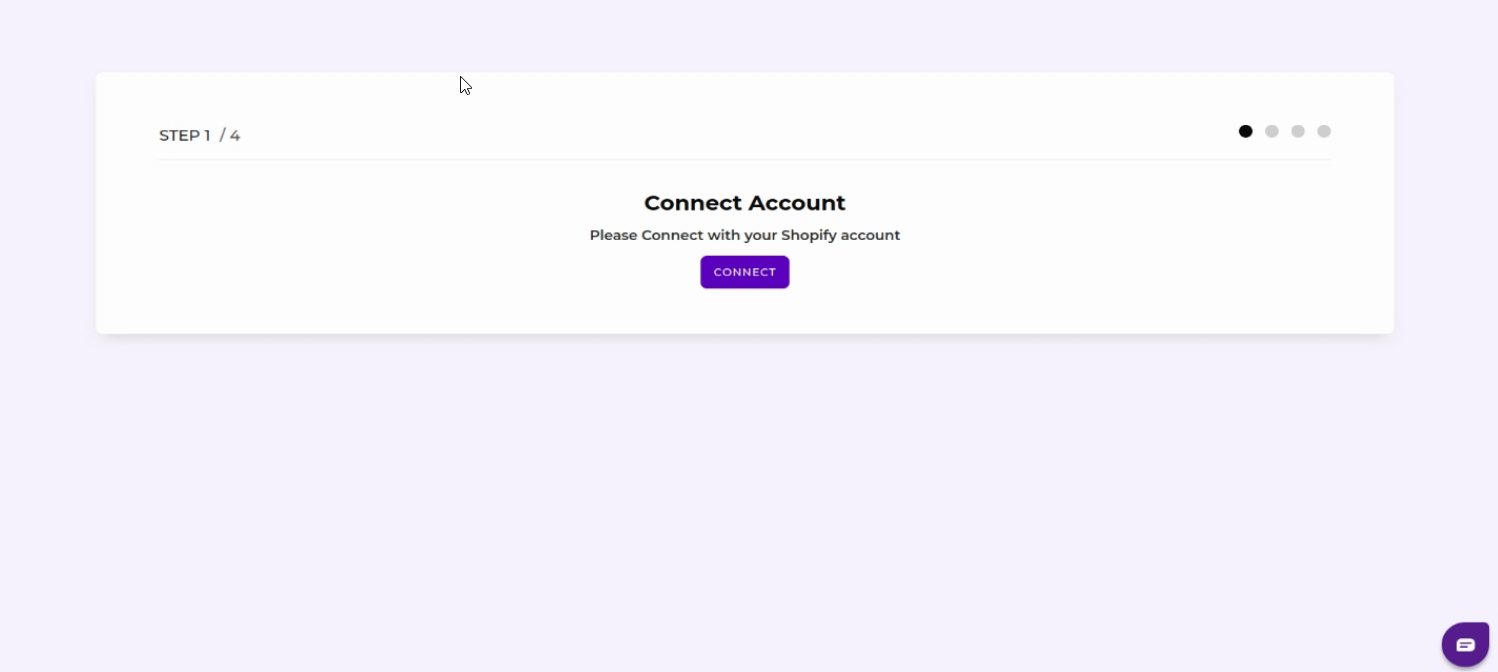
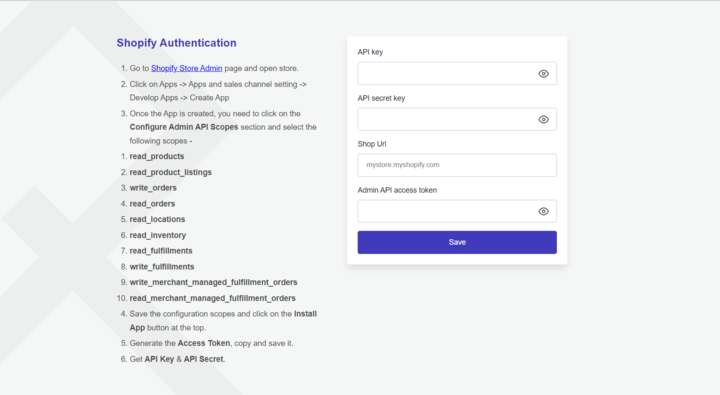
- You will be taken to a form, where you can mention the details of your Shopify store such as API Key, API Secret Key, Shop URL, and Admin API Access Token.
- After entering all the details, click the connect button and the Shopify application will connect successfully.
Step 2: Connect your Miravia account
- After connecting your Shopify store, you must now connect the app to your Miravia account and authorize the app to make changes to the app.
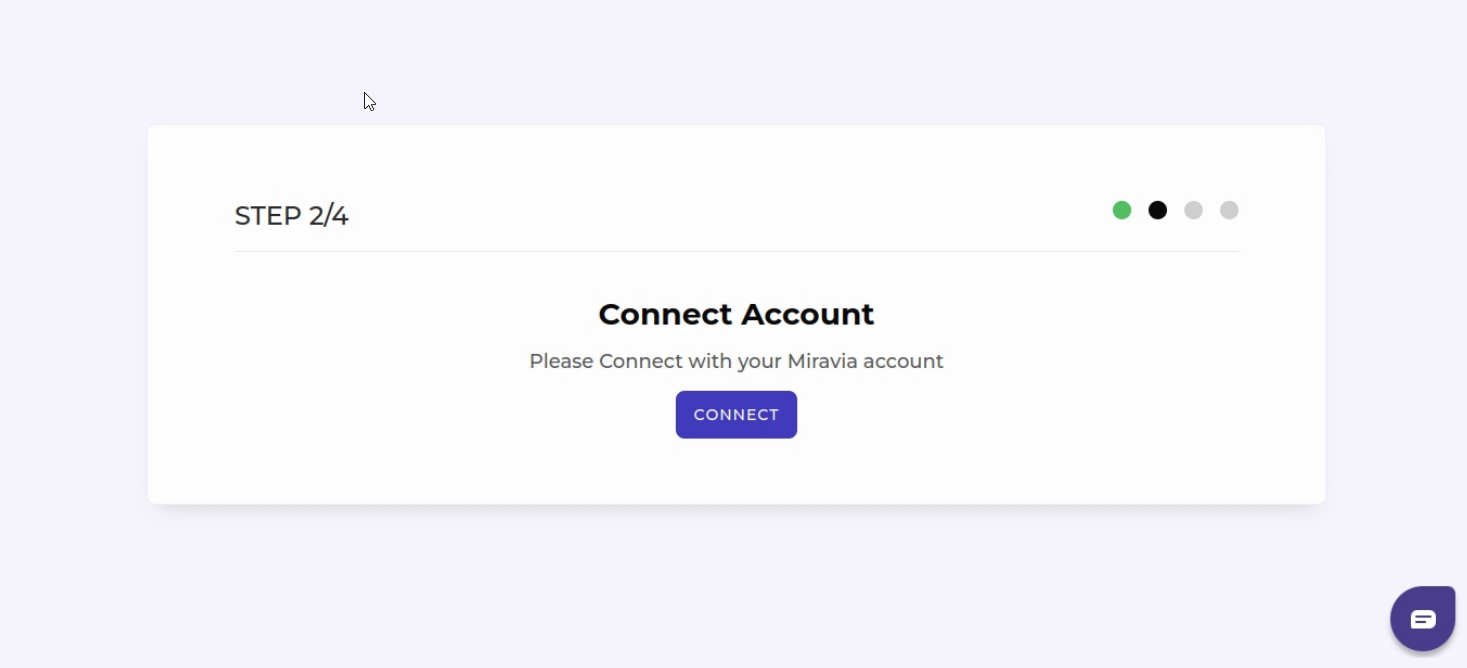
- When you click on the connect button, you will be redirected to the “Miravia Seller Centre.”
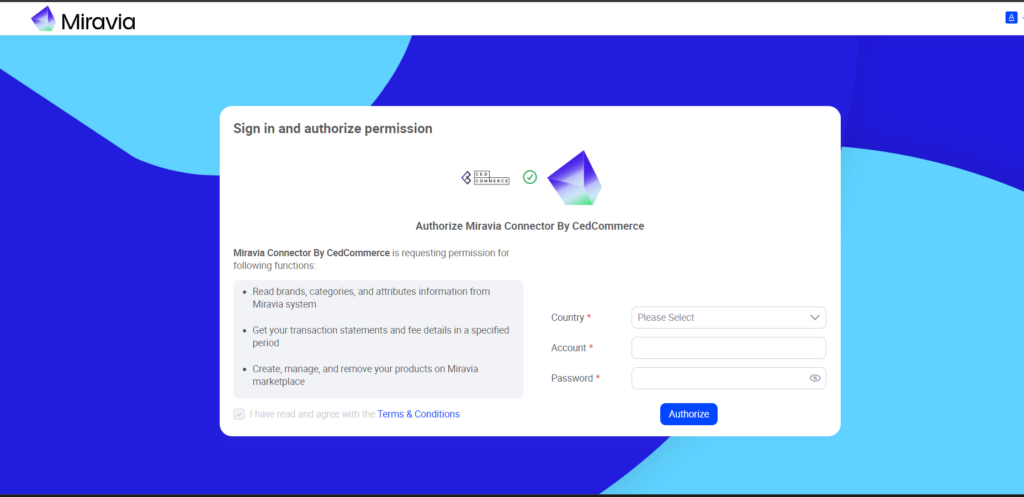
- Authorize and grant access to the “Miravia connector app” app to access & update your Miravia store.
Step 3: Default Profiling
Once you have successfully connected the application with Miravia, you must then map your product category listed in Shopify with Miravia. By doing so, you will improve the visibility of your product catalog for shoppers in your Miravia store. To do so, you must:
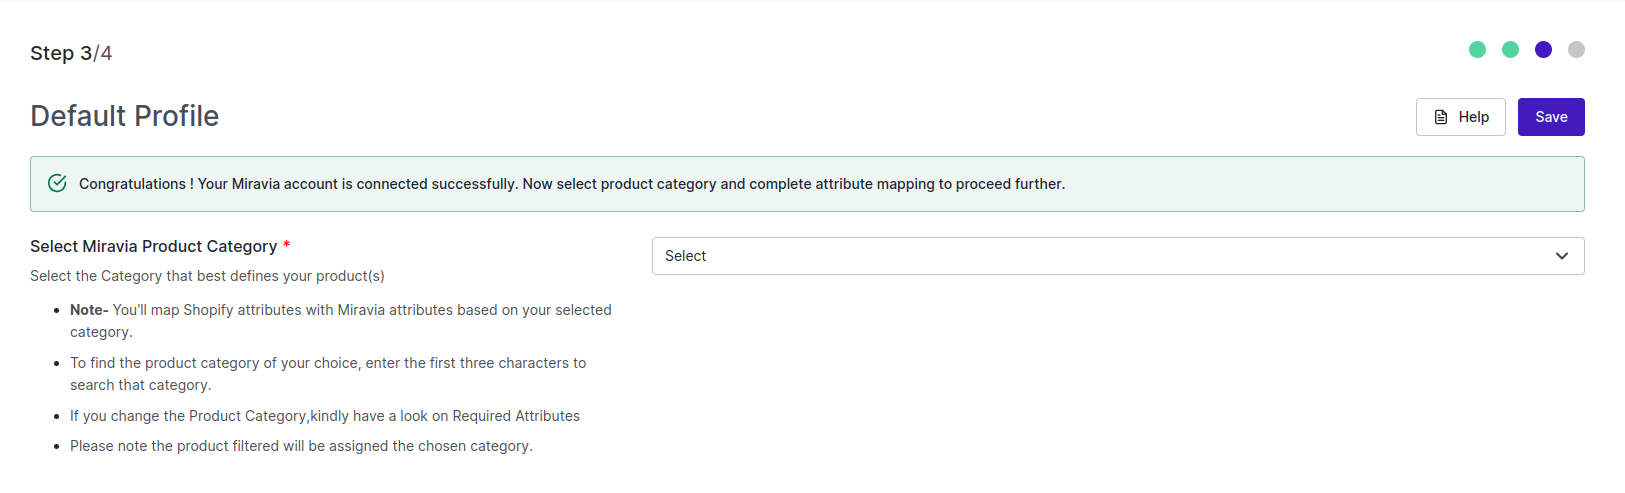
- Select the Miravia product category from the drop-down menu.
- Map the mandatory/required attributes, i.e. the weight, length, height, and width of the product.
- Now set the Attribute variation, i.e. color and specification.
- Set recommended attributes, which are not mandatory, but will help your product rank better in the Miravia store and help buyers better understand the product.
Step 4: Default configuration
- Once the profile data has been successfully saved, continue with the default settings.
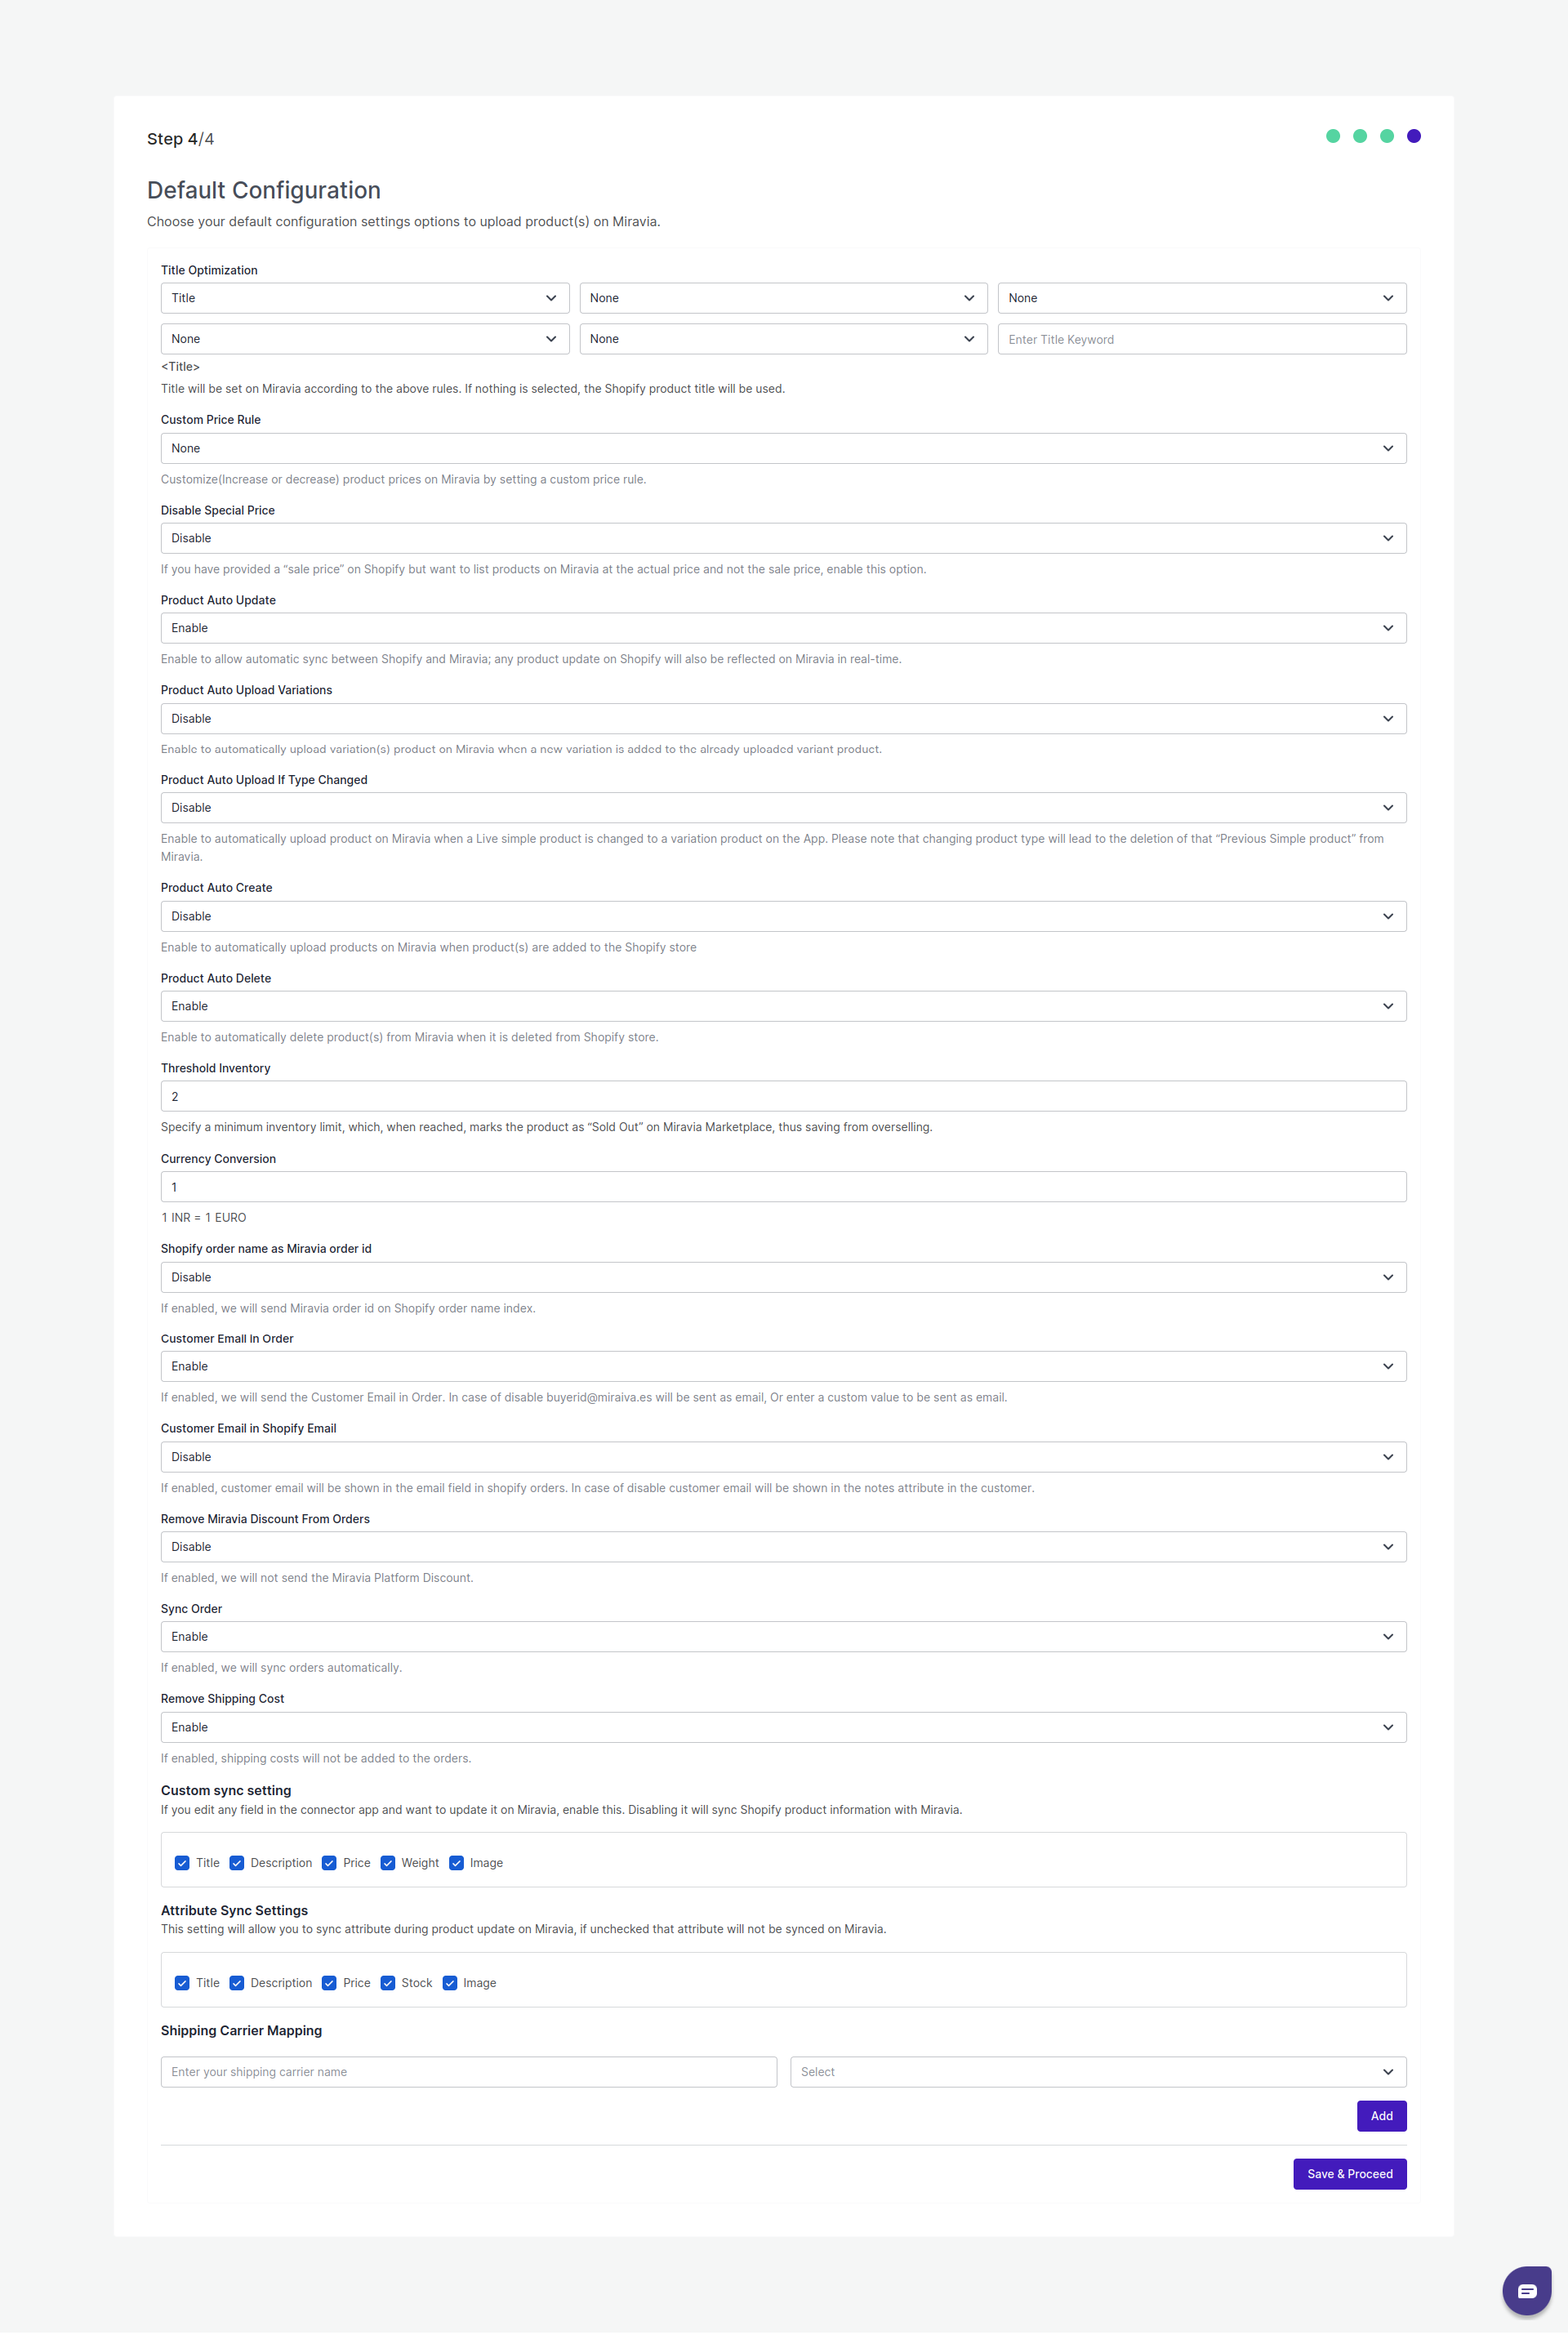
- Title Optimization: Set product title and optimize it as per SEO for better visibility. Add relevant keywords to get it easily identified by customers.
- Custom Price Rule: Here, you can set the price rule like percentage increase or decrease and so on. For example, if you want an increase of 10% in all products, choose percentage increment & then write 10%.
- Disable Special Price: By enabling this option, you restrict the sale price on the Miravia listing. This means your products will not be listed on Miravia at a discounted price.
- Product Auto Update: Any update on your Shopify product will also be reflected on the Miravia marketplace. If this is enabled, two more options open up, i.e., “Product auto upload variation & product auto upload if type changed.”
- Product Auto Upload Variations: This feature allows you to automate product variation upload on Miravia Marketplace. This means whenever you upload another product variant on Shopify, it automatically gets updated and listed on Miravia Marketplace too.
- Product Auto Upload If Type Changed: When a simple product is changed to a variant product, which means now you wish to provide product variation in terms of color or size or anything. By enabling this you can automate uploading products On Miravia Marketplace when its product type is changed. Additionally, the previously listed simple product will be deleted from Miravia.
- Product Auto-create: By enabling this, you agree to create/ add a new product to the Miravia Marketplace if any product is created on the Shopify store.
- Product Auto Delete: If any product is deleted from the Shopify store, then it will also get deleted from the connector app and will show a deleted status on the Miravia platform.
- Threshold Inventory: Set minimum inventory level, after reaching which product will reflect “Out Of Stock” status. This prevents you from overselling.
- Currency Conversion: Convert your Shopify store currency to Miravia Marketplace currency.
- Shopify order name as Miravia order ID: If enabled, the app will send the Miravia order ID on the Shopify order name index.
- Customer Email in Order: If enabled, the app will send the Customer Email in Order. When disabled, buyerid@miraiva.es will be sent as an email or a custom value to be sent as an email.
- Customer Email in Shopify Email: If enabled, customer email will be shown in the email field in Shopify orders. When disabled, customer email will be shown in the notes attribute in the customer.
- Remove Miravia Discount From Orders: If enabled, the app will not send the Miravia Platform Discount.
- Remove Shipping Cost: If enabled, shipping costs will not be added to the orders.
- Custom Sync Setting: Select the product details that you wish to sync from the connector app to Miravia Marketplace, like product title, description, etc.
- Attribute Sync Settings: This setting will allow you to sync attributes during product updates on Miravia. If you leave these unchecked, the specific attributes will not be synced on Miravia.
Save the changes and you are good to go.
×


