
How to create a new Category Template
As you already know by now, that while onboarding the app, you must set your default template so that any new listing can be at least assigned under a default template if there aren’t any. However, you can always create new template just like you created your default template.
Begin with the following instructions:
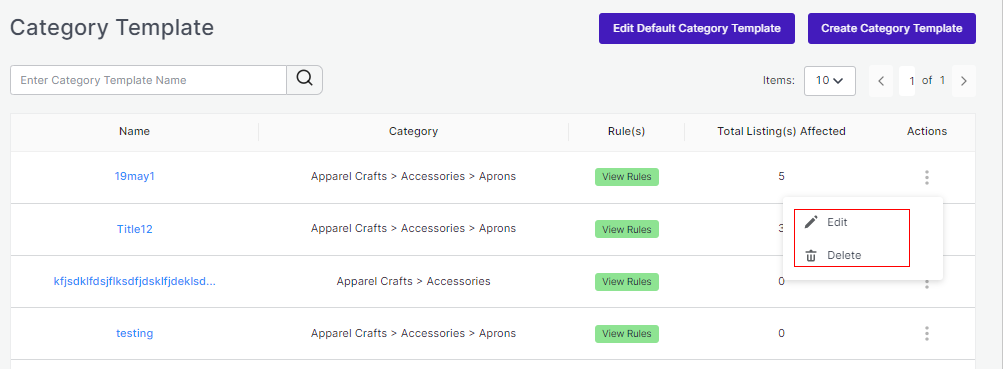
- Go to Category Template tab and click on the Create Category template as shown below:

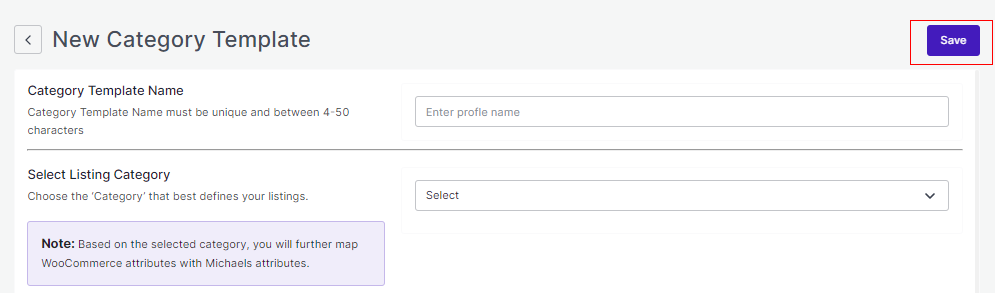
- Create Profile Name: Next you will be redirected to the template creation page where you will need to first enter a Profile Name (remember every profile name has to be unique).

- Choose Listing Category: Choose your listing category that best defines your listings. Click on the arrow and keep choosing your categories until you get a specific and exact category.
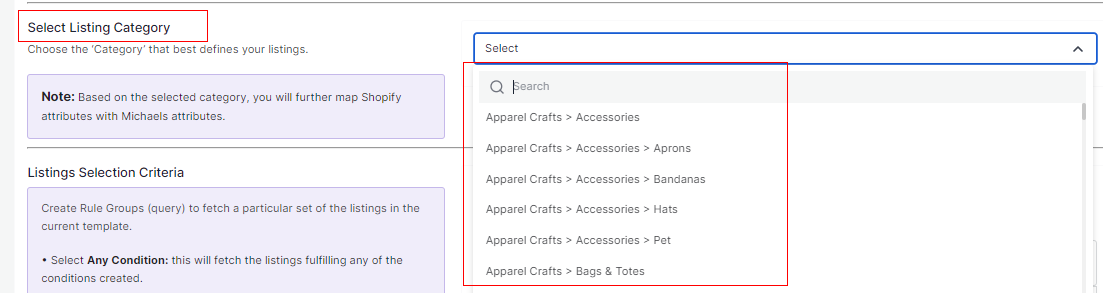
- Once you are done with completing the basic profile creation part, you will be shifting to the next step, “Attribute Mapping” which will be just below as guided in the next step.
It is mandatory to map all the required attributes in the attribute mapping. The same can be edited at any time after profile creation.
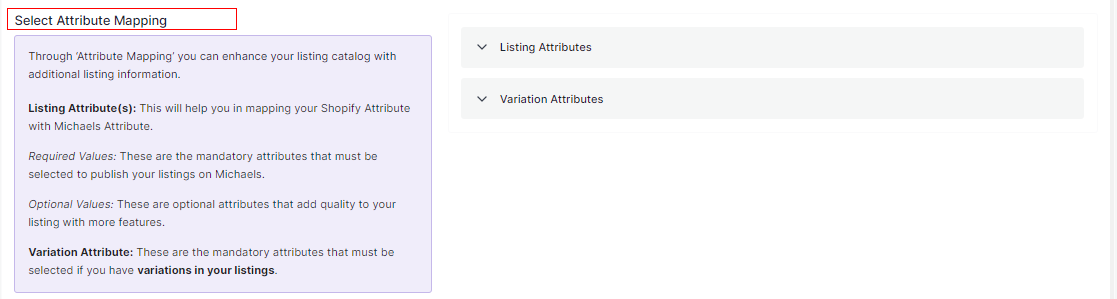
You will get three options – Required, Variation, and Recommended to map your attributes. Required is a compulsory option whereas Variation and Recommended are optional. You can either choose two, three, or just the Required attributes to proceed further.
Required Attributes
Under Required, the attribute mapping is done on the basis of Brand, Weight, Height, Width, and Length to the category that you have selected in the previous step.
There are two headings -Match Type and Value.
Under Match Type you will have two options to choose from Attribute and Fixed.
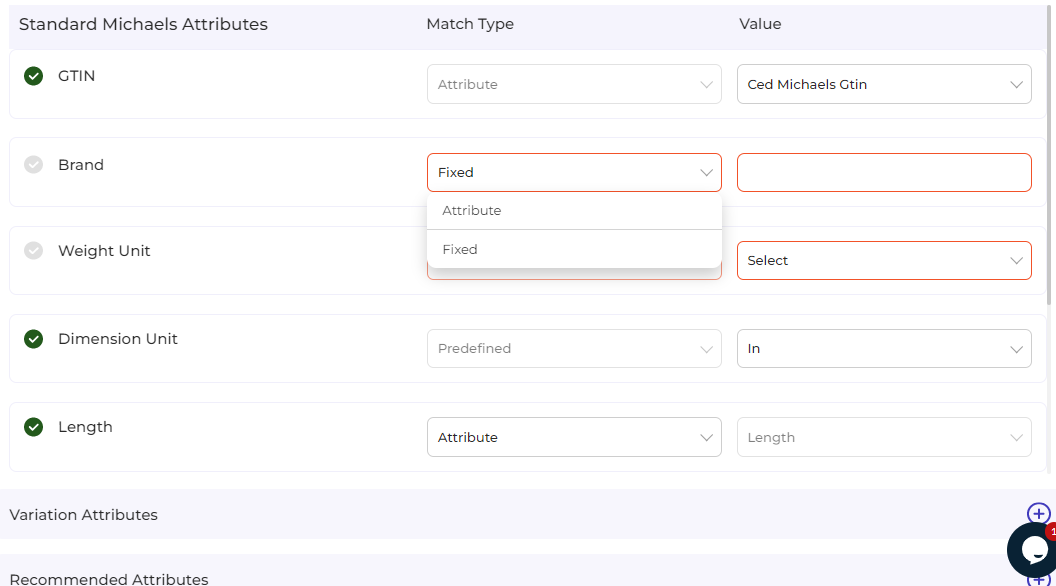
If chosen Attribute, you will have further options as a drop-down under Value to choose from. The dropdown will have the necessary options against GTIN, Brand, Weight Unit, or Dimension unit.
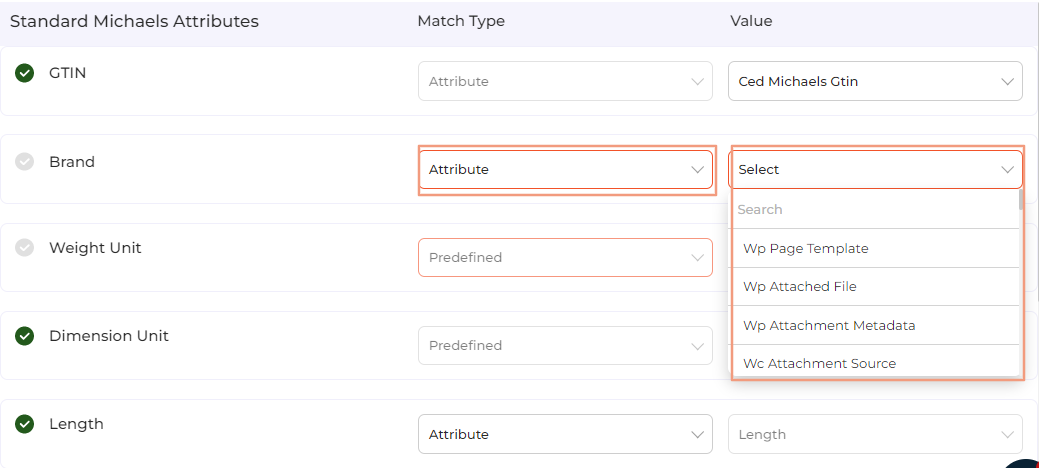
Whereas, if chosen Fixed, you will have to choose and assign a Value on your own (in other words, you are allowed to add a custom value under this).

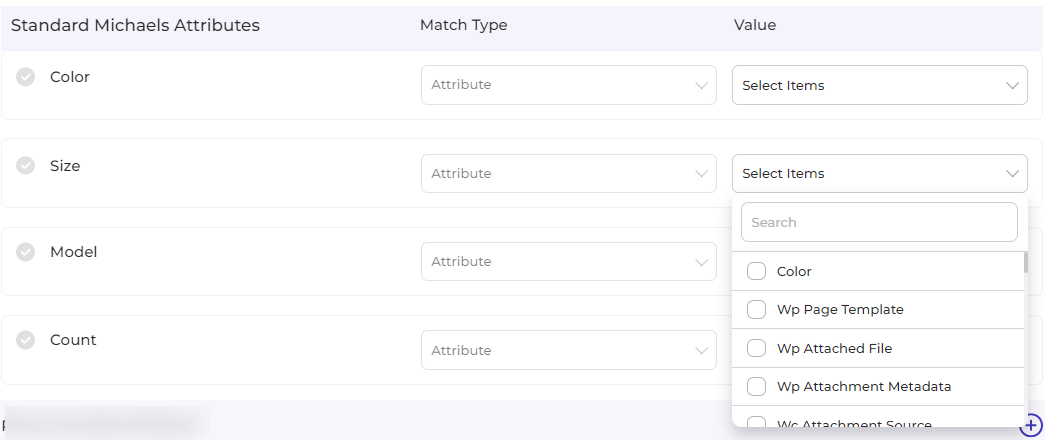
Variation Attributes
Under Variations, the attribute mapping is done on the basis of Size, Color, Model, and Count.
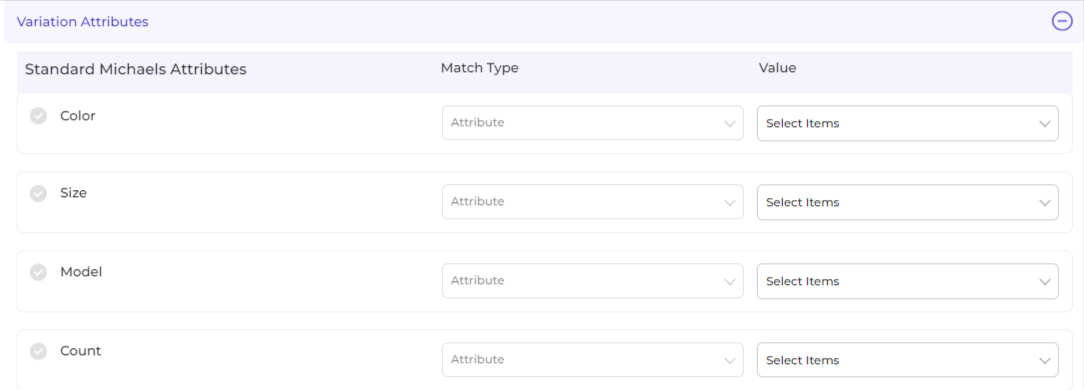
Under Match Type you have one option Attribute.
You will have to further choose Value from the dropdown: Title, SKU, Brand, Product id, Quantity, weight, weight unit, color, barcode, height, weight, length, and width.
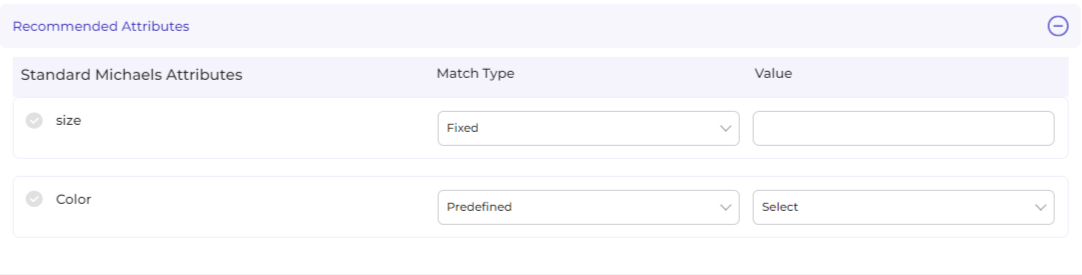
Recommended Attributes
Recommended attributes are additional features and are completely optional. Based on the criteria given, you will have to select your option from the drop-down below.
With this, you finish your Attribute Mapping task!
- Setting Rules and Conditions: Further, you need to select “Rule” containing conditions to select a particular type of product in the template you are selecting. The Rule is based on Any Condition as well as All Conditions that define whether you want all the selected conditions or any of them to be true.

This section has many other features that you must understand one by one.
- How does “Override” work?

Suppose, earlier you have created a profile/template XYZ of a particular product set. Some of the products of profile XYZ are mutual (common/same) in the profile you are creating currently, let’s say ABC.
Now, if you enable the override option, the mutual products will get removed from the profile XYZ and would be linked to your “new current” profile ABC.
Consequently, whenever you upload profile ABC to the Michaels Catalogue, those mutual products will get updated automatically with the details furnished under profile ABC (not XYZ). Therefore, be cautious while executing the changes.
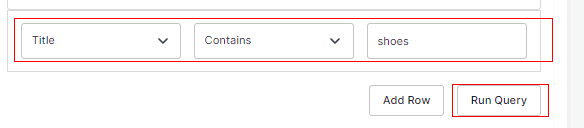
2. In the “Rule Group”, choose Product Category any option from Title, Category, and, Tags. Further in the Rule Group itself, choose the Value from the Contains section’s dropdown.
- Equals
- Not Equals
- Contains
- Does Not Contain
With respect to it, enter the Filter Value and click on “Run Query” as shown in the image below.
3. To add more groups, click on the option Add Row.
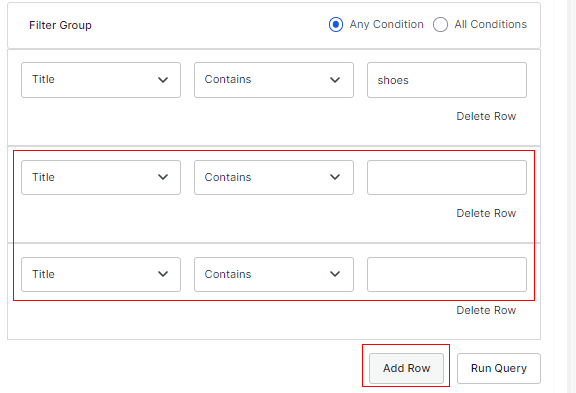
In case you want to add more rule groups, click on logics “Any” or “ALL” and then “Run Query”. Let the app fetch the product details, and after that, click on “Next.”
4. You can choose All conditions or Any Condition to run a query.

- Shipping Dimensions: Proceed next with shipping dimensions that will help match and sync shipping dimensions between Michaels and Shopify.

- Shipping & Return: After you have completed mapping and setting Rules, you need to move ahead with shipping and return details. The shipping and return help you and customers with all shipping and return policies for seamless delivery.
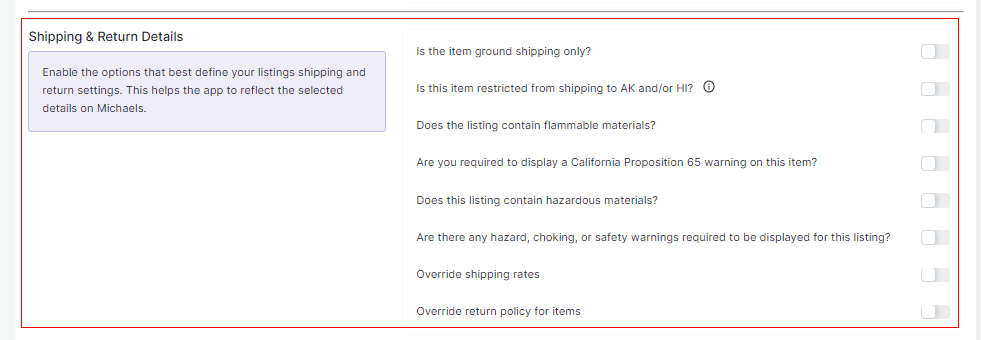
get to know in detail, what each option complies:
-
- Is the item ground shipping only – The question asks you to confirm if this shipping will be on ground or air or water etc.
- Is this item restricted from shipping to AK and/or HI – The question is whether you can ship in Alaska or Hawaii.
- Does the listing contain flammable materials – You have to mark if the products are flammable or inflammable.
- Are you required to display a California Proposition 65 warning on this item – This question talks about California Prop 65, which means businesses to provide warnings to Californians about significant exposures to chemicals that cause cancer, birth defects, or other reproductive harm.
- Does the listing include hazardous materials – You need to mark this question if your listing has hazardous items.
- Are there any hazard, choking, or safety warnings required to be displayed for this listing – The question demands consent if the listing has any items with the mentioned features?
- Override shipping rates- In case you want to put your own shipping rides, you can tick to override the current shipping rates.
- Override return policy for items – In case you want to put your own return policies, you can tick to override the current override return policy for items.
- Proceed with Saving the profile.
Once saved, you will be prompted with the message “Profile Created Successfully” and further, you will be redirected to the “Profile” page having the details of the template created.

In case you want to “Edit” or “Delete” the profile, click on the three dots corresponding to that particular profile. According to the options displayed, you can choose what suits your case.
With this, we are done with successfully creating a new template!


