Add a New Store
This section will allow the admin to create a New Store. The steps are as follows:
1.Go to the admin panel.
2. In the left navigation bar, select the Store Pickup-> View Store
The admin would be directed to the Manage Store Pickup page. In order to create a new store click on the Add New button present at the top right corner.

Once, the admin click on the Add new button, he would be redirected to the New Store page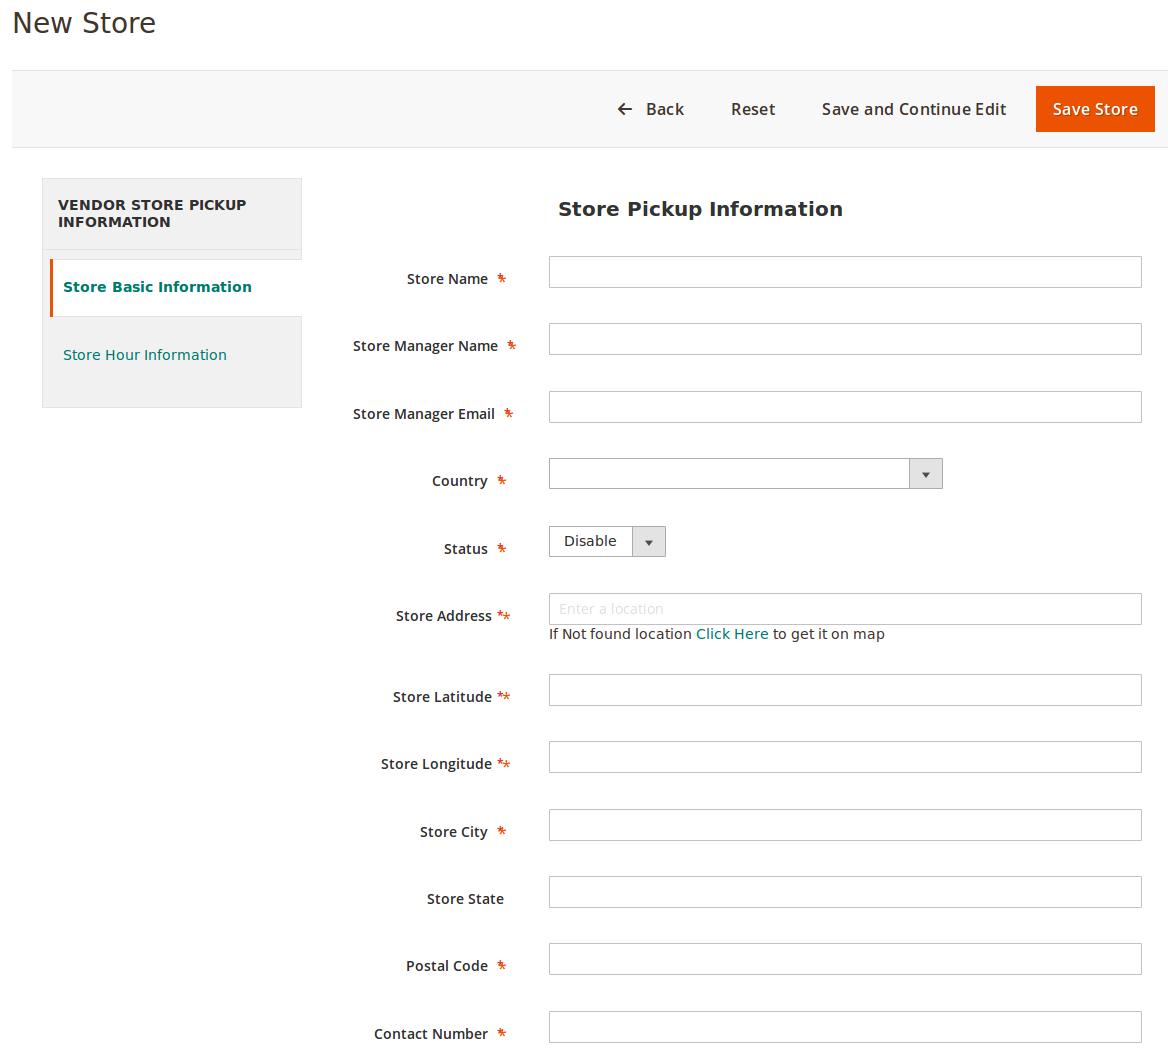
The following details need to be filled by admin as follows
1.In the Store Name box, enter the name of the store.
2. In the Store Manager Name box, enter the name of the store manager.
3. In the Store Manager Email box, enter the email-Id of the store manager.
4.In the Country list, select the required country name.
5.In the Status list, select the required option to enable or disable the store.
6.In the Store Address box, click the box and enter the initials of the store address.
A list appears.
Select the required location.
If the required location does not exist in the list, then click the Click Here link to get it on the map.Based on the selected city and location, the respective values appear in the Latitude and the Longitude fields.
7.In the Store City box, enter the name of the required city.
8.In the Store State box, enter the name of the State.
9.In the Postal Code box, enter the pin code of the location.
10. In the Contact Number box, enter the valid contact number of the store manager.
- In the left navigation panel click the Store Hour Information menu.
The page appears as shown in the following figure: - In the right panel, under Hour of Operation, do the following steps:
- In the list associated with the required weekdays, select the required option to enable or disable the specific day for working.
- In the corresponding Start and End lists, select the respective Start time and the End time.
- In the corresponding Interv list, select the required interval time between the working hours.
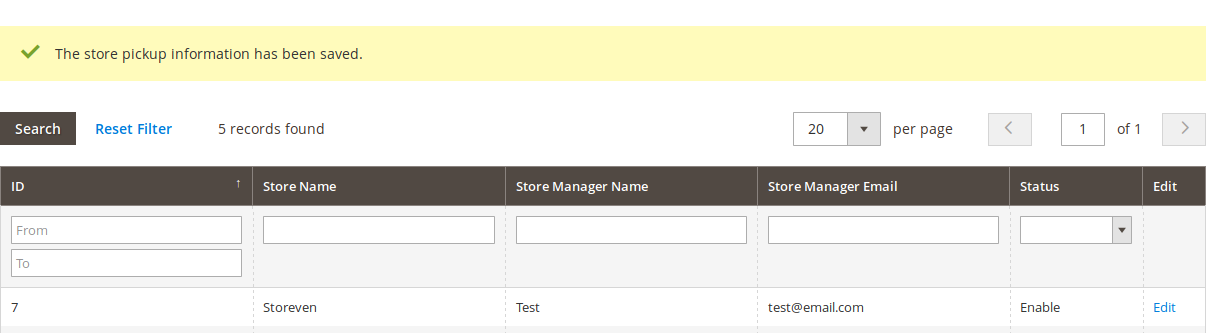
Click the Save Store button.
The new store is created and listed on the Your Store page. Also, a success message appears.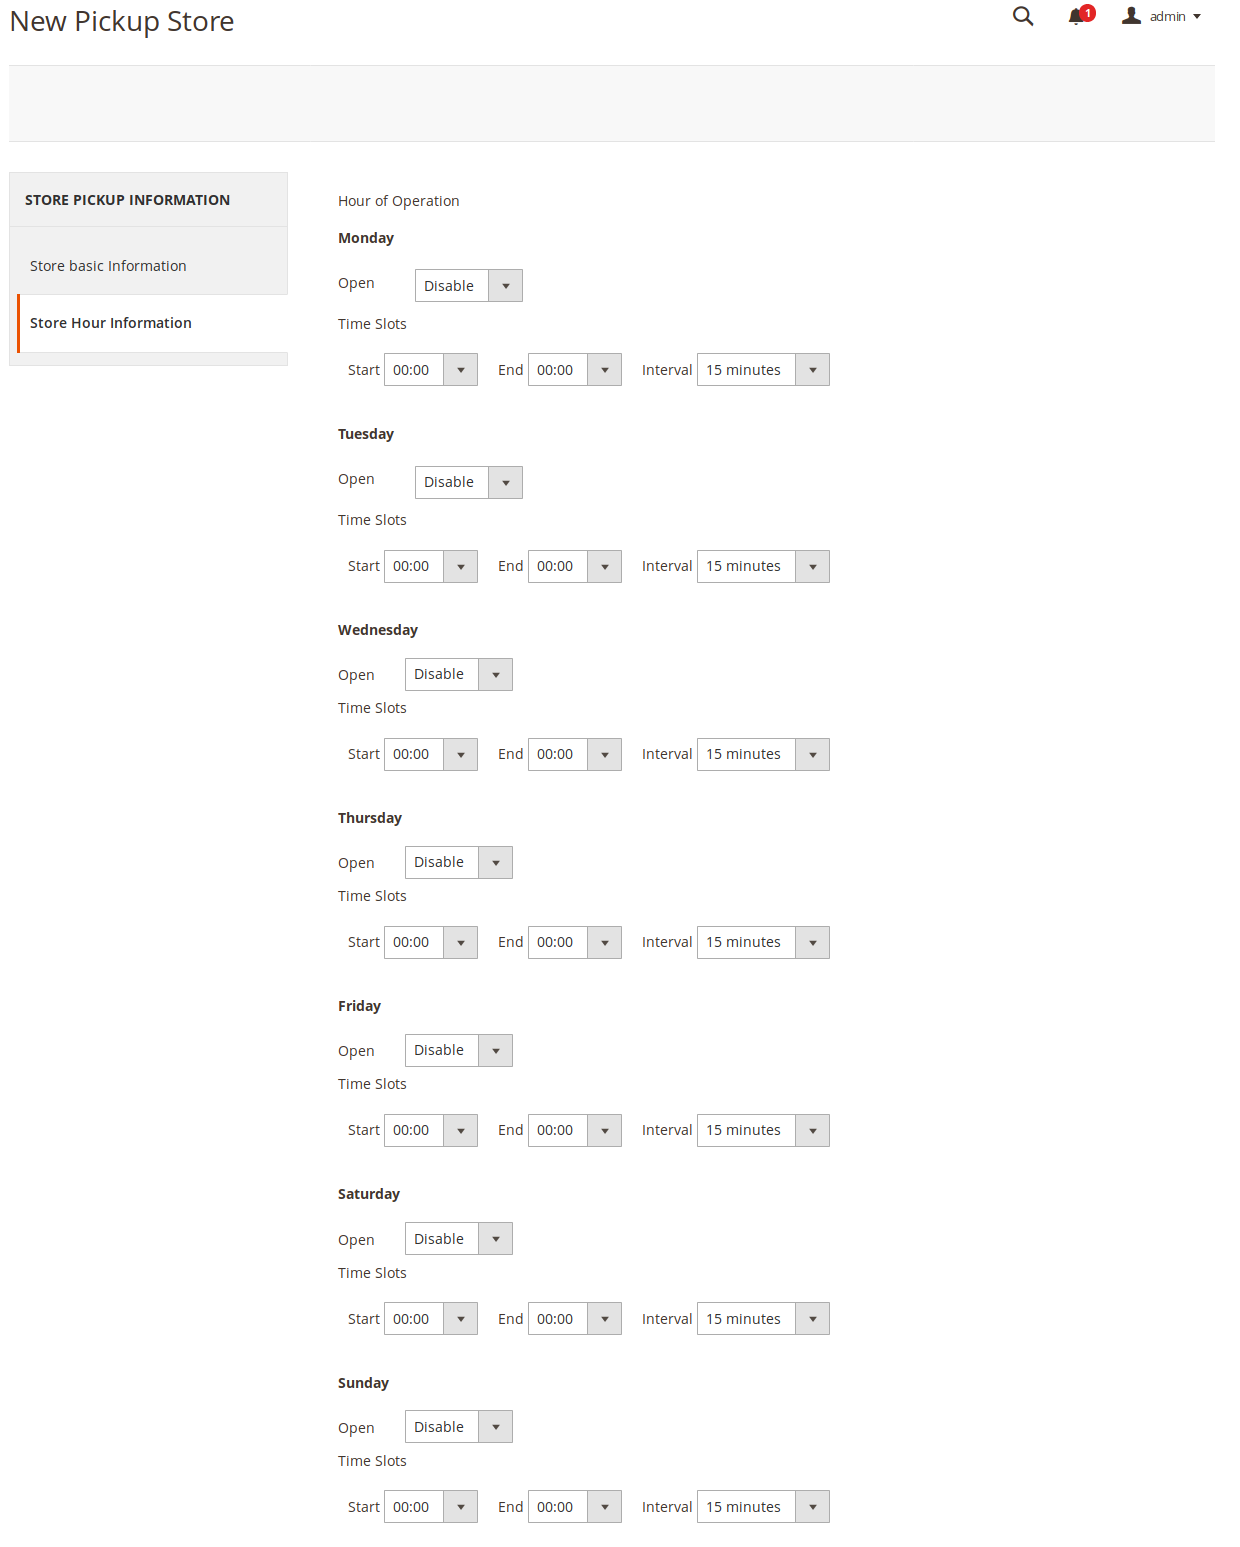
- In the left navigation panel click the Store Hour Information menu.
The page appears as shown in the following figure: - In the right panel, under Hour of Operation, do the following steps:
- In the list associated with the required weekdays, select the required option to enable or disable the specific day for working.
- In the corresponding Start and End lists, select the respective Start time and the End time.
- In the corresponding Interval list, select the required interval time between the working hours.
Click the Save Store button.
The new store is created and listed on the Your Store page. Also, a success message appears.