
Configuration Settings
After the seller is done with the successful installation of Shopify to Magento 2 Product Importer, the Shopify Product Importer menu can be seen on the left navigation bar of the admin panel. Now since the merchant has created a seller account in the Shopify seller panel and it is approved by Shopify, the merchant gets the API credentials from Shopify.
After successful login to the panel, the admin needs to go through the following steps to set up the configuration.
- Go to the Magento 2 Admin panel.
- On the left navigation bar, click the Shopify Product Importer.
- The menu appears as shown in the following figure:
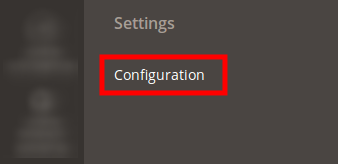
- Click on Configuration. The page that you get navigated to, looks as has been shown in the image below:
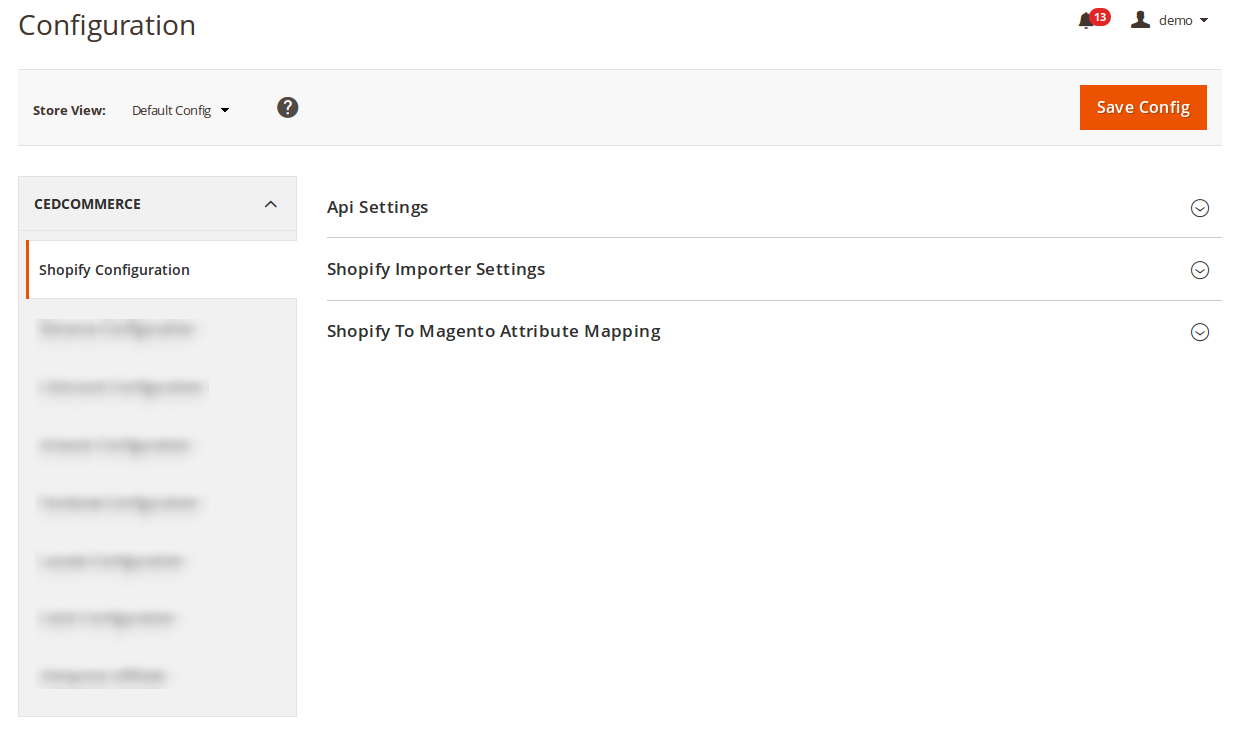
-API Settings-
- Click on the API settings, and the section gets expanded as shown below:

- Select Yes to enable the importer, and the section gets expanded as shown below:
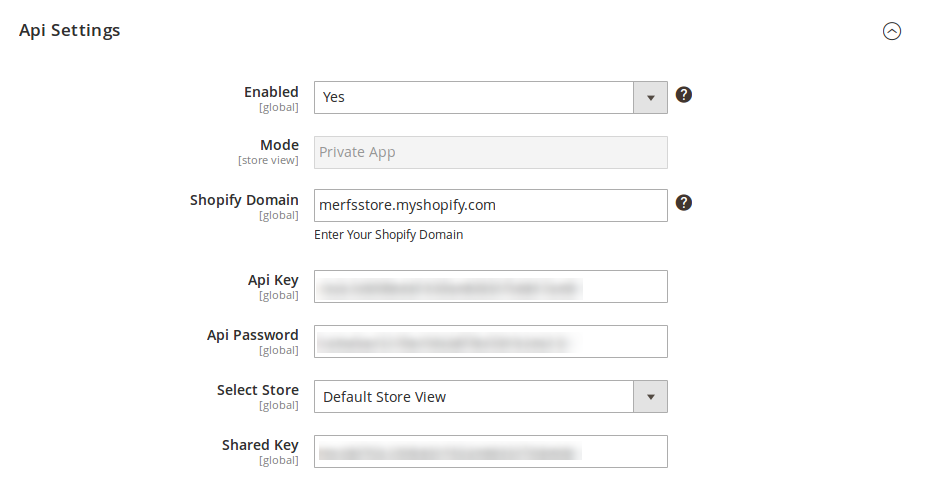
- In Mode, the Private App is there by default.
- In Shopify Domain, enter merfsstore.myshopify.com, as has been shown in the image above.
- In the API Key, enter the API Key that you may get from your Shopify Seller Account.
- In the API Password, enter the Password that you may get from your Shopify Seller Account.
- In Select Store, select the store from where you need your products to be imported.
- In Shared Key, enter the shared key.
-Shopify Importer Settings-
- Click on Shopify Importer Settings and the section gets expanded as shown below:

- In Set Product Status, select Enable.
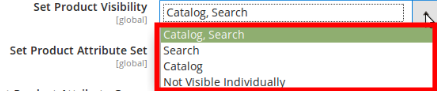
- In Set Product Visibility, select the option which you want, and your product will be shown on your Magento store according to it. For example, if you use Catalogue, Search option, your product will be shown in the front end in the search as well as the catalog.
- In the Set Product Attribute Set, select Default or select according to your business need.
- In the Set Product Attribute Group, select Product Details [set Default], or select option that’s suitable for your business.
- In the Product Price, enter the default price of the product if it’s unfetchable from Shopify.
- In Product SKU Prefix, enter the prefix that you need for your Shopify products.
- Enter the default weight of your product in the Product Weight category if its unfetchable from the Shopify store.
- In Default Category, select the Default Category.
- In Product Creation Chunk, enter the Default Product Creation Limit.
Once you’re done with this section, move on to the next section – Shopify to Magento Attribute Mapping.
–Shopify to Magento Attribute Mapping–
- Click on Shopify to Magento Attribute Mapping and it gets expanded as shown below:
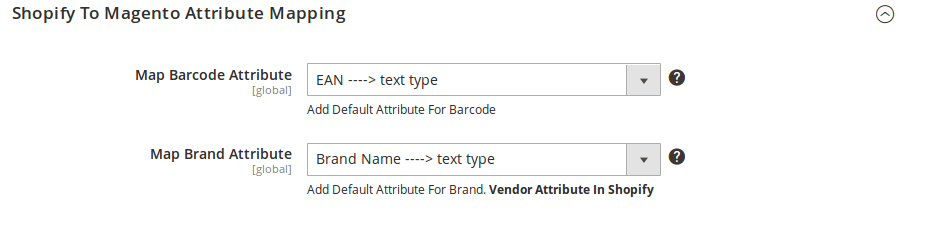
- In Map Barcode Attribute, add a default attribute of your Magento store for storing Shopify Barcode.
- In the Map Brand Attribute, add a default attribute of your Magento store for storing Vendor.
When you’re done filling up the necessary details in all the three sections of this page, click on the Save Config button on the top right side of the page.
All your configuration settings will be saved.


