
OnBuy Configuration Settings
To Set Up the Configuration Settings:
- Go to the Magento 2 Admin panel.
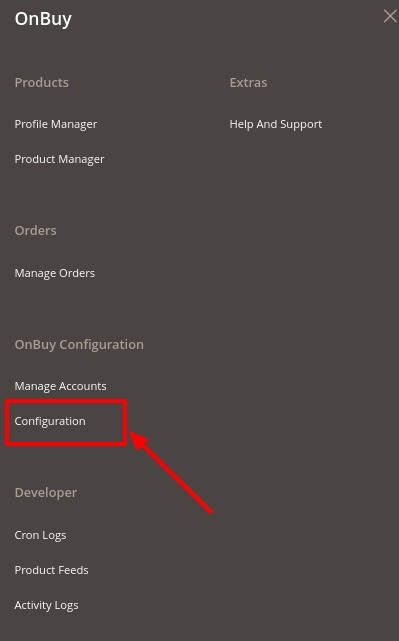
- On the left navigation bar, click the OnBuy Integration menu.
The menu appears as shown in the following figure:
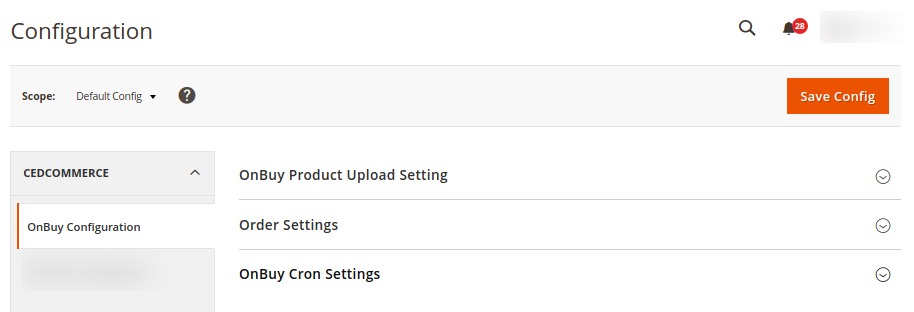
- Click Configuration.
The Configuration page appears as shown in the following figure:
- In the right panel, click the OnBuy Product Upload Setting tab.
The OnBuy Product Upload Settings tab is expanded and the relevant fields appear as shown in the following figure:
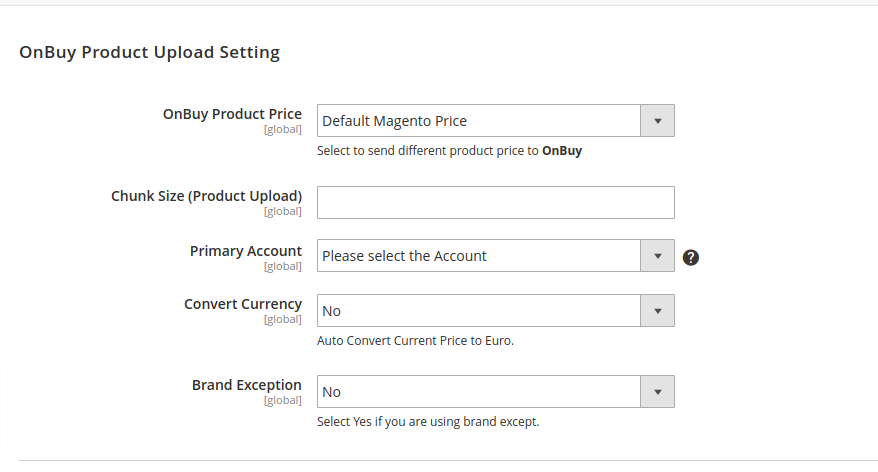
- Under the OnBuy Product Upload Setting tab do the following :
- In OnBuy Product Price you can increase or decrease the price accordingly to display, for this do the following steps:-
- Increase by Fixed Price: If selected, then the Modify by Fix Price field appears.
- Increase by Fixed Percentage: If selected, then the Modify by Percentage Price field appears.
Enter the numeric value to increase the price of the OnBuy, product price by the entered value % of Magento 2 price.
For Example,
Magento 2 price + 5% of Magento 2 price.
Magento 2 Price = 100
Select Increase By Fixed Percentage option
Modify by Percentage Price = 5
100 + 5% of 100 = 100 + 5 = 105
Thus, OnBuy Product Price = 105 - Decrease by Fixed Price: If selected, then the Modify by Fix Price field appears.
- Decrease by Fixed Percentage: If selected, then the Modify by Percentage Price field appears.
Enter the numeric value to decrease the price of the OnBuy product price by the entered value % of Magento 2 price.
For Example,
Magento 2 price – 5% of Magento 2 price.
Magento 2 Price = 100
Select Decrease By Fixed Percentage option
Modify by Fix Price = 5
100 – 5% of 100 = 100 – 5 = 95
Thus, OnBuy Product Price = 95
- In Modify by Fixed Price, enter the price.
- In the Chunk Size(Product Upload) box, enter the number accordingly for the chunks of Products Upload.
- In the Primary Account option, select your primary account.
- In the Convert Currency, select Yes if you want to convert the price automatically to Euro.
- In the Barcode Exemption, if you are a manufacturer or selling barcode exempted category then you can select “Yes” from the barcode exemption dropdown. Then you will no longer be requiring barcodes for the products.
- In OnBuy Product Price you can increase or decrease the price accordingly to display, for this do the following steps:-
- Then click on the Order Settings tab and it expands as:

- Under this Order Settings perform the following steps:
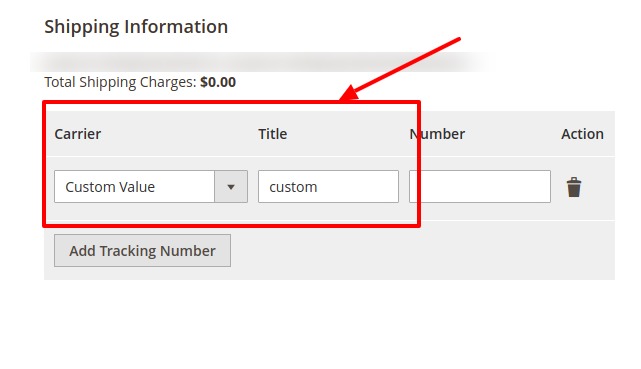
- In the Shipping Methods, map the OnBuy Shipping Carrier with the Magento Carrier. The Magento Carrier Title should be entered the same while shipping orders and adding tracking as shown in the figure below:
- In the Order Notification Email box, enter the email for order notification.
- In the Shipping Method of OnBuy Orders, choose the shipment methods for OnBuy Orders(e.g: OnBuy Shipping Method).
- In the Payment Method of OnBuy Orders, choose the payment methods for OnBuy orders(e.g: OnBuy Payment Method).
- In the OnBuy Orders Refund Reason, select the reason for the refund of the order. A credit memo is generated from the Magento store and the reason selected here in configuration will be sent to OnBuy.
- In the OnBuy Orders Cancel Reason, specify the reason for the cancellation of the order. The reason entered here will be sent to OnBuy.
- In the Fetch Order For Out Of Stock Product box, select the Yes option, to fetch orders for out of stock products.
- In the Customer Group option, select your customer group option.
- In OnBuy Order Id Prefix, enter the OnBuy order Id Prefix.
- In the Shipping Methods, map the OnBuy Shipping Carrier with the Magento Carrier. The Magento Carrier Title should be entered the same while shipping orders and adding tracking as shown in the figure below:
- Now Click on OnBuy Syncing Settings, and the tab expands as:
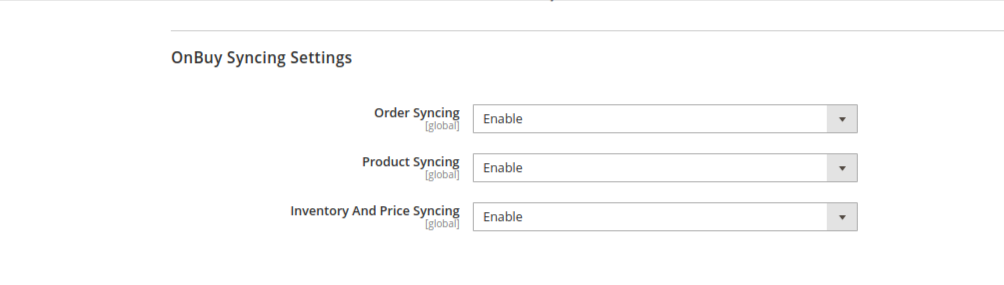
- Under the OnBuy Syncing Settings, do the following steps:
- In the Order Syncing box, select Enable option to enable the order sync cron.
- In the Product Syncing box, select the Enable option to enable the product syncing cron.
- In the Inventory and Price Syncing box, select the Enable option to enable the inventory and price syncing cron.
- Click on the Save Config button to save the configuration information.
×


