
Manage Accounts
To Manage Accounts:
- Go to the Magento 2 Admin panel.
- On the left navigation bar, click the OnBuy Integration menu.
The menu appears as shown in the following figure:
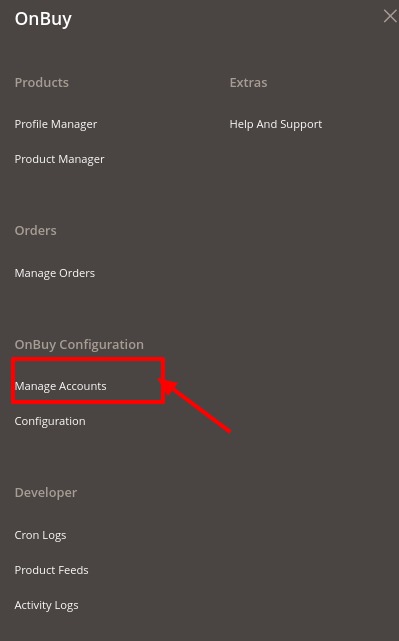
- Click on Manage Accounts.
The page appears as shown in the following figure:
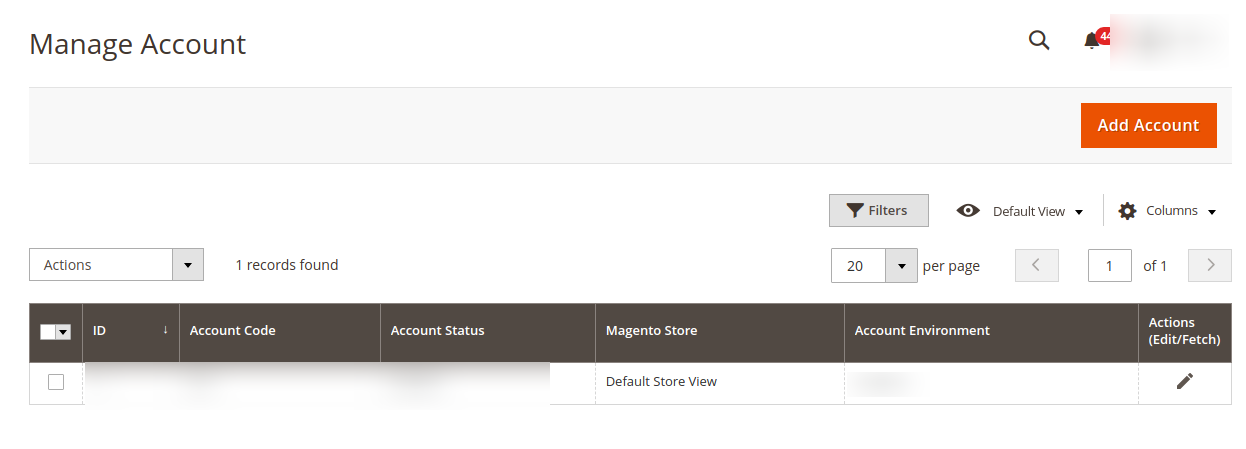
- Click the Add Account
The Add Account page appears as shown in the following figure:
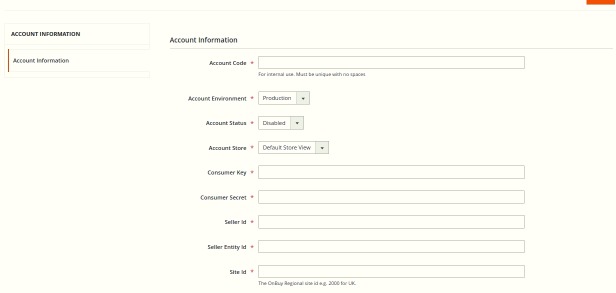
- Under the New Account section, do the following steps:
- In the Account Code box, you can enter your account code.
Note: For internal use. It must be unique with no spaces. - In the Account Environment box, select the Account environment whether its Production or Sandbox.
- In the Account Status box, select the account status.
- In the Account Store box, choose the Default Store View Option.
- To retrieve the next 4 fields you need to log in to your OnBuy seller panel.
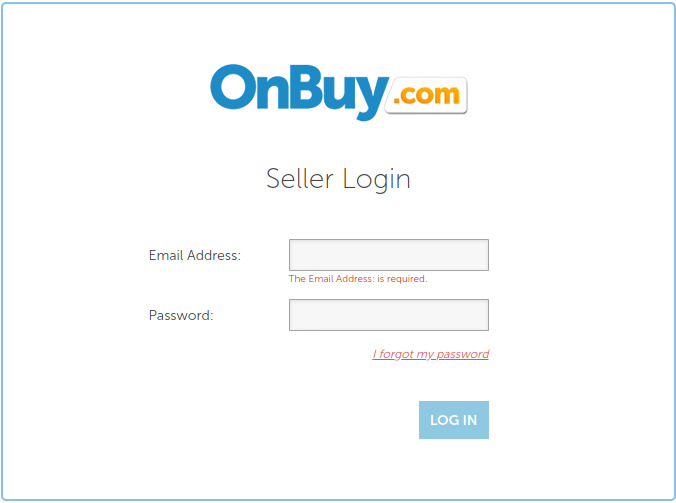
- Enter you seller credentials and login. You’ll be redirected to the OnBuy seller homepage.
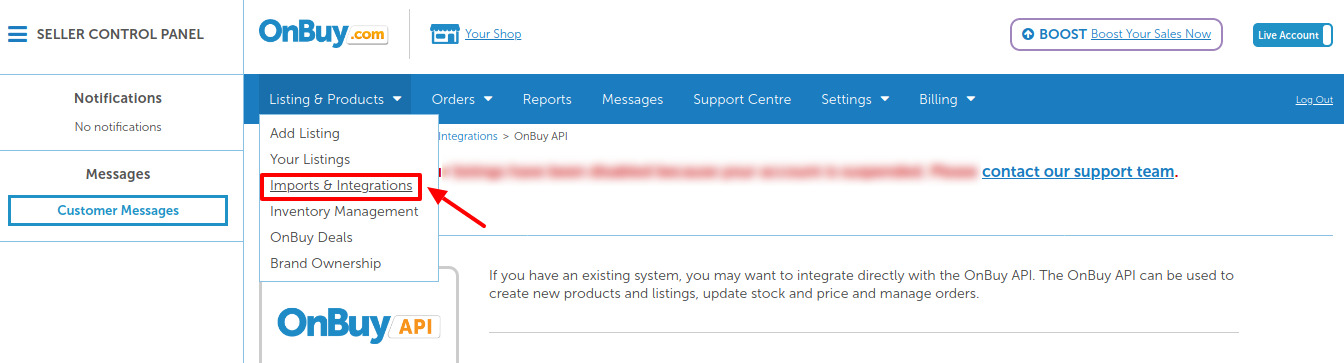
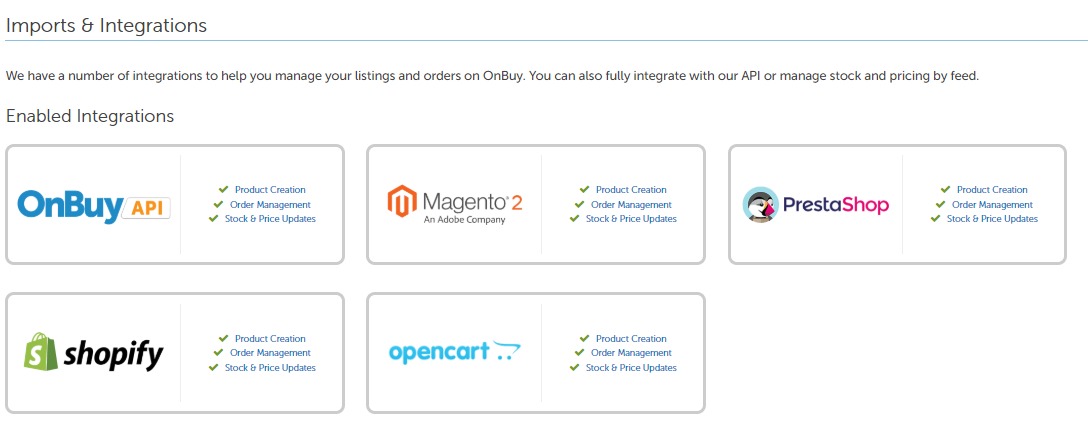
- Click on Imports & Integration under Listings & Products.
The page appears as:
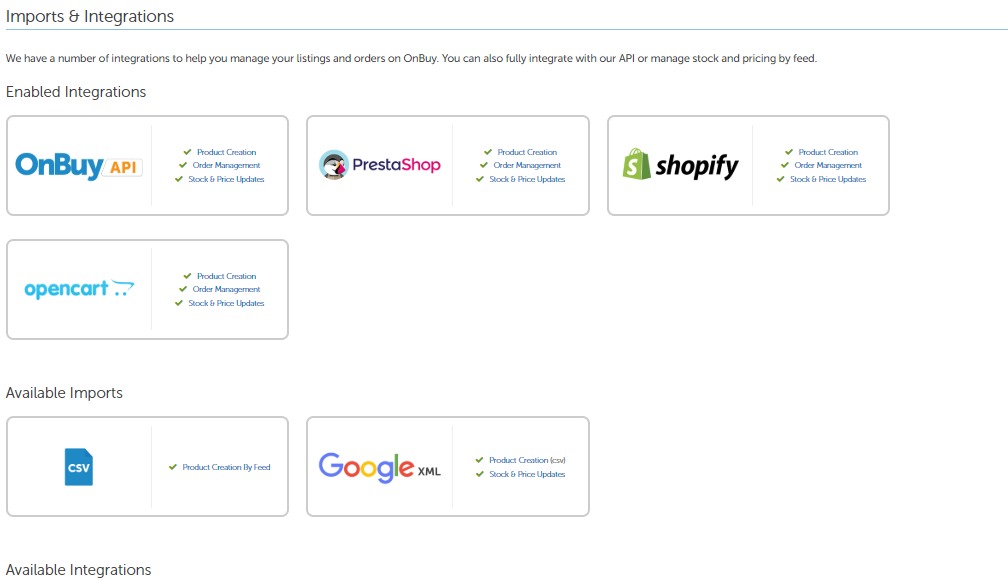
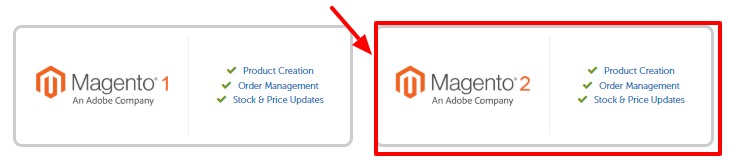
- Now to Enable Magento 2 Integration, under Available Integrations click on Magento 2 Integration.
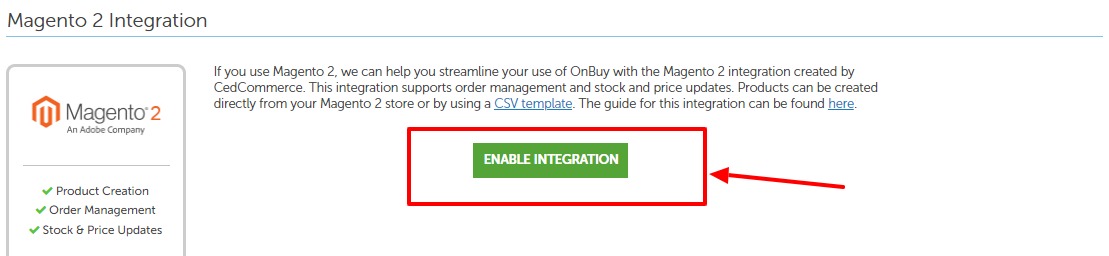
- After clicking on Magento 2 Integration, you will be redirected to the page as shown below, where you need to click on Enable Integration button for enabling the extension.
- Once the extension is enabled it will be shown in the list of Enabled Extensions.
- Then under enabled extension click on Magento 2 integration.
- You’ll be redirected to a new page as shown below:
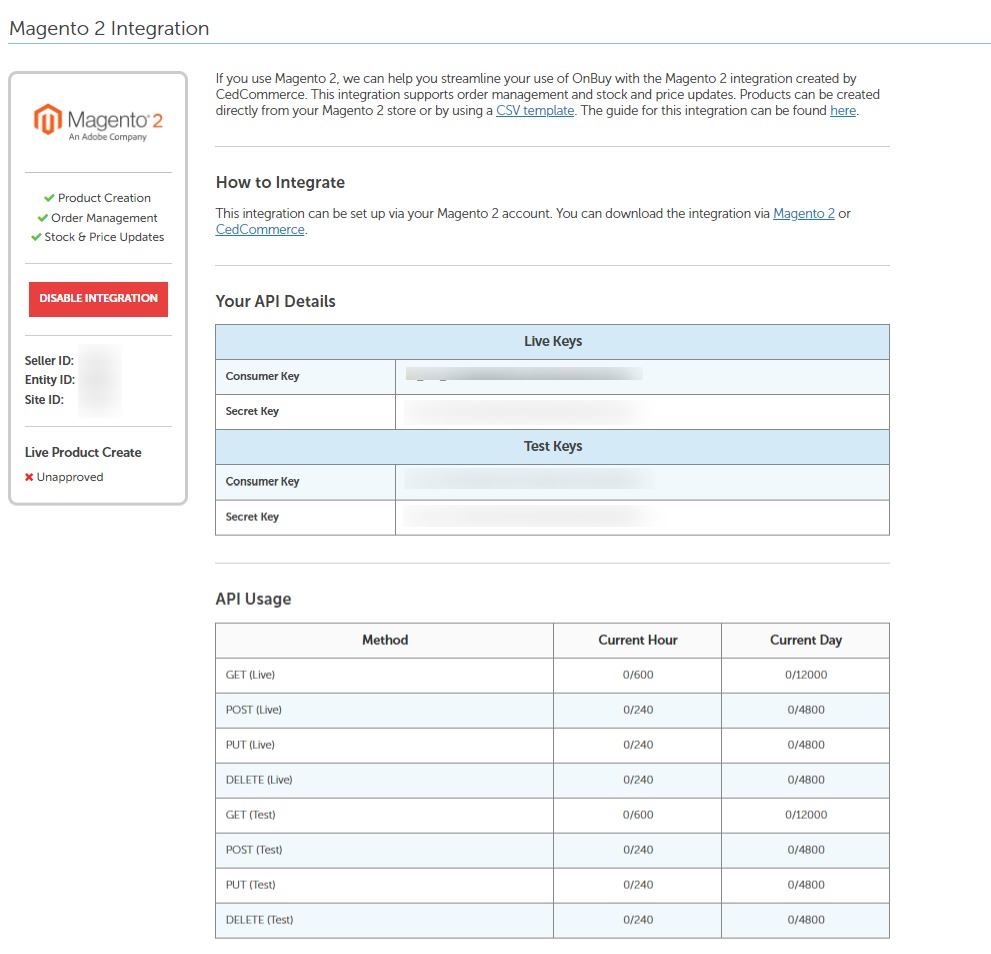
- Retrieve all the necessary details from here.
- Now move back to you Magento Seller panel.
- In the Consumer Key box under Live Keys, enter the Consumer key from the seller account.
- In the Secret Key box under Live Keys, enter the Consumer Secret from the seller account.
- In the Consumer Key box under Test Keys, enter the seller id retrieved from the seller account.
- In the Secret Key box Test Keys, enter the seller entity id from the seller account.
- In the Account Code box, you can enter your account code.
- Click on Save Button to save the following information.
- Once you save your account information. The Edit option appears as shown:
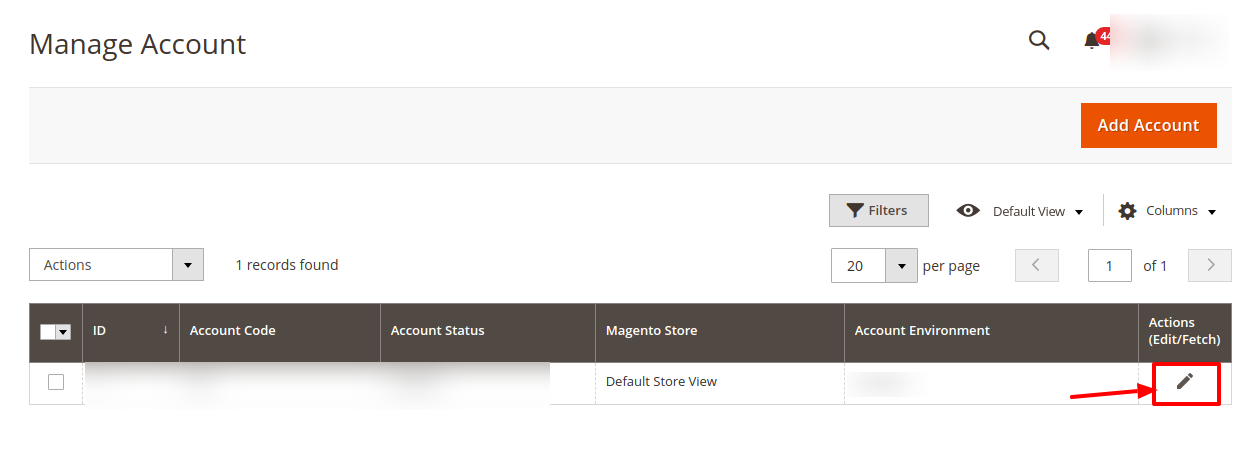
- Clicking on edit option will redirect you to the accounts management page and you can then do the required edits in the account details.
- Click on Save to save the changes.
×


