
Manage Accounts
To Manage Account On Newegg B2B
- Go to the Magento 2 Admin panel.
- On the left navigation bar, click the Newegg B2B Integration menu.
The menu appears as shown in the following figure:
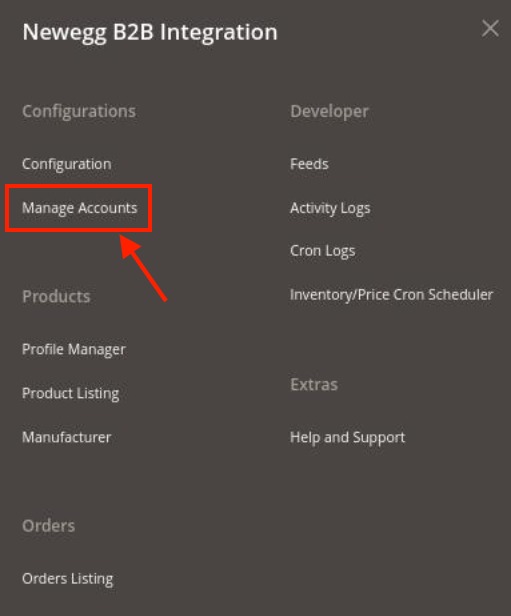
- Click on Manage Accounts.
The Manage Account Page appears as shown below:
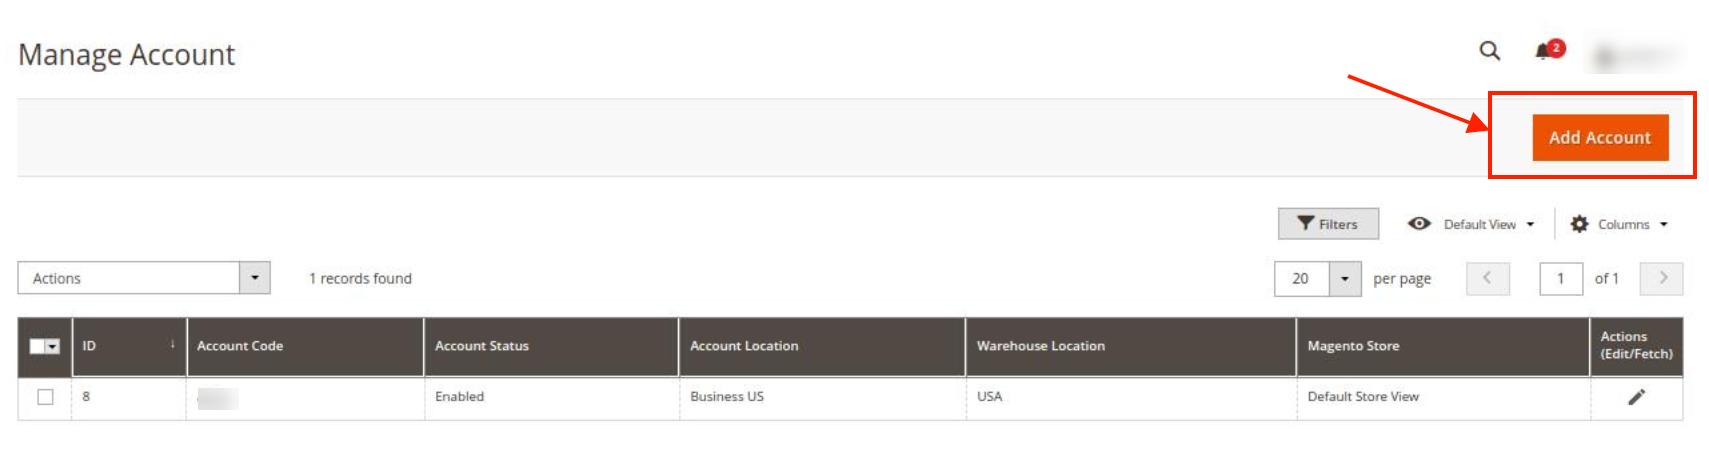
- To add a new account, click on Add Account button on the top right corner.
The New Account Page appears as shown below:
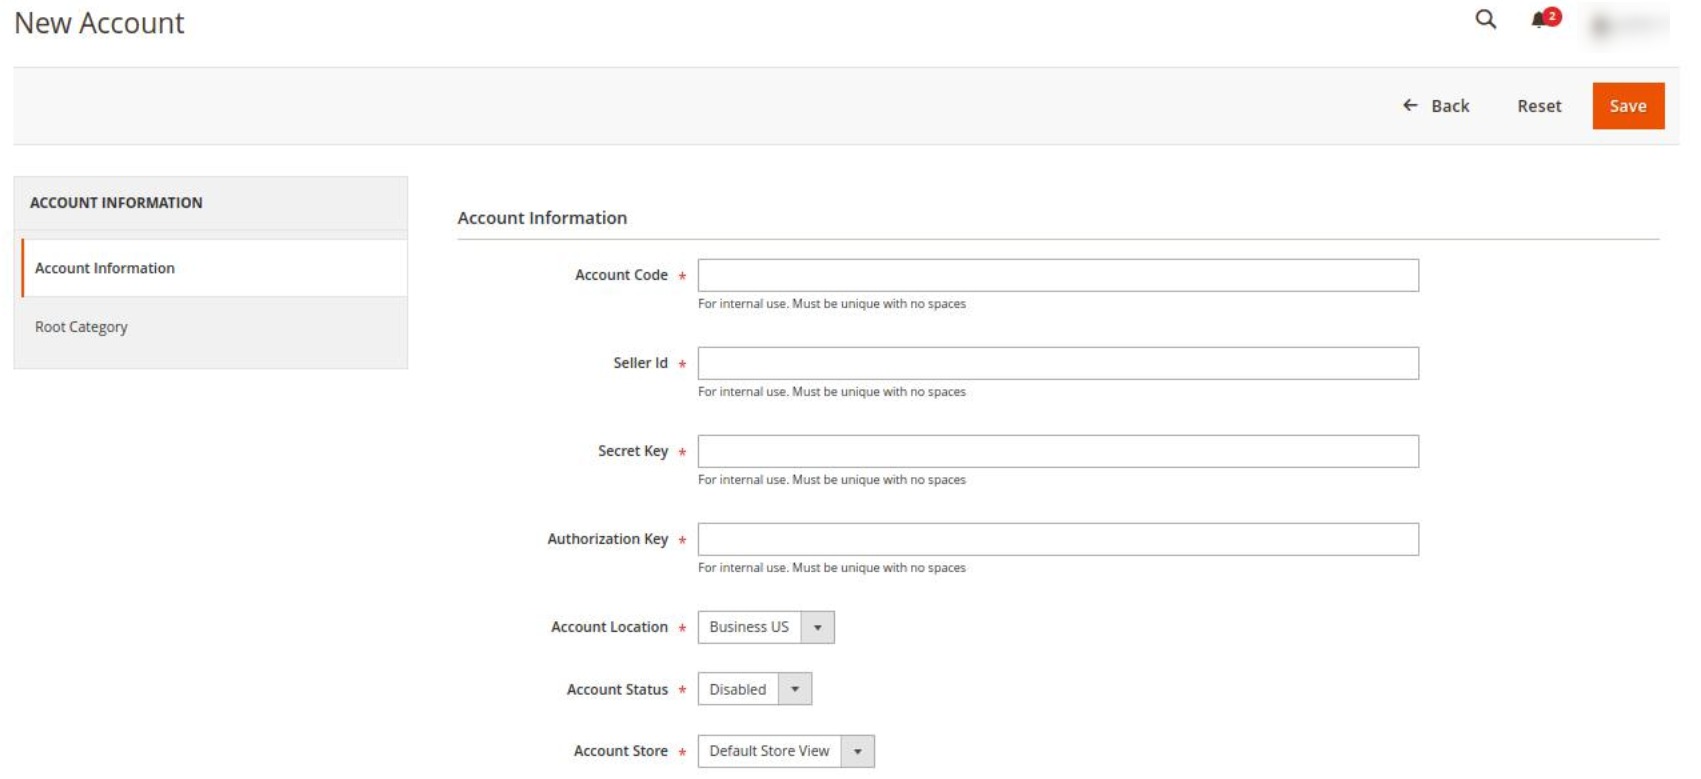
- Under Account Information do the following steps:
- In the Account Code, enter the unique code for the Newegg B2B account that you will be using.
- In Seller Id, enter the seller Id which is provided to you by the Newegg B2B marketplace.
- In Secret Key, copy the seller id that is generated in the Newegg B2B seller panel and paste it here.
- In Authorisation Key, copy the account authorisation key from the Newegg B2B seller panel and paste it here.
- In Account Location, select the location for the account. Since Newegg B2B is for only US location so no other location can be selected except the US.
- In Account Status, select Enable option to enable the status of the account you are creating.
- In Account Store, select the store view for the account.
- Now on the right side click on Root Category. The section appears as shown below:
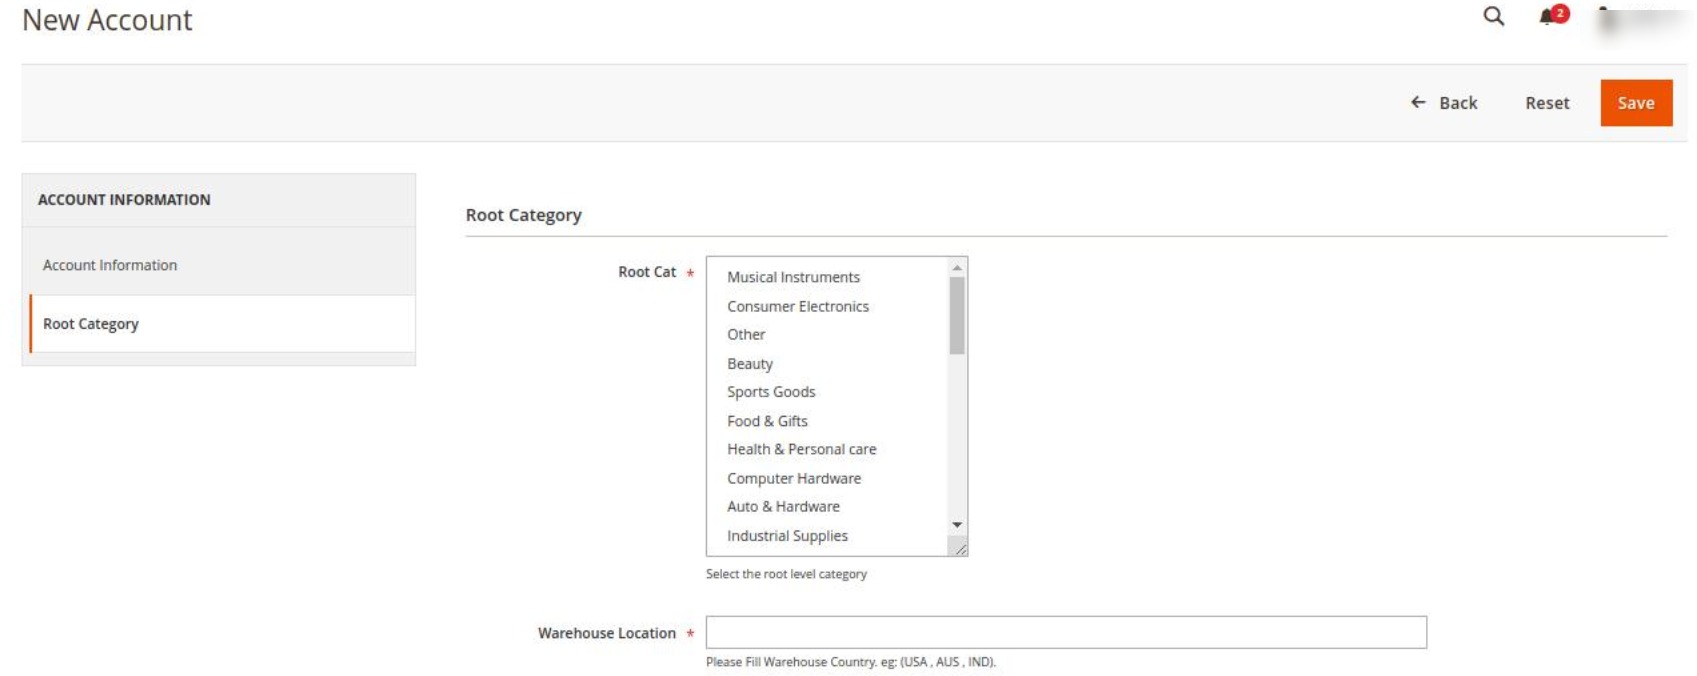
- Under Root Category, do the following steps:
- In the Root Cat, select the root category from the drop-down menu for the account you are creating.
- In Warehouse Location, enter the location where the warehouse is situated for that root category.
- Once all the actions have been taken so far, click on the Save button on the top right of the page.
The New Account will be created and displayed on the Manage Accounts page.
×


