
Vendor Configuration Settings
After installing the Vendor Product add-on, the admin has to set the vendor configuration settings to enable the features of the vendor system and the add-on.
To set up the configurations
- Go to Admin panel.
- On the left navigation bar, click the MARKETPLACE menu.
The menu appears as shown in the following figure:
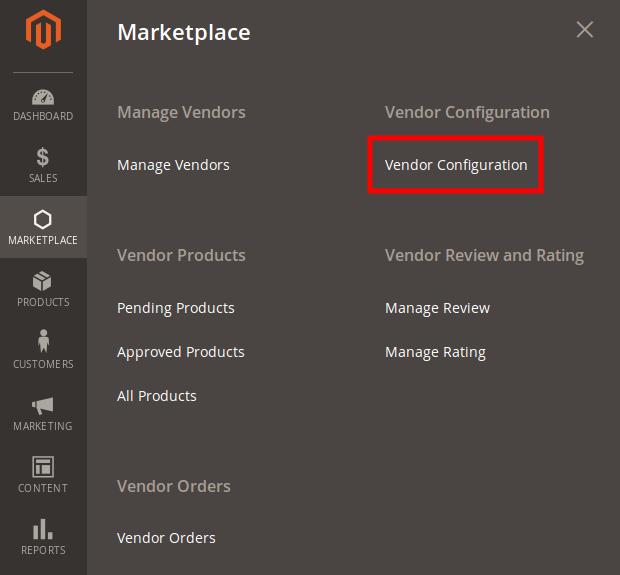
- Click Vendor Configuration.
The Configuration page appears as shown in the following figure:
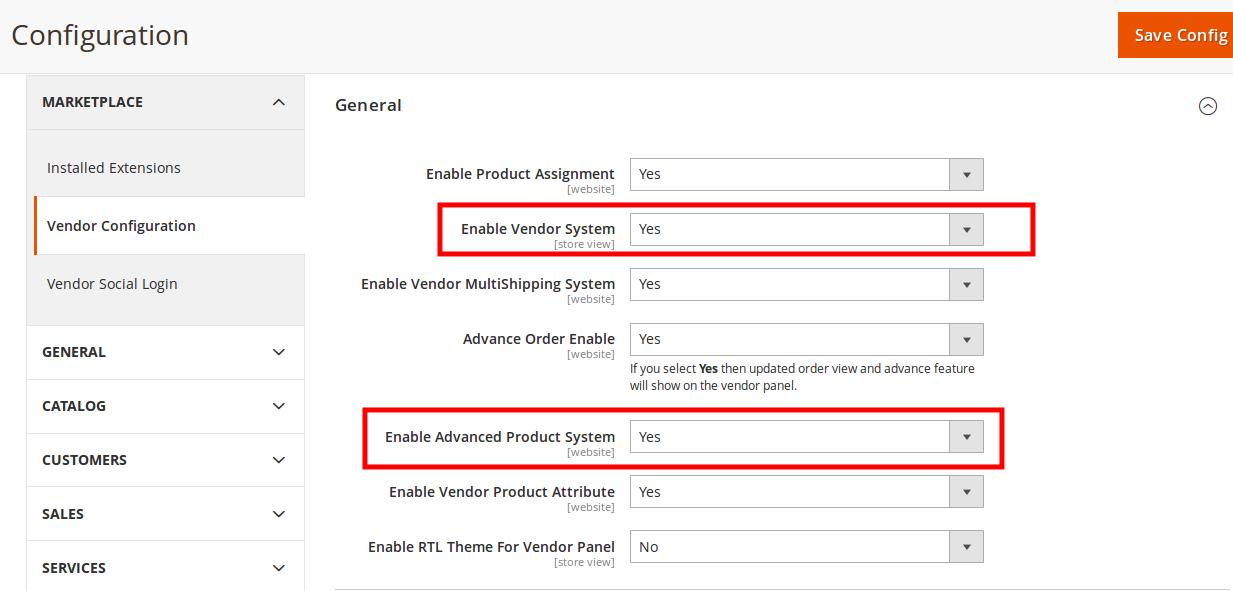
- In the right panel, under the General section, do the following steps:
- In the Enable Vendor System list, select Yes.
- In the Enable Advanced Product System list, select Yes.
- Scroll down to the Vendor Products tab, and then click the tab.
The tab is expanded and the relevant fields appear under the Vendor Products section as shown in the following figure:
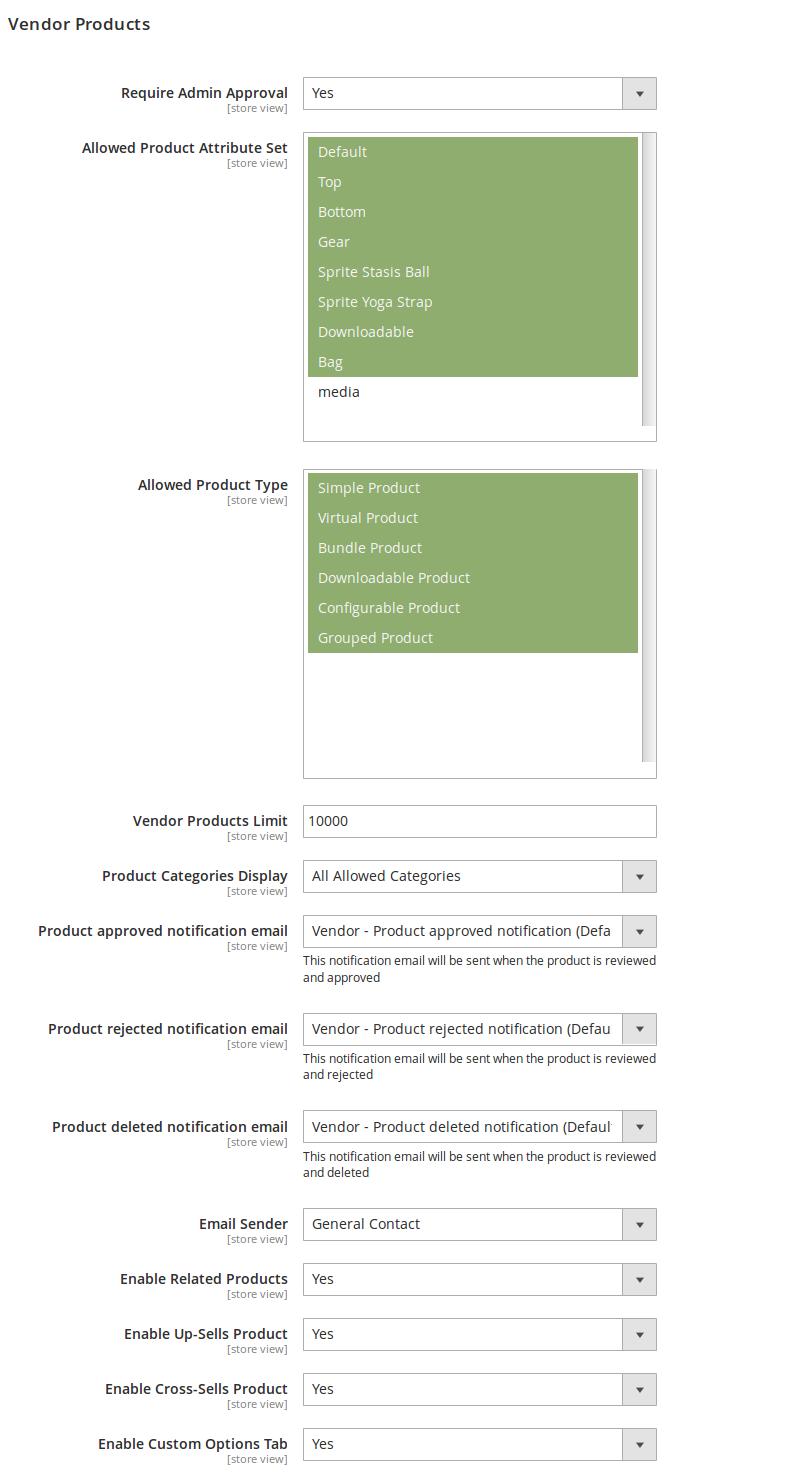
- Under Vendor Products, do the following steps:
- In the Require Admin Approval list select Yes if the admin approval is needed to approve the products created by the vendors.
- In the Allowed Product Attribute Set list, select the required Attribute Set.
- In the Allowed Product Type list, select the required product type that the admin wants to allow the vendors to create.
- In the Vendor Products Limit box, enter the number of products that the admin wants to allow the vendors to create.
- In Product Categories Display list, select one of the following options:
- All Allowed Categories: All the available categories are allowed.
- Specific Categories: On selecting this option, the next field Allowed Categories appears, from where admin can select the each required category from the list.
- In the Product approved notification email list, select the notification email to be sent when the product is reviewed and approved.
- In the Product rejected notification email list, select the notification email to be sent when the product is reviewed and rejected.
- In the Product deleted notification email list, select the notification email to be sent when the product is reviewed and deleted.
- In the Enable Related Products list, select Yes to enable the vendors to create the related products.
- In the Enable Up-Sells Product list, select Yes to enable the vendors to create the Up-Sells products.
- In the Enable Cross-Sells Product list, select Yes to enable the vendors to create the Cross-Sells products.
- In the Enable Custom Options Tab list, select Yes to display the Custom Options tab in the Vendor panel.
- Click the Save Config button.
The configuration settings are saved.
×


