- Overview
- Google Shopping Actions Integration Extension - Installation
- Retrieve API Credentials from Google Shopping Actions
- Configure your Merchant Account
- Configuration Setting
- Manage Google Shopping Actions Accounts
- Manage Google Shopping Actions Profiles
- Upload Products on Google Shopping Actions
- Fetch Google Shopping Actions Orders
- Google Shopping Actions Cron Logs
- Google Shopping Actions Activity Logs
- Product Feeds
- Help & Support

7.1.Add a New Profile ↑ Back to Top
To add a new profile
- Go to the Magento Admin panel.
- On the left navigation bar, click the Google Shopping Actions Integration menu.
The menu appears as shown in the following figure:

- Click the Profile Manager menu.
The Google Shopping Actions Manage Profile page appears as shown in the following figure:

- Click the Add New Profile button. The page appears as shown in the following figure:

- Select the account for which you want to create a new profile.
- The new profile page appears as shown below:

- In the Profile Code box, enter a profile code.
Note: It is only for the internal use. Use the unique profile code with no spaces. Start with small letters. - In the Profile Name box, enter the name of the profile.
Note: Use the unique name to identify the profile. - In the Status list, select Enabled to enable the profile.
Note: The Disabled option disables the profile. - Click the Save and Continue Edit button.
- In the left navigation panel, click the Category & Attribute menu.
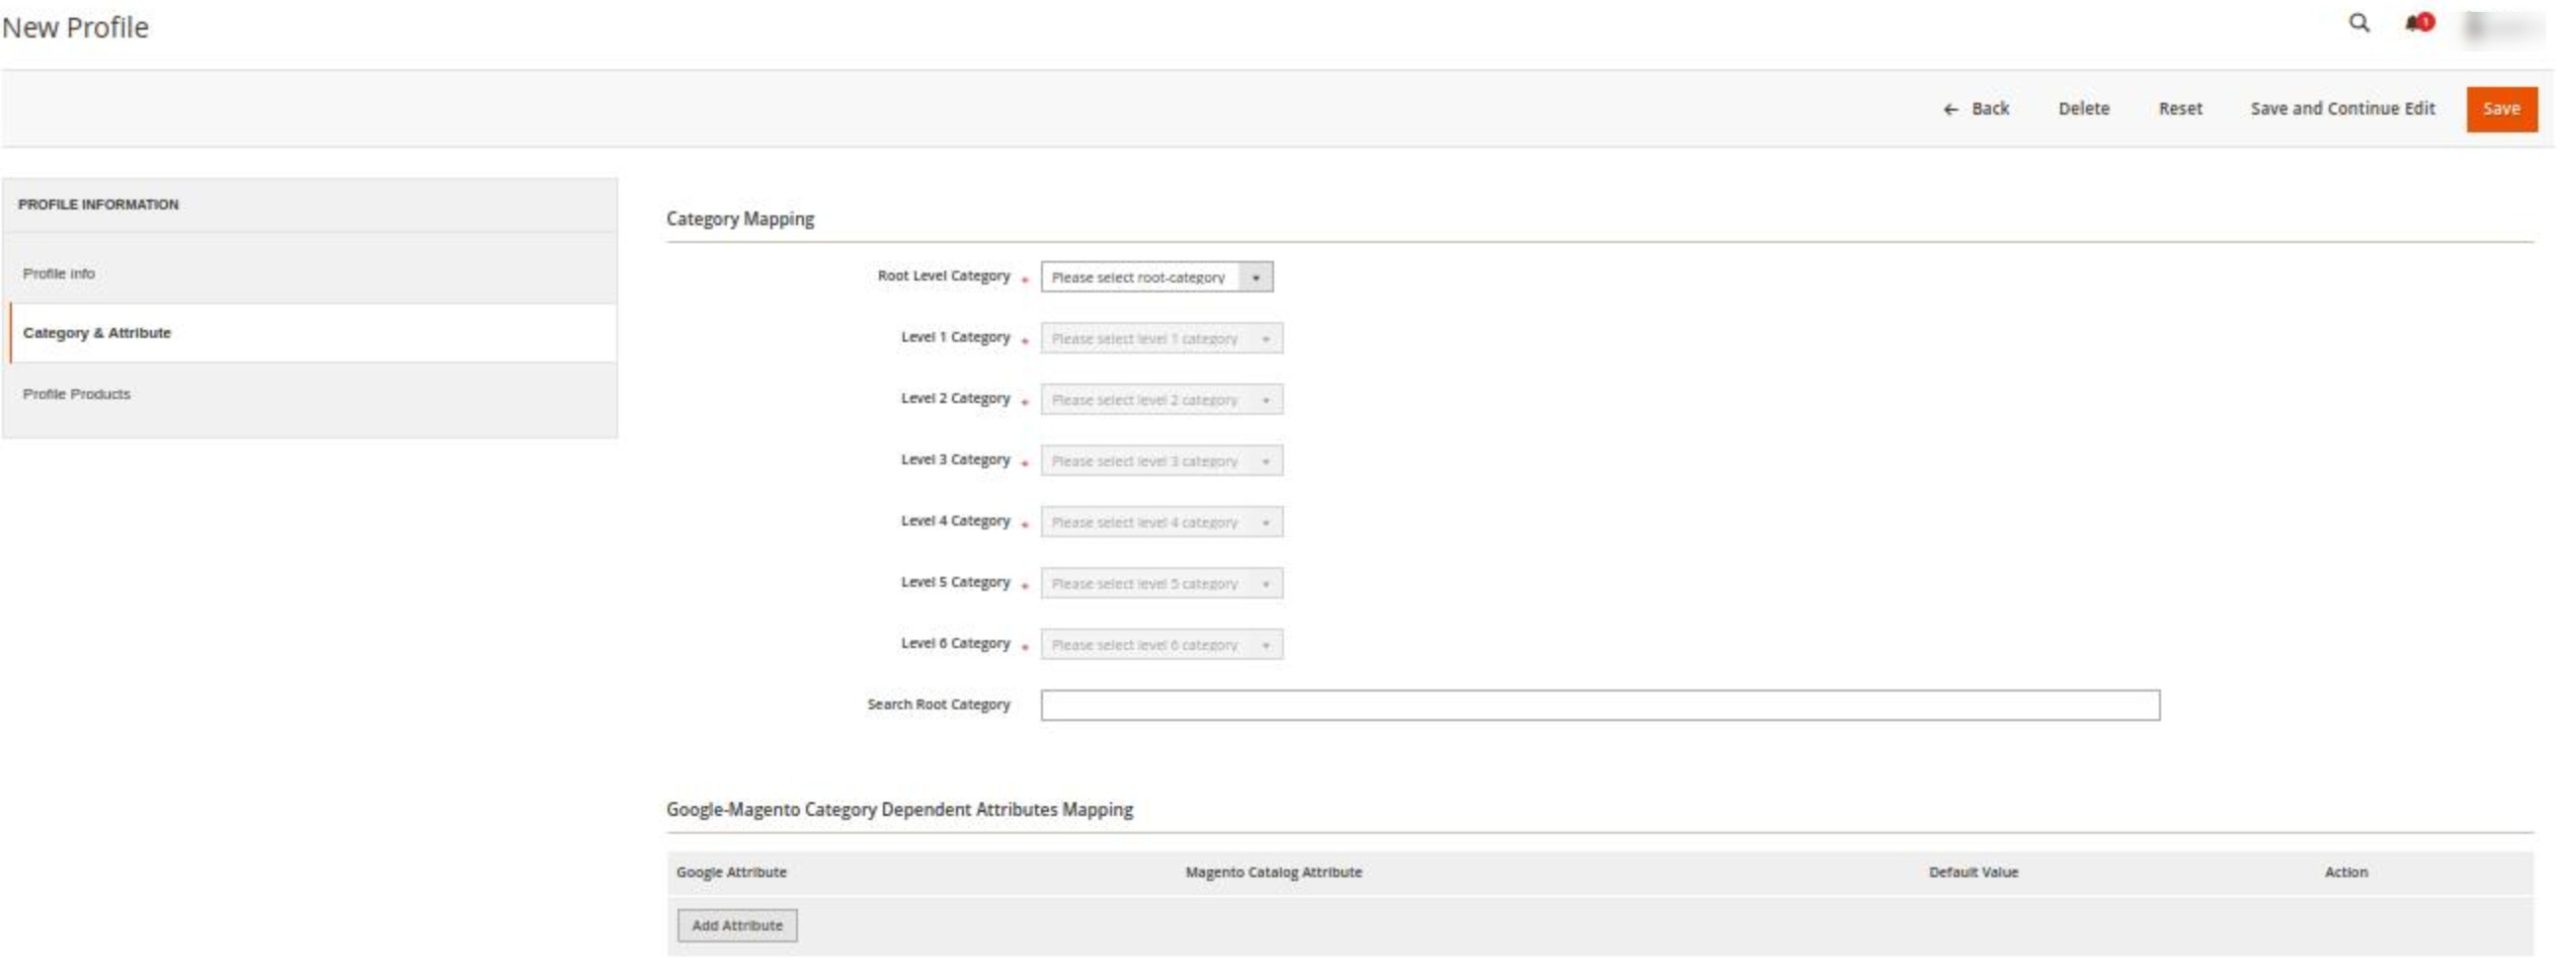
The page appears as shown in the following figure:

- In the right panel, under Category Mapping, do the following steps:
- In the Root Level Category, select the preferred Google Shopping Actions category that the admin wants to map.
- In the right panel perform the required mapping.
- You can also Search Root Category from the box provided.
- Click the Add Attribute button to add more attributes.
- In Google Magento Category Dependent Attribute Mapping, map the Google attributes with the Magento attributes.
- In the left navigation panel, click the Profile Products menu. The page appears as shown in the following figure:

- Since no products as assigned to the profile, there are no products listed in the table.
- Click on the Save button present on the top right corner and the new profile will be saved.
×


