
Better That Installation Settings
Disclaimer: Better That cannot provide any guarantee on the plugins performance in your website nor that there will be any conflict or issues that need to be resolved. Better That bears no responsibility for any errors that arise from self installation of the Better That plugin, other Magento plugins, the Magento core platform, or any other software.
Important notice: Before commencing on any of the following actions it is important that you take a backup of your website and database.
Step 1 – Setting up a Magento Marketplace account and connecting it to your website:
If you have built a Magento and used plugins it is likely you already have a Magento marketplace account or your developer does at marketplace.magento.com.
Please find this out first, as if that is the case this whole step may be avoided.
If you or your developer has never installed plugins from the Magento marketplace please continue.
- Go to https://marketplace.magento.com/ and sign up for an account.
- Once signed in and verified you will need to create an access key by going to
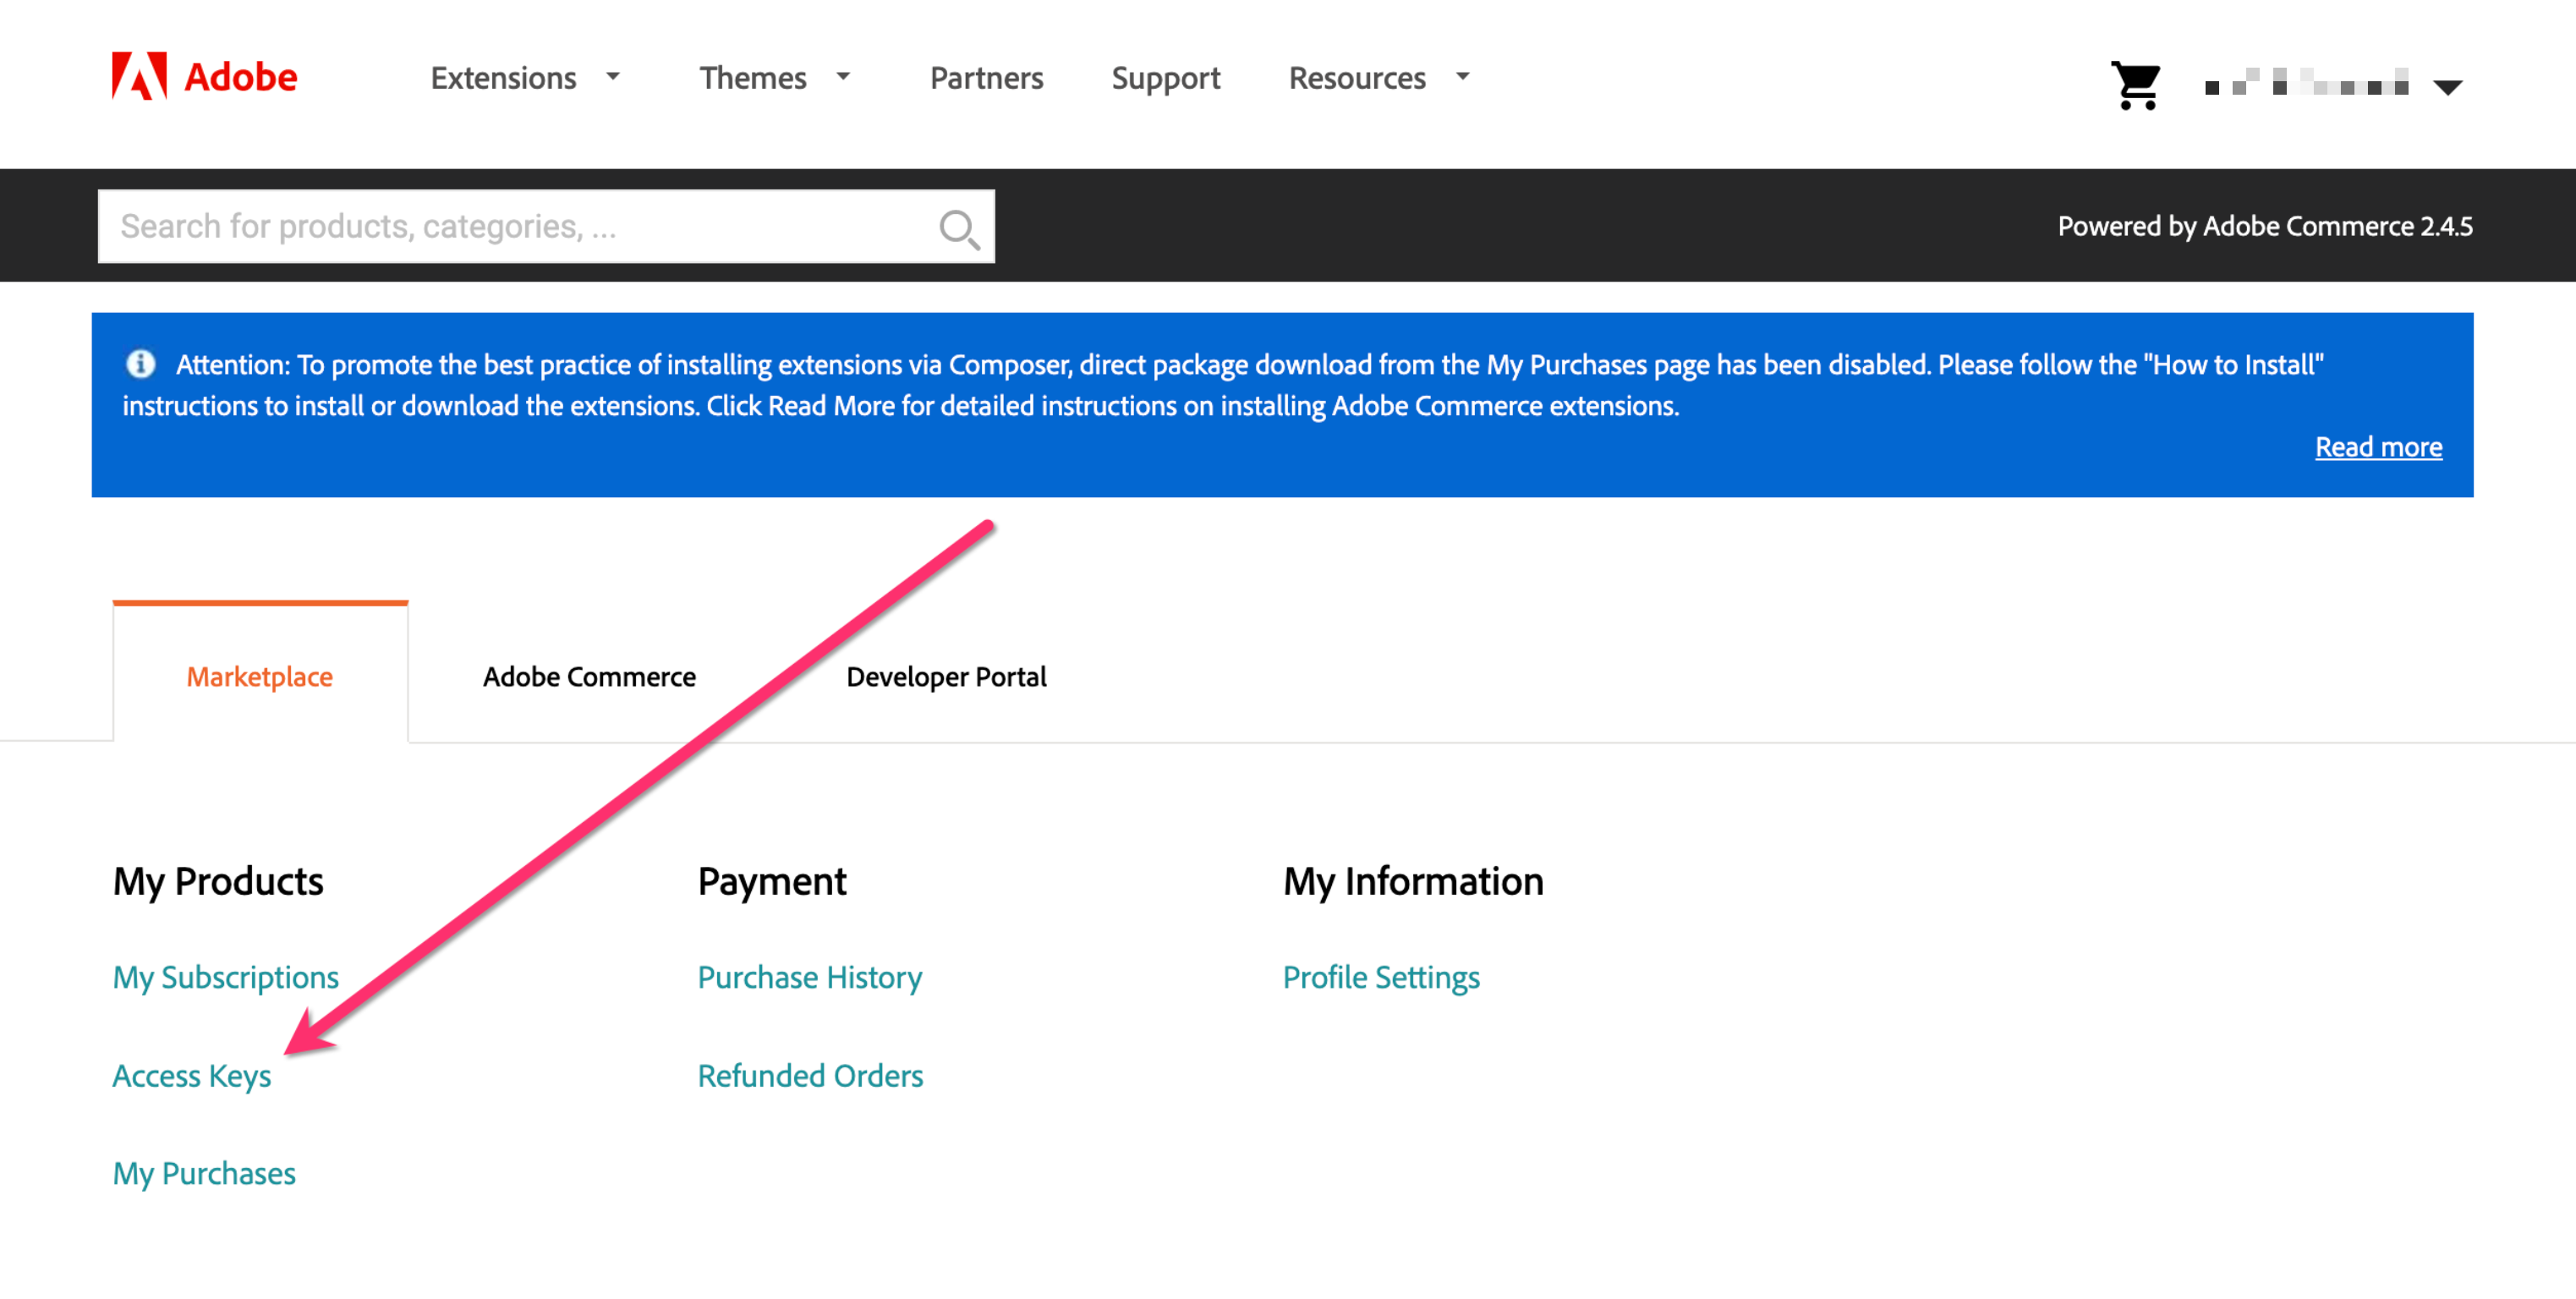
- Go here –

or click here – https://marketplace.magento.com/customer/account/ - Clicking Access Keys –
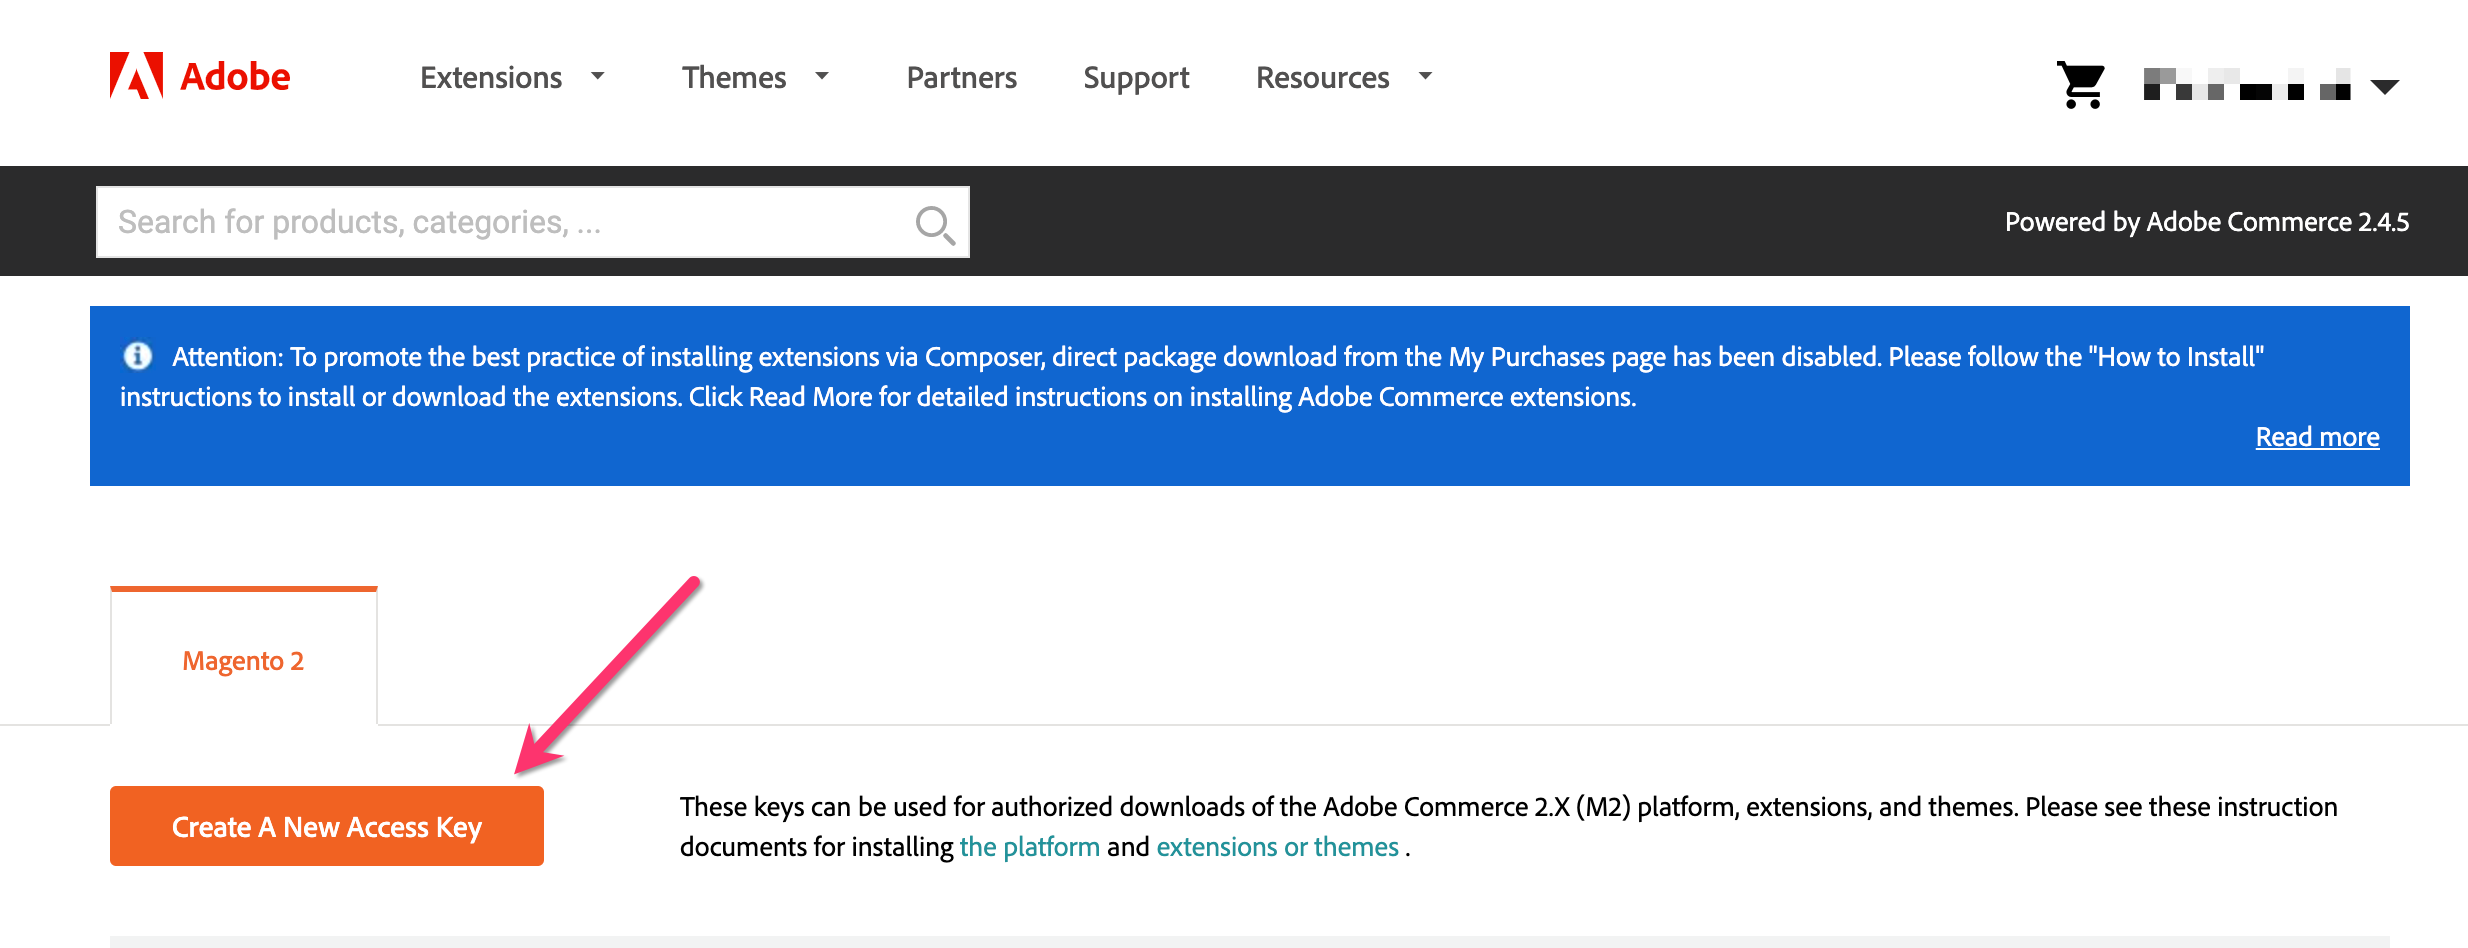
- Create a new access key –
- Give the access key a name (any name with no spaces) –
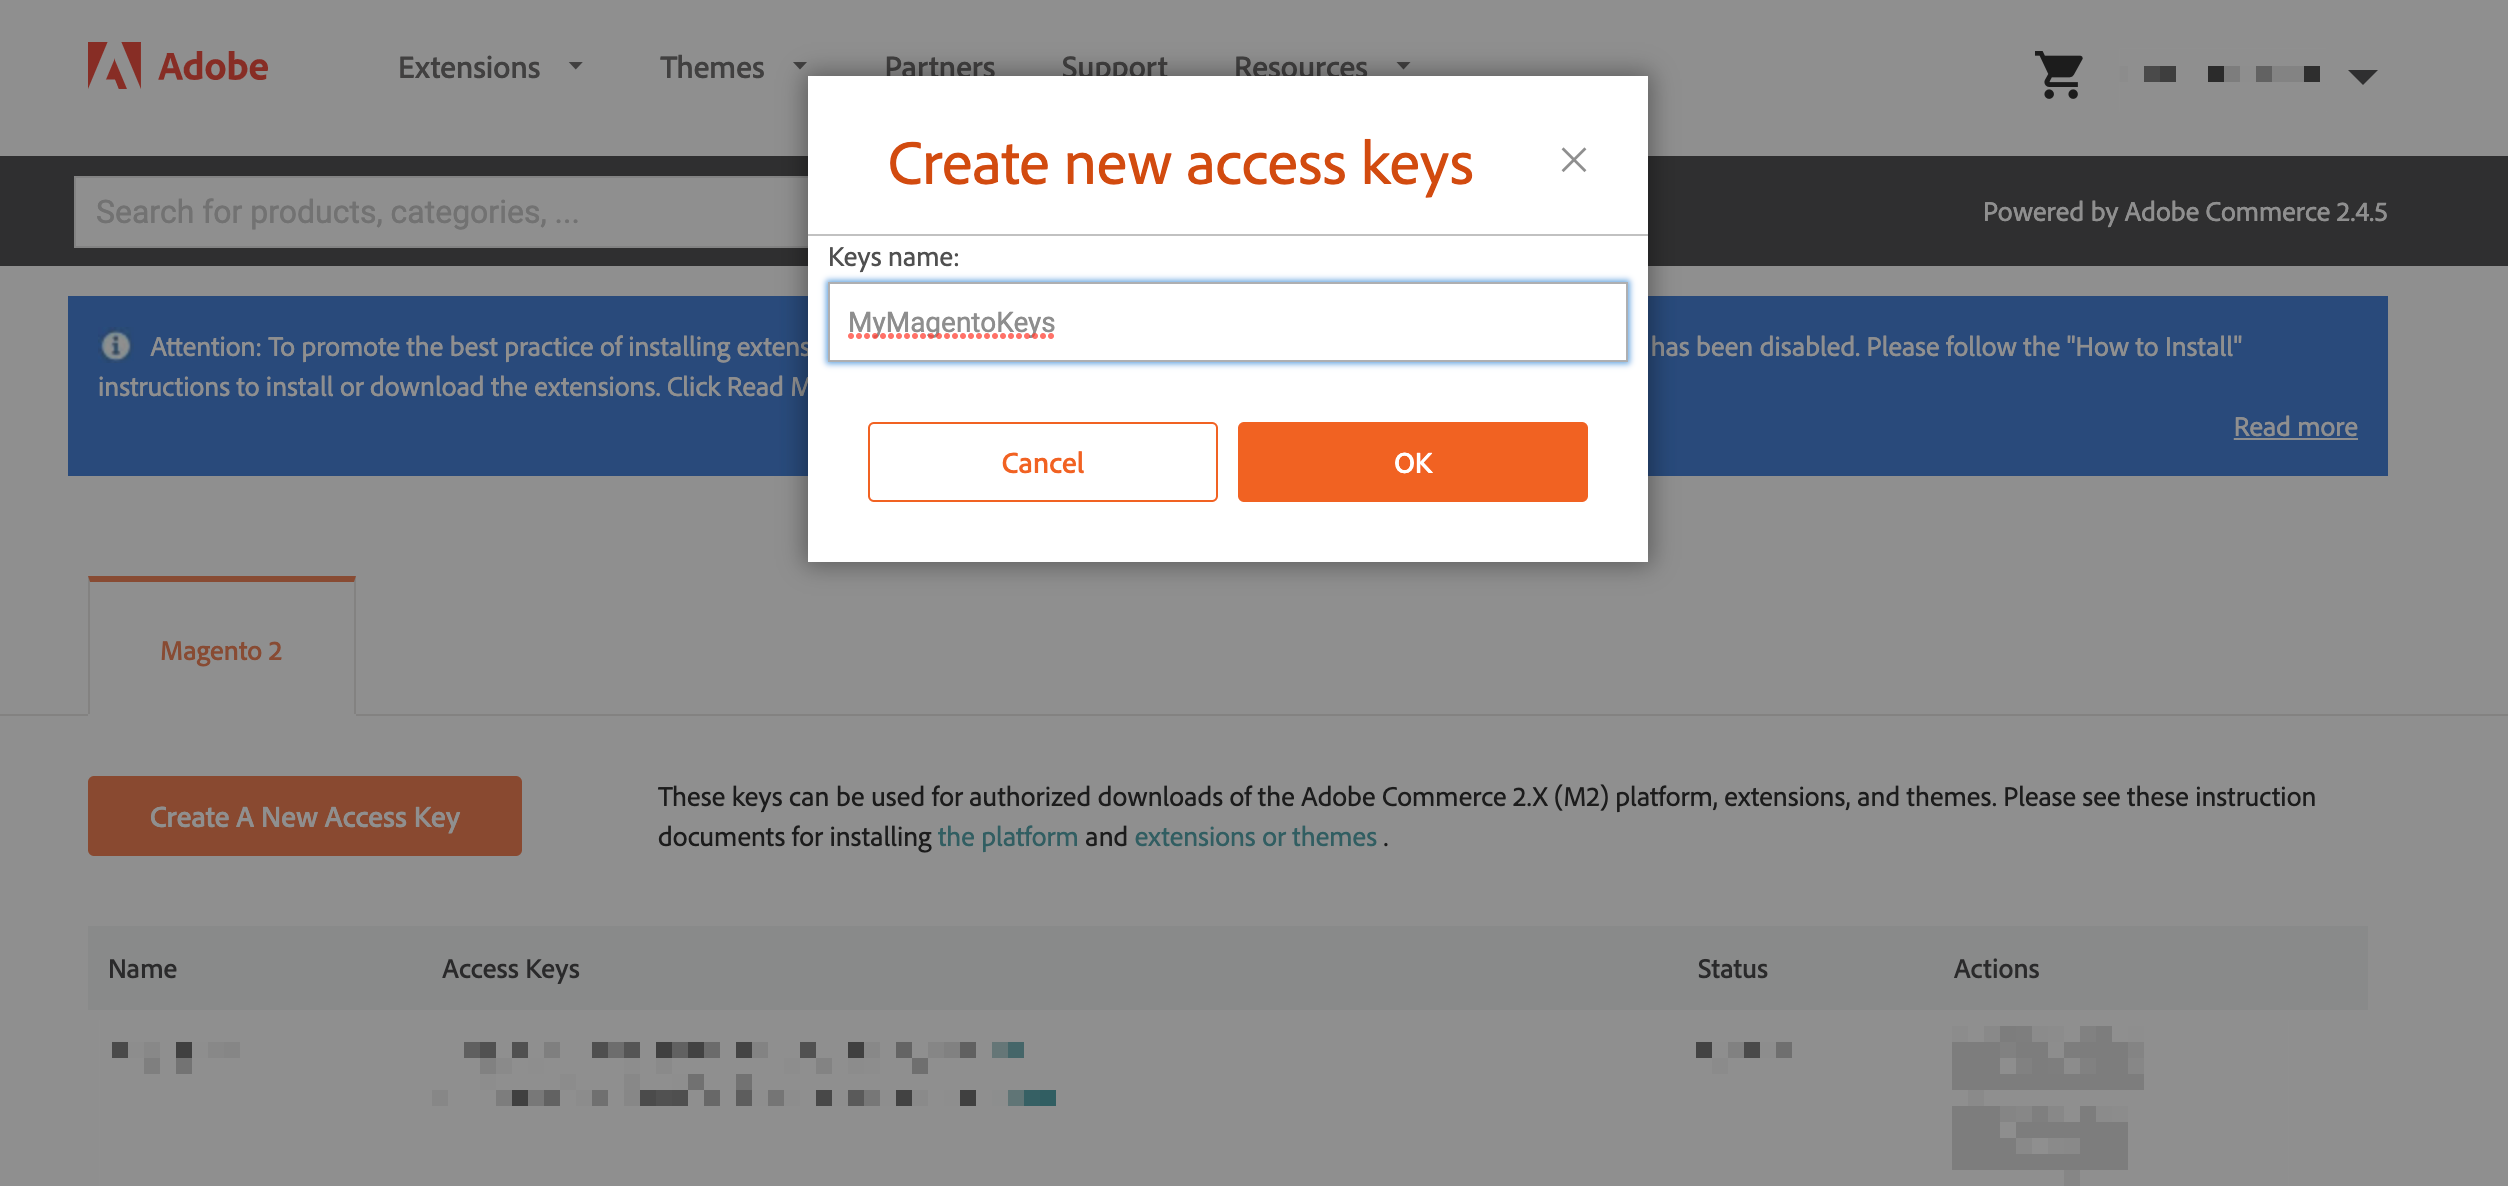
- Leave that page open with the keys as you need it for the next part.
Technical parts
Warning: should be carried out if you are confident in web file system management. If not, please be aware you can cause serious damage to your website.
- Go here –
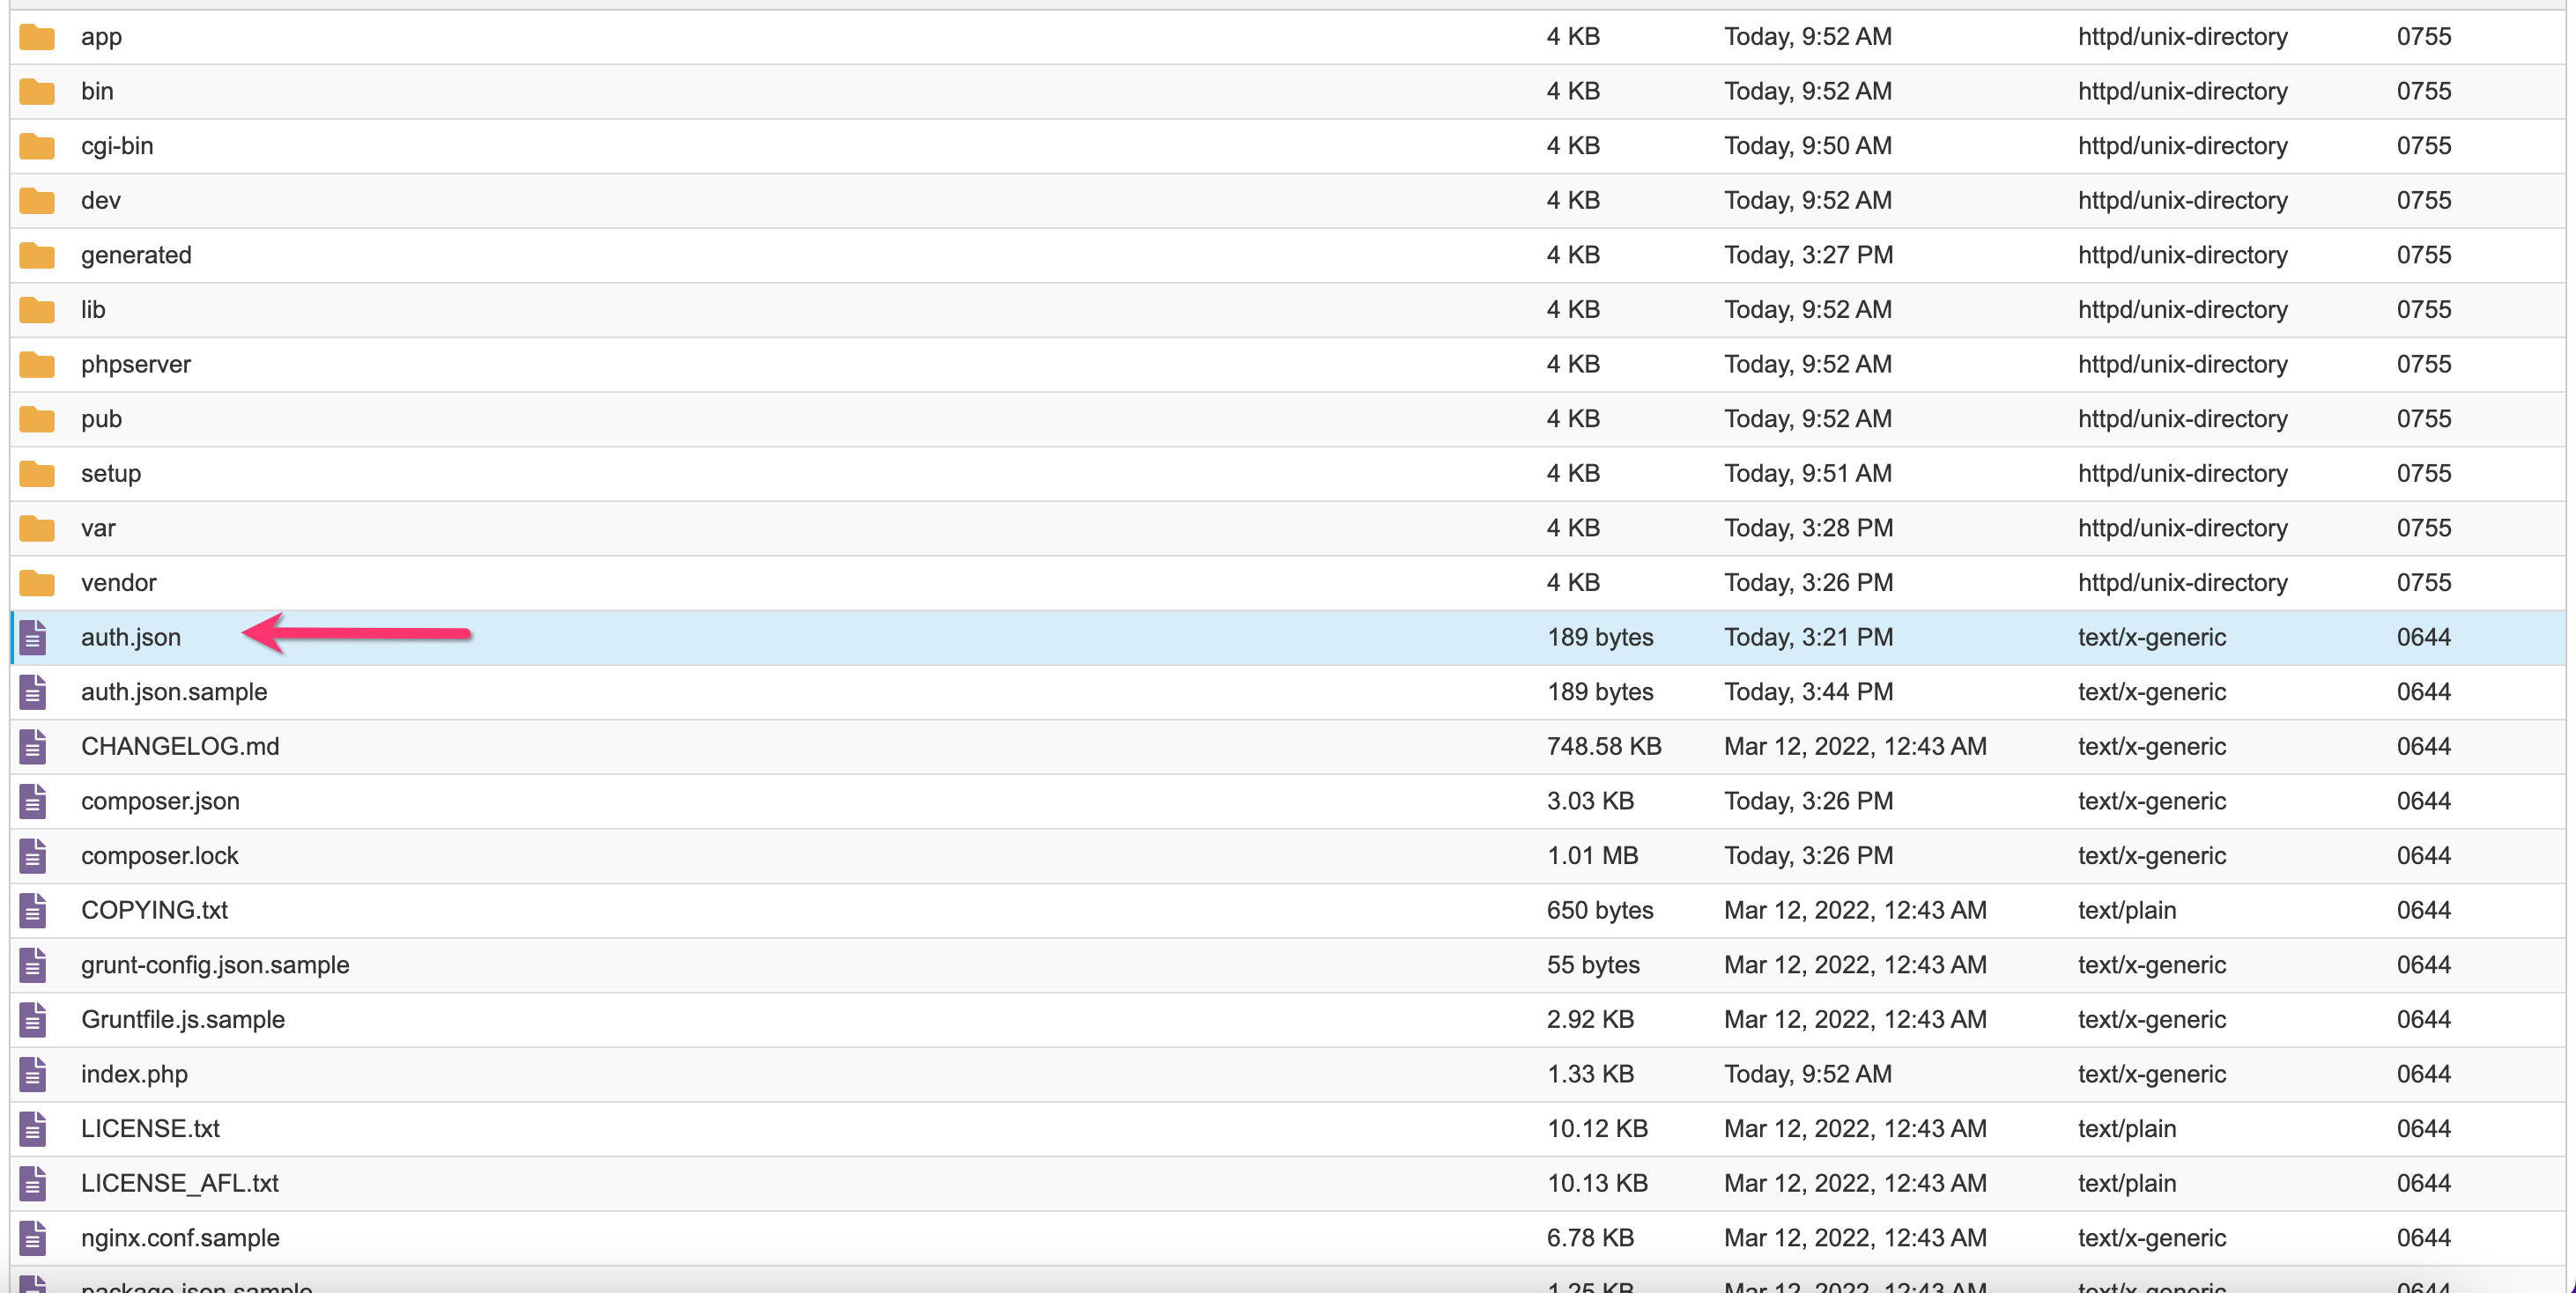
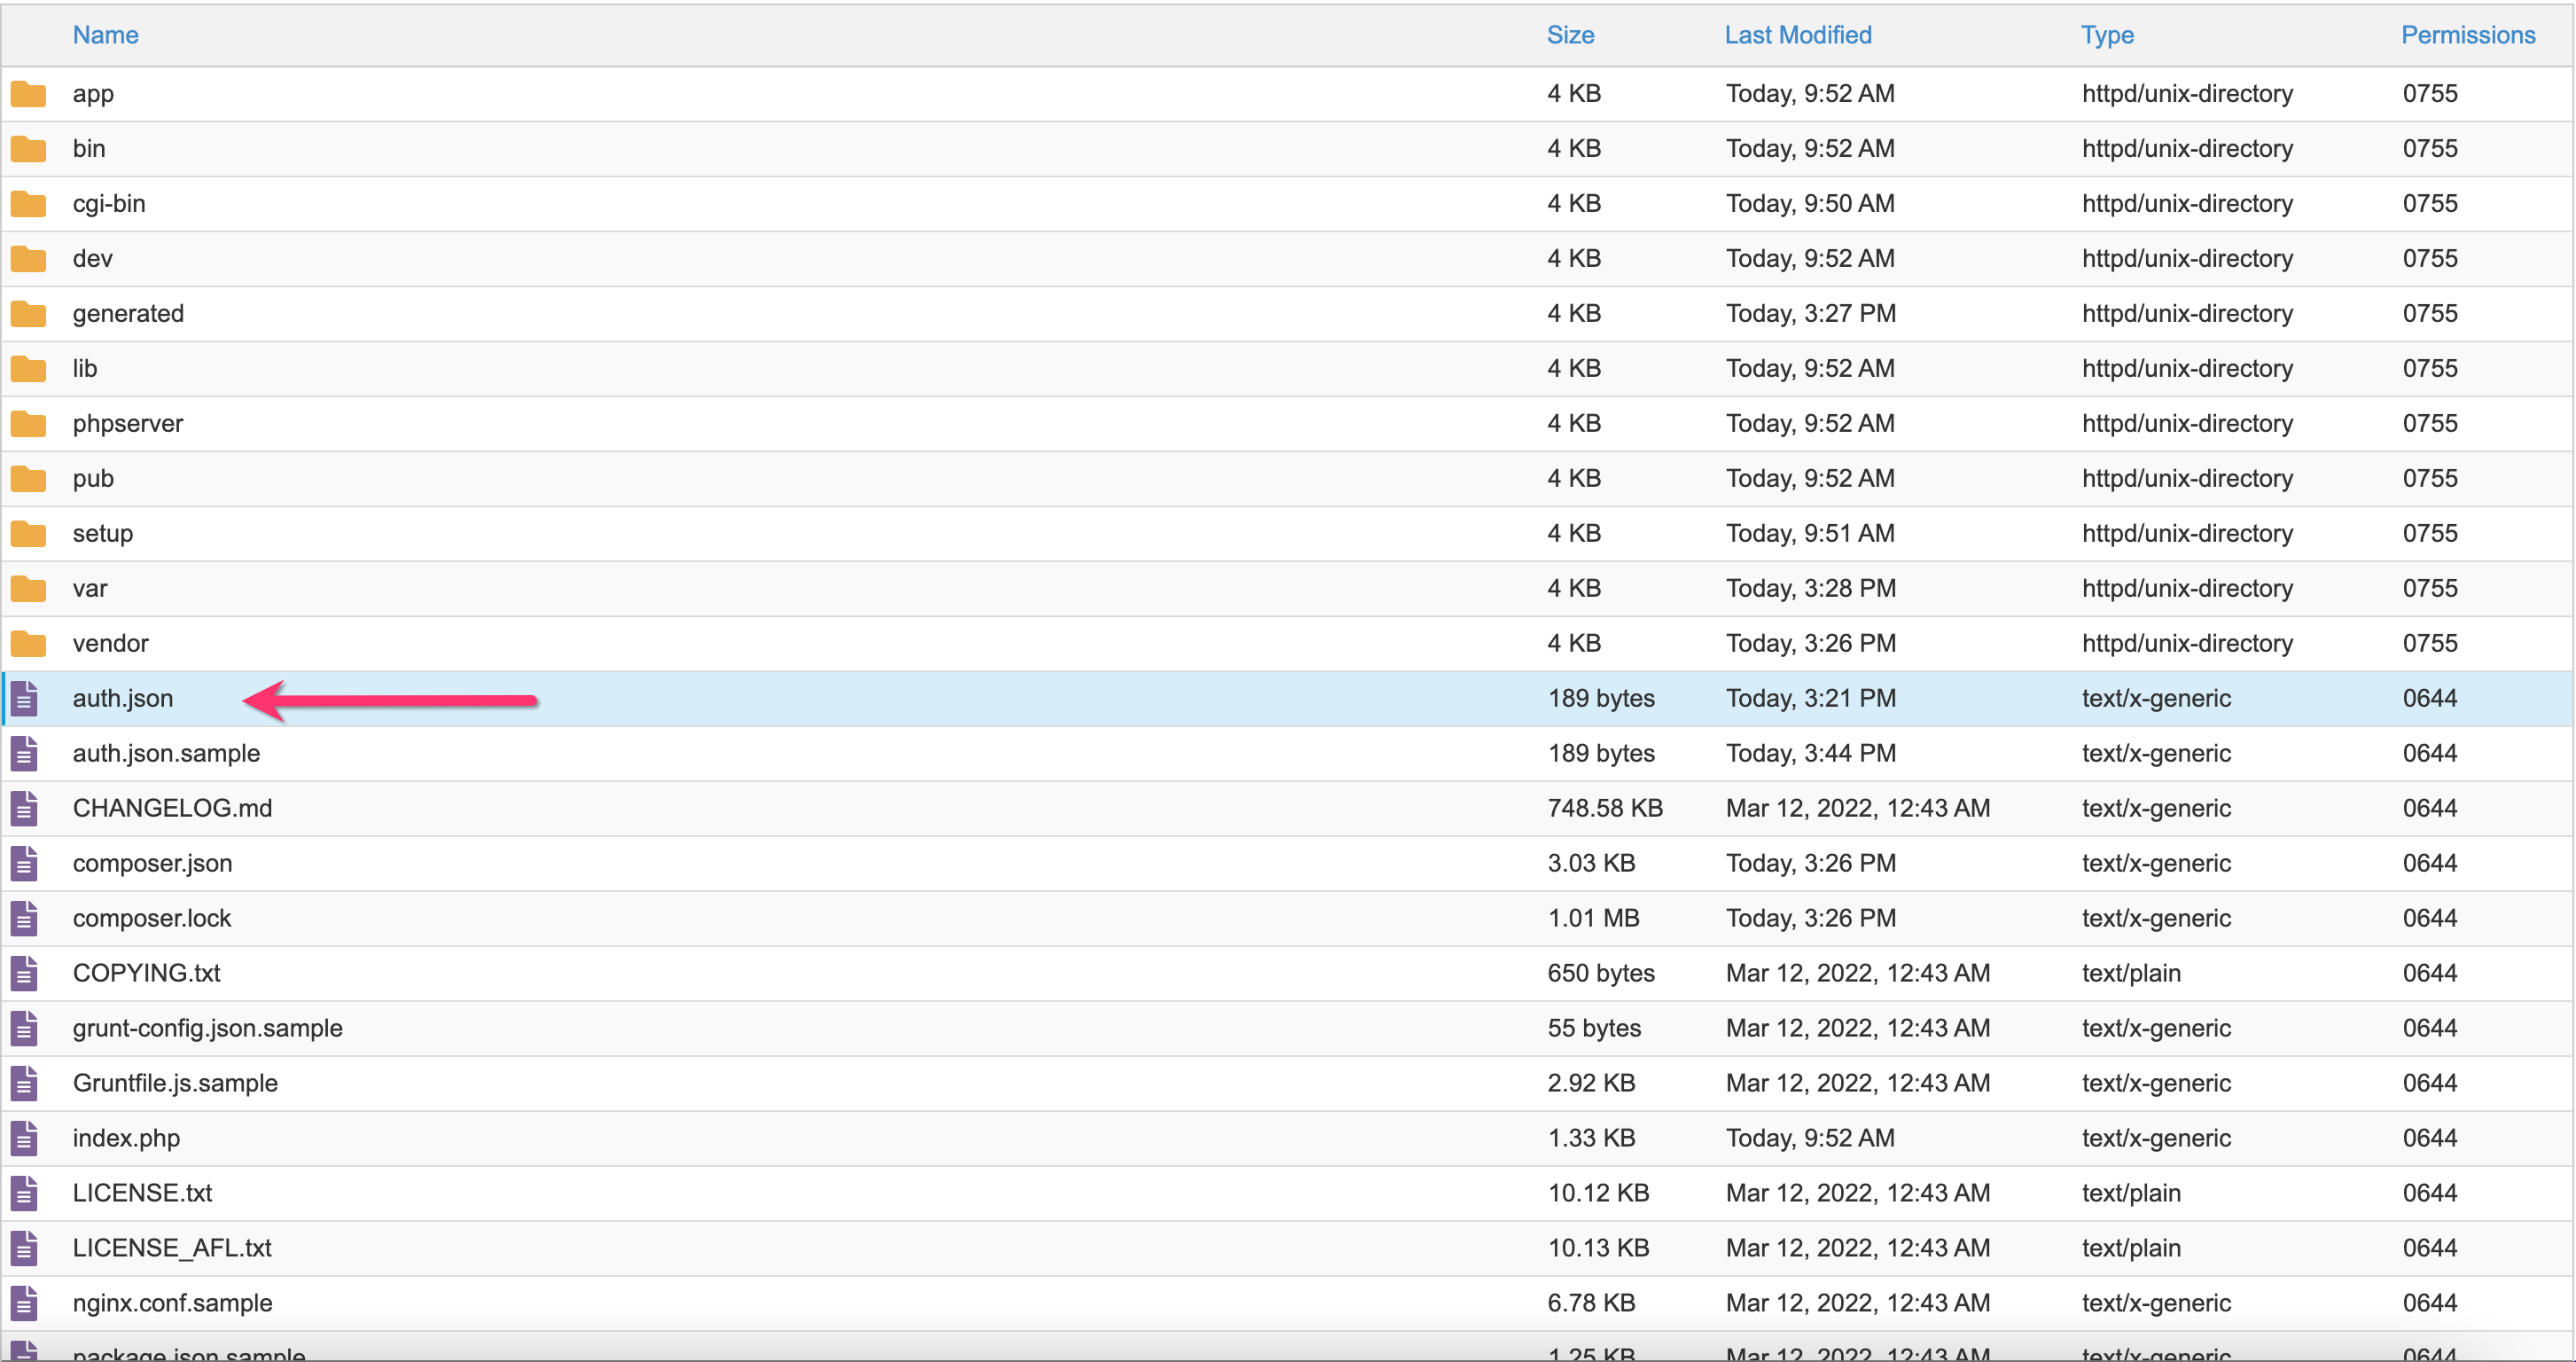
- You need to go into the file system of your Magento. This can be done via FTP or if you have cPanel, that’s even easier.
- See if the file called auth.json in the file system in the root directory –
- If there is one there, you or your developer has already installed a plugin from the Magento marketplace and therefore you need to talk to them about installing the Better That Magento plugin, otherwise, you may have issues with updating your other plugins later on.
- If there is not one there you need to locate a file called auth.json.sample and rename it to auth.json
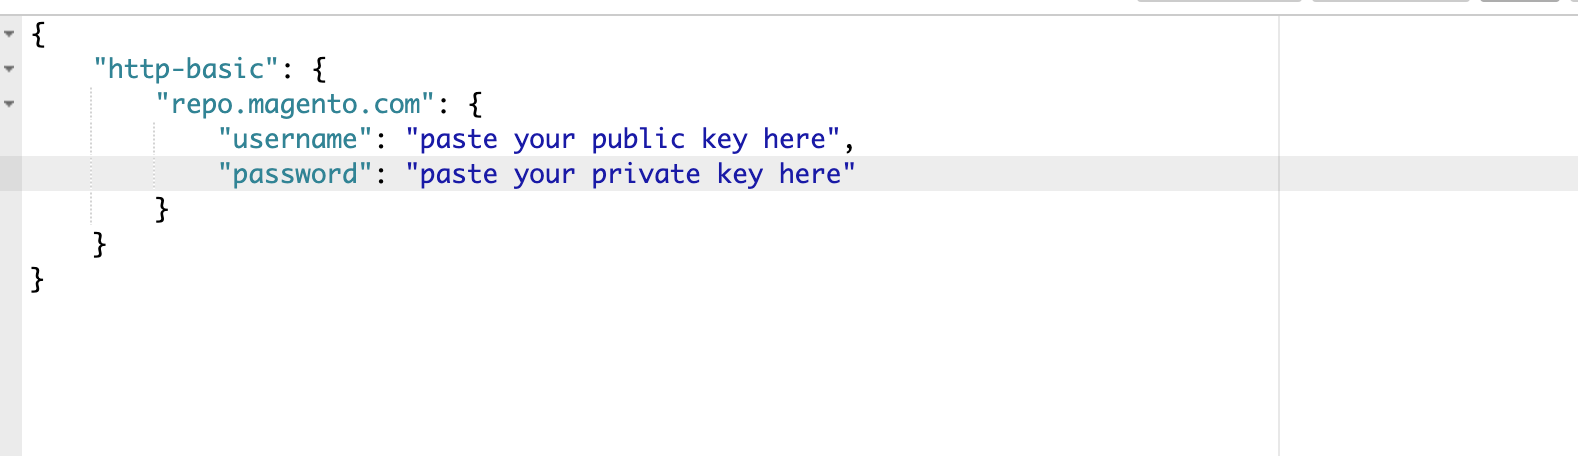
- Then open that file up to edit its contents –
- You then need to paste your public and private keys in
- See here –
- This is what it will look like before you save –
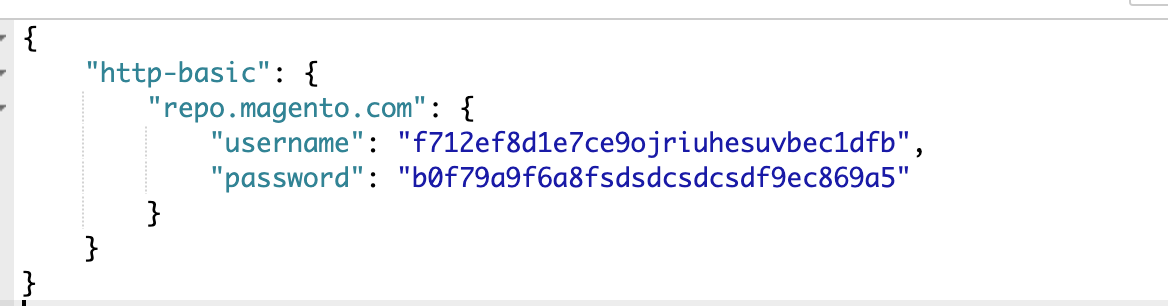
except the keys will be your keys. - Then save the file
- See here –
Step 2- Installing the Better That Plugin:
Warning: This step will require you to SSH into your Magento and perform actions on the command line. This is a very complex task with a significant amount of expected prior knowledge. If you are not familiar with or competent in SSH and associated services do not try this step and seek advice from your web developer or Better That.
- SSH into your web server.
- Traverse to the root directory where the Magento is and run the command:
composer require betterthat/betterthat- If you get an authentication error, revert back to Step 1 as there is an issue with your auth file.
- If you get a not found error you are likely not in the right directory
- If it is working you will receive a number of prompts asking you for an input. Put y in each of them. Example

- Once you complete you should have seen this run –
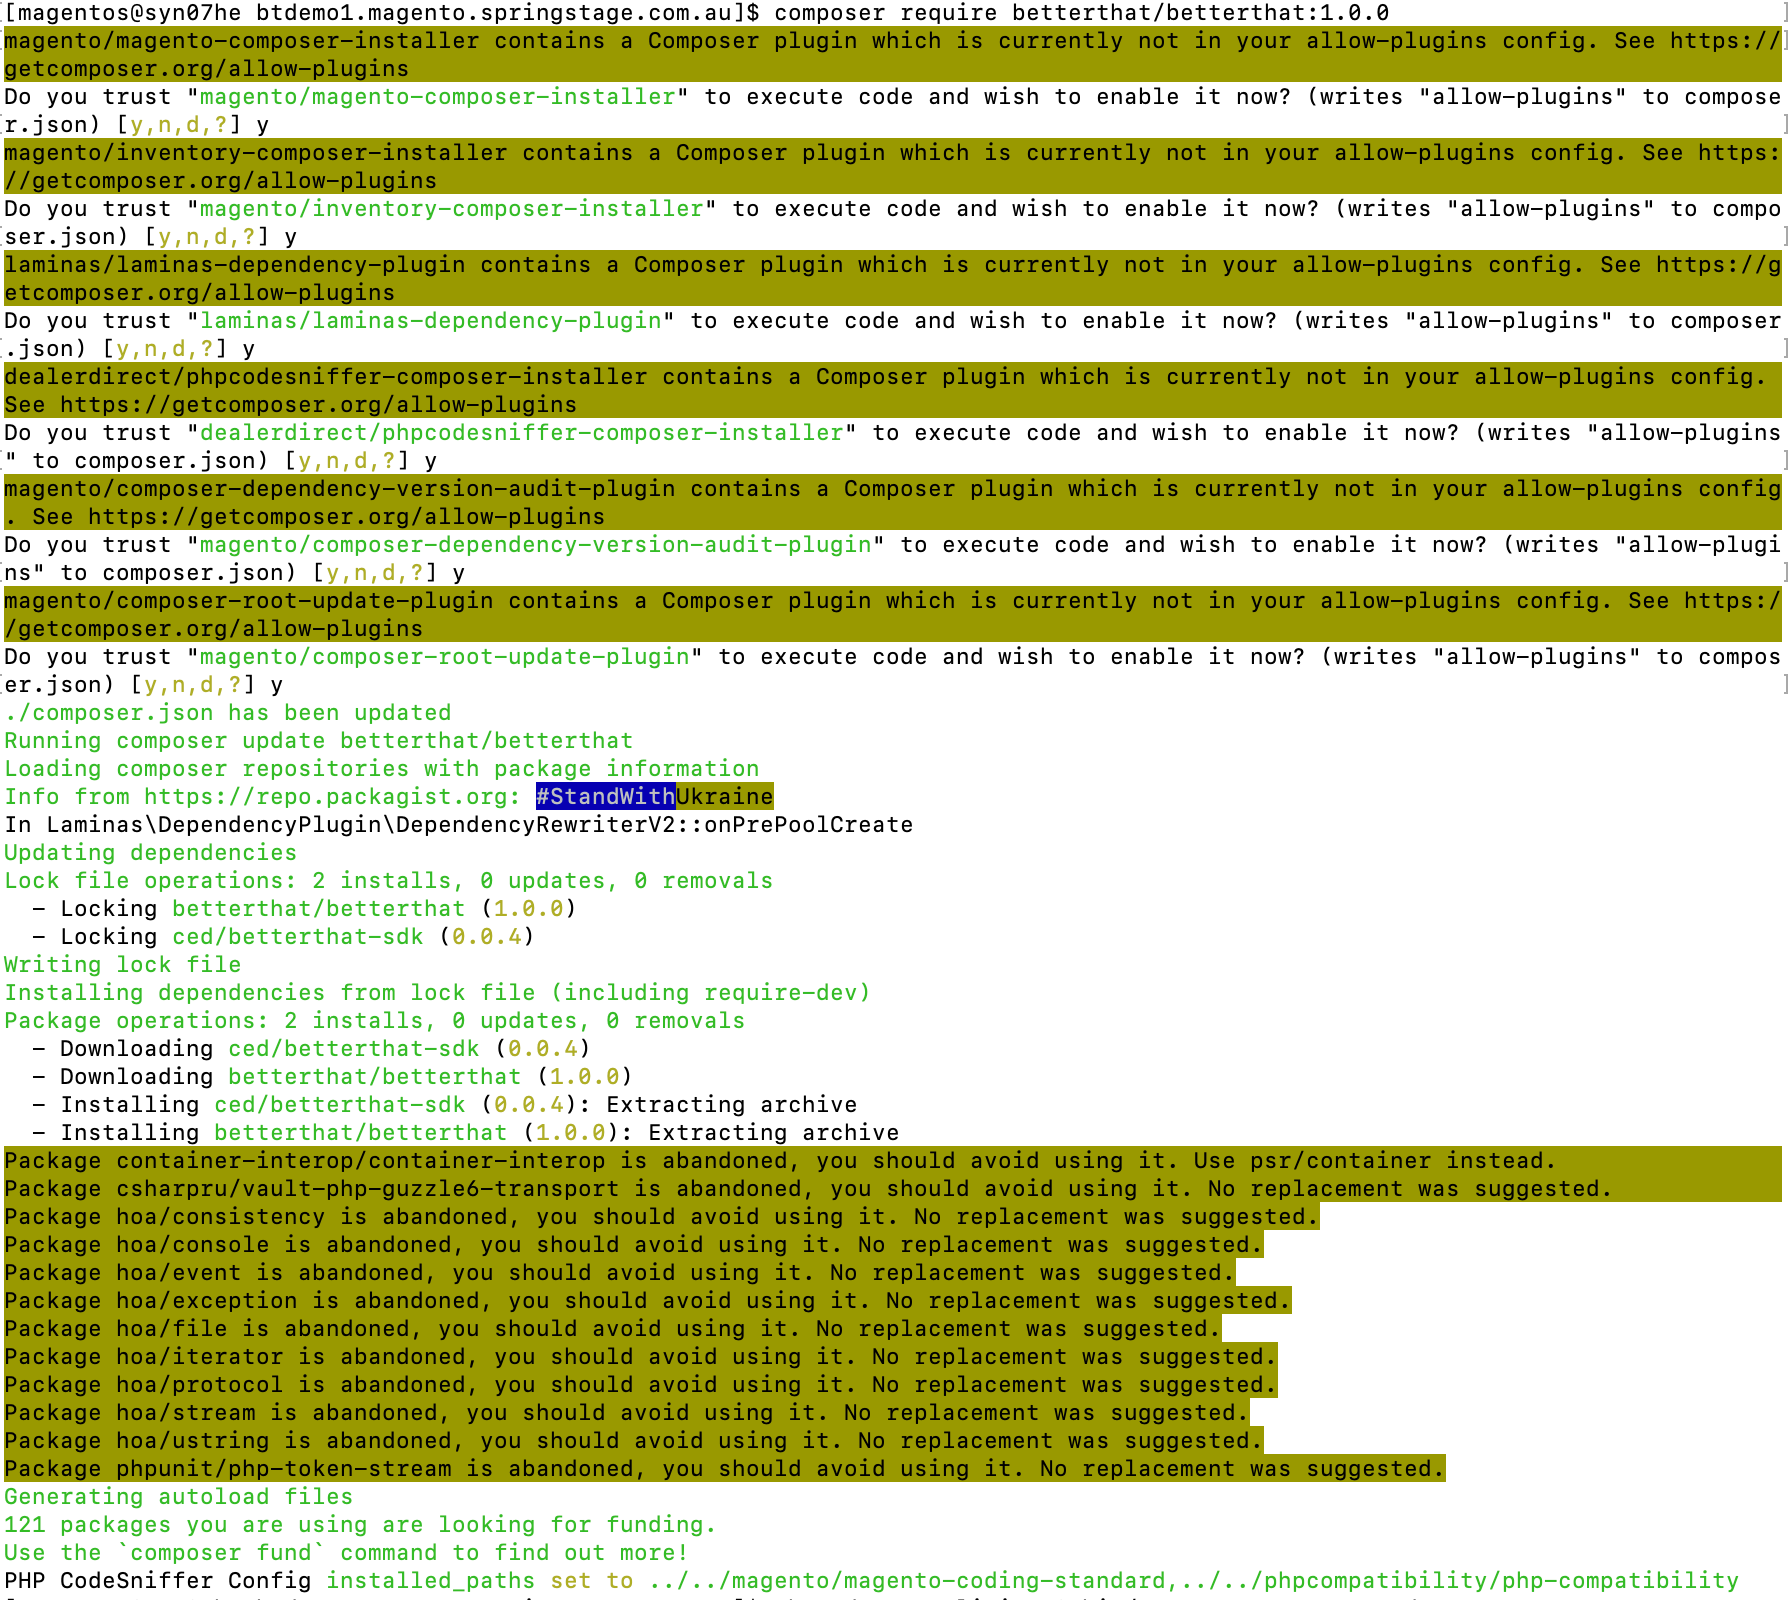
in your SSH window
- Run the command to upgrade all Magento and Extensions
php -dmemory_limit=5G bin/magento setup:upgrade
This command is used to upgrade Magento and extensions which are currently being used in your system. When you run this command the latest version will be installed in Magento and the required set of database queries will be run to upgrade the database schema if needed.
More information can be found here –
https://experienceleague.adobe.com/docs/commerce-operations/installation-guide/tutorials/database-upgrade.html - Run the command to install core magento required files for the Better That Plugin to operated
php -dmemory_limit=5G bin/magento setup:di:compile
This command is a required command which must be run if we install any new extension in Magento. There are numerous autogenerated core Magento files required and this command will generate them.
More information can be found here –
https://experienceleague.adobe.com/docs/commerce-operations/configuration-guide/cli/code-compiler.html - Run the command to generate the required static front end files
php -dmemory_limit=5G bin/magento setup:static-content:deploy -fWhen installing a new extension this command is also required. It will enable the generation of static front end related files like HTML, css and js.
More information can be found here –
https://experienceleague.adobe.com/docs/commerce-operations/configuration-guide/cli/static-view/static-view-file-deployment.html - Run the command to reindex the Magento
php bin/magento index:reindex
This command is not entirely essential however if when we are installing a new extension, we suggest doing it manually once for safety purposes to visualize changes related to the extension in Magento
More information can be found here –
https://experienceleague.adobe.com/docs/commerce-operations/configuration-guide/cli/manage-indexers.html - Run the command to clean cache
php -dmemory_limit=5G bin/magento cache:clean
This command will reset the cache so any cache data must be cleaned up and our extension work properly with the new data after installation
More information can be found here –
https://experienceleague.adobe.com/docs/commerce-operations/configuration-guide/cli/manage-cache.html - Run the command to flush cache
php -dmemory_limit=5G bin/magento cache:flush
This command will reset the cache so any cache data must be cleaned up and our extension work properly with the new data after installation
More information can be found here –
https://experienceleague.adobe.com/docs/commerce-operations/configuration-guide/cli/manage-cache.html


