
Affiliate Dashboard
Affiliate member can view the following details and perform the various corresponding tasks on the Affiliate Dashboard page of the Affiliate panel:
- Recent Orders: This section provides a table with the following details related to the order placed by the customers:
- Order #: Order Number of the order placed by a customer through an affiliate system.
- Date: Date when the order is placed.
- Customer Email: Email Id of the Customer who had placed the order.
- Commission: Commission amount that the affiliate member earns when a customer clicks the store product promoted by the Affiliate member. The amount appears in a percentage or fixed mode depending upon the Commission Mode selection.
- Commission Mode: Defines the commission mode in Percentage of Fixed.
- Status: Displays the order status such as Pending, Processing, and Complete.
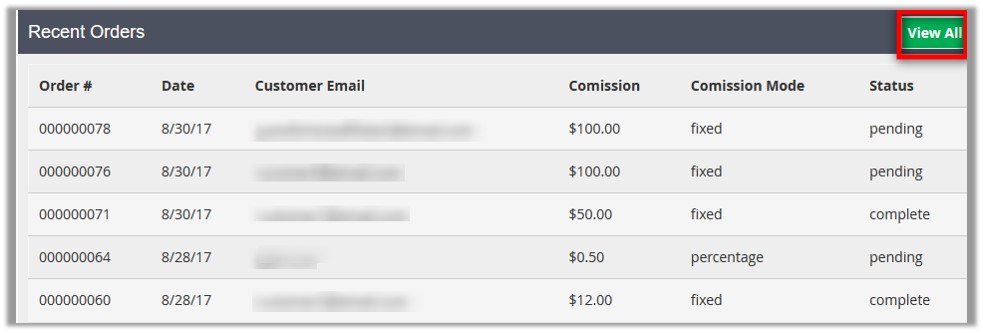
Click the View All button to view all the Commission related details and perform the various corresponding tasks. It redirects to the Commission page of the Affiliate panel.
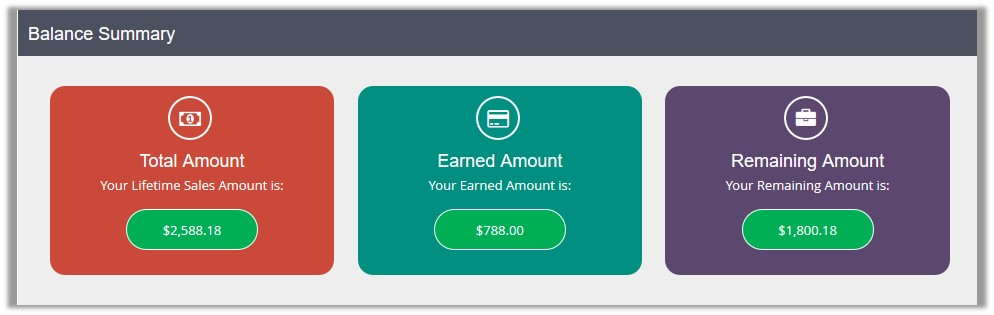
- Balance Summary: This section displays the information on the following:
- Total Amount: Total Commission amount available in the Affiliate Account.
- Earned Amount: Commission amount that the Affiliate has earned.
- Remaining Amount: Commission amount in the balance that the affiliate has not yet earned.
- Account Information: It displays the information on Contact Information and Newsletters Subscription.
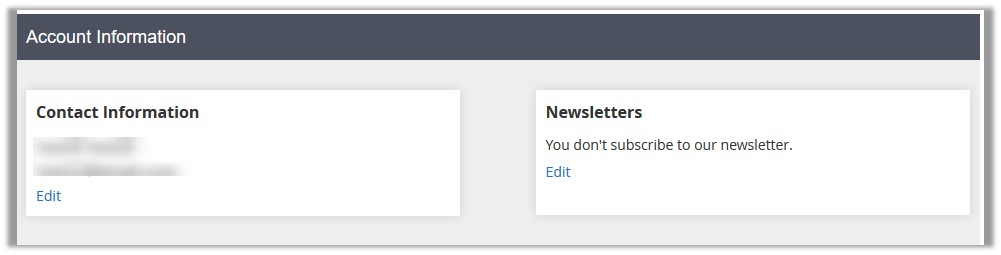
- Contact Information: Affiliate member can Edit the contact information.
- Newsletters: Affiliate member can subscribe to the newsletters.
To edit the contact information
- Under Contact Information, click the Edit link.
The page appears as shown in the following figure:
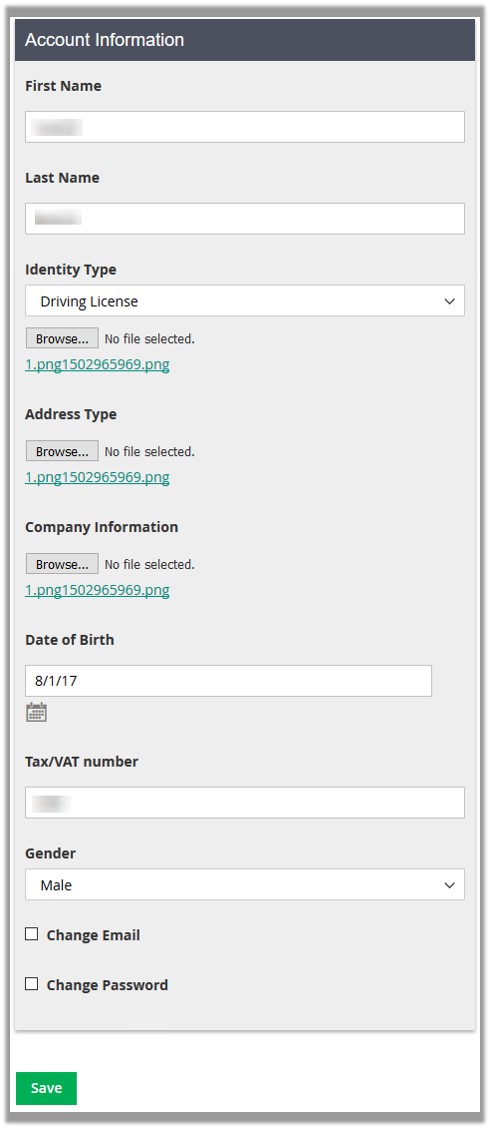
- Enter the required details such as First Name, Last Name, Identity Type, Date Of Birth, Tax/VAT Number, and Gender.
- Browse the required documents based on the selected Identity Type.
- Select the check box associated with the Change Email to change the Email Id and Password if required.
Fields appear as shown in the following figure:
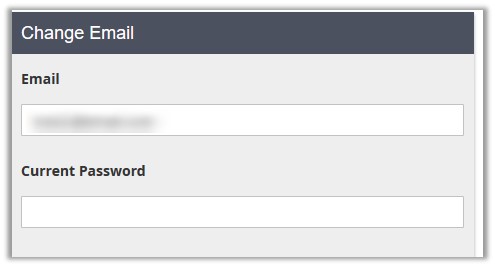
- In the Email box, enter a new email ID
- In the Current Password box, enter the current password.
- Select the check box associated with the Change Password to change the current password if required.
Fields appear as shown in the following figure:
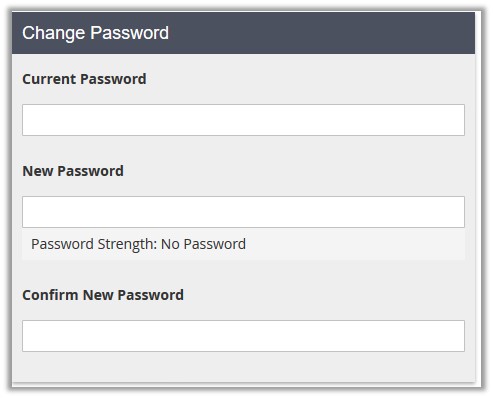
Note: Selecting both the check boxes associated with the Change Email and Change Password fields enable the affiliate member to change both the Email Id and the password. - Click the Save button.
The changes made in the account information is saved.
To subscribe to the newsletter
- Under Newsletters, click the Edit link.
The page is redirected to the Newsletter Subscriptions page of the account as shown in the following figure:
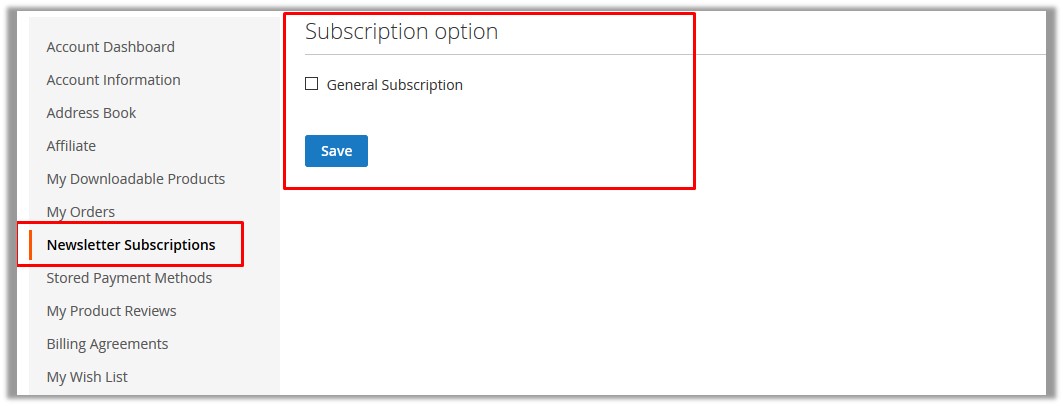
- Under Subscription option, select the check box associated with the General Subscription field.
- Click the Save button.
A success message appears on the page. - In the left navigation panel, click the Affiliate menu to go back to the Affiliate panel.
- Address Book: Affiliate member can add or edit the Default Billing Address and the Default Shipping Address.
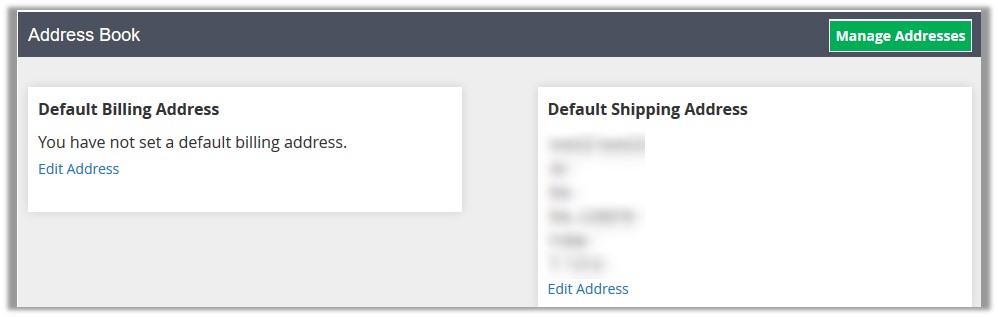
Click the Manage Address button to open the Default Address page of the Account to makes changes in the Shipping Address and the Billing Address if required.
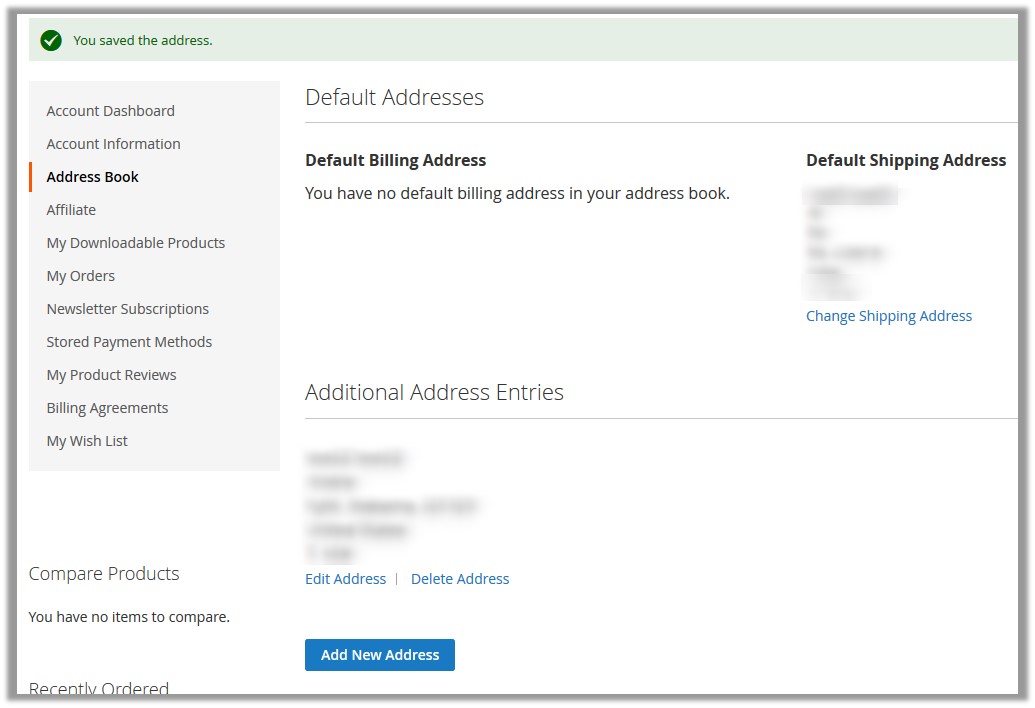 To edit the default billing address or shipping address
- Under Default Billing Address, click the Edit Address link.
It redirects the page to the Address Book page of the account as shown in the following figure: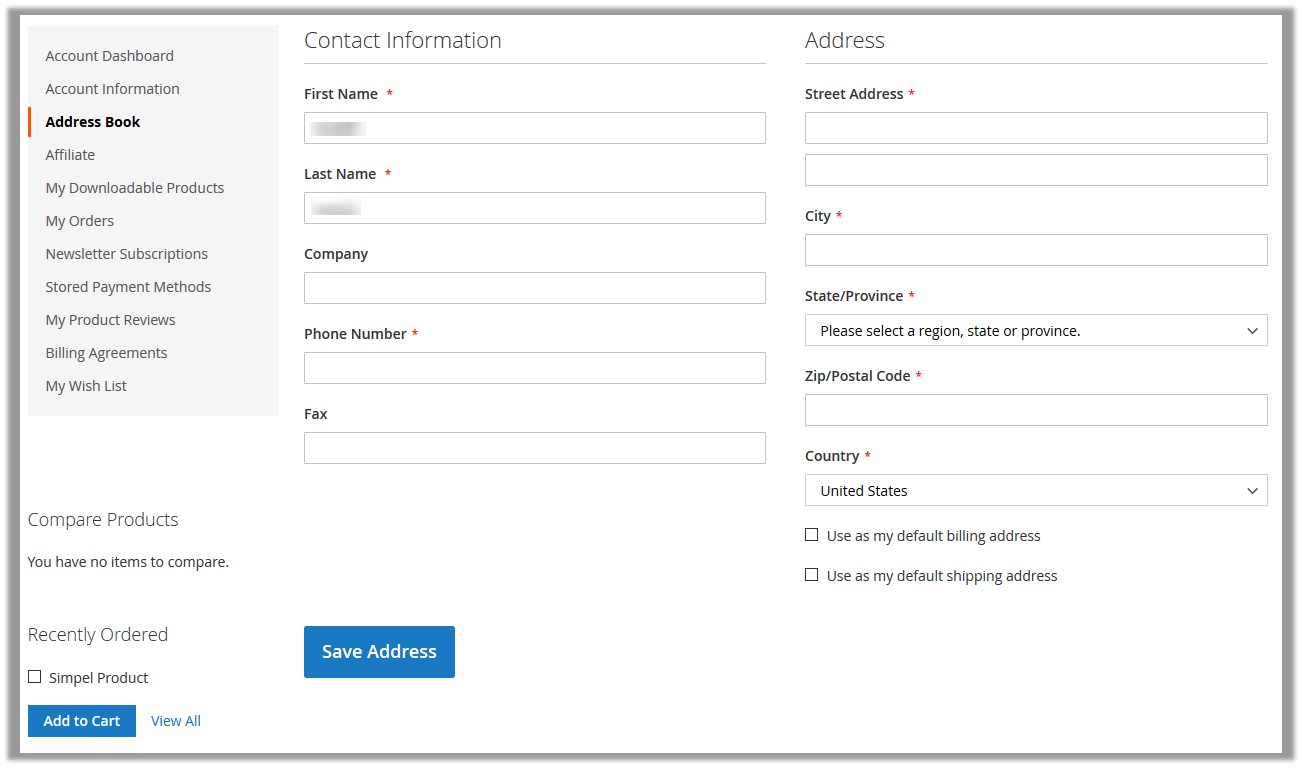
OR
Under Default Shipping Address, click the Edit Address link.
It redirects the page to the Address Book page of the account as shown in the following figure:
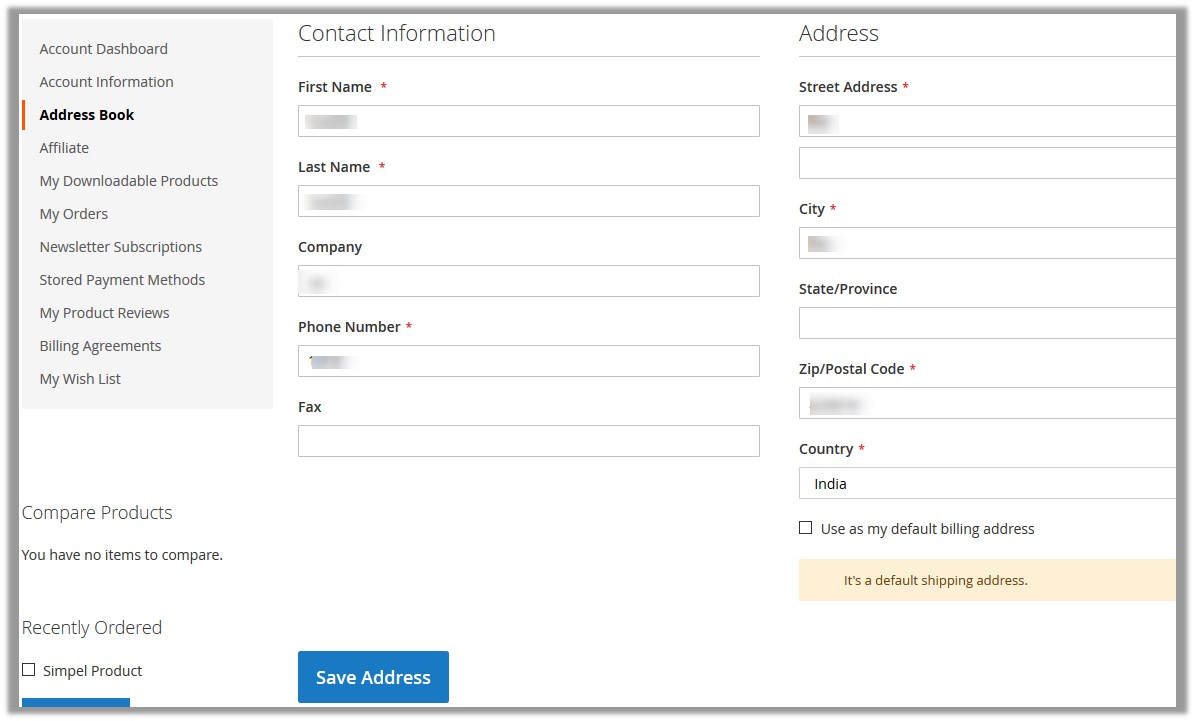
- Make the changes in the required fields, and then click the Save Address button.
It redirects the view to the Default Address page. A success message appears on the page.
- Click the Change Shipping Address link to change the shipping address.
- Make the required changes, and then click the Save Address button.
- In the left navigation panel, click the Affiliate menu to go back to the Affiliate panel.
- Under Default Billing Address, click the Edit Address link.
×


