
eBay Configuration Settings
Once the extension is successfully installed on the Merchant’s store, the eBay INTEGRATION menu appears on the left navigation bar displayed in the Magento Admin Panel. Before starting with the configuration settings, the pre-requisite is to have an eBay seller account.
To set up the eBay Integration Configuration settings
- Go to Admin panel.
- On the left navigation bar, click the EBAY INTEGRATION menu.
The menu appears as shown in the following figure:
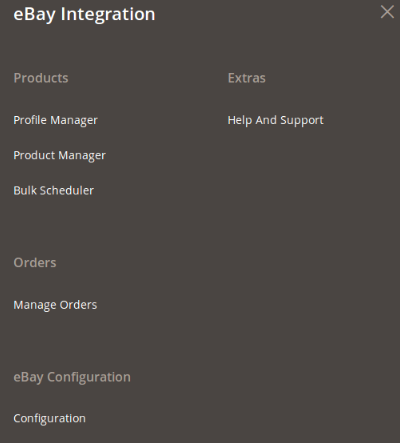
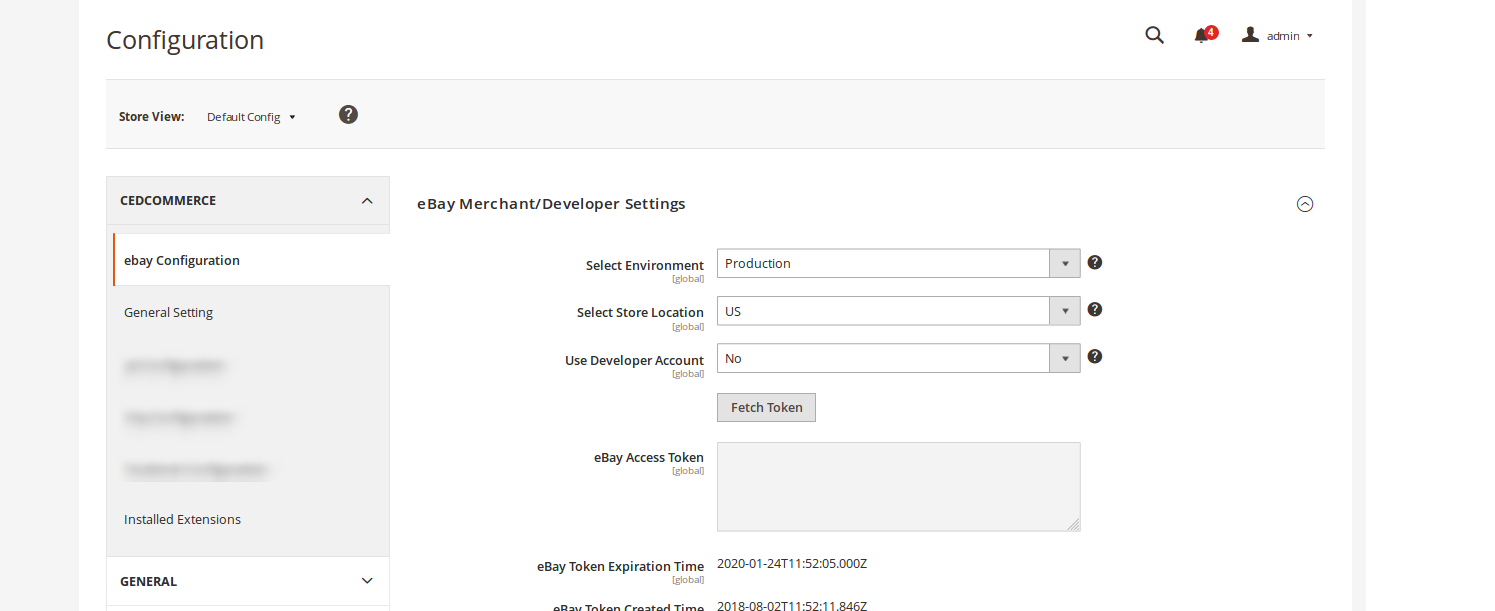
- Click Configuration.
The Configuration page appears as shown in the following figure:
Now before you start the configuration, you need to take an important step. You need to disable the secret key to be added to the URL, while entering it during the configuration process.
- To do that,
- Click on Advanced which is on the left left panel menu of Configuration page. The section gets expanded as shown below:
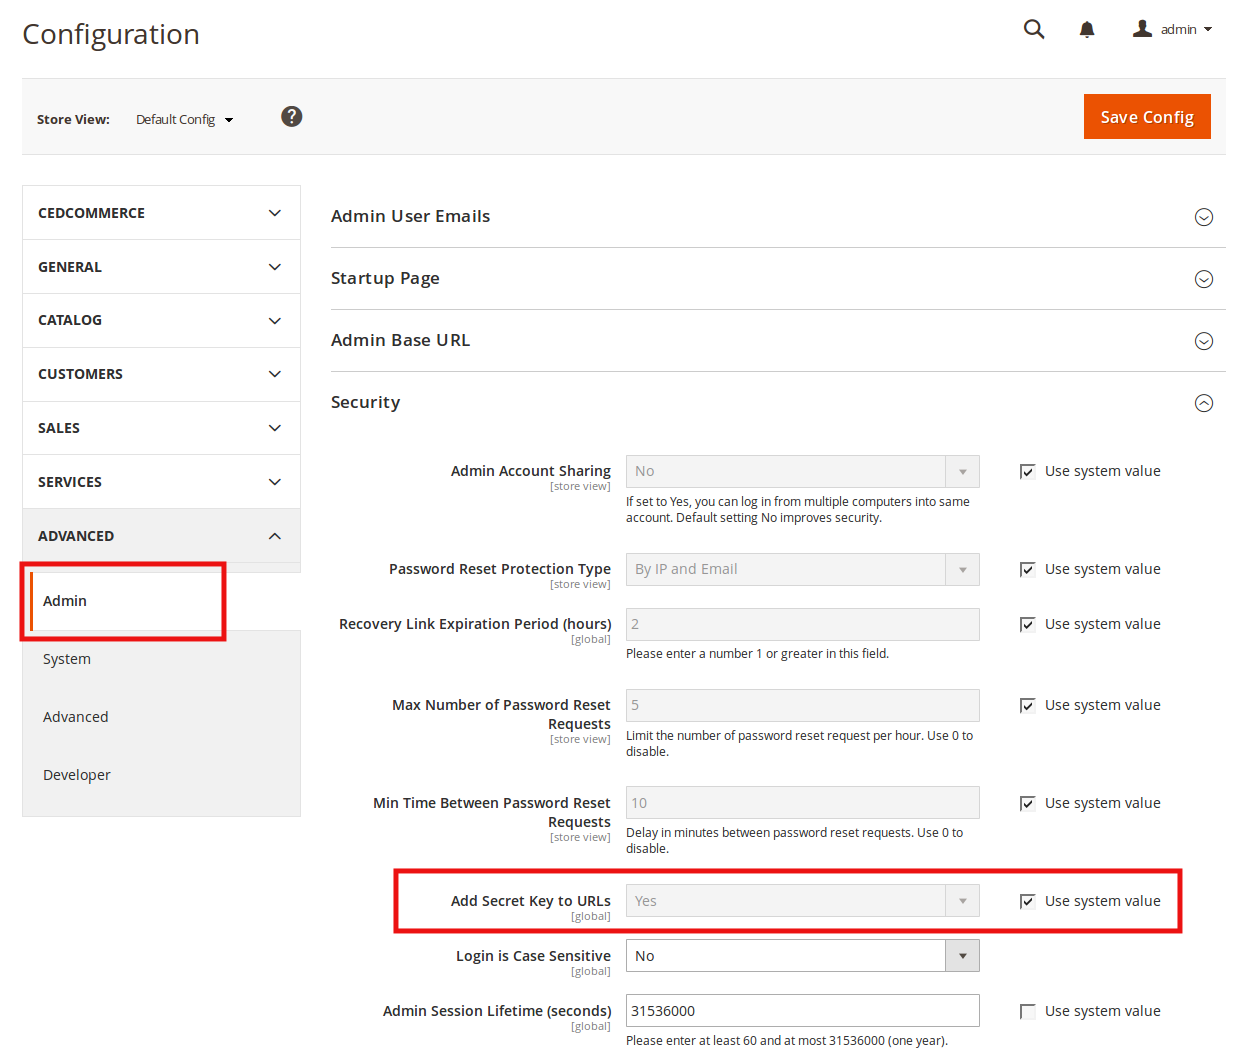
- Click on Admin and the section will appear as shown in the image above.
- In the box adjacent to Add Secret Key to URLs, the status is Yes. With yes as status, the key gets displayed in the URL as shown in the image below in the red box:

- Uncheck the Use system value and change the status from Yes (which is the default status) to No.

- By taking this step, the Secret Key gets removed from the URL, as shown in the image below:
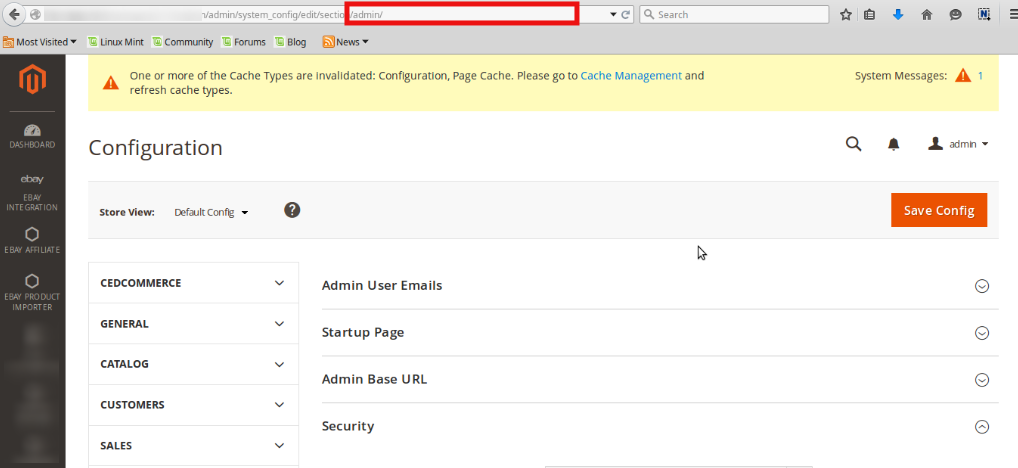
- Once you have completed the configuration, you may change the status of Add Secret Key to URLs from No to Yes.
Now you may start the Configuration process:
eBay Merchant/Developer Settings
- In the Select Environment list, select Sandbox or Production as per the requirement.
Note: Sandbox environment is used for the testing purpose; Production is to make it live. - In the Select Store Location list, select the required location.
Note: Depending upon the selected Store Location, all the relevant information is fetched by using the Fetch Token and the Fetch Other Details buttons. - In Use Developer Account, if you select No, the page will appear as it is shown in the above image.
- Click the Fetch Token button.
The page is redirected to the eBay SignIn page as shown in the following figure:

- Enter the eBay login credentials, and then click the Sign in button.
The page appears as shown in the following figure:
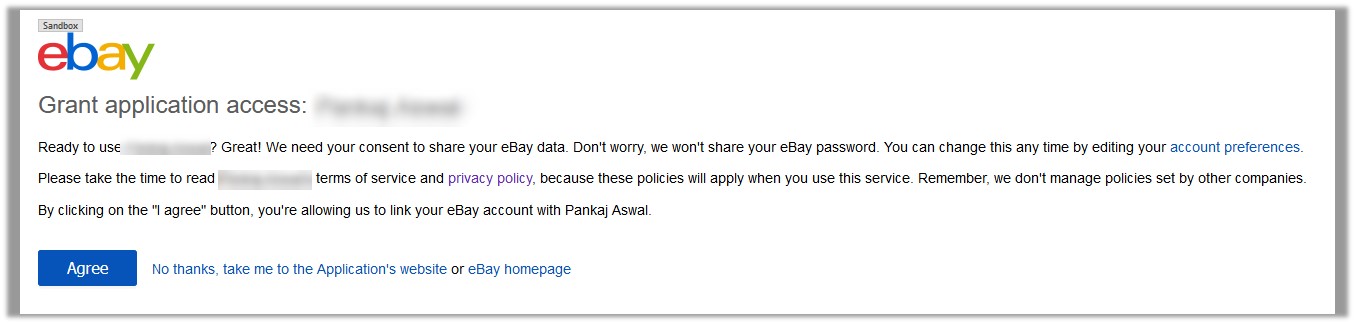
- Click the Agree button.
You will be redirected to the configuration page as shown in the following figure, with the Access Token being filled:
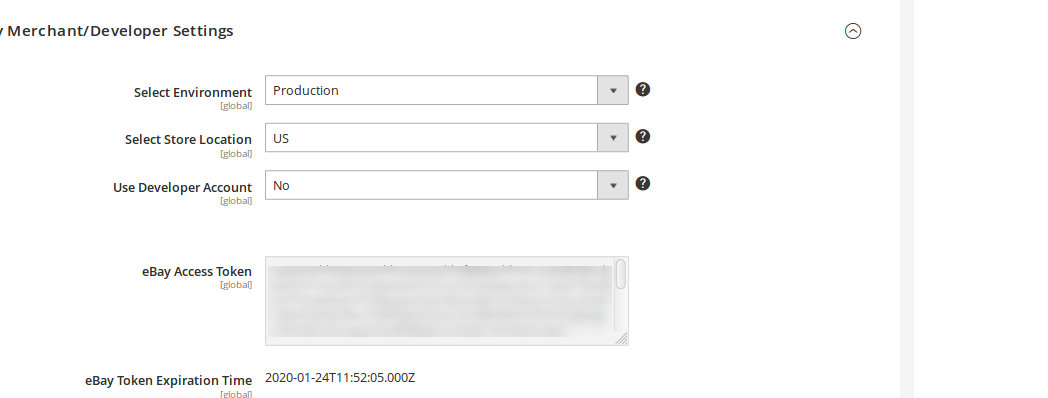
The following required information is fetched from the eBay website to the Magento store:- eBay Access Token
- eBay Token Expiration Time
- eBay Token Created Time
- eBay Token Session ID
- Now if you select Yes in the Use Developer Account field, the page appears as:
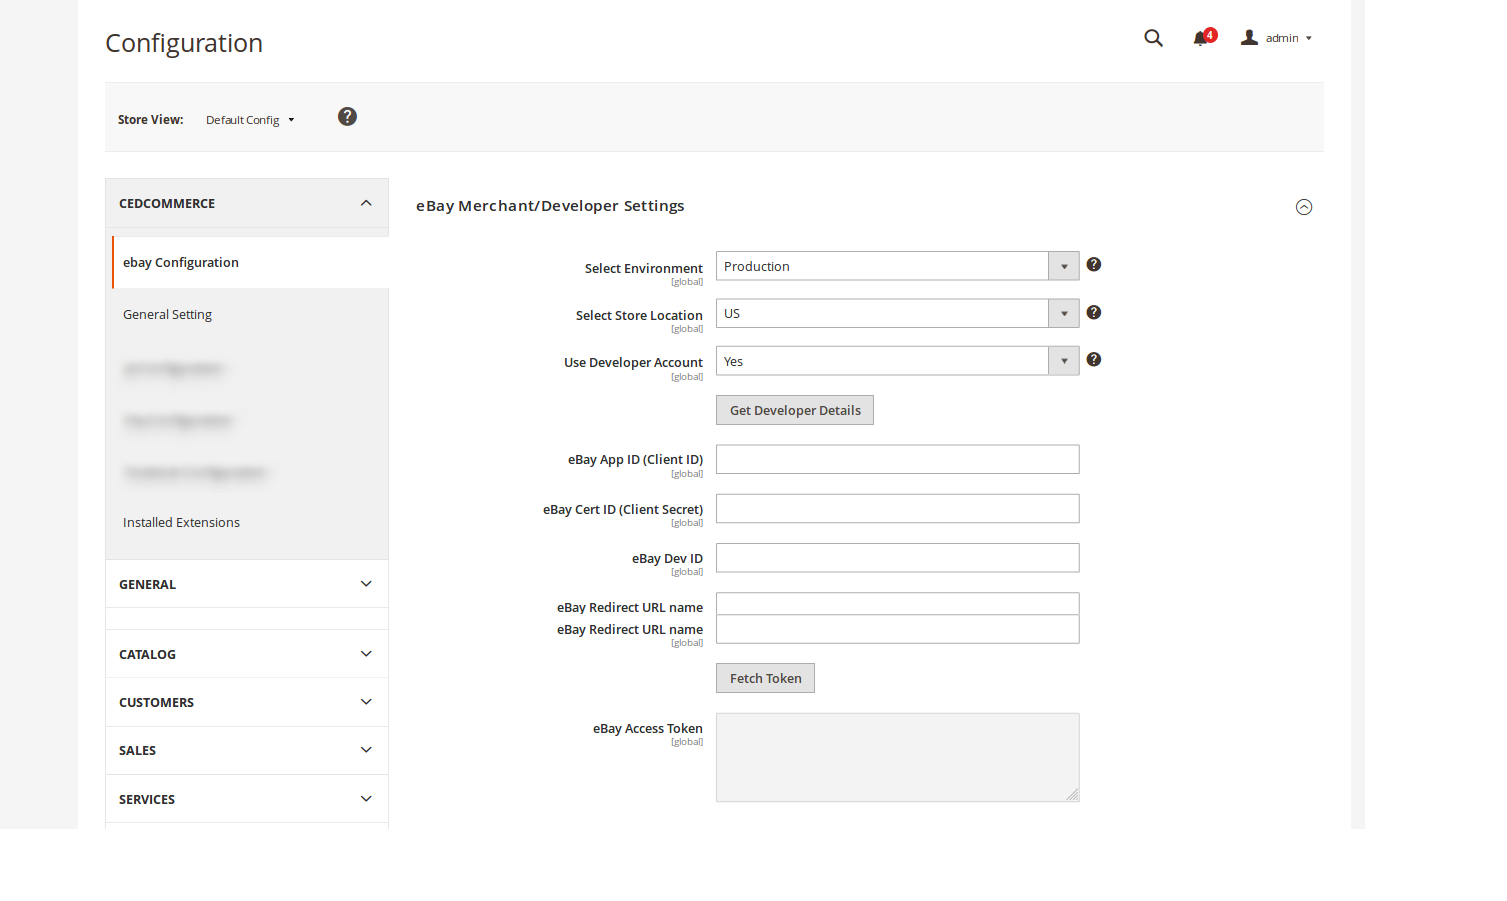
- To fill eBay App ID, Cert ID, Dev ID, and eBay Redirect URL Name, you need to click on Get Developer Details button which is below these fields.
- On clicking it, the eBay developers program page opens.
- Click Sign In on the top, the sign in page opens and you need to login.
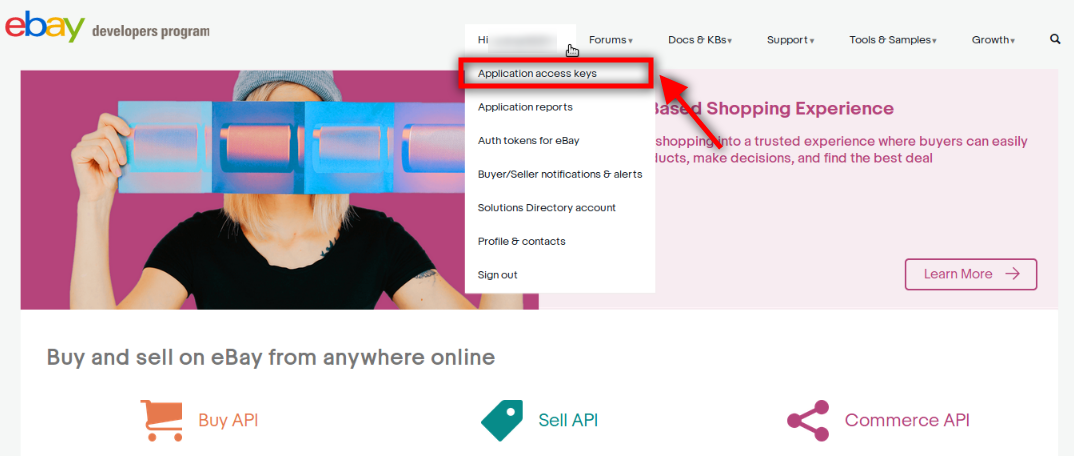
- Enter the Log In credentials and then click the sign in button. The page appears as shown below:

- Now, click on your profile name on the top of the page, and when the menu appears, click Application access keys, as highlighted in the image below:
- On clicking it, a tab will get opened and you may see your App Id, Dev Id and the Cert Id on the page for Sandbox/Production as highlighted in red boxes in the image below:
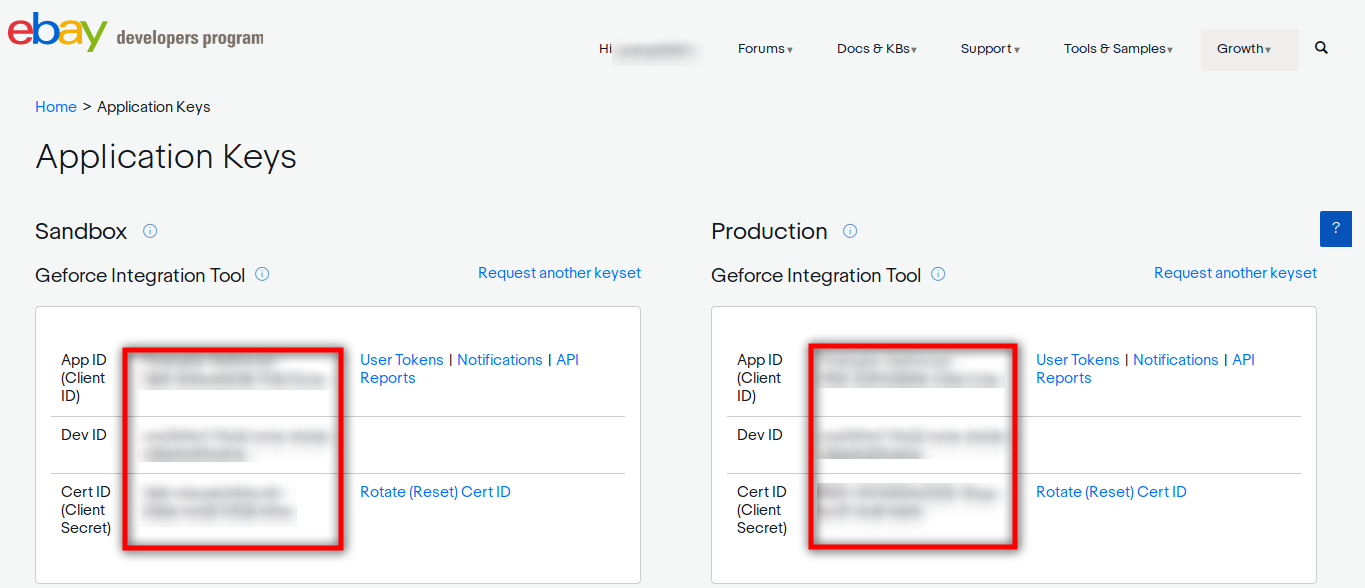
- Copy the API Keys and enter them in the respective fields displayed in the section of the eBay Configuration page.
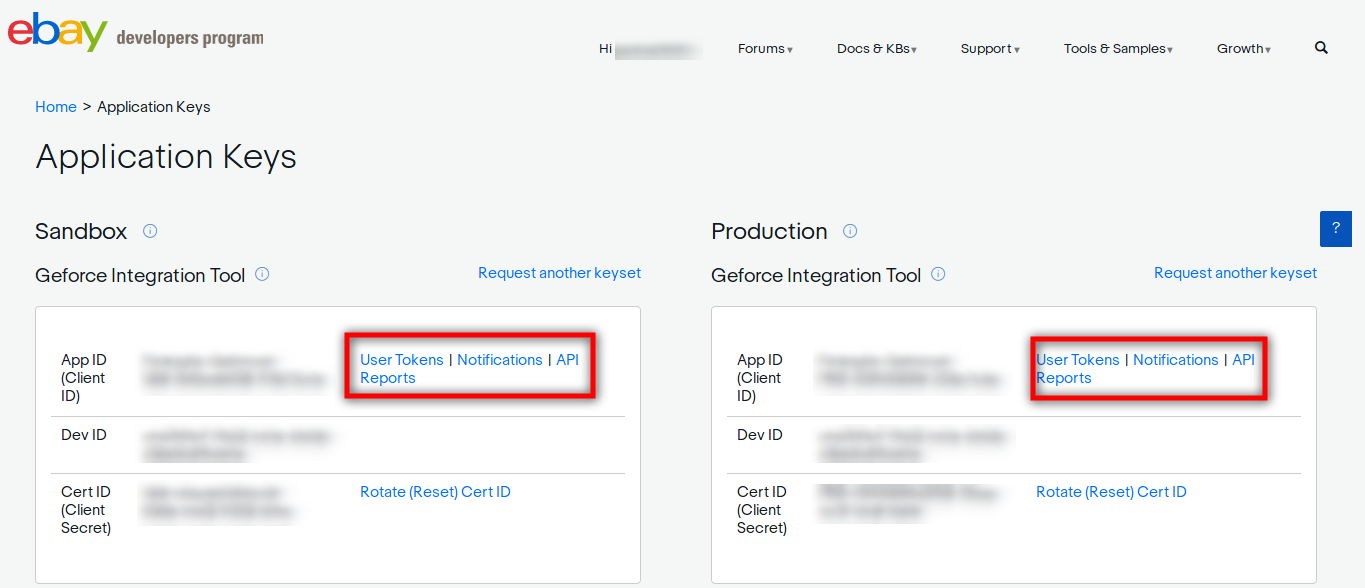
- Now, for Redirect URL Name for either Sandbox or Production, click on the corresponding User Token | Notifications | API Reports on the seller page’s section where you get the ID’s. It is highlighted in the image below:
- On clicking it, you will be navigated to the page as shown below:
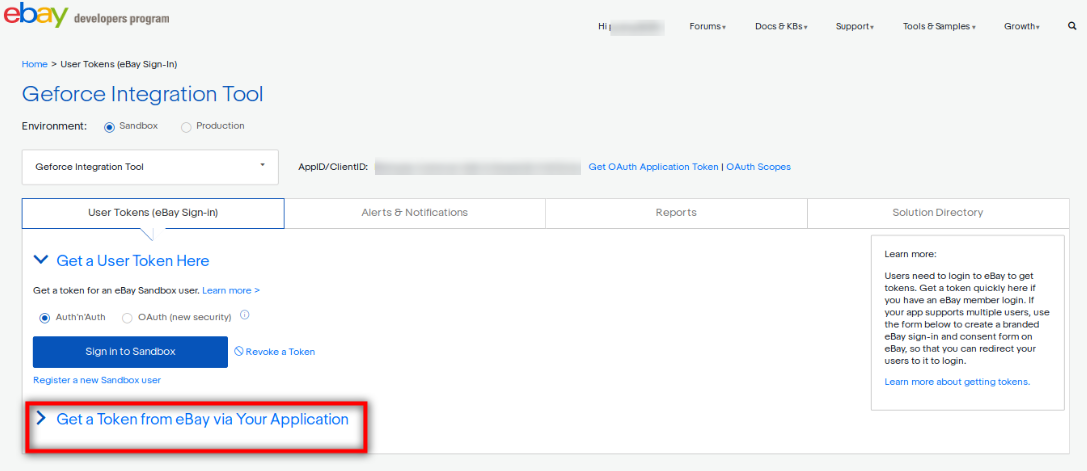
- Click the Get a Token from eBay via Your Application Button as highlighted in the above image. The section gets expanded and appears as shown below:

- Now copy the Redirect URL Name as highlighted inside the red box in the above image and paste it in the eBay Redirect URL Name field on eBay Configuration page. (In Your auth accepted URL and Your auth declined URL fields present on the same page as shown in the above image, you need to enter the URL’s given to you by CedCommerce and save the settings.)
- Once you have filled the ID’s and Redirect URL Name, you may click the Fetch Token button. The process to fetch it has already been mentioned.
- Now, once the actions till now have been taken (whether you select Yes or No in Use Developer Account), click the Fetch Other Details button.
Other details such as Payment details, Shipping details, and Return policy are fetched from the eBay website to the Magento store. - In Select Store, select your store.
Payment Details
- Scroll down to the Payment Details tab, and then click the tab.
The Payment Details tab is expanded and the relevant field appears as shown in the following figure:
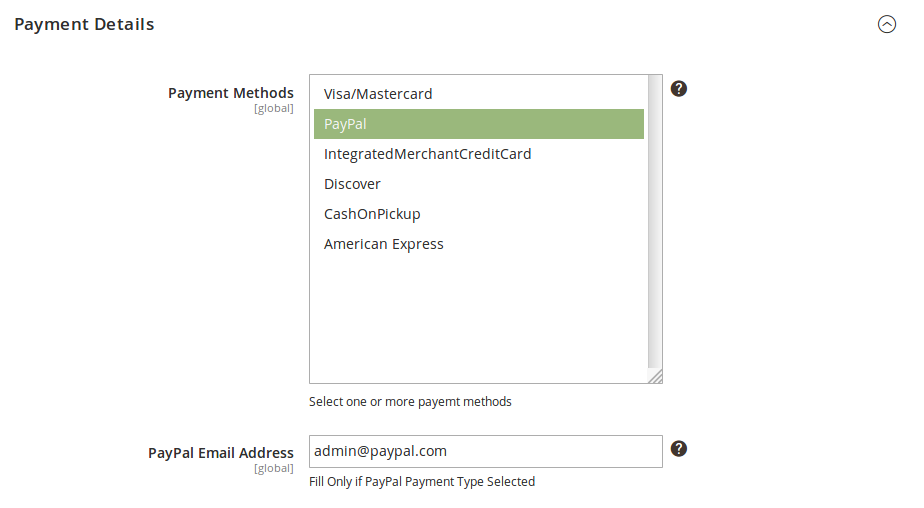
- In the Payment Methods list, select the required payment methods for eBay products.
- In PayPal Email Address, enter your PayPal email address. This needs to be filled only if you have selected the PayPal Payment Methods.
Shipping Details Settings
- Scroll down to the Shipping Details tab, and then click the tab.
The Shipping Details tab is expanded and the relevant fields appear as shown in the following figure:
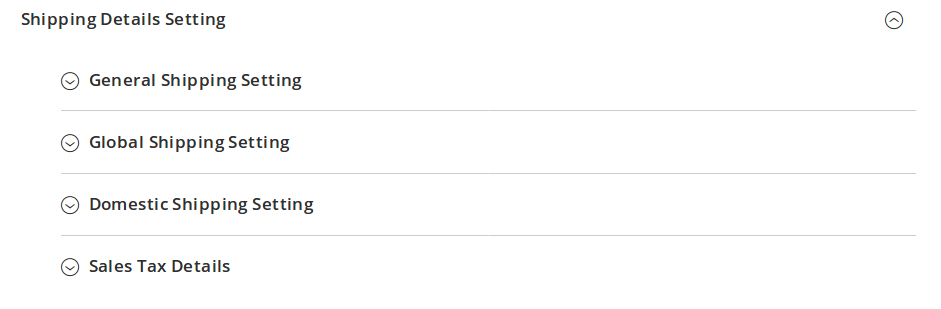
- Click General Shipping Setting. The section will expand as:

- In the Service Type list, select the required option.
- In the Shipping Service list, select the required option.
- Now click the next sub-section under General Shipping Details which is Global Shipping Setting. It expands as:

- In Global Shipping field, select Yes if you want to ship the ordered products globally. On selecting Yes, the section expands further as:
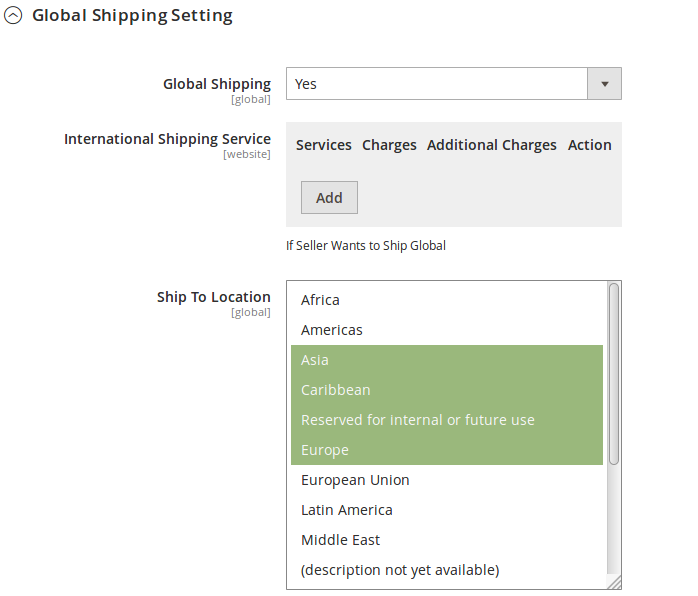
- In International Shipping Service, you need to click Add button if you wish to ship internationally.
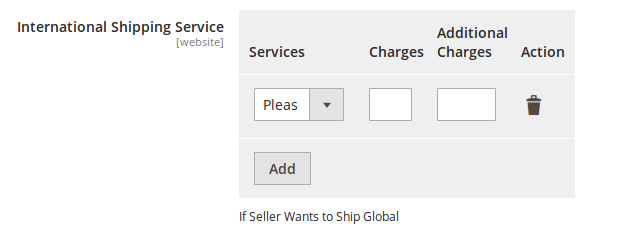
- On clicking Add, the section appears as shown above.
- In Services, select the required option from the list. Similarly, enter the Charges and Additional Charges. (Note:Additional Charge should be lesser than Charge)
- In Ship to Location, select the countries in which you will be shipping the ordered products.
- Now click the next sub-section under General Shipping Details which is Domestic Shipping Setting. It expands as:
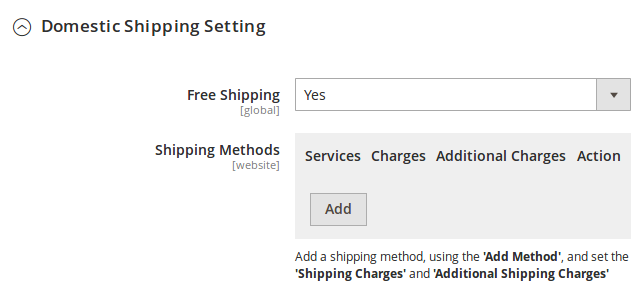
- In the Free Shipping field, select the Yes if you are available to ship the products for free.
- In Shipping Methods, click Add button to add shipping method(s) for free shipping.
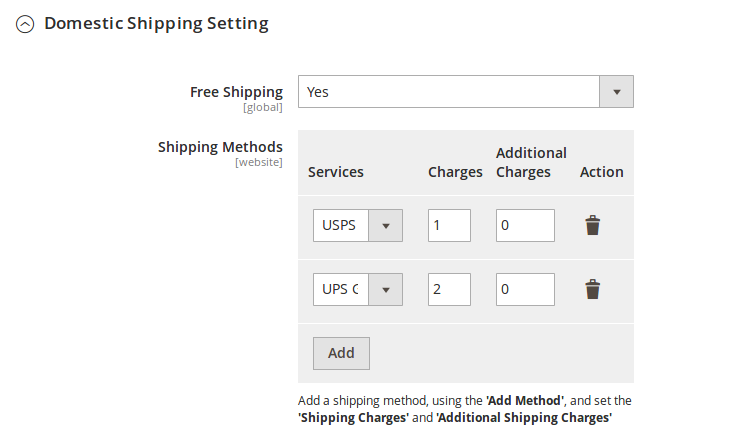
- In Services, select the required shipping service. In Charges and Additional Charges fields, enter the charges for shipping.
- Now click the next sub-section under General Shipping Details which is Sales Tax Details. It expands as:

- In Sales Tax Percentage, enter the percentage for sales tax.
- In Sales Tax State, enter the state for which the sales tax is applicable.
- In Shipping Includes in Tax, select Yes if shipping is included in tax.
Return Policy
- Scroll down to the Return Policy, and then click the tab. The section appears as:
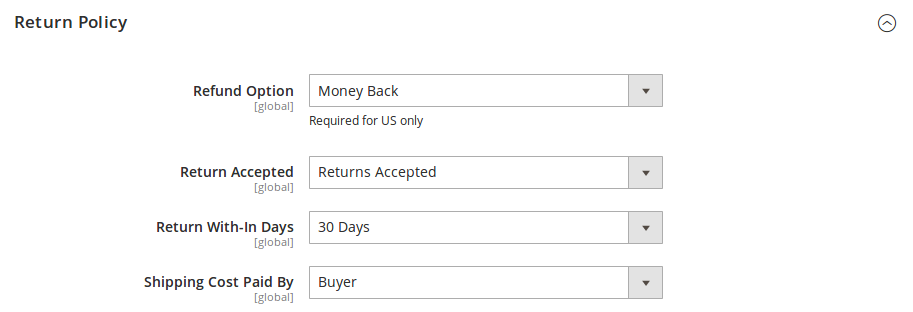
- In the Refund Option, select the required refund option.
- In the Return Accepted list, select the option to mention whether the return is accepted or not.
- In Return With-In Days, select the number of days within which the return is applicable.
- In the Shipping Cost Paid By list, select the payer of the shipping cost.
- If you have selected one of the following countries in the Select Store Location field – Italy, Germany, France, or Spain – then the Return Description box will appear in the Return Policy section.

- In the Return Description box, enter the description.
eBay Cron Settings
- Scroll to eBay Cron Settings and the section will expand upon clicking as:
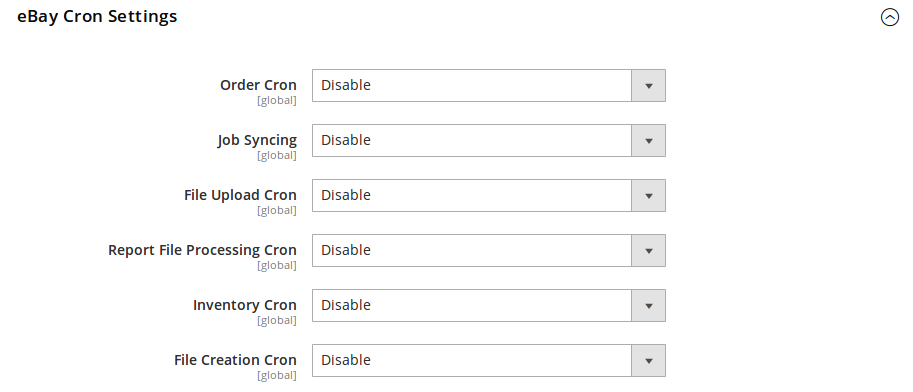
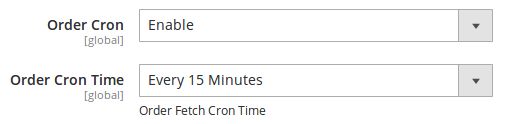
- In Order Cron, select Enable if you want to enable the cron to run after a specific time-interval, periodically.
- On doing so, the Order Cron Time field appears as shown below, in which you need to select the time interval.
- In Job Syncing Cron, select Enable if you want to enable the cron to run after a specific time-interval, periodically.
- In File Upload Cron, select Enable if you want to enable the cron to run after a specific time-interval, periodically.
- In Report File Processing Cron, select Enable if you want to enable the cron to run after a specific time-interval, periodically.
- In Inventory Cron, select Enable if you want to enable the cron to run after a specific time-interval, periodically.
- On doing so, the Inventory Cron Time field appears as shown below, in which you need to select the time interval.

- In File Creation Cron, select Enable if you want to enable the cron to run after a specific time-interval, periodically.
eBay Product Upload Setting
- Scroll to eBay Product Upload Setting and the section will expand upon clicking as:
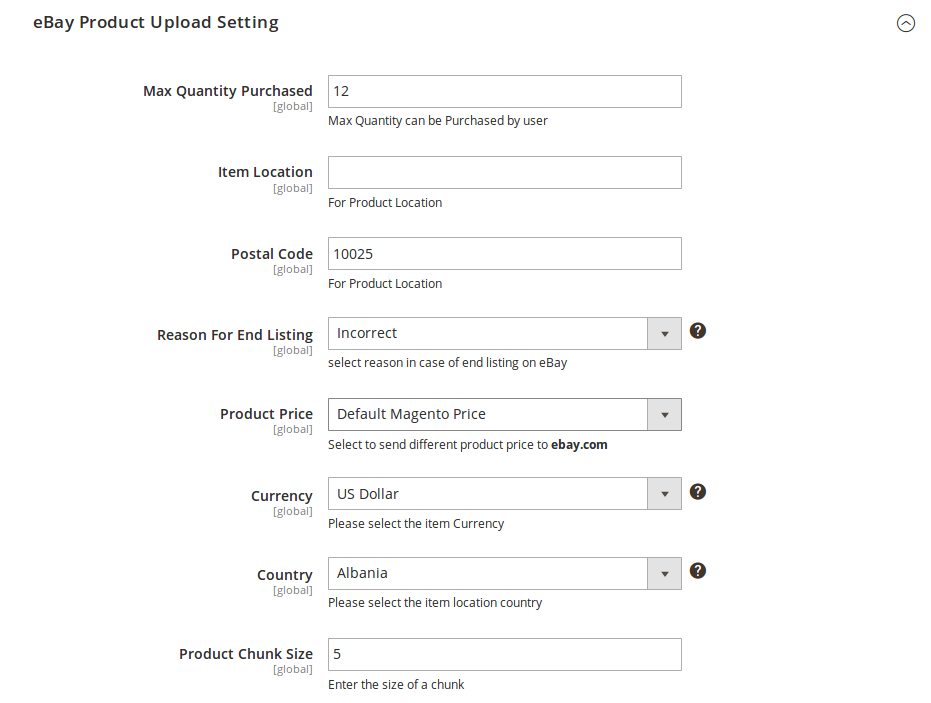
- In Max Quantity Purchased, enter the maximum number of product quantity that a user can buy from you.
- In Item Location, enter the location of the product.
- Enter the Postal Code in the next field. This is the postal code of the location from where the product will be shipped to the customers.
- In Reason For End Listing, select the reason for ending the product listing
- In Product Price, you may select a price option in accordance with which the price for your products will be sent or reflected on eBay. The options are:
- Increase by Fixed Price
- Increase by Fixed Percentage
- Decrease by Fixed Price
- Decrease by Fixed Percentage
- Set individually for each product
- Increase by Fixed Price: If selected, then the Enter Amount field appears.
 Now suppose if you enter 50 in the field and your product is available on Magento for 100, the product will be available on eBay for 150 as you have chosen increased by fixed price and have entered the amount of 50; so it will be added to the price for which the product is available on Magento and the resultant amount will be reflected on eBay, which is 150 in this case.
 - Increase by Fixed Percentage: If selected, then the Enter Percentage field appears. Enter the numeric value to increase the price of the eBay, product price by the entered value % of Magento price
For Example,
Magento price + 5% of Magento price.
Magento Price = 100
Select Increase By Fixed Percentage option
Enter Percentage = 5
100 + 5% of 100 = 100 + 5 = 105
Thus, Ebay Product Price = 105 - Decrease by Fixed Price: If selected, then the Enter Amount field appears. Now suppose if you enter 50 in the field and your product is available on Magento for 100, the product will be available on eBay for 50 as you have chosen decreased by fixed price and have entered the amount of 50; so it will be subtracted from the price for which the product is available on Magento and the resultant amount will be reflected on eBay, which is 50 in this case.
- Decrease by Fixed Percentage: If selected, then the Enter Percentage field appears.
Enter the numeric value to decrease the price of the eBay product
price by the entered value % of Magento price
For Example,
Magento price – 5% of Magento price.
Magento Price = 100
Select Decrease By Fixed Percentage option
Enter Percentage = 5
100 – 5% of 100 = 100 – 5 = 95
Thus, Ebay Product Price = 95 - Set Individually For Each Product: On selecting this option, a field appears as,
 You need to enter the attribute code required in this case.
 - In Currency, select the item currency for the country where you will be selling your products.
- In Country, select the item location country.
- In Product Chunk Size, enter the size of chunk in numbers. It basically refers to the number of products that will be sent to eBay from your Magento store in one batch.
eBay Order Setting
- Scroll to eBay Order Setting and the section will expand upon clicking as:
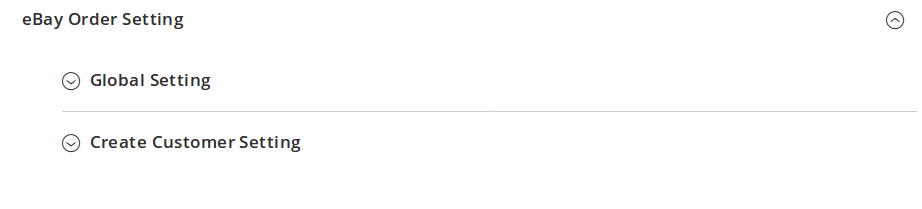
- Click Global Setting and the sub-section will expand as:
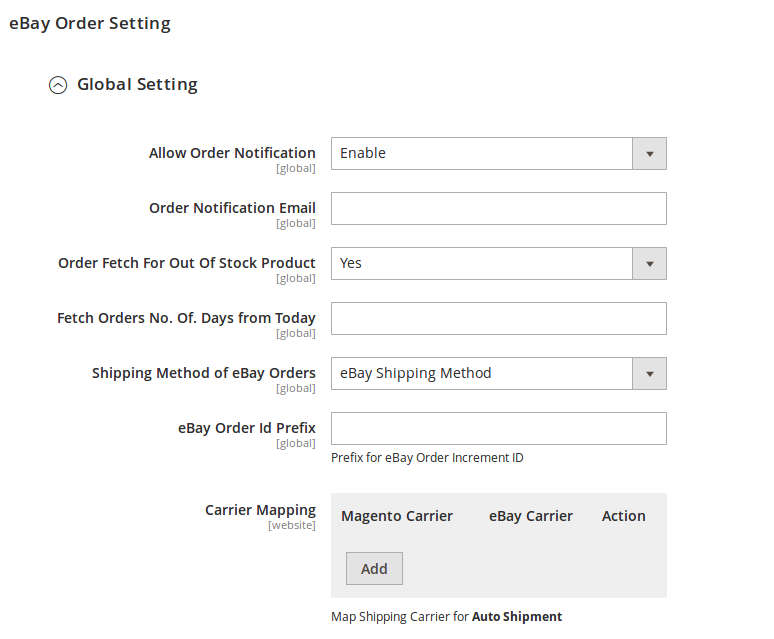
- In Allow Order Notification, select Enable if you want to get the order notifications.
- Order Notification Email, enter the email id on which you want to receive the order notification email.
- In Order Fetch For Out Of Stock Product, select Yes if you want to fetch the orders or receive orders for products that are out of stock.
- In Fetch Orders No. Of. Days from Today, enter the number for last ‘number of days’ for which you want the orders to be fetched. For example, if you enter 30 in it, orders of last 30 days would be fetched.
- In Shipping Method of eBay Orders, select the method of shipping to ship the ordered products.
- In Ebay Order ID Prefix, enter the prefix that you want to be added to all your eBay orders.
- In next field of Carrier Mapping, map the Magento shipping carrier with that of eBay. It is required for Auto Shipment.
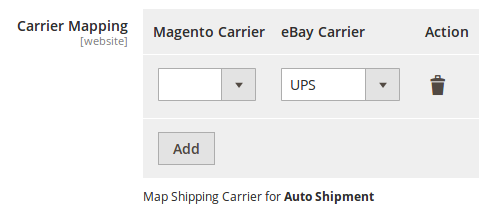
- For that, click on Add button and the section will appear as shown in the above image.
- In Magento Carrier column, select the Magento carrier.
- In eBay Carrier column, select the corresponding eBay carrier.
- You may add more carriers by clicking on Add button.
- Now click on the sub-section of Create Customer Setting. The section will expand as:
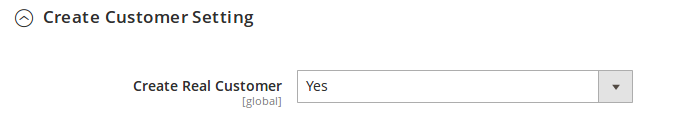
- If Yes is selected in Create Real Customer field, the section will appear as shown in the above image.
- If No has been selected, the section will appear as:
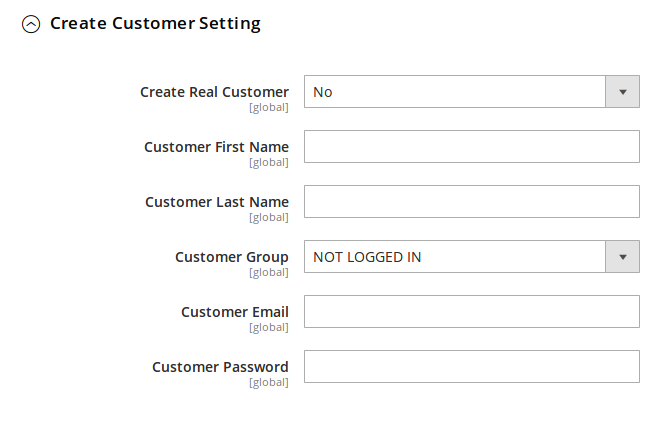
- In Customer First Name, enter the first name for the name under which you want the eBay orders to be created.
- In Customer Last Name, enter the last name for the name under which you want the eBay orders to be created.
- In Customer Group, select the customer group from General, Wholesale, Retailer, and NOT LOGGED IN.
- In Customer Email, enter the email with which you want the eBay orders to be created.
- In Customer Password, enter the password with which you want the eBay orders to be created.
Once you have taken all the actions mentioned above under all the sections, click Save Config button on the top right side of the page. Configuration will be saved.


Leave a Reply
You must be logged in to post a comment.