
Edit the Products
To edit the product
- Go to the WooCommerce Admin panel.
- On the left navigation bar, click the Jet menu.
- In the right panel, click the Manage Products tab.
The page appears as shown in the following figure:
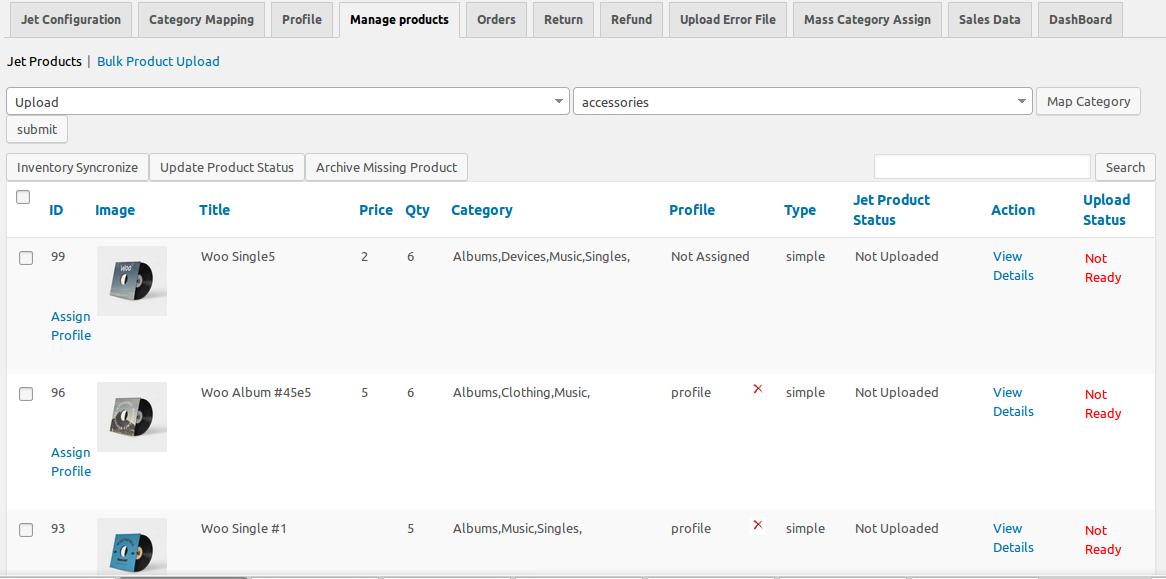
The Jet Products tab is opened by default. - On the Jet Products tab, scroll down to the required product to edit.
- In the Action column of the respective row, click the View Details link.
Th Edit Product page appears. - Scroll down to the Settings area.
- In the left navigation panel, click the Jet Attributes tab.
The page appears as shown in the following figure:
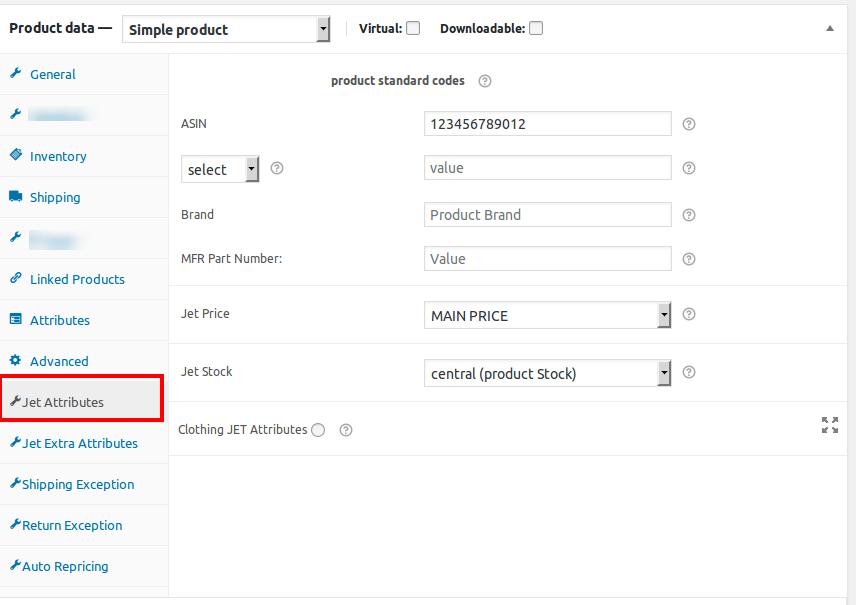
- Under product standard codes, do the following steps.
- In the ASIN box, enter the required value.
- In the Select list, select the required code, and then enter the value in the corresponding box.
Note: This product code is optional if the ASIN is provided. - Similarly, enter the values in the other required attribute fields or make the required changes.
Note: Changes made on the Edit Product page is applicable only to the product. Fields values entered on the Profile page overwrites the field values of the product page.
- In the left navigation panel, click the Jet Extra Attributes tab.
The page appears as shown in the following figure:
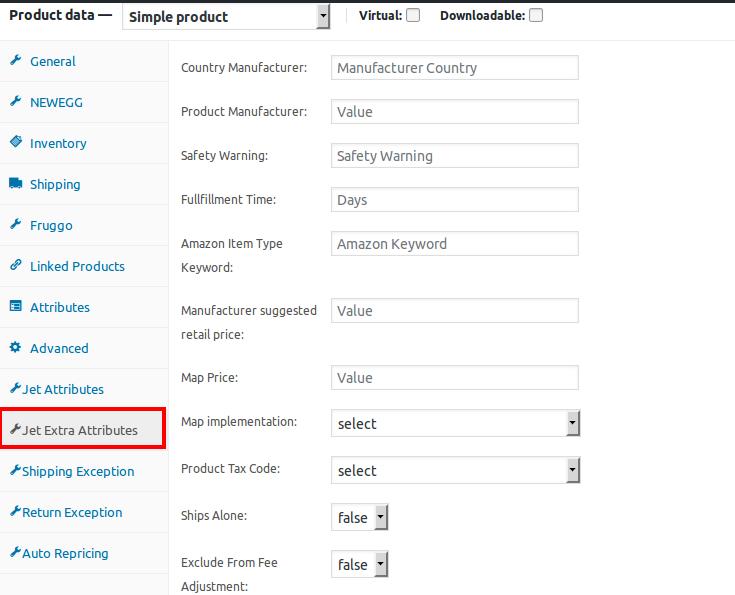
- Enter the values in the required attributes fields.
- In the right panel, click the Update button.
Note: After making any changes to the product, make sure that the product is uploaded again on Jet.com.
×


