
Add A New Profile
To add a new profile
- Go to the WooCommerce Admin panel.
- On the left navigation bar, click the Jet menu.
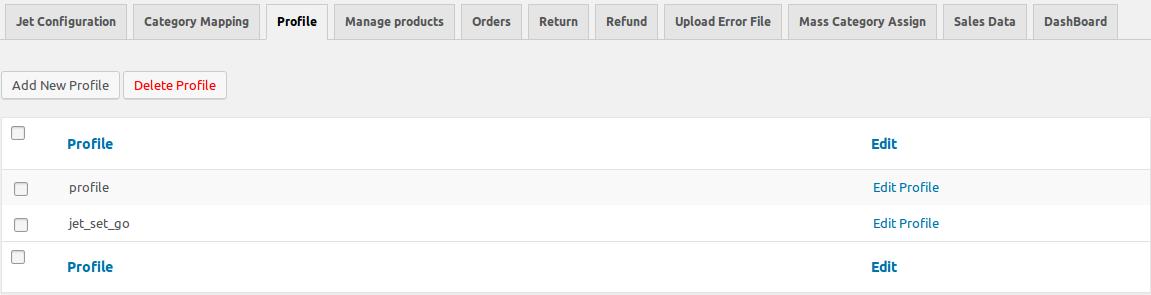
- In the right panel, click the Profile tab.
The page appears as shown in the following figure:
- Click the Add New Profile button.
The New Profile page appears as shown in the following figure:
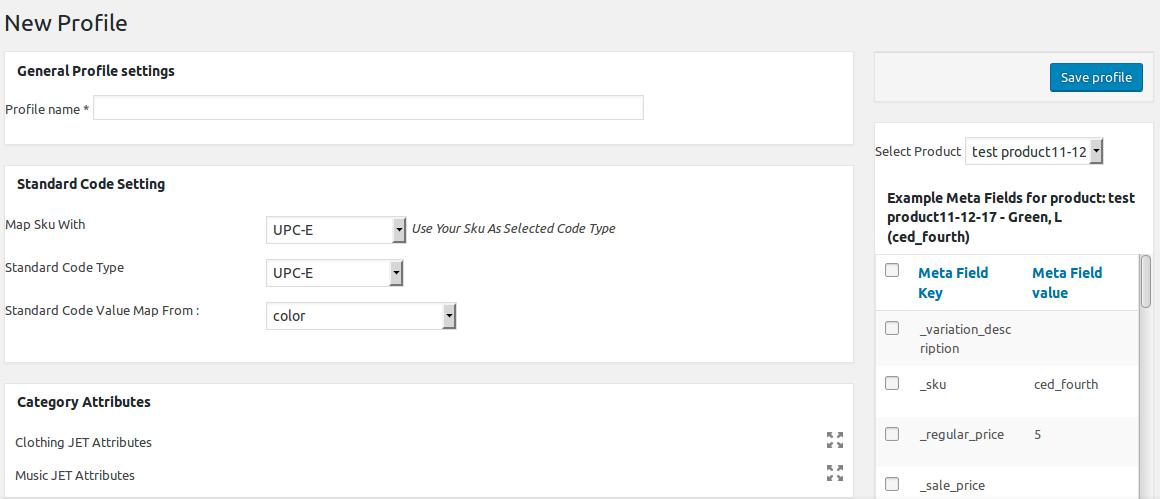
- Under General Profile settings, in the Profile name box, enter the name of the profile.
- In the right panel, do the following steps:
- In the Select Product list, select the required product.
The relevant attributes appear in the Meta Field Key column. - Select the required attributes.
- Click the Add Meta Keys button.
- In the Select Product list, select the required product.
- In the left panel, move to the Standard Code Setting section.
The section appears as shown in the following figure:
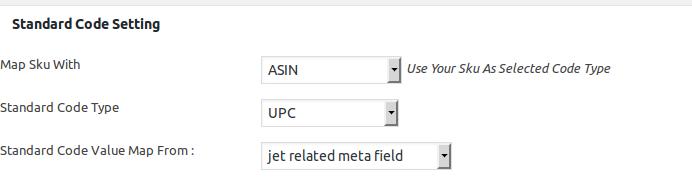
- Under Standard Code Setting, do the following steps:
- In the Map Sku With list, select the required code type.
- In the Standard Code Type list, select the required code type.
- In the Standard Code Value Map From list, select the required meta field.
- In the left panel, move to the Category Attributes section.
The section appears as shown in the following figure:

- Under Category Attributes, do the following steps:
- Click
 .
.
The relevant attributes appear as shown in the following figure:
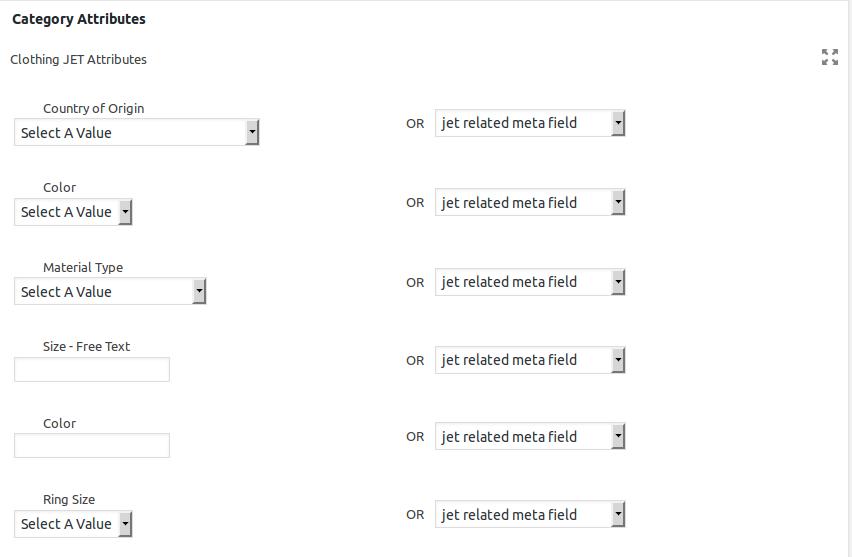
- In the Country of Origin list, select the required value.
Or
In the corresponding jet related meta field list, select required meta key.
Note: The value selected in the list is applicable to all the products assigned to the profile. Whereas, selecting the meta key from the jet related meta field list selects the individual value of the individual product. - In the Color box, enter the required custom value.
Or
In the corresponding jet related meta field list, select required meta key.
Note: The value entered in the box is applicable to all the products assigned to the profile. Whereas, selecting the meta key from the jet related meta field list selects the individual value of the individual product. - Similarly, enter the values in the other required attributes.
- Click
- Scroll down to the Item Specifics section.
The section appears as shown in the following figure:

- Under Item Specifics, do the following steps:
- Move to the required field row.
- In the custom value box, enter the required value.
OR
In the use attributes value list, select the required meta field.
- In the custom value box, enter the required value.
- Similarly, move to the other required field rows and enter the custom value or select the required meta field.
- Move to the required field row.
- Click the Save Profile button.
The profile is saved and listed on the Profile tab. Also, a success message appears.
×


