
Registration and Newegg Configuration Setup
Once the app is installed in the panel, you can resume the registration and app configuration process.
The registration and configuration involves set of steps which requires you to provide account information and map your store with Newegg.
To begin the registration process and set up the configuration settings,
Go to the Shopify store.
In the left navigation panel, click the Apps link.
The page appears as shown in the following figure:
In the right panel, click the Newegg Marketplace – Integration app link.
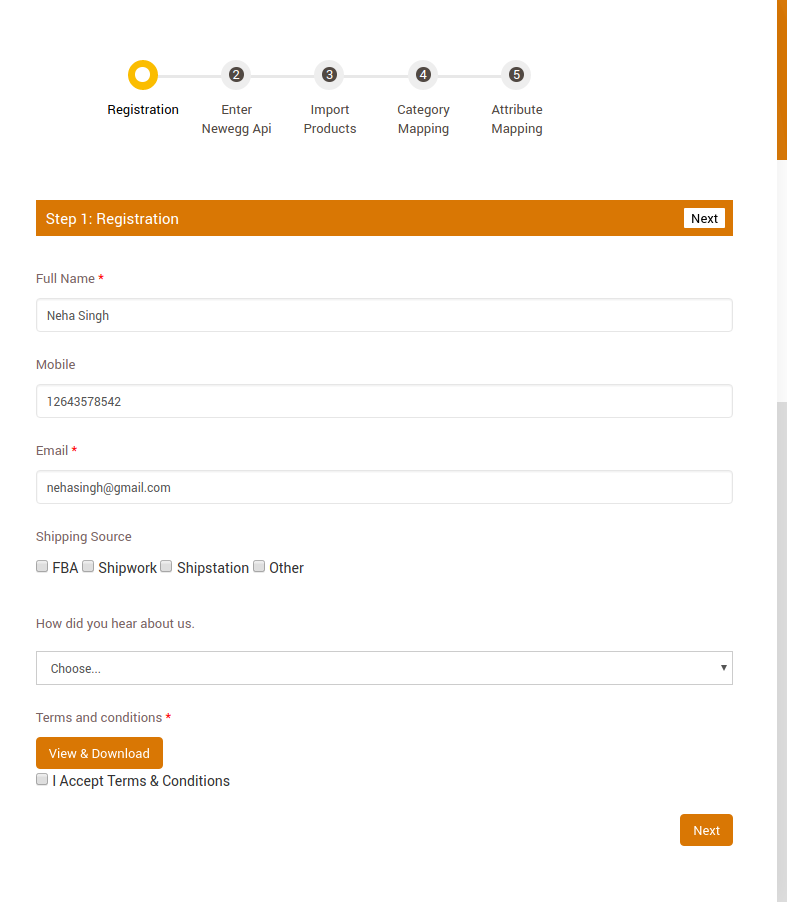
The Step 1: Registration page appears as shown in the following figure:
Enter the following information in the respective fields:
- First Name: First Name of the Store Owner.
- Last Name: Last Name of the Store Owner.
- Mobile: Mobile number of the Store Owner.
- Email: Email Id of the Store Owner.
- Your Primary Time Zone: Select the required time zone.
- Your Preferred Time Slot: Select the required time slot from the list.
- Time Format: Select AM or PM as per the requirement.
- Shipping Source: Choose your fulfillment management tool
Note:If not Shipwork or Shipstation, then select the checkbox associated with the Other option.
Also, CedCommerce is official Channel integration process of Shipstation, Choosing Shipstation through Cedcommerce enables you to get 2 months free service on all the plans.
How did you hear about us?: Select the required option from the available list.
Under Terms and conditions, read the content and then select the checkbox associated with the
I Accept Terms & Conditions text.
Click the Next button.
The Step 2: Enter Newegg API page appears as shown in the following figure. It requires you to enter PI details obtained from Newegg.
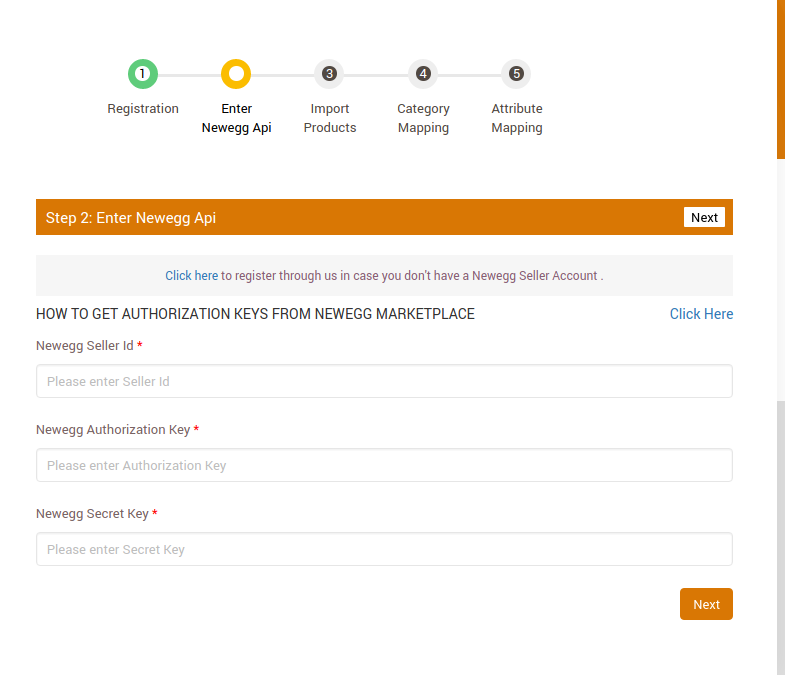
In the Newegg Seller ID box, paste the Seller ID obtained from Newegg .
Next is the Newegg Authorization Key box, here enter the same key.
Thereafter there is one more Newegg Secret Key, enter the secret key details here.
Click the Next button.
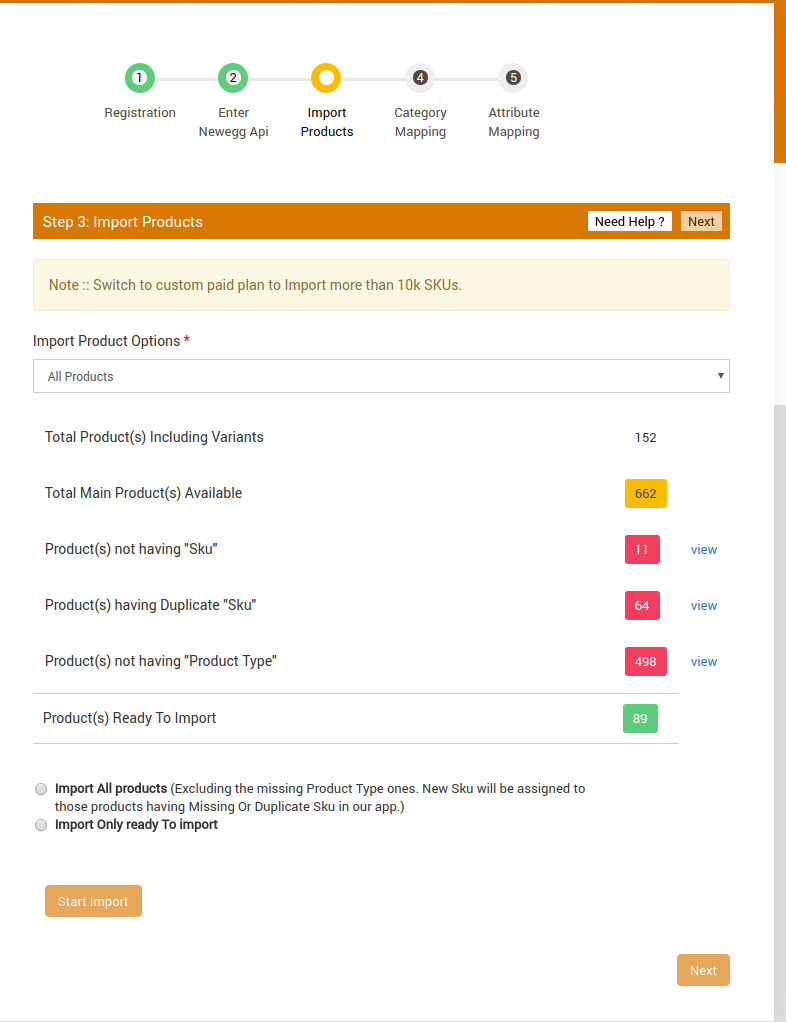
The Step 3: Import Products page appears as shown in the following figure:

In the Import Product Options list, select one of the following options:
- All products: It enables the store owners to import all the Shopify store products in the app.
- Published Products: It enables the store owners to import only those products which are available at the Shopify store front-end.
- Select Products to Import: It enables the store owners to import only those products which they want to upload from their Shopify store to the app.
If selected the All Products option, then the page appears as shown in the following figure:
If selected the All Published Products option, then the page appears as shown in the following figure:

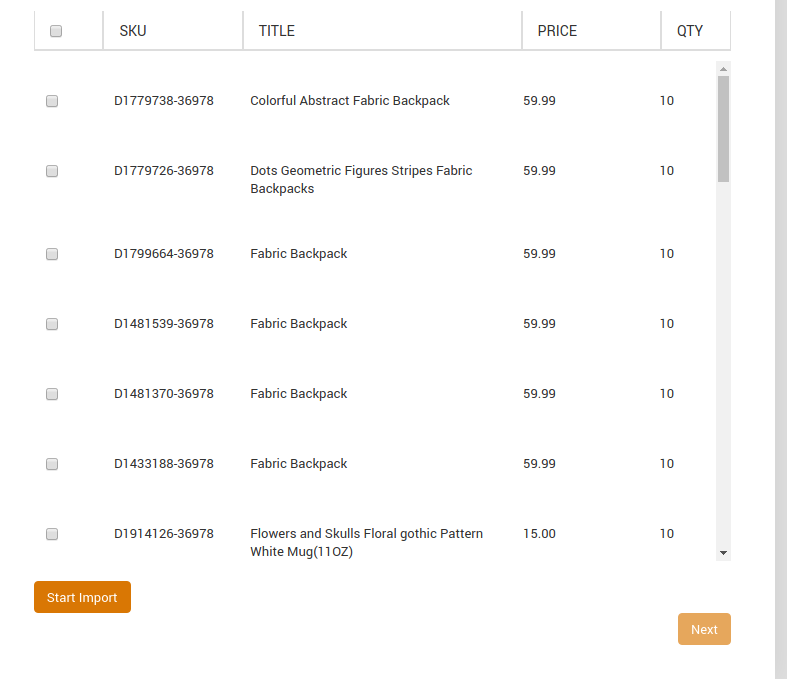
If selected the Select Products to Import option, then the page appears as shown in the following figure:
Do one of the following steps:
Select the checkboxes associated with the required product SKU.
Or
Select the checkbox associated with the SKU label to select all the products listed on the page.
Scroll down to the Start Import button and then click the button.
The Product Import Status section appears as shown in the following figure:
Click the Next button.
The Step 4: Category Mapping page appears as shown in the following figure:
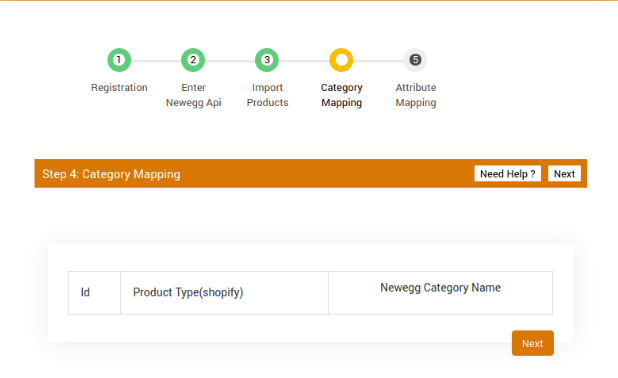
The relevant fields appear as shown in the following figure:
Correct category mapping is very important to find the relevant product in the respective category.
Newegg maps the product type to the category and then subcategory.
It means Category > Sub-Category
The chances of getting order increases if the store owner has mapped the product types to the correct category.
In the Newegg CATEGORY NAME column, select the required categories and the sub-categories from the respective lists.
Scroll down to required product category row.
In the PRODUCT TYPE column, select the required product types from the respective lists.
Click the Next button.
The page appears as shown in the following figure:
Step 5: Attribute Mapping
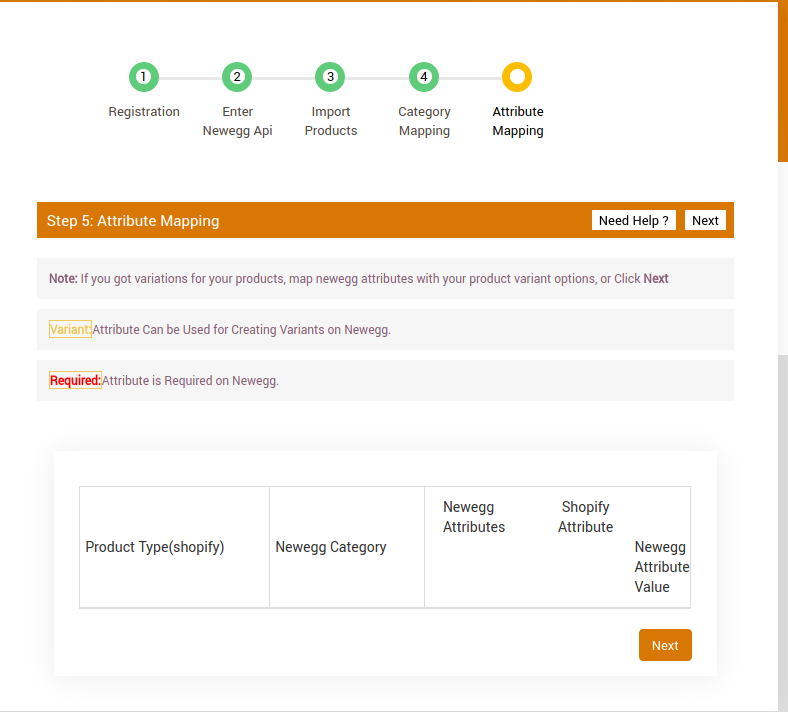
Scroll down to the row of the required Newegg attribute.
In the SHOPIFY column of the respective row, do one of the following steps:
- Select the checkbox associated with the appropriate Shopify options for the Newegg attribute.
OR - Enter any value for the Newegg attribute if there is no similar option available in the Shopify column.
Click the Next button.
Was this helpful? Yes No Suggest edit
———————————————–
When you are done with all the Configuration settings now you are ready to explore the app.
Starting from the Dashboard of the App, i.e., Home on the top navigation menu bar. The Dashboard of the app looks like the following:
License agreement:
https://apps.cedcommerce.com/integration/newegg-policy/newegg-policy.pdf
Contact Us: https://cedcommerce.com/contacts
Copyright © CedCommerce 2018 DMCA Protected. http://www.cedcommerce.com


