Products Section of the Vendor App
After getting imported from Shopify, the products are displayed right on the app panel under the Product tab. In addition to that, you can also find out what actions you can perform on these products. Also, the product section lets you view and customize the products according to your needs before listing them on the marketplace.
You can find the Product section on the collapsable panel on the left side of your screen at the second position from the top.
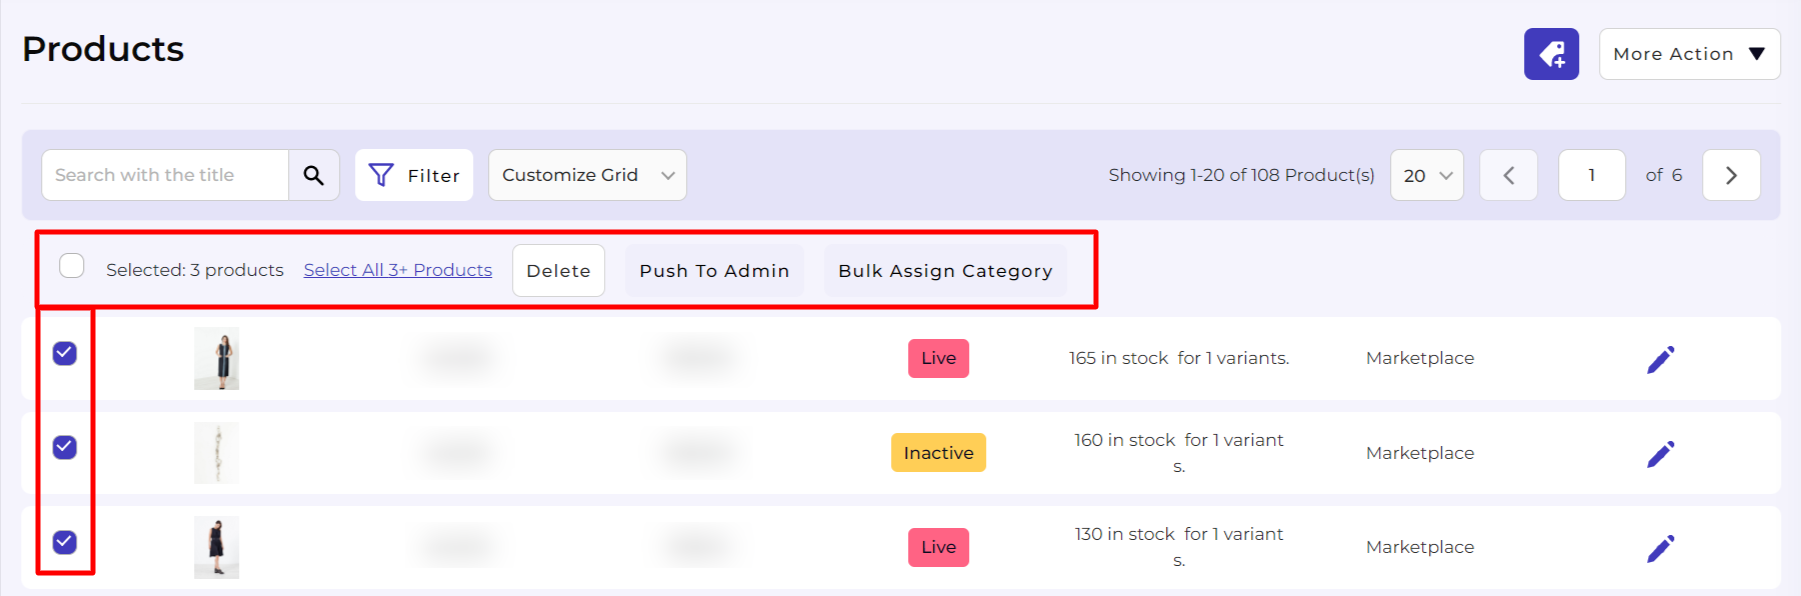
The product grid lets you view your products based on their current status in the marketplace. Below you can find the different product statuses.
- Imported: The products are simply imported from Shopify or directly via CSV to the app and are not yet uploaded on Marketplace.
- Pending: The products, once uploaded to the marketplace, need to get verified and approved by the marketplace admin. The products are assigned the Pending status until they get approved or rejected.
- Live: This status comes from the marketplace once the product is uploaded from the app to the marketplace and the admin approves it to make it live on the Marketplace.
- Inactive: The inactive products have been live on the marketplace but have been taken down because of zero inventory; you are not selling them anymore or for any other reason.
- Rejected: This status comes from the marketplace. You can view it when the admin rejects it on the Marketplace.
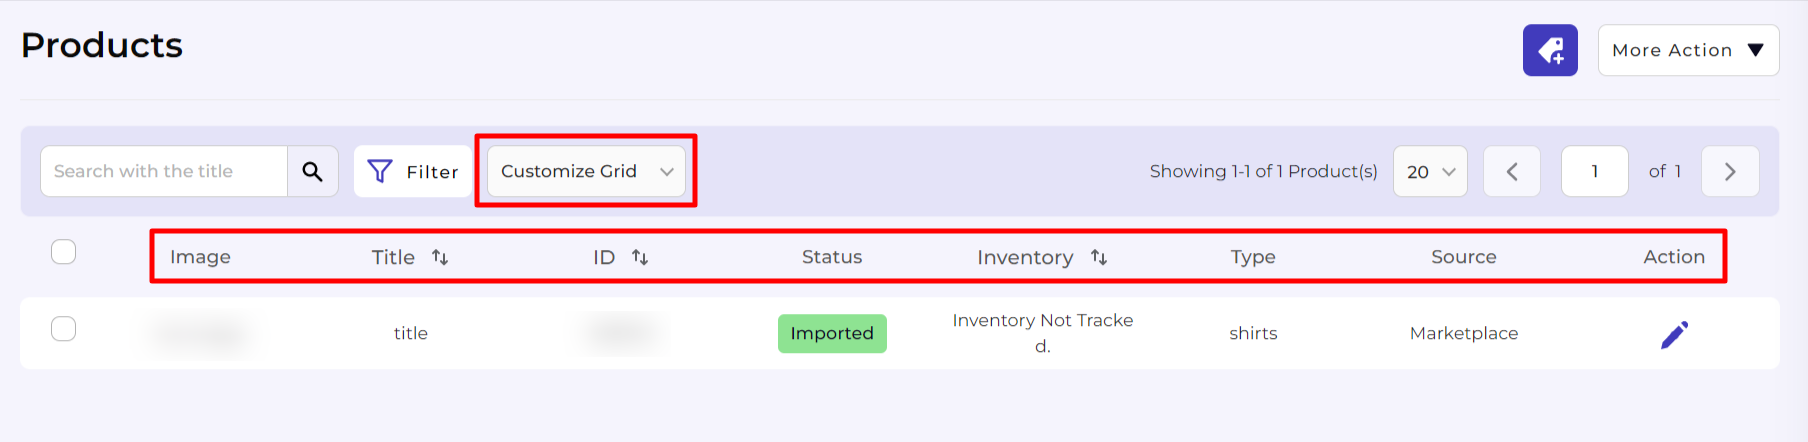
Customizing the Product grid for a personalized view
- Go to the products section.
- Find the Customize grid button in the center of the page, next to the filter option.
- Select the options you wish to view on the product grid by ticking the checkboxes for respective attributes. Below you can find the different product attributes.
- Image
- ID
- Status
- Inventory
- Type
- Source
Note: You can not remove the Product Title and Actions from the grid.
Products displayed per page
- Go to the dropdown displaying the number of Items per page.
- Use the drop-down to select the number of products you want to view on a single page (you can select 10, 20, and 50 products).

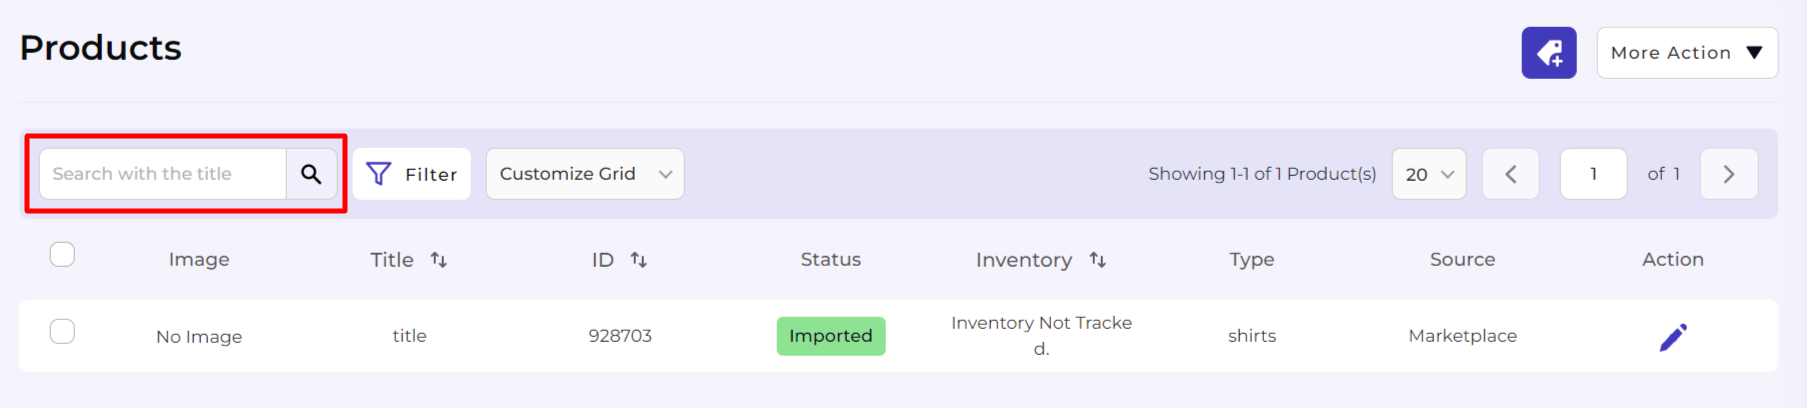
Filter and find a specific product
- Go to the Product section.
- Enter the Product Title in the search box on the top left of your screen and enter.
- The app will apply the filter and display the requested product.
Note: You can also perform a broad search using the search bar by entering partial information. To search for a Product – Fusion Backpack, you may enter Fusion / Backpack / Fu / Back / Ba / Pack and similar combinations. The app will display results that match your query. You can use the result to select the best product for your needs.
You can also utilize the filters button to perform a more refined search for a specific product type based on the below-stated options. First, click on the More Filters button next to the search box on top of the Product grid, and then select the filter you wish to apply to find your product(s).
Note: You can use multiple filters at once.
- Type: This lets you filter products based on the Product Type they’ve been assigned under. You need to enter either a partial or a complete Product type name for your product Type assigned to the product(s). Once you’ve entered the required details, click on the Apply button.
- Quantity: This lets you filter products based on their Quantity. The app gives you an option to create a condition by providing FROM and TO values for the Quantities. To do that, you need to enter the minimum quantity of a product and the maximum quantity of the product. Click on the Apply button.
- Title: This lets you filter products based on the title they’ve been assigned. You need to enter either a partial or a complete Product Title for your product. Once you’ve entered the required details, click on the Apply button.
- Status: The option lets you filter the products as per their status on the application. You can select from a list of 5 available product statuses on the application.
- ID: This lets you filter the products based on their ID. Enter a partial or complete Product ID of the product you want to filter. Entering partial Product IDs like 247 / 35475 / 77 / 23 will display all the products with the given product ID numbers on their ID.
Using the More Actions Button
- Go to the product section.
- Find the More Actions button available in the top right corner of the page.
- Click on the More Actions button. A drop-down menu appears, providing you with four options, i.e., Import Images, Import Product CSV, and Export Product CSV.
Import Images
The Import Images button lets you import product images to the app you want to assign to different products before selling on the marketplace.
- Click on the Import Images button, and a new page opens asking you to upload a ZIP file containing images of products you wish to upload to the marketplace.
- Once you’ve selected the zip file, click on the Upload ZIP file button.
- You can visit the Activities page, where you can view the task status.
Export CSV
The export CSV option lets you export products from the app that you want to edit in bulk before uploading them to the marketplace.
- Click on the Export CSV button, and a dialogue box opens asking you to select the local drive folder where you wish to export the product CSV file.
- Once you’ve selected the location and file name, click on the SAVE button.
You can visit the Activities page, where you can view the task status.
Import Products
The import products button lets you import products from Shopify to the app to sell on the marketplace.
- Click on the Import Products button, and a dialogue box asks you to upload a CSV file containing details of products you wish to upload to the marketplace.
- Once you’ve selected the CSV, click on the Upload button.
- You can visit the Activities page, where you can view the task status.
Note: If any changes are made in the handle column of the exported CSV it will result in the creation of a new product when the CSV is imported once updated.
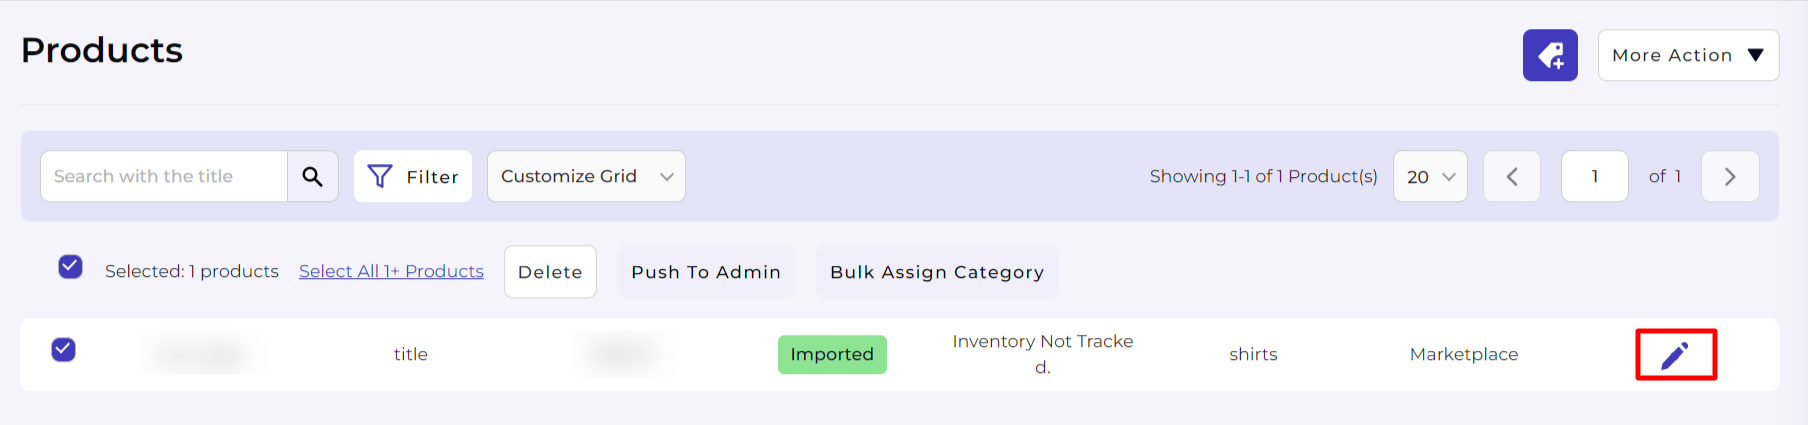
Performing Actions on Products
- Go to the Product section.
- Filter/Search the product you want to view complete product details.
- Search for the Action tab in the product grid.
Actions – Edit
- Select the Edit Product option to edit the complete product details.