
Profiling
In the last step, you imported some products from your Shopify store into the app. But the app can’t list those products on your Etsy Shop just yet. To list those products on Etsy, you need to create a profile and then assign those products to the profile. So a profile is basically a set of products that have similar properties like category, attributes, and shipping details.
You can create as many profiles as you want, and assign any number of products in a profile, but you can’t list a product on Etsy until it has been assigned to a profile.
Why Profiling?
This is a great question and it needs to be answered now rather than later. What you need to understand about profiling is that Etsy requires certain attributes for every product that is going to be listed on the marketplace. You can’t list your products without specifying these attributes.
Shopify does not require these, so there needs to be a way for you to specify these attributes to your products. And this is where profiling comes in. When you create a profile on the app, you have to specify these attributes. And all the products that will be assigned to the profile will carry the same attributes when you list them on Etsy. So in a way, profiling saves you from having to assign the required attributes individually for each product.
With this understanding, let’s move on to the steps you need to take to create a profile. You are at the final step of the onboarding process as you can see in the image below.
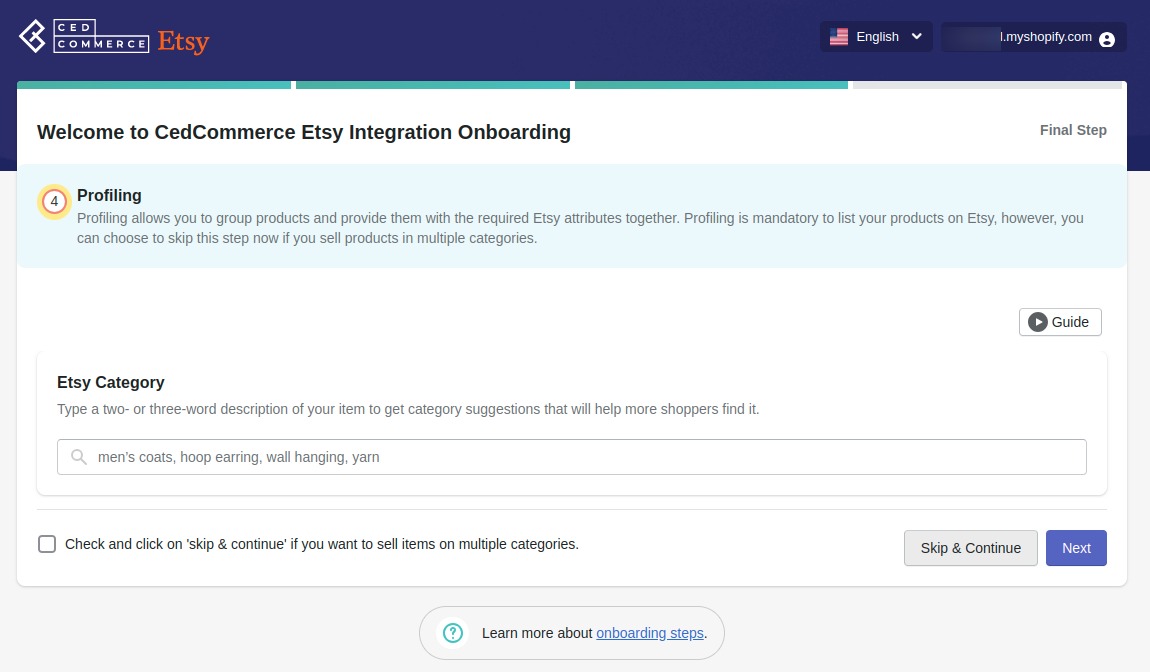
Note – This is a default profile, and it will include all the products that you imported in the last step. When you will create a new profile from within the app, you will need to assign products in the profile itself.
Step #1. Choosing the Etsy Category
This is the first step in creating a profile. You need to specify the Etsy category in which you want to list your products associated with this profile. Start by typing the name of a product category and the app will suggest you a list of categories that are available on Etsy as you can see below.
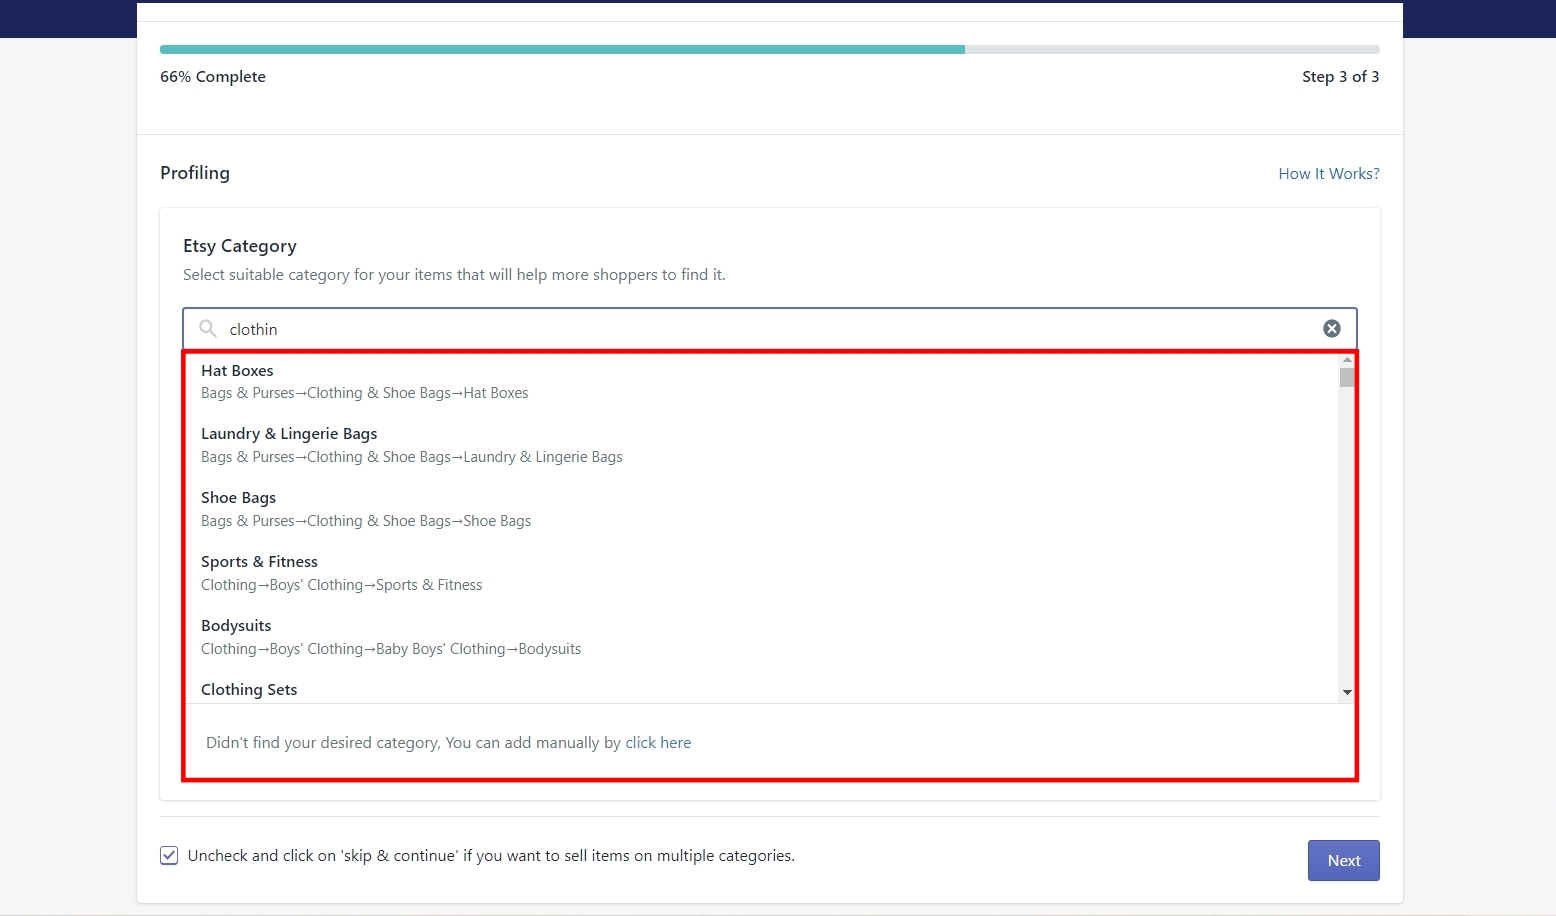
Scroll through the list of categories and select the best match for your products. It’s also possible that you can’t find the exact category that you want in the list. In such a case, you can also add the Etsy category manually. Scroll down to the bottom of the list and you will find the following message written there.
“Didn’t find your desired category, You can add manually by clicking here”.
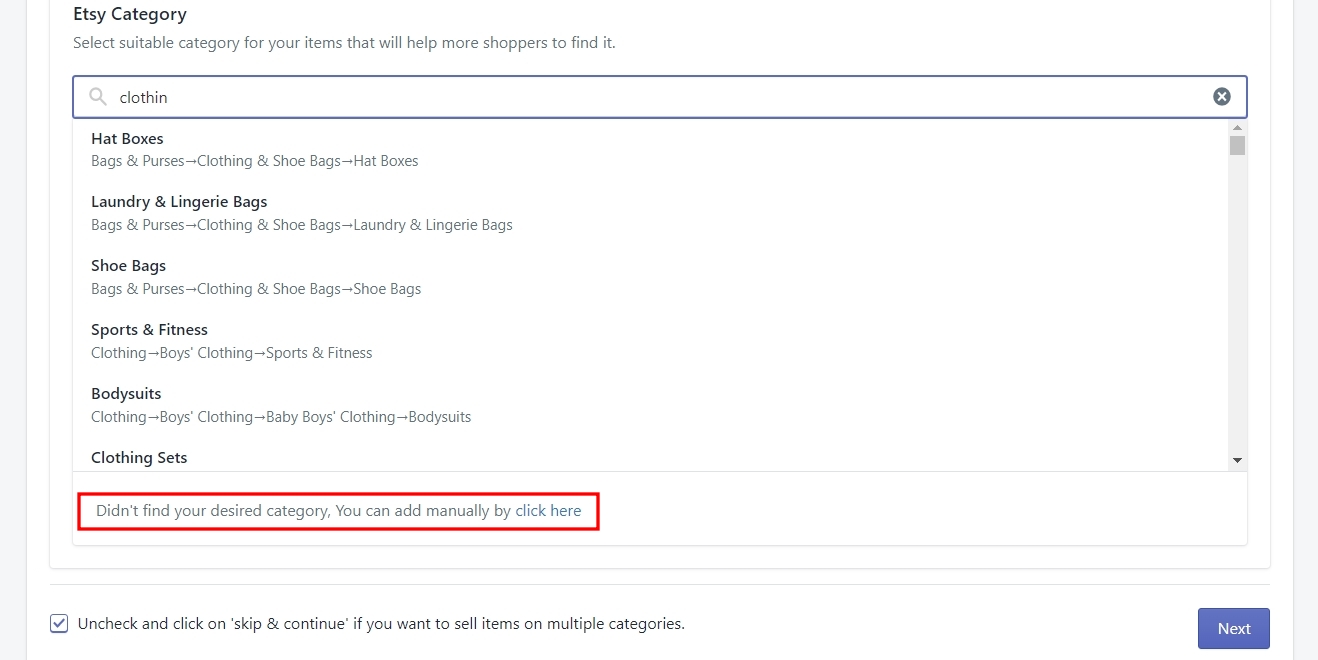
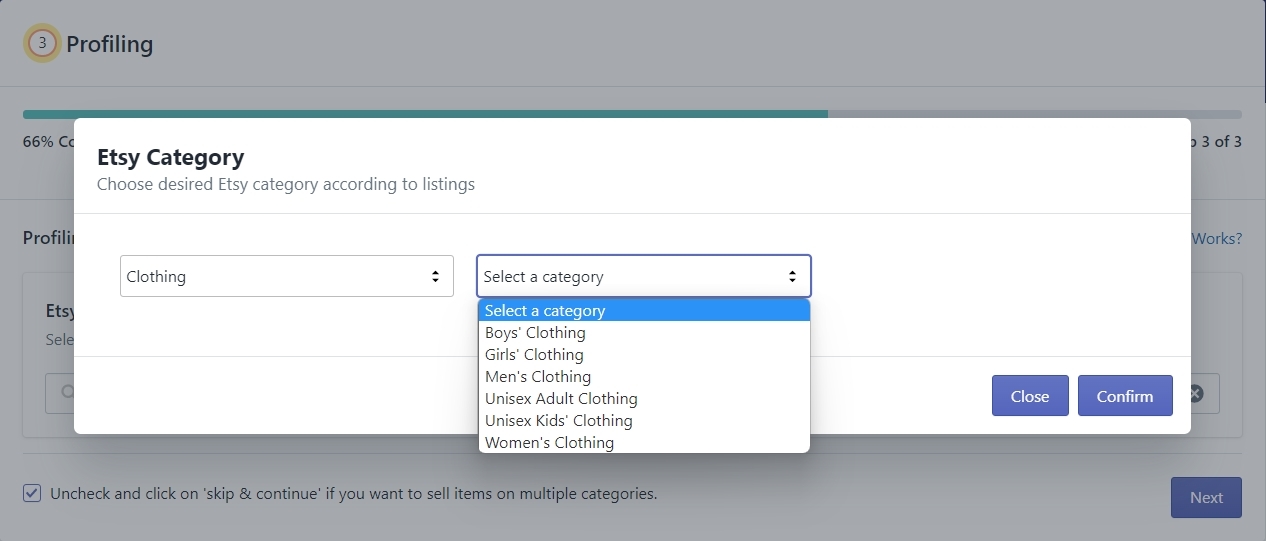
Click on the hyperlink to access the Etsy Category box and click on the dropdown to access a list of Etsy categories.
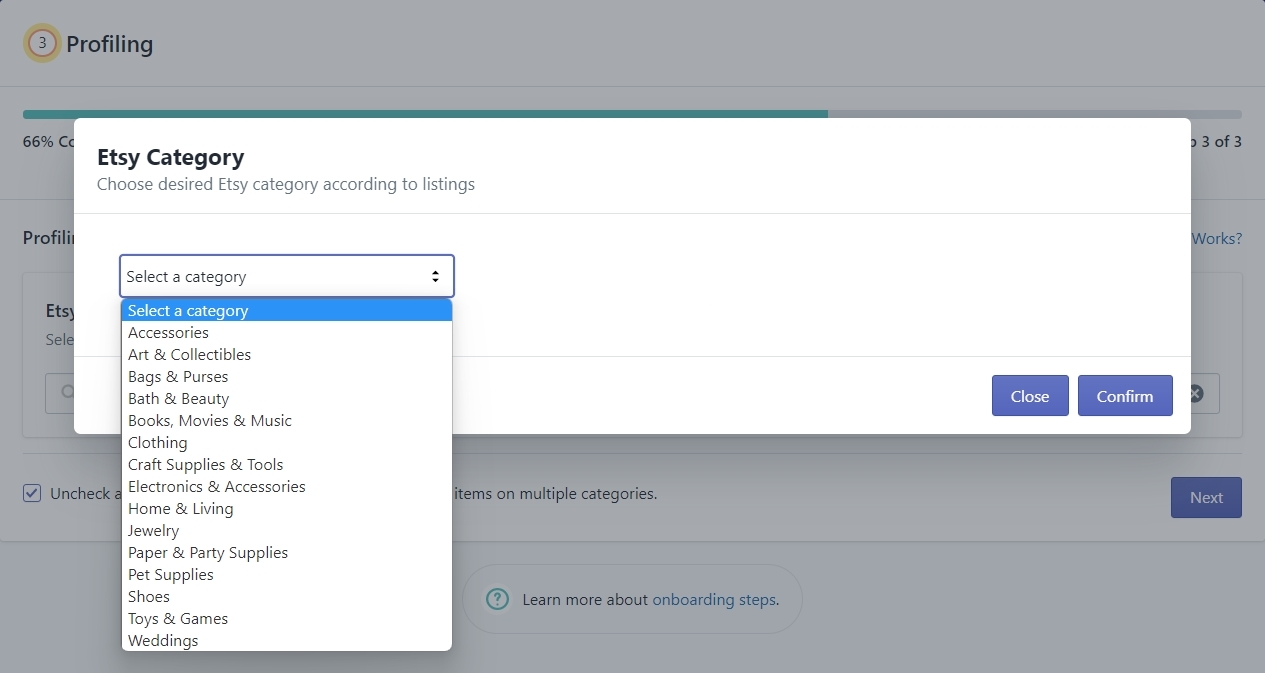
Once you choose a category, a new dropdown will appear that will give you the option to choose a sub-category based on the main category you chose. Now you have two options. You can either settle with the main category and click on the ‘Confirm’ button or you can click on the new dropdown and choose a sub-category. See the image below for reference.
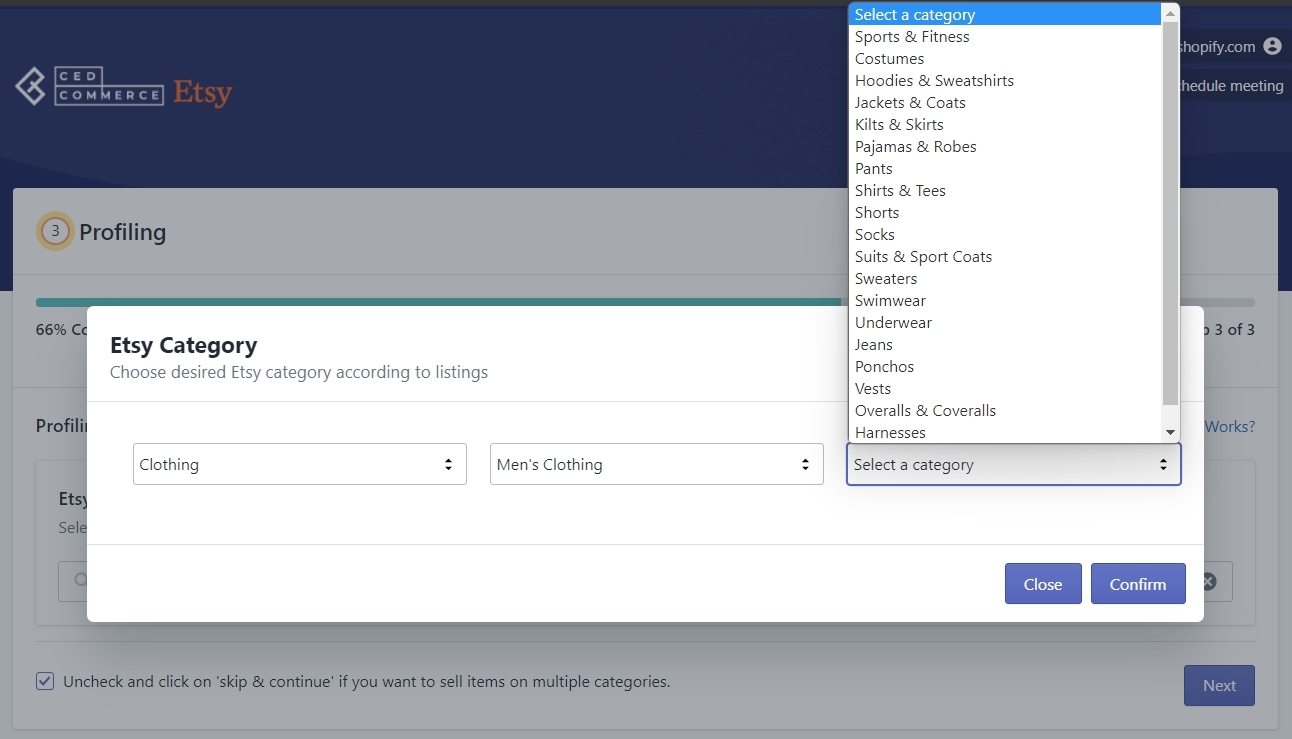
Once you choose the sub-category, you’ll get another dropdown to select even more sub-categories. Again, you can either choose to settle with the sub-category and click on Confirm. Or you can click on the dropdown to choose a sub-sub-category. See the image below for reference.
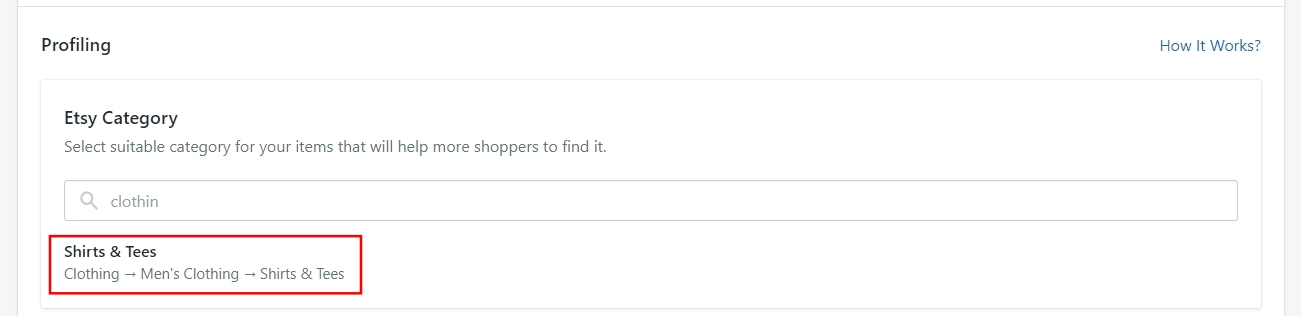
This process of choosing the subcategories will go on until you get to the last sub-category that Etsy has to offer. When you are happy with your category choice, click on the Confirm button to select the last sub-category as the Etsy category for your products in the profile. You can see in the image below that the last sub-category you chose has been set as your Etsy product category.
Step #2. Attributes Mapping
These are the attributes that we discussed earlier that are required for every product to be listed on Etsy.
The first section in Attributes Mapping has 3 fields, namely –
- Who made it?
- What is it?
- When did you make it?
Let’s talk about each of these fields in a little more detail.
#1. Who made it?
Since Etsy is a marketplace for handmade items, vintage items, and craft supplies, Etsy needs to know who made the product that you are going to list. So when you click on the dropdown for the ‘Who made it?’ field, you will see three options as shown in the image below.
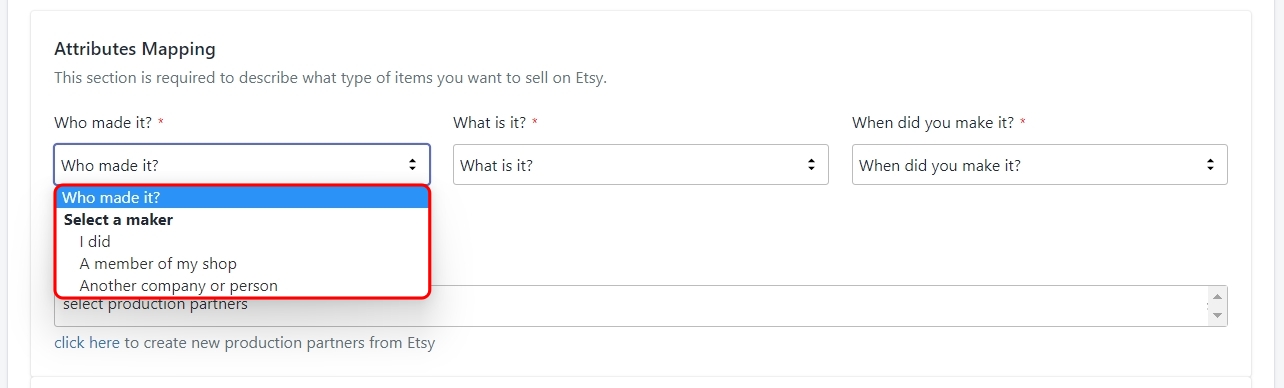
- I did – to be used when you are the maker of the product.
- A member of my shop – to be used when someone other than you made the product, but the person is working for you.
- Another company or person – to be used when you are selling a product that is made by one of your production partners.
If your products are made by a production partner then you’ll need to mention them in the ‘PRODUCTION PARTNERS’ field. You can add production partners directly from your Etsy shop, and then fetch them in the app from the ‘Settings’ section. Once they’ve been fetched, you’ll be able to select them from the dropdown.
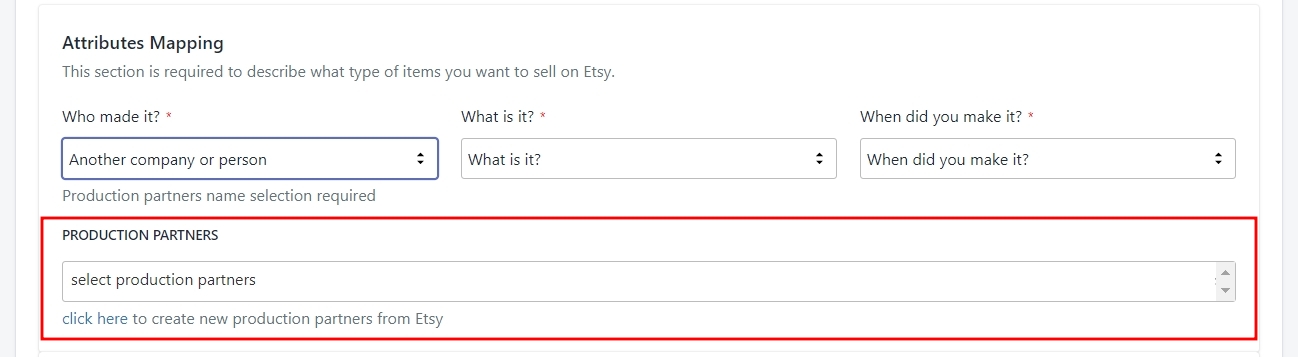
Note – Click on the hyperlink below the production partners field to go to Etsy and create one.
#2. What is it?
The ‘What is it?’ field, has two options as shown in the image below.
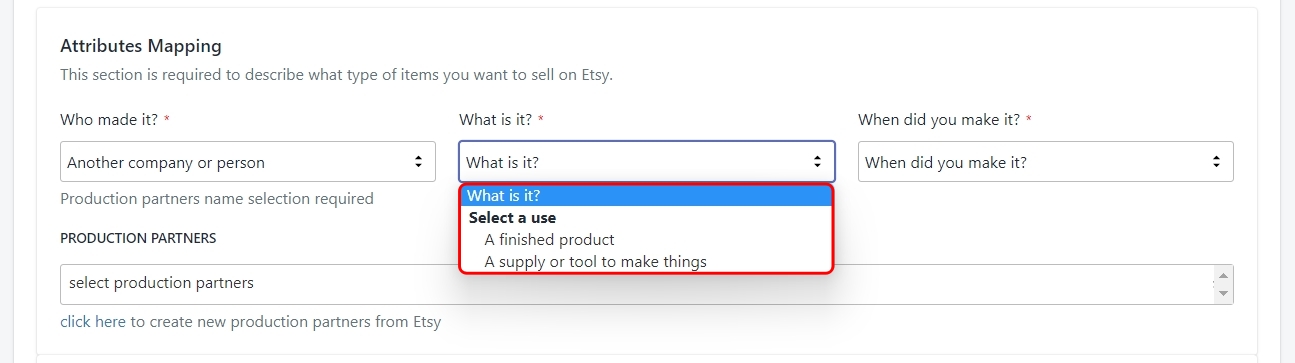
- A finished product – to be used for finished products.
- A supply or tool to make things – to be used when the product is not a finished product, but a supply or a tool to make other things, like craft supplies.
#3. When did you make it?
This is an attribute that tells Etsy about the time when the product was created. This is a required attribute because Etsy uses this data to differentiate between made-to-order products, recently made products, and vintage products. When you click on the dropdown, you will see a list as shown below.
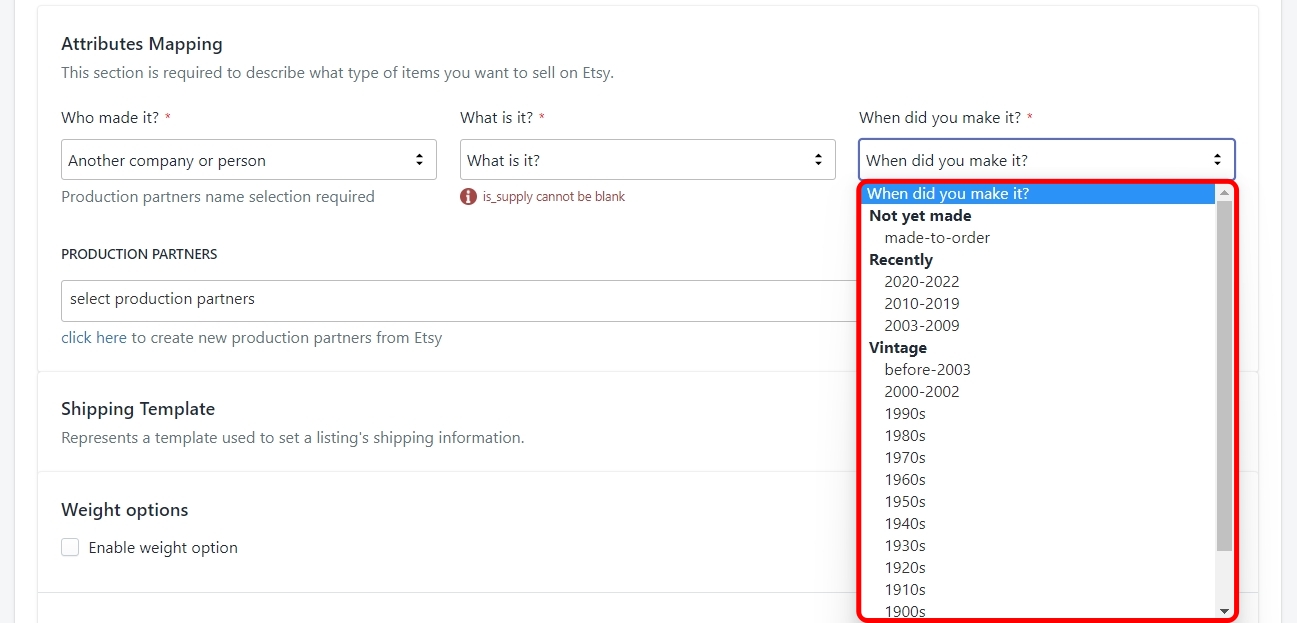
- Not yet made – Made-to-order. This made option is to be selected for the products that you only make on-demand. In simple words, you only start creating these products when you receive an order.
- Recently – Made in the last 20 years. You have the option to select the time frame in which you created your products. For the current year 2022, you get the time frames ranging from 2003 – 2009, 2010 – 2019, and 2020 – 2022.
Note – These time-frames will keep changing year by year because any product older than 20 years is considered a Vintage product by Etsy. So in the year 2025, any product which was created in the year 2003 will be considered Vintage.
- Vintage – All products older than 20 years counting from the current year. Under vintage, you can select a time that is more than 20 years in the past. You can literally sell products that were made in the 1700s or before on Etsy. That’s what makes the Etsy marketplace so unique.
Step #3. Shipping Template
A shipping template is a template that contains all the information required to ship your orders and each profile must contain a shipping template. You can create new shipping templates or use templates that you may have created on Etsy in the past.
In case you are selling all your products in a single country or location, you can use just one shipping template for all your profiles. But if you are selling different products in multiple countries or even multiple continents, you may need to create separate profiles and separate shipping templates for each profile and location.
Let’s talk about how to create a shipping template.
Weight options
The first step in creating a shipping template is to decide whether you want to do shipping based on the product weight. There may or may not be products on your Etsy shop that come in different weights. But if they do, you can use the weight options in the shipping template.
Note – It must be noted that you can only add one weight range per shipping template, so you may need to create multiple profiles and shipping templates for different weight ranges of a product which we will not recommend.
Click on the checkbox to enable the weight options. Once you do, you will be asked to input the weight range followed by a dropdown to select the unit of weight. See the image below for reference.

Shipping Info
This is the section where you will enter all the details related to how you will ship your products. You will need to provide the following information –
Dispatch Origin
In this option, you will need to provide the name of the country from which you are shipping the products. In simple terms, this is the country where your shop is located. Click on the dropdown and select the country by either scrolling through the list or typing in the name of the country.
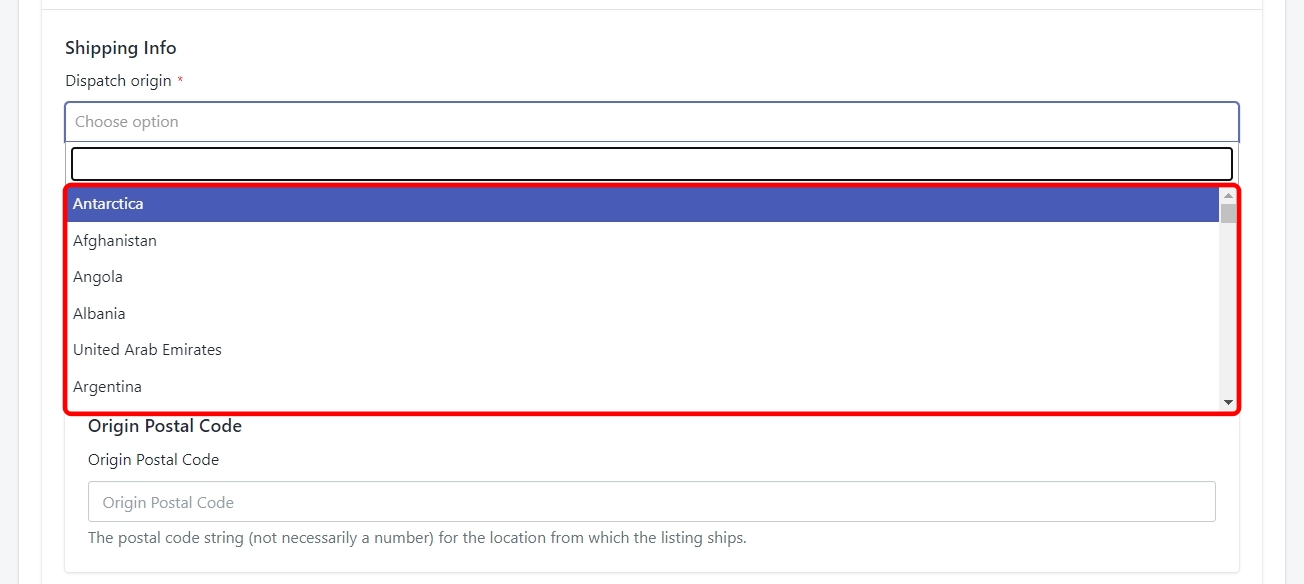
Note – As soon you select the dispatch origin, the Standard Shipping panel will open. More on that later.
Processing Time
Processing time is the amount of time that you take, as a seller, to ship an order after it’s created. Notice that this is not the delivery time. The delivery time will be specified in the Standard Shipping panel. This is the amount of time that you will take to process and ship the order. Click on the dropdown to select a processing time range that will be enough for you to process and ship the order. See the image below for reference.
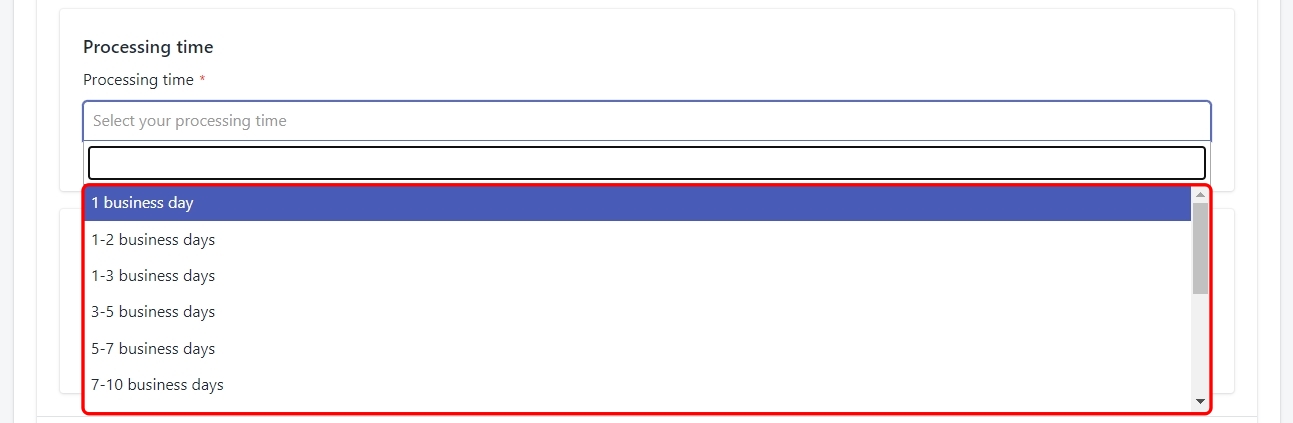
However, in such a case when you can’t find the right processing time range for the products – for example, you may take 2 months to finish a made-to-order product – then you can also create your own custom processing time. Scroll to the bottom of the dropdown list and select ‘Custom Range’. You will see that a new custom field will appear where you can choose your minimum and maximum processing time.
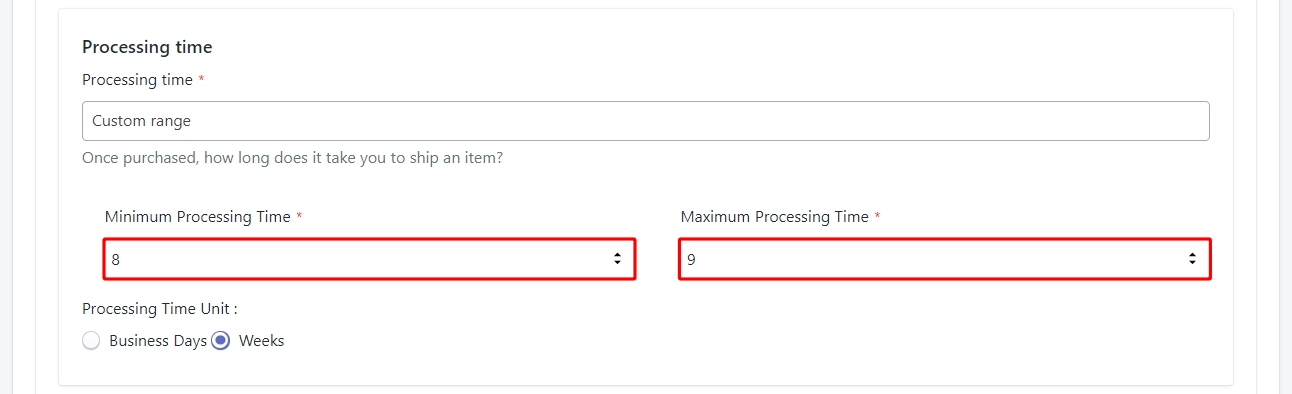
Once you have decided on the custom range, make sure to choose the right processing time unit. It can be either Business Days or Weeks.
Note – Processing time can’t be more than 10 weeks
Origin Postal Code
This is a simple one, you just need to provide the postal code for the shipping location. It is not a mandatory field so you can choose to just leave it blank.
Standard Shipping
The Standard Shipping panel only appears once you have selected the dispatch origin for the shipping template. Let’s take a look at all the options available in this panel. Use the image below for reference.
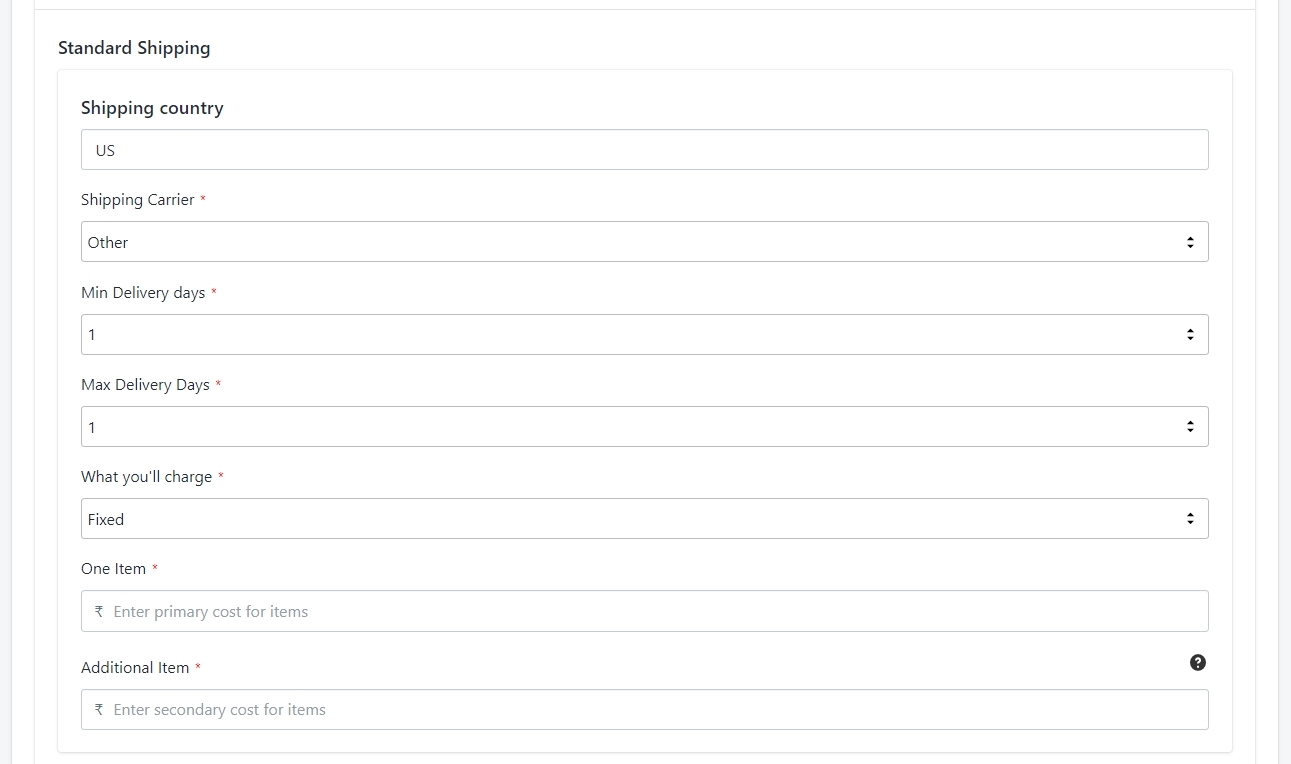
Shipping country
The shipping country is the same country you provided in the ‘Dispatch Origin’ field. You need to change the dispatch origin to change the Shipping country. However, if you want to ship your products in multiple countries then you can add other shipping locations as well. We will discuss how to add multiple shipping locations after we’ve discussed all the options in the standard shipping panel.
Shipping Carrier
You need to choose the name of the shipping carrier from the dropdown list that you will use to ship your orders. By default, it will show ‘other’ which will be applicable in case you want to fulfill the orders using any local courier service.
The dropdown list will be populated with the Shipping carriers that Etsy has partnered with. So you will see different shipping carrier names depending on where you are located.
For example, if your shipping country is the United States then you will see USPS, FedEx, and UPS as the standard shipping carriers. If your shipping country is India then you will see India Post as the standard shipping carrier and so on.
Mail Class
The mail class field will only appear when you choose a Shipping carrier from the list. It will be in the form of a dropdown which will be populated by the Shipping methods available for the shipping carrier you selected.

Note – The options for Minimum Delivery Days and Maximum Delivery Days will only be applicable if you have not selected a standard Shipping Carrier because otherwise the minimum and maximum delivery days will be decided by the Mail class.
Minimum Delivery Days
In this option, you need to select the minimum number of days in which the order will be delivered to the buyer after it has been shipped. You will get this option only when you have not selected a standard shipping carrier.
Maximum delivery Days
In this option, you need to select the maximum number of days in which the order will be delivered to the buyer after it has been shipped. You will get this option only when you have not selected a standard shipping carrier.
Note – The limit for the minimum and the maximum number of days is 45. So once the order has been shipped it has to be delivered within 45 days when your orders are self-fulfilled.
What you’ll charge
This option gives you the ability to choose whether you want to offer free shipping or you want to charge a fixed rate for the orders. Click on the dropdown to select the shipping charge as shown in the image below.
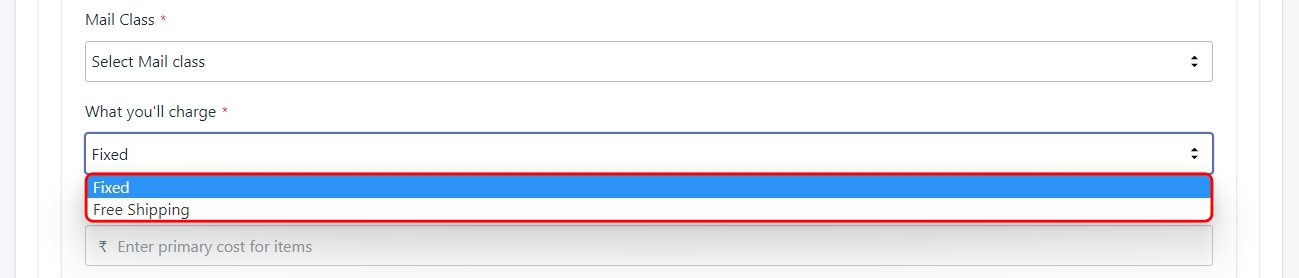
If you select ‘Free Shipping’ then that is all you need to do. But if you choose ‘Fixed’ then you need to further configure how much you will charge for one item and how much you will charge if a buyer purchases more than one quantity of an item.
One item
In this field, you need to mention the amount of money that you will charge from a buyer who purchases just one item.
Note – You need to enter only the numeric value in this field because the currency will automatically be fetched from your Shopify store.
Additional Item
Let’s say that a buyer purchased 5 quantities of a product. In this case, whatever value you have entered here will be charged for each quantity. So in this case, the buyer will be charged 5 times the Additional Item value.
Note – The value of shipping cost for ‘Additional item’ will always be less than the ‘One item’ cost. So, let’s say you are charging $5 for one item, in this case, the additional item cost will always be less than $5.
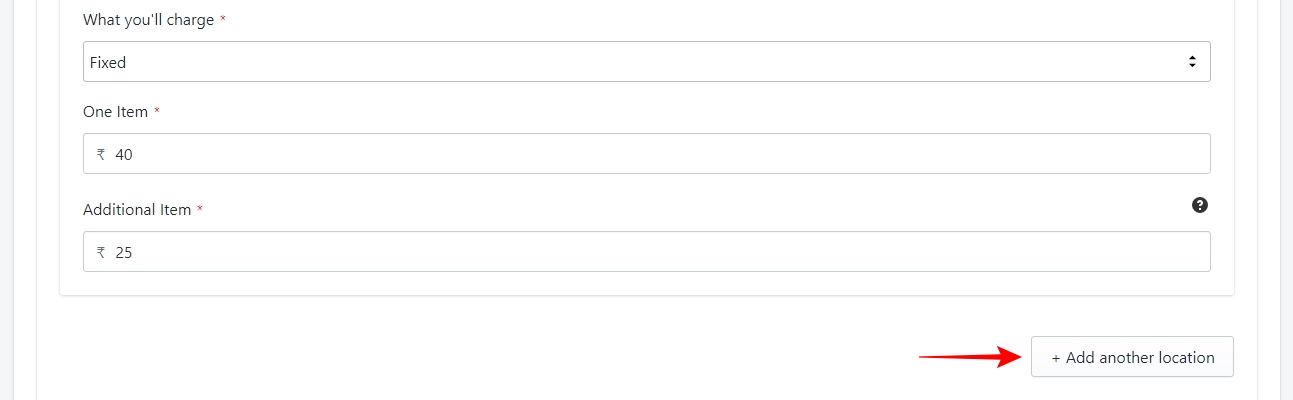
Add Another Location
Up until this point in the shipping template, we have discussed every detail that you need to provide for shipping in your own country (the country where your shop is located). But what if you want to ship your products to multiple countries at the same time?
In such a case, you can add multiple locations to your shipping template by clicking on the ‘Add another location’ button as shown in the image below.
Once you have added another location, a new Standard Shipping panel will appear beside the original one. You can see the image below for reference.
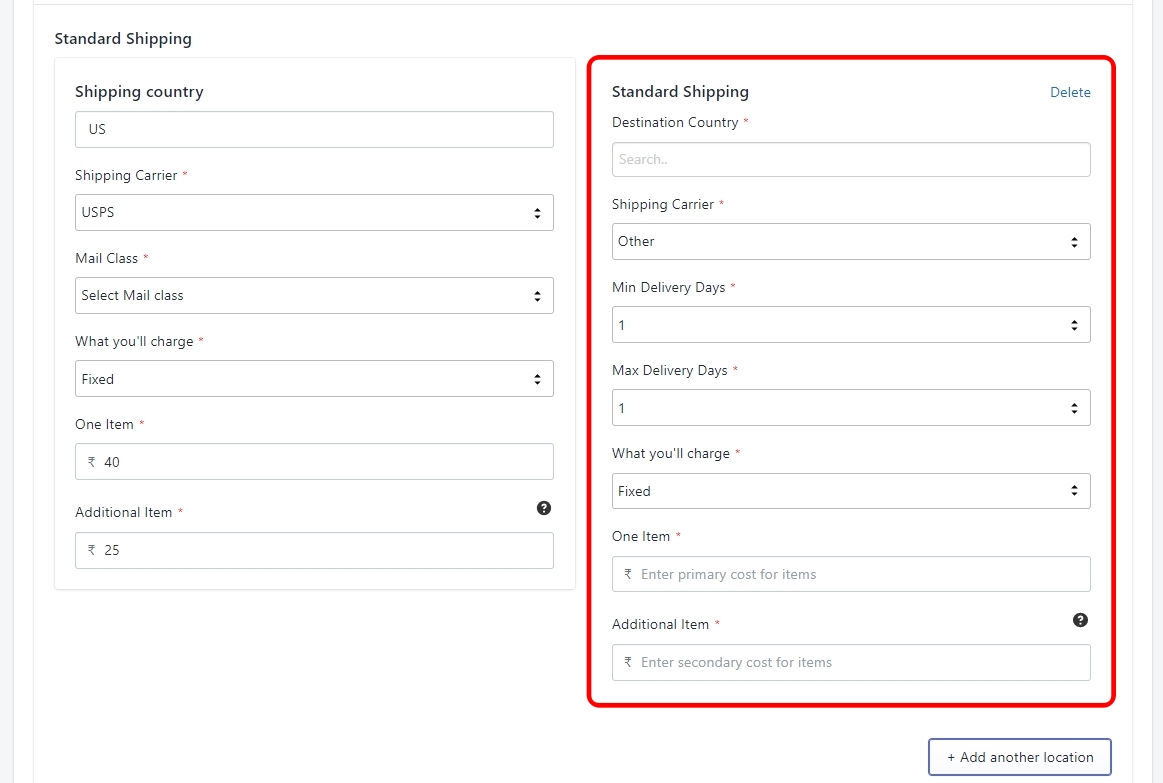
In this new panel for the second shipping location, you need to mention the Destination Country, but other than that, all other fields are the same as we discussed earlier. You can add all the different locations to your shipping template where you are planning to sell or already selling your products. And with this, you have successfully created a shipping template for your profile. All that’s left is to give a name to your template and save it.
Template name
You should give a unique name to your shipping template so that you can easily find it in the future. You may or may not need to create many shipping templates based on how many countries you are shipping in so it’s always a good practice to give relevant names to your templates.
Finally, click on the checkbox at the bottom of the page and then click on ‘Next’ to save your default profile and you will be taken to the app dashboard which we will discuss next.
Note: If you encounter any issues that prevent you from completing the onboarding steps for the CedCommerce Etsy Integration App, please contact our support channels for further assistance.
The term 'Etsy' is a trademark of Etsy, Inc. This application uses the Etsy API but is not endorsed or certified by Etsy, Inc.


