
Linio Configuration Settings
To set up the configuration settings in the Prestashop Admin panel
- Go to the Prestashop Admin panel.
- In the left navigation panel, place cursor on the Linio Integration menu.
The menu appears as shown in the following figure:
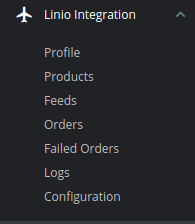
- Click on Configuration.
The Configuration page appears as shown in the following figure:
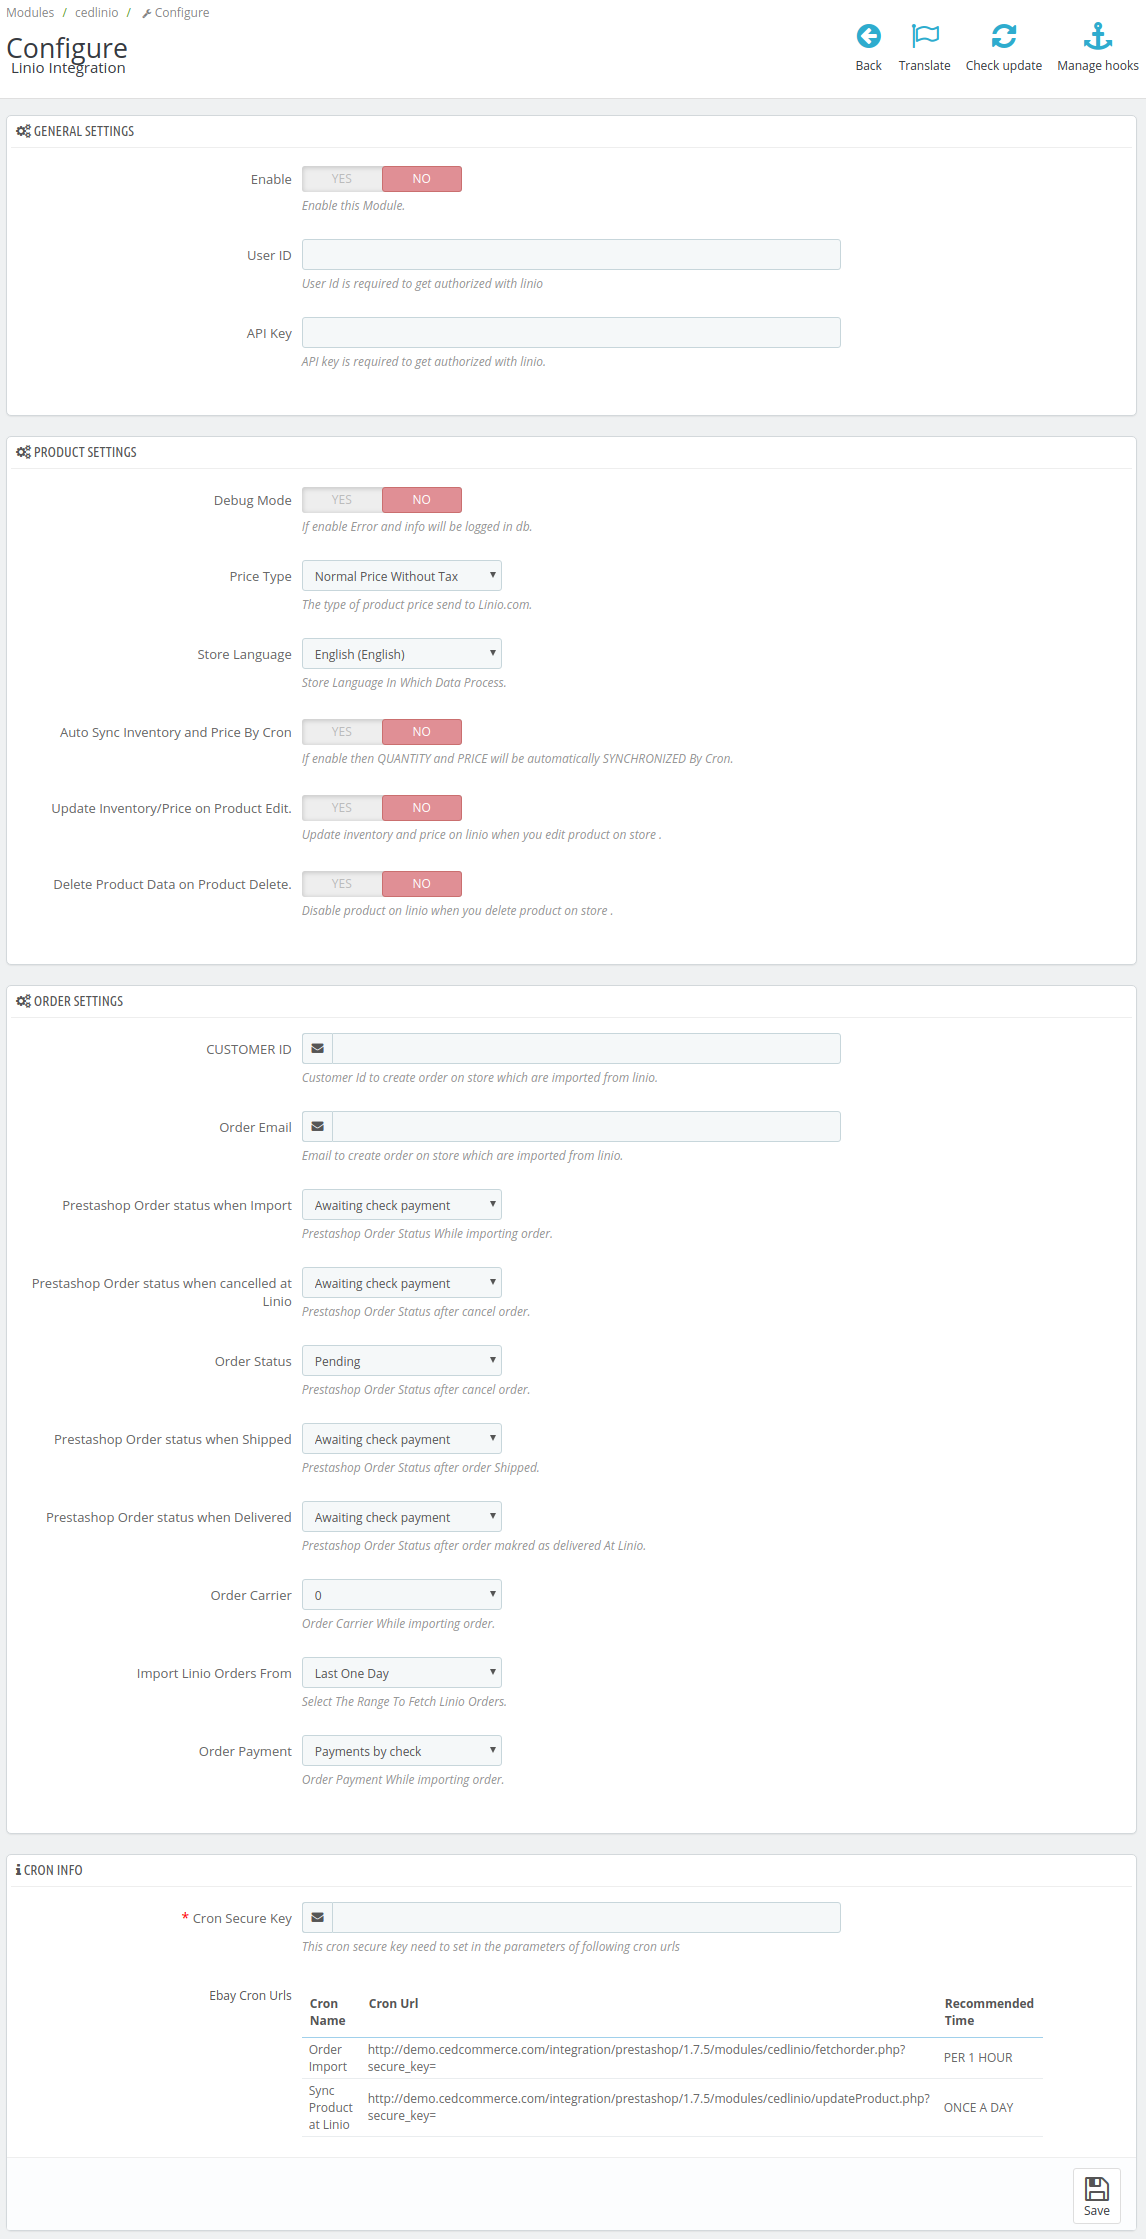
- Go to General Settings.
The tab appears as shown below:
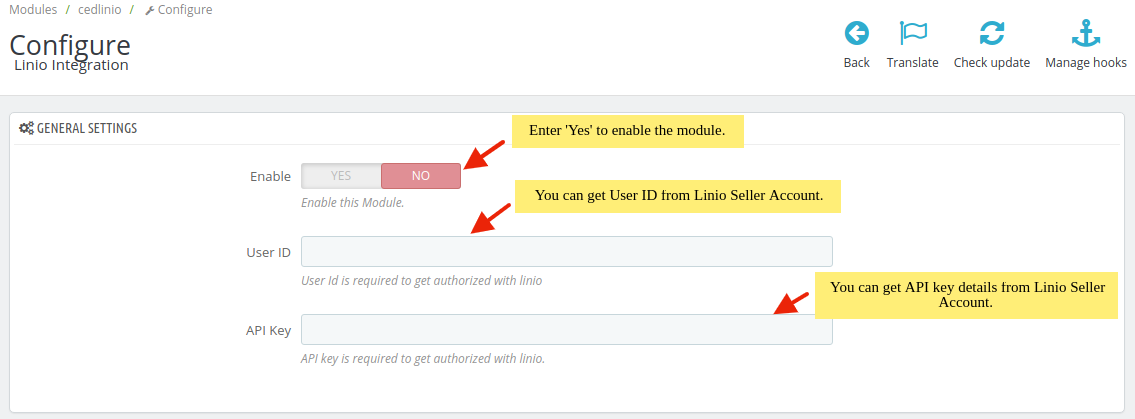
- In the General Settings, do the following information:
- In the Enable box, select Yes to enable the module.
- In the User ID box, enter the User id from Linio Seller account.
- For the API key, you need to follow these steps:
- Go to https://sellercenter.linio.cl
- Login to your Linio Seller Account.
- After that Go to Settings and click on Manage Users button.
The page appears as shown in the figure:
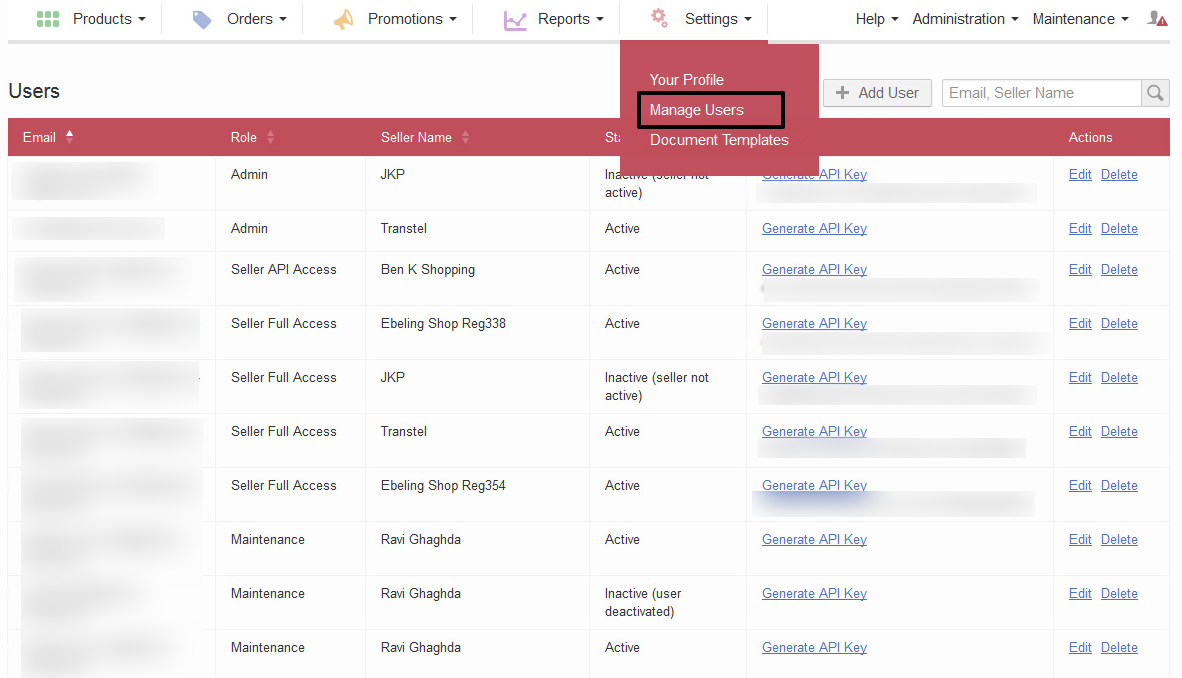
- In the you can see email id and API key, if in case there’s no user then you can click on Add User button as shown in the figure:

- From here, you can copy email id and API key and paste it in your Linio Configuration settings.
- Now Go to Product section.
The tab appears as shown in figure:
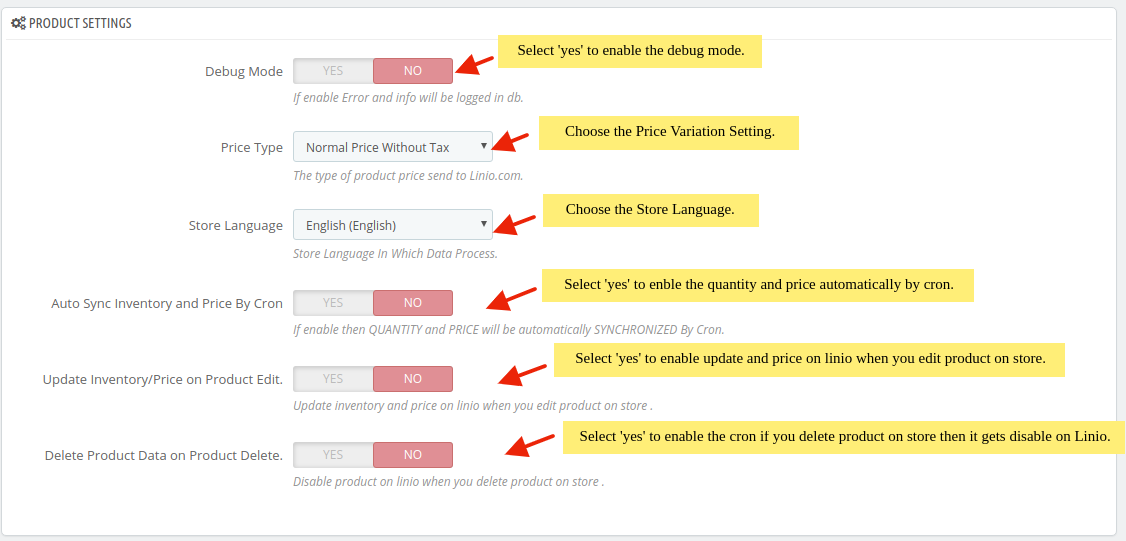
- In the Product Settings, do the following steps:
- In the Debug Mode, choose Yes to enble the debug mode,
- In the Price Type, choose the price variations.
- In the Store language, select your store language.
- In the Auto Inventory and Price by cron, select Yes to enable the auto update inventory and price cron.
- In the Update Inventory/Price on Product Edit, select Yes to enable the update inventory/Price on linio when you edit product on store.
- In the Delete Product Data on Product delete, select Yes to enable the cron if you delete product on store then it gets disable on Linio.
- Now Go to Order Settings.
The tab appears as shown in the following figure:
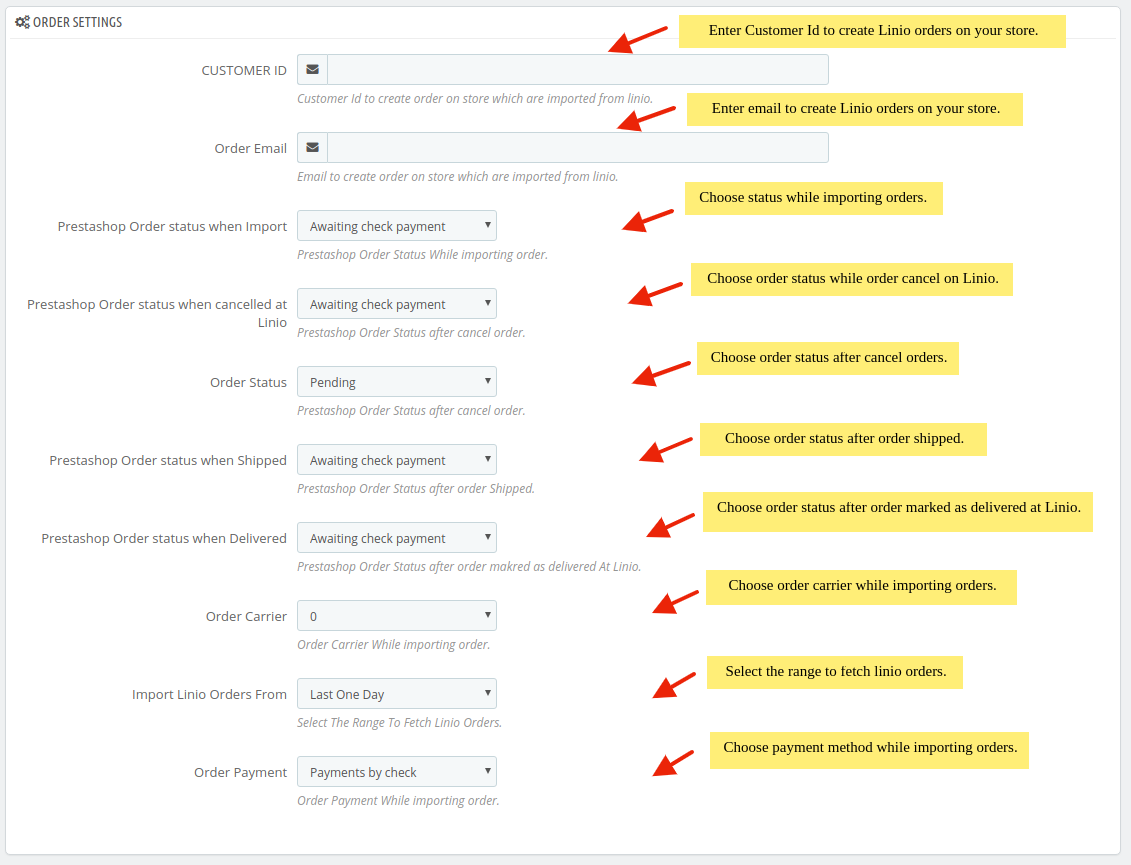
- In the Order Settings, do the following steps:
- In the Customer ID, enter the customer id to create order on store which are imported from Linio.
- In the Order Email box, enter the email to create order on store which are imported from Linio.
- In the Prestashop order status when import, select the status when linio orders import in Prestashop order section.
- In the Prestashop order status when cancelled at Linio, select the status when order cancel on Linio.
- In the Order Status, select the status after cancel orders.
- In the Prestashop order status when Shipped, select the status when after the orders gets shipped.
- In the Prestashop order status when delivered, select the status after order marked as delivered at linio.
- In the Order Carrier, choose the order carrier through which you ship the order.
- In the Import Linio orders from, select the range to fetch to fetch order.
- In the Order Payment, choose your payment method.
- Lastly, Go to Cron Settings.
The tab appears as shown in the figure:
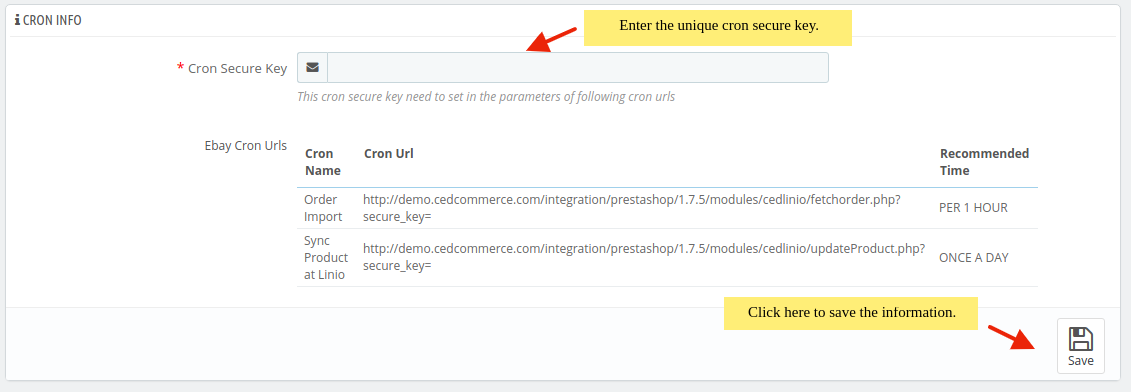
- In the Cron Settings, do the following steps:
- In Cron Secure Key, you can make a combination of secure key consisting of the alphabet, number, and special characters.
- You may see cron URL, name and recommended time.
- Click the Save button and the configuration will be saved.
×


