
3.Fruugo Configuration Settings ↑ Back to Top
After installing the Fruugo PrestaShop Integration module, the store owner (admin) has to set up the Fruugo Integrations configurations. Prior to this, the admin has to first create a seller account on Fruugo seller panel. Once the seller account is created and is approved by Fruugo, the store owner can use the Fruugo Username and Password while setting up the Fruugo Configuration settings in the PrestaShop Admin panel.
To set up the configuration settings in the PrestaShop Admin panel
- Go to the Prestashop Admin panel.
- In the left navigation panel, place cursor on Modules menu.
The menu appears as shown in the following figure:

- Click Modules & Services.
The page appears as shown in the following figure:

- In the right panel, click the Installed modules tab.
The Manage installed modules page appears as shown in the following figure:
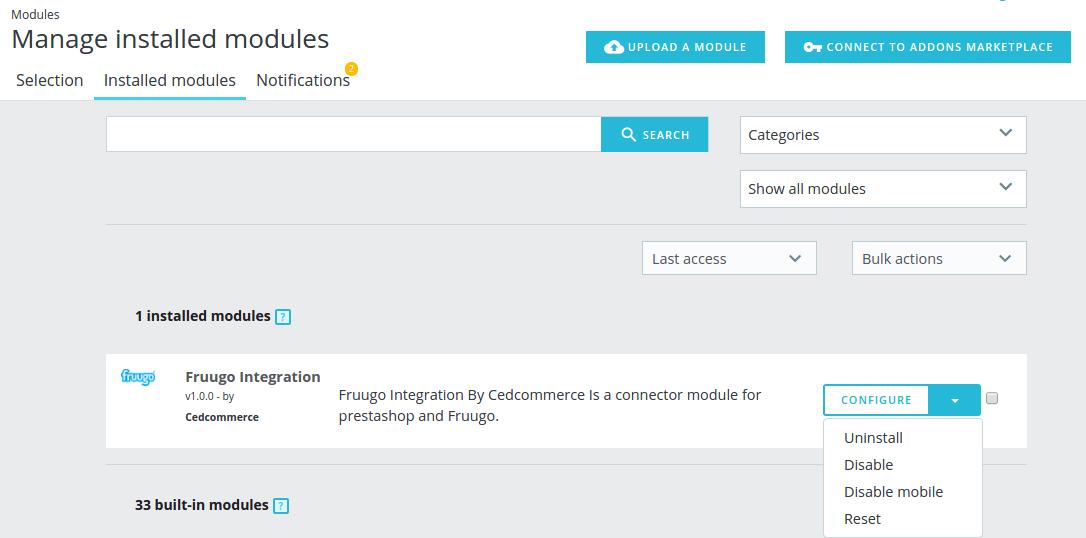
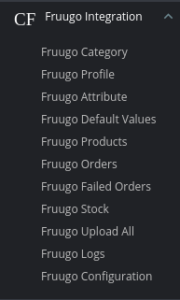
Other than configuration, the admin can un-install the module, disable the module, disable mobile, and reset the settings. Click the respective option to perform these tasks. - On the left navigation bar of your dashboard, place cursor on Fruugo Integration, and click Fruugo Configuration button.
The Configuration page appears as shown in the following figure:
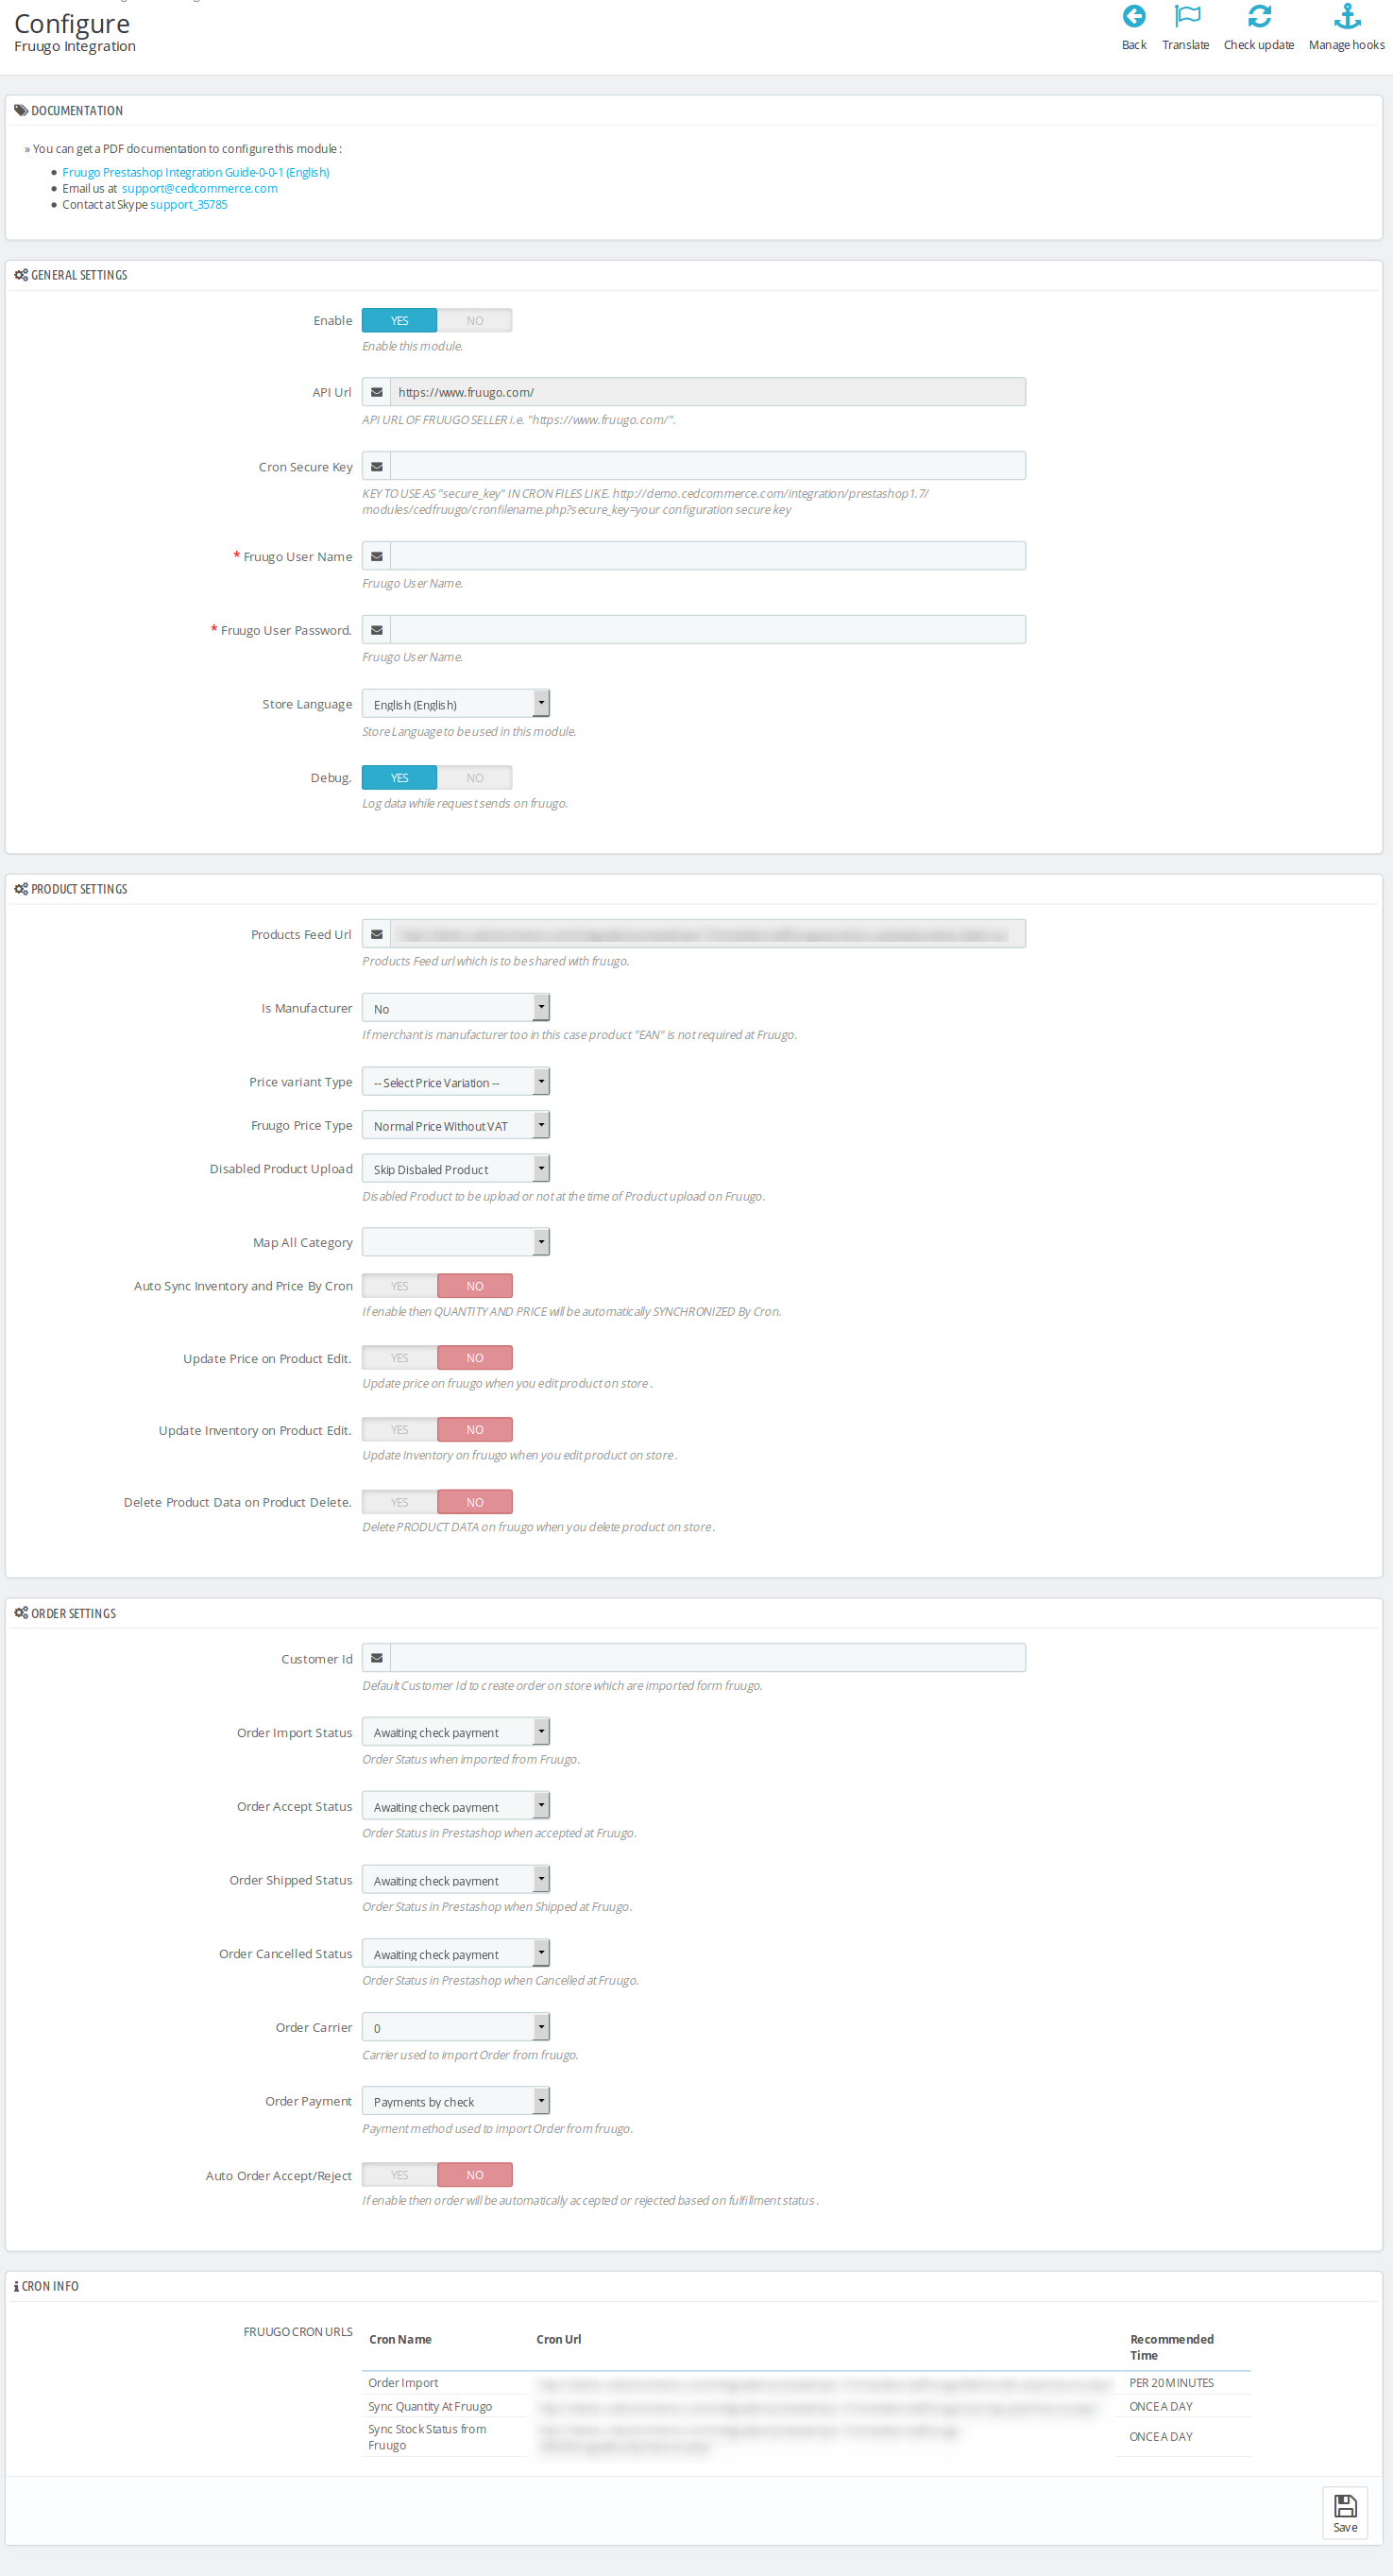
General Settings
- Under General Settings, do the following steps:
- Click the YES button in Enable to enable the module.
- In the API URL box, enter the required URL.
- Scroll down to the other fields:
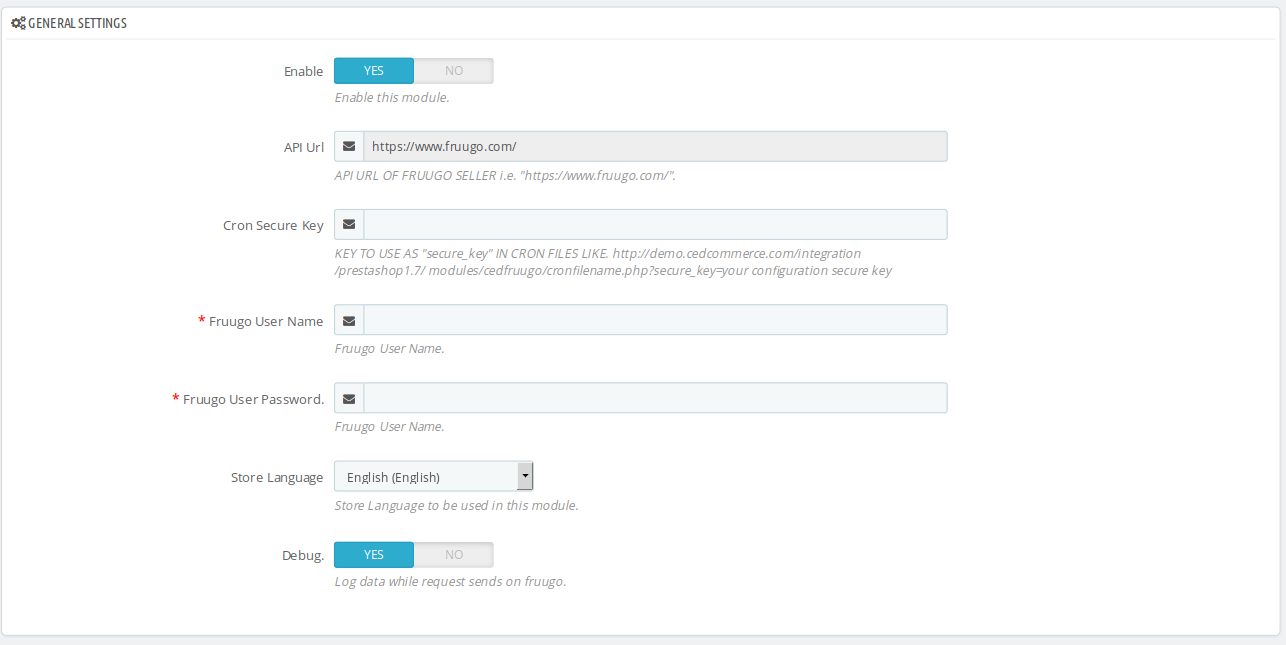
- In the CRON SECURE KEY box, enter the key value.
- In the Fruugo User Name box, enter the Fruugo seller account Username.
- In the Fruugo User Password box, enter the Fruugo seller account Password.
- In Store Language, select the language of your store.
- In Debug, select YES if you want the data log to be created.
Product Settings
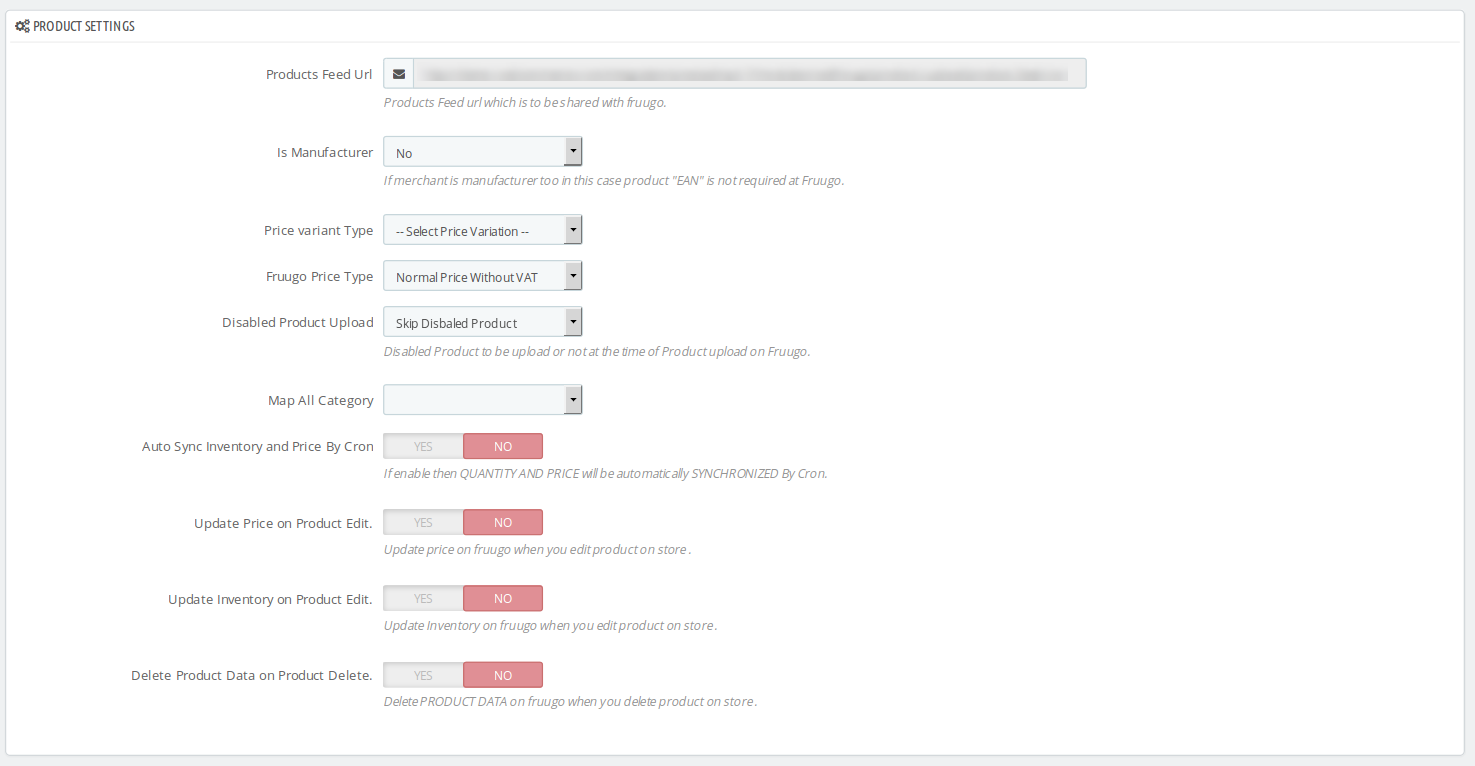
- In Product Feed URL, enter the URL which needs to be shared with Fruugo.
- In Is Manufacturer, Yes is to be selected if the admin is manufacturer too.
- In Price Variant Type, select the price option that you want for your products on Fruugo marketplace.
- Regular Price: If you don’t want any change in the price of your PrestaShop store products on Fruugo marketplace.
- Increase Fixed Amount: You may select this option if you want your product price to be increased on Fruugo as compared to your PrestaShop store. If you select this option, a box appears as shown below:

- By choosing this option, you may enter in the Price Variant Value box the amount by which you want your product price to be Increased on Fruugo as compared to your PrestaShop store. Suppose if you enter 50 in this field and your product is for 100 on your PrestaShop store, then the amount that your product will be available for on Fruugo would be 150 (as the amount entered is 50 for Increase by fixed price, so the price entered would be added to the price for which product is available on PrestaShop).
- Decrease Fixed Amount- You may use this option if you want the price of your PrestaShop product to be decreased on Fruugo.
- By choosing this option, you may enter in the Price Variant Value box the amount by which you want your product price to be decreased on Fruugo as compared to your PrestaShop store. Suppose if you enter 50 in this field and your product is for 100 on your PrestaShop store, then the amount that your product will be available for on Fruugo would be 50 (as the amount entered is 50 for Decrease by fixed price, so the price entered would be subtracted from the price for which product is available on PrestaShop).
- Increase Fix Percentage- You may use this option if you want the price of your PrestaShop product to be increased on Fruugo by a certain percent.
- By choosing this option, you may enter in the Price Variant Value box the percentage amount by which you want your product price to be increased on Fruugo as compared to your PrestaShop store. Suppose if you enter 20 in this field and your product is for 100 on your PrestaShop store, then the amount that your product will be available for on Fruugo would be 120 (as 20% of 100 is 20 which gets added to 100).
- Decrease By Fix Percent- You may use this option if you want the price of your PrestaShop product to be decreased on Fruugo by a certain percent.
- By choosing this option, you may enter in the Price Variant Amount box the percentage amount by which you want your product price to be decreased on Fruugo as compared to your PrestaShop store. Suppose if you enter 20 in this field and your product is for 100 on your PrestaShop store, then the amount that your product will be available for on Fruugo would be 80 (as 20% of 100 is 20 which gets subtracted from 100).
- In Fruugo Price Type, choose from Normal Price with VAT and Normal Price without VAT, as per your requirement.
- In Disabled Product Upload, select the status for your products which are disabled, from Skip Disabled Products and Upload with Out Of Stock status.
- In Map All Category, select one from the categories to map it with PrestaShop category, for all your products.
- In , select Yes if you want to enable the quantity and price synchronization by Cron.
- In Update Price on Product Edit, select Yes if you want the price to be updated on editing the product. You may disable it by selecting Disable.
- In Update Inventory on Product Edit, select Yes if you want the inventory to be updated on editing the product. You may disable it by selecting Disable.
- In Delete Product Data on Product Delete, select Yes if you want to delete product data on Fruugo when you delete product on store.
Order Settings
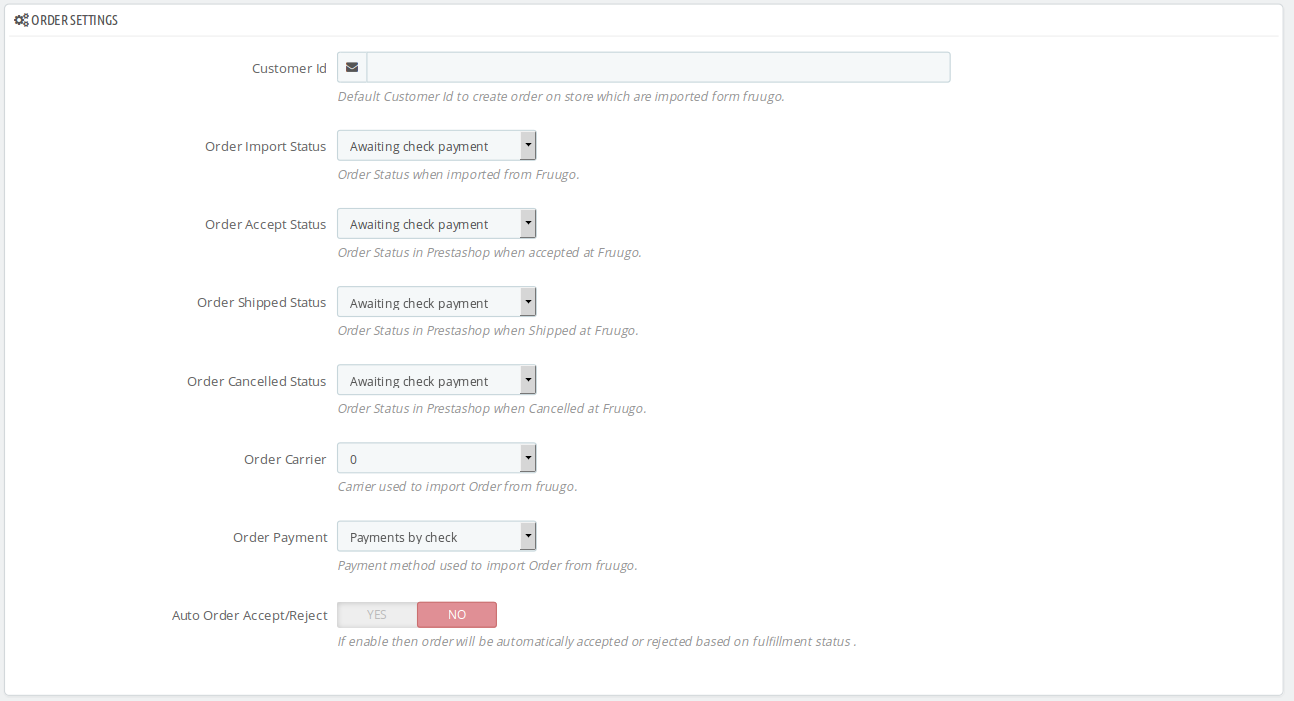
- In the Customer ID box, enter the customer Id which will be used to create the order that is imported from Fruugo to the store.
- In the Order import status, select the order status when it is imported from Fruugo.
- In the Order accept status, select the order status when it is accepted at Fruugo.
- In the Order shipped status, select the order status required to show after order is shipped.
- In the Order canceled status, select the order status required to show after order has been canceled.
- In the Order carrier, select the order carrier required while importing the order.
- In the Order Payment list, select the type of order payment required while importing the order.
- In Auto Order Accept/Reject, if Yes is selected, order will be automatically accepted or rejected based on fulfillment status.
Cron Info

- You can see Cron Info in this section. It appears as set by you on the server.
- You may see cron url, name and recommended time.
Click the Save button and the configuration will be saved.
×


