
Coolshop Prestashop Configuration Settings
After installing the Coolshop PrestaShop Integration module, the store owner (admin) has to set up the Coolshop Integrations configurations. Prior to this, the admin has to first create a seller account on Coolshop seller panel. Once the seller account is created and is approved by Coolshop, the store owner can use the Coolshop Username and Password while setting up the Coolshop Configuration settings in the PrestaShop Admin panel.
To set up the configuration settings in the PrestaShop Admin panel
- Go to the Prestashop Admin panel.
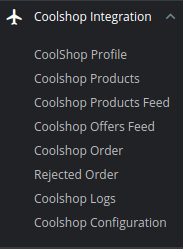
- In the left navigation panel, place cursor on Coolshop Integration and the section expands as:

- Now click on Coolshop Configuration.
The tab appears as shown in the following figure:
- Click on Coolshop Configuration Settings.
The tab appears as shown in the following figure:
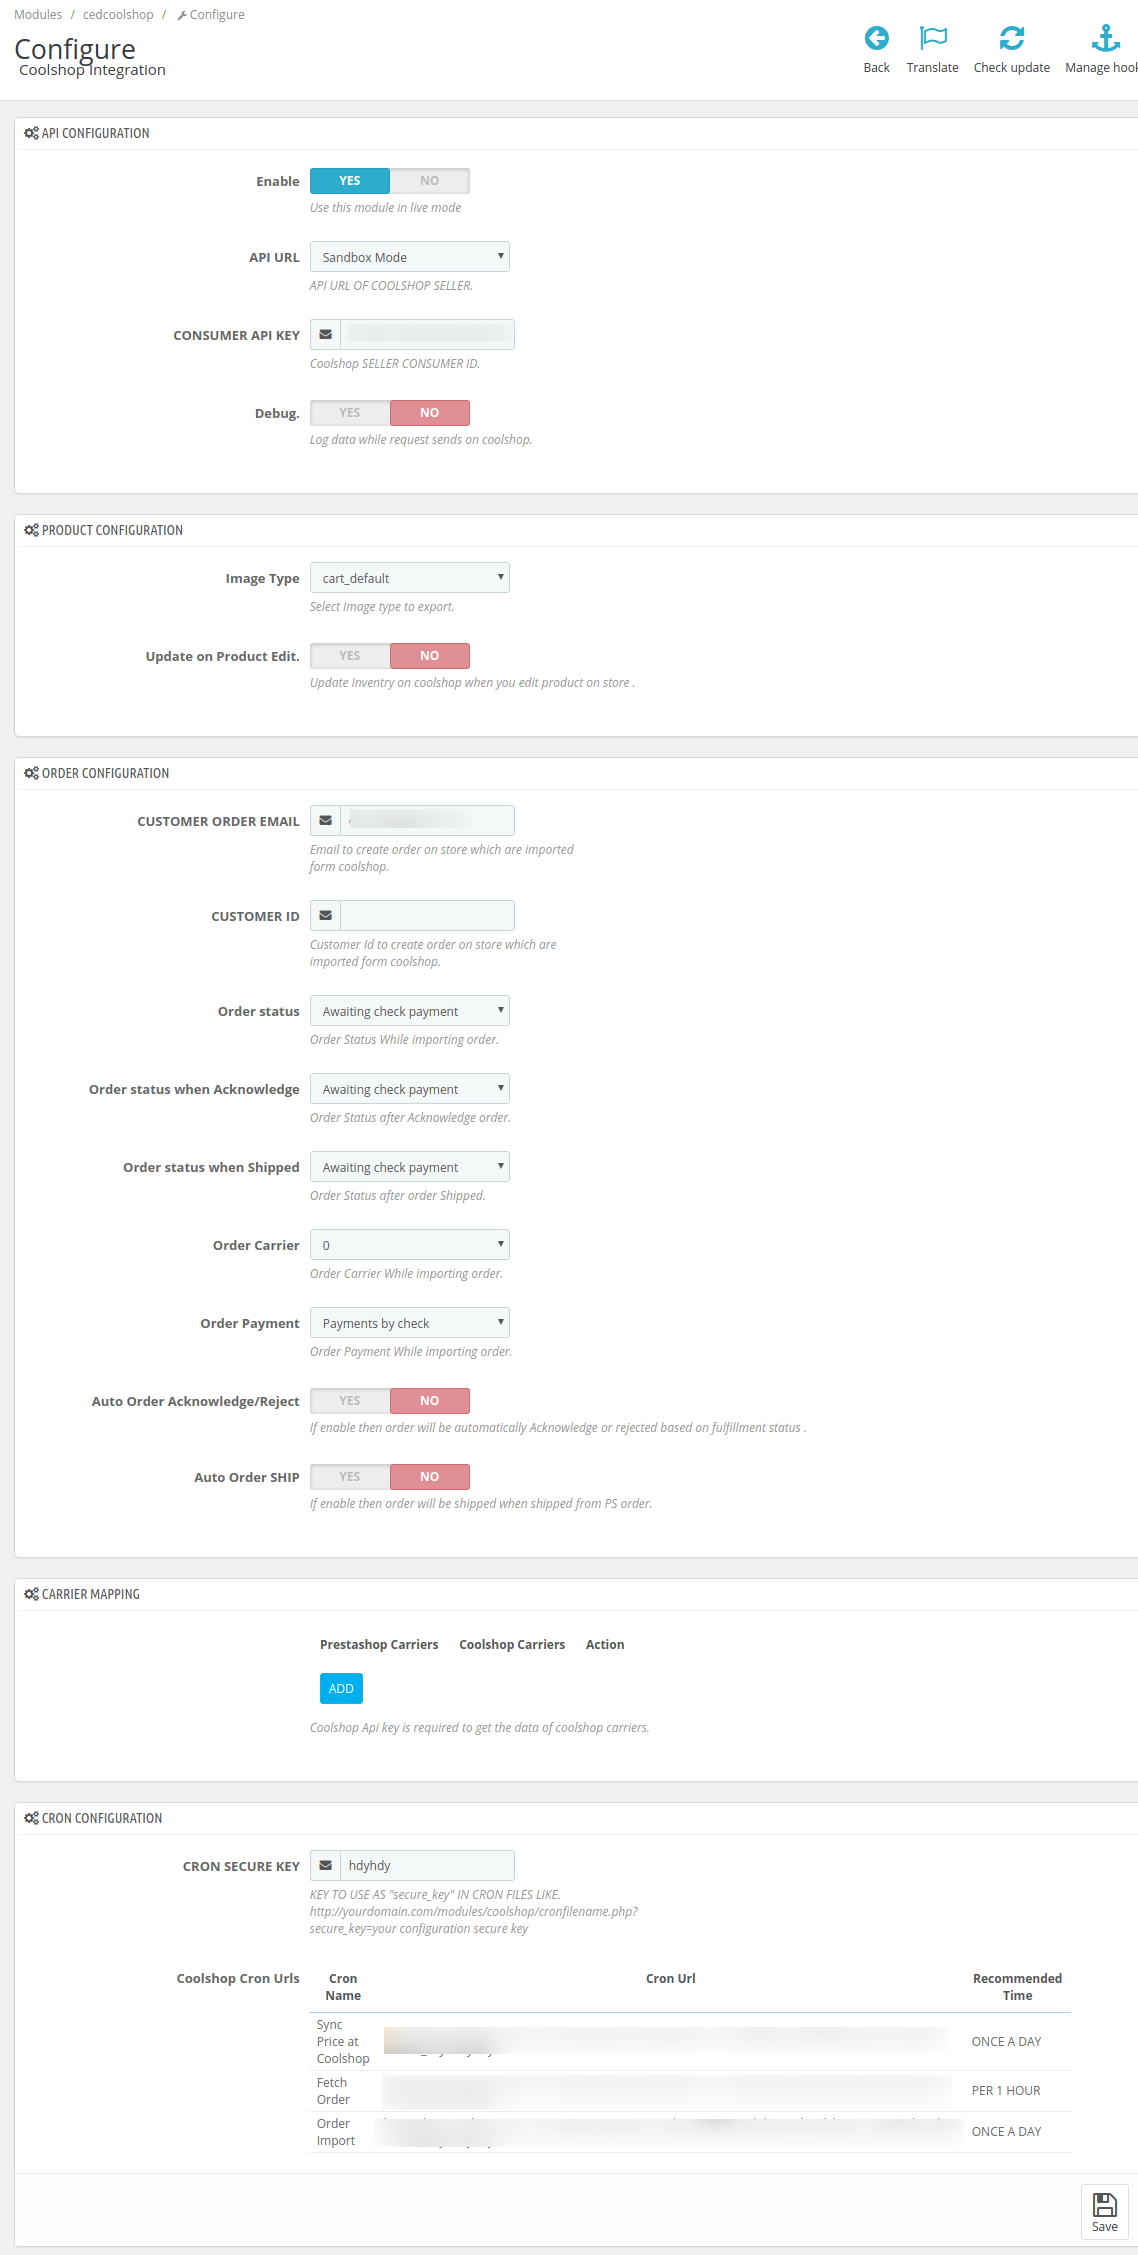
- In the Coolshop Configuration settings, do the following steps:
- In the Enable Section, select the Yes option to enable the Coolshop module in live mode.
- In the API URL section, select the mode from where you can be retrieved API URL from seller panel.
- In the Consumer API key, enter the unique Consumer API key retrieved from the Coolshop seller panel for your store.
To retrieve the API Key from the Coolshop Seller Account- Go to this link for Live Mode or Go to this link for SandBox Mode. (It should be in accordance with the Mode that you will be choosing while doing the Configuration).
The Login page appears as shown in the following figure:

- Enter the login credentials, and then click the Sign In button.
The page appears as shown in the following figure:
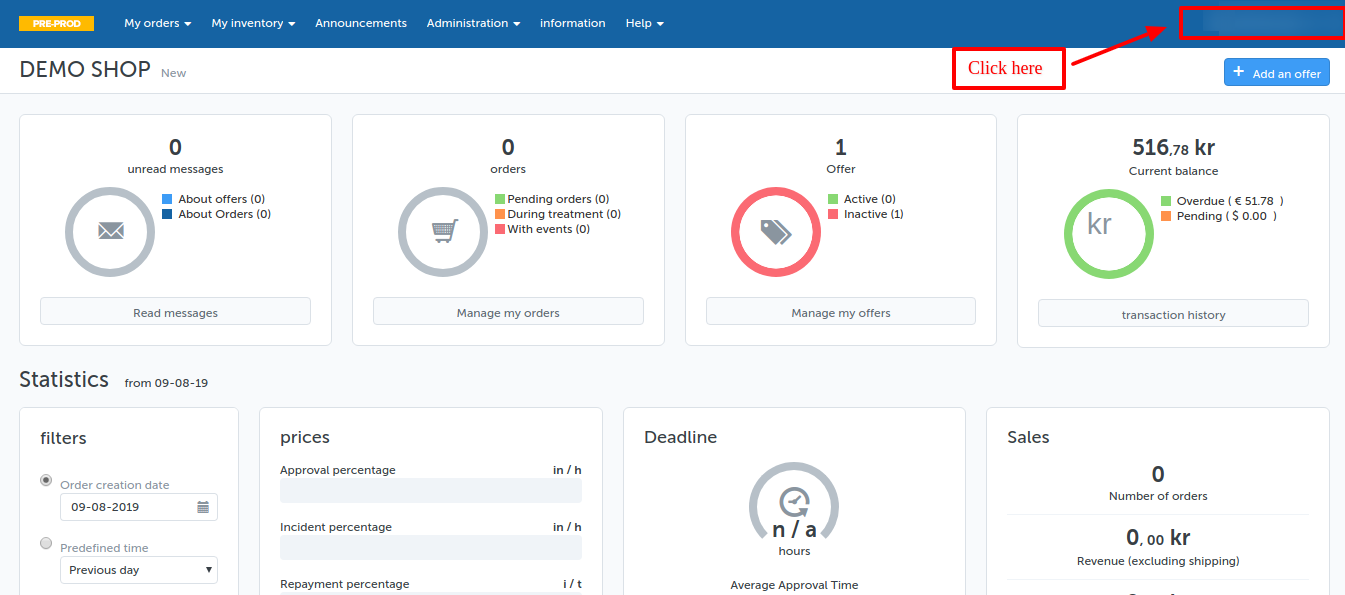
- Click the username as highlighted in the figure.
The page appears as shown in the following figure:
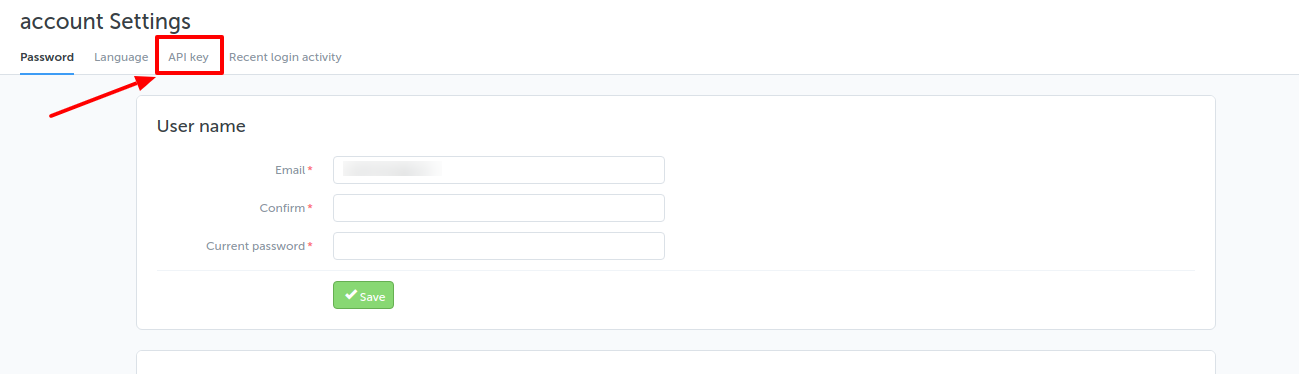
- In the left navigation panel, click the API Key menu.
The API Key value appears in the right panel as shown in the following figure:
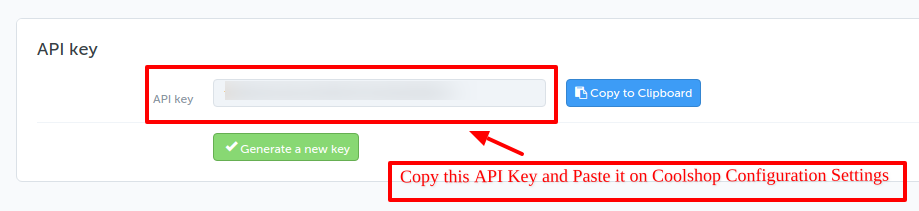
- Click the Copy to clipboard button to copy the API key value.
- Save the corresponding value in some text editor or the in Word file to use it later on while setting up the configuration in the Opencart store admin panel.
- Go to this link for Live Mode or Go to this link for SandBox Mode. (It should be in accordance with the Mode that you will be choosing while doing the Configuration).
- In the Debug section select Yes if you wish to Log data while the request is being sent on Coolshop.
- Now in the Product Configuration section, do the following steps:
- In the Image Type option, you can select the image type you want to export.
- In the Update on the Product Edit box, select the Yes option to update Inventory on Coolshop when you edit a product on the store.
- Now in the Order Configuration section, do the following steps:
- In the Customer Order Email, you need to provide the Email to create order on the store which is imported from Coolshop.
- In the Customer Id section, you can enter your unique Customer Id which is used to create order on the Prestashop store which is imported from Coolshop.
- In the Order status, select the order status to appear while importing orders.
- In the Order status when Acknowledge, select the order status to appear when the order gets acknowledged.
- In the Order status when shipped, select the order status to appear when the order has been shipped.
- In the Order Carrier, select the order carrier set for particular orders while importing the Coolshop order.
- In the Order Payment Method, select the order payment method set for each order while importing the Coolshop order.
- In Auto Order Acknowledge/Reject, if Yes is selected, the order will be automatically accepted or rejected based on fulfillment status.
- In the Auto Order Ship, is Yes is selected, then the order will be shipped when shipped from Prestashop order.
- In the Carrier Mapping section, you can map Prestashop carrier to the Coolshop carrier.
Note: Coolshop API key is required to get the data of Coolshop carriers. - In the Cron configuration settings, do the following steps:
- In the Cron Secure Key, enter your Cron URL secure key.
Note: KEY TO USE AS “secure_key” IN CRON FILES LIKE. http://yourdomain.com/modules/coolshop/cronfilename.php?secure_key=your configuration secure key - In the Cron URLs, you can see your cron URLs.
- In the Cron Secure Key, enter your Cron URL secure key.
- At completing the process, you need to click on the Save Config button on the bottom right of the page as shown in the figure below:

- A confirmation message appears as shown:

×


