
Default Configuration
Once the attributes are mapped properly, the next step is to configure default settings. Here you can enable or disable automatic product updates, upload and delete settings. Moreover, you can also set custom pricing for products on the Miravia marketplace. You can also map shipping carriers, order statuses, and brands.
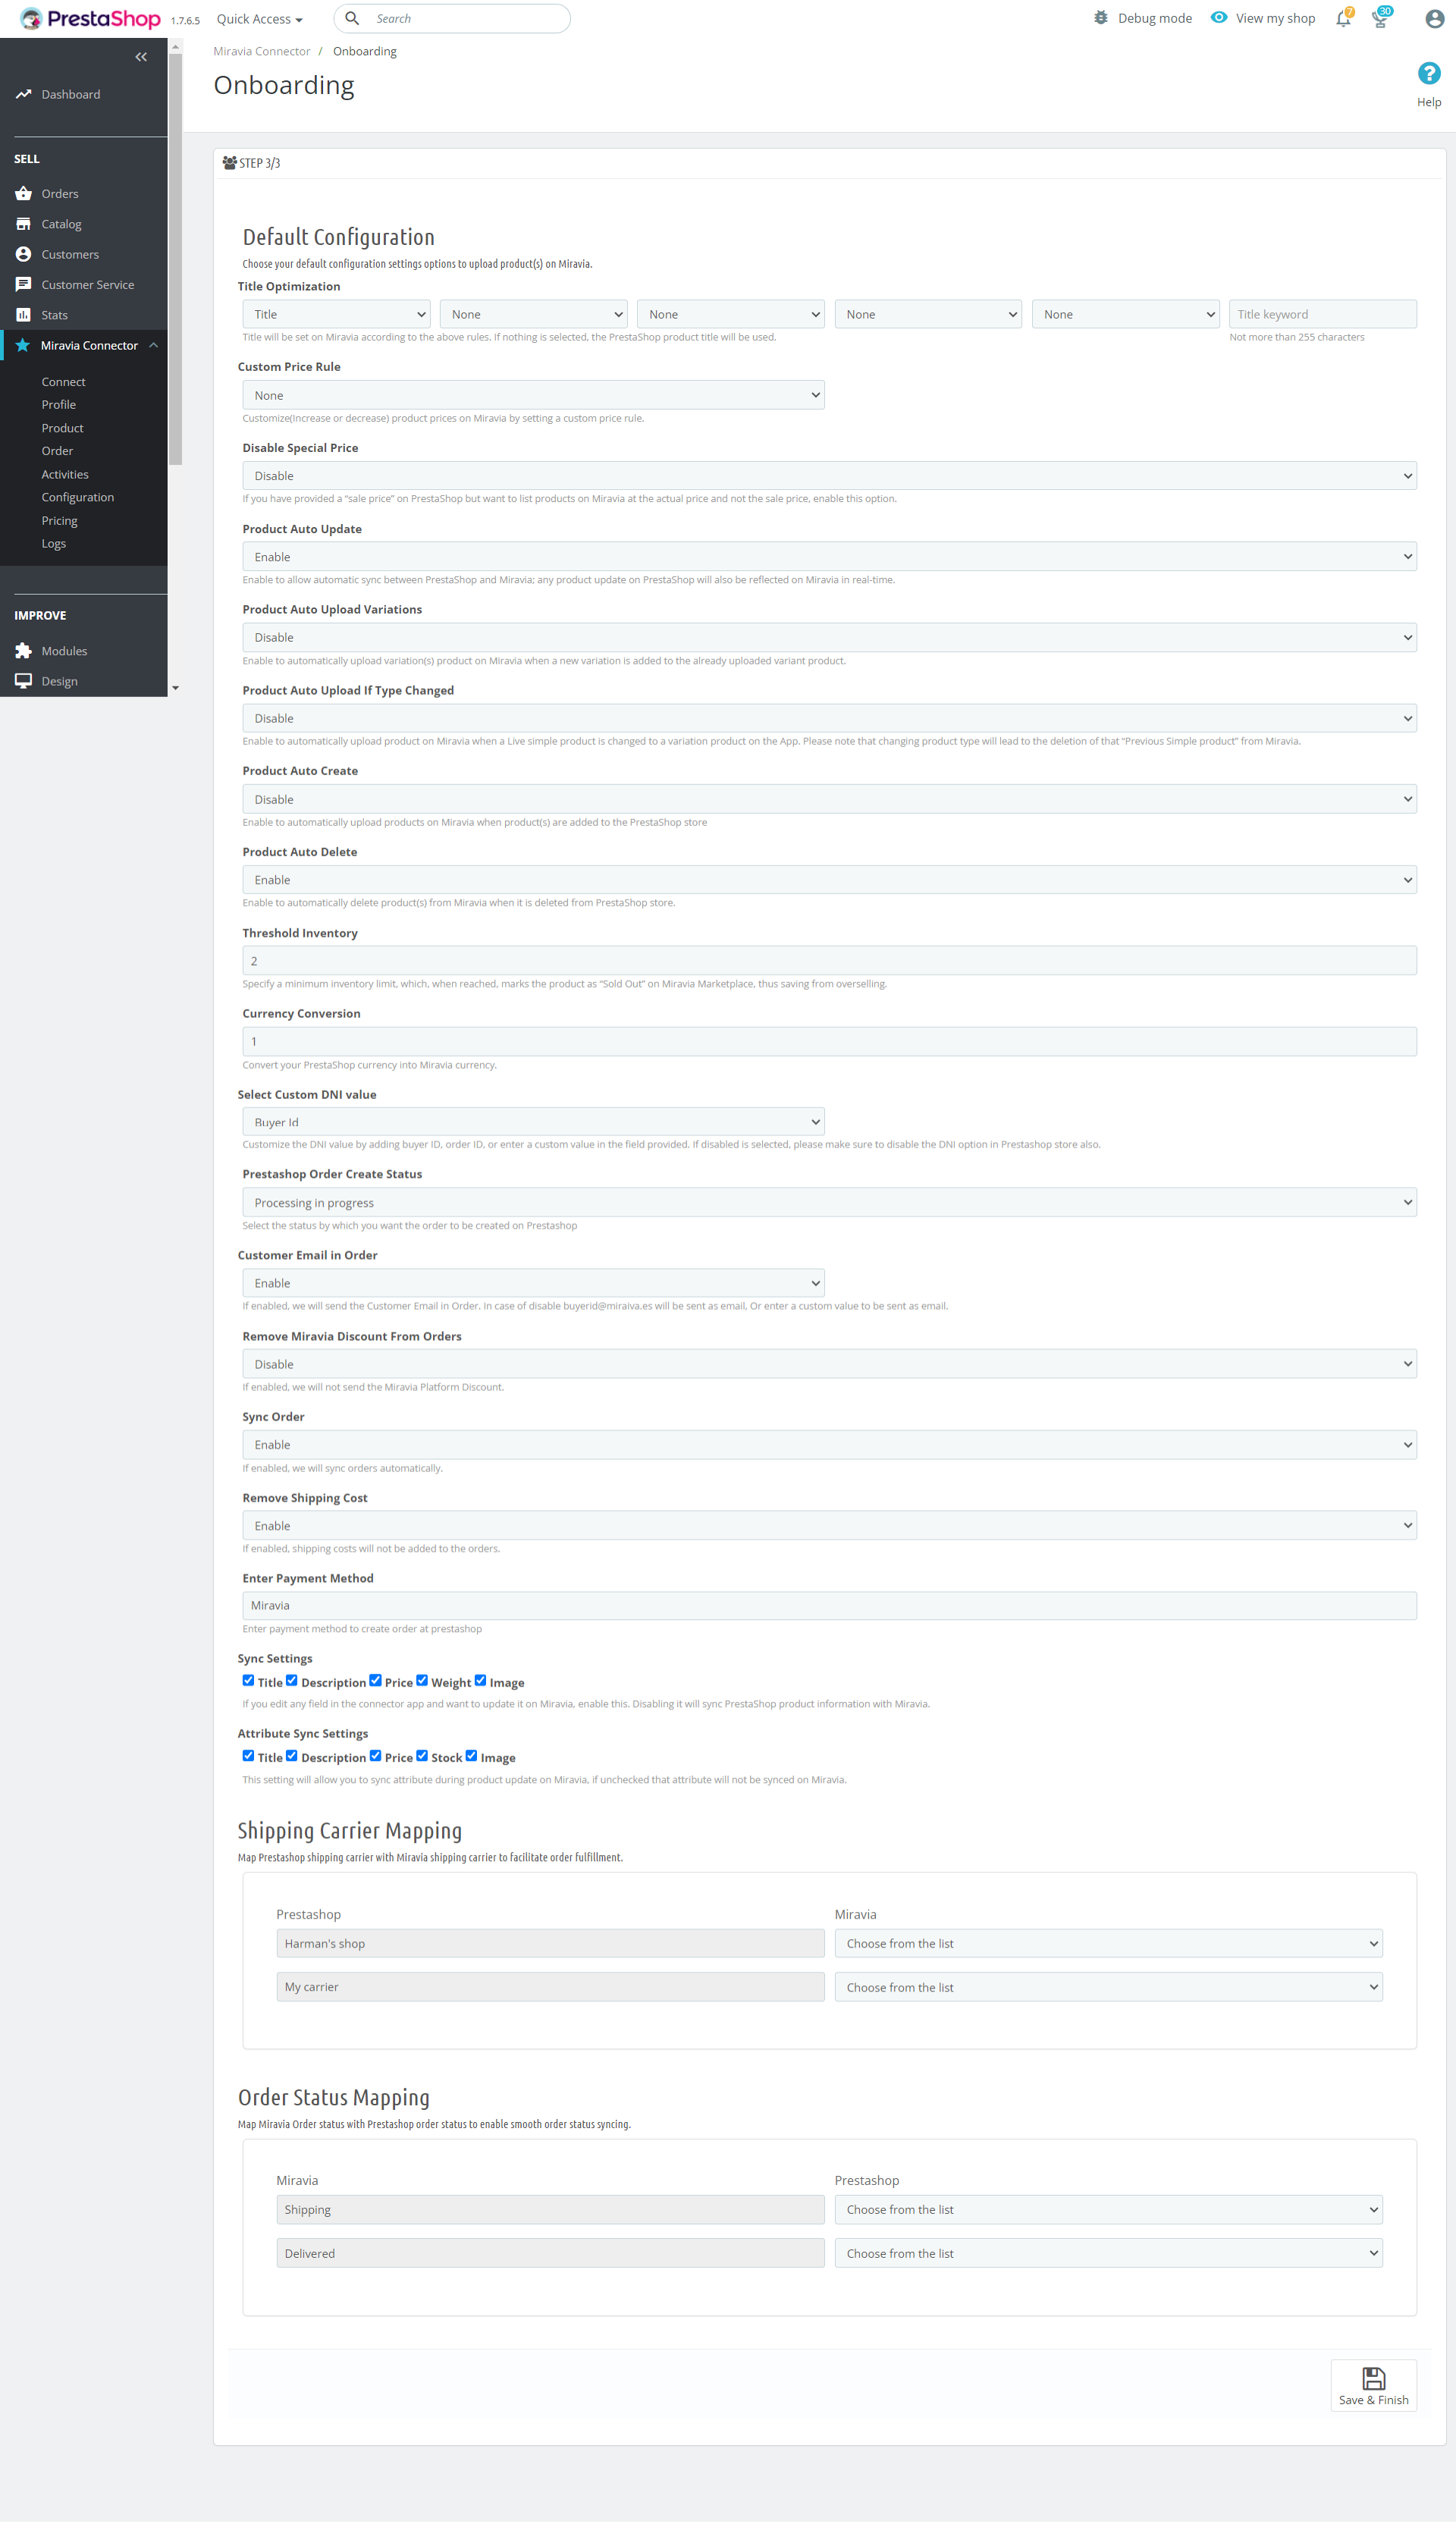
- Title Optimization: The title will be set on Miravia according to the above rules. If nothing is selected, the PrestaShop product title will be used.
- Custom Price Rule: Customize(Increase or decrease) product prices on Miravia by setting a custom price rule.
- Disable Special Price: If you have provided a “sale price” on PrestaShop but want to list products on Miravia at the actual price and not the sale price, enable this option.
- Product Auto Update: Enable to allow automatic sync between PrestaShop and Miravia; any product update on PrestaShop will also be reflected on Miravia in real time.
- Product Auto Upload Variations: Enable to automatically upload variation(s) product on Miravia when a new variation is added to the already uploaded variant product.
- Product Auto Upload If Type Changed: Enable to automatically upload product on Miravia when a Live simple product is changed to a variation product on the App. Please note that changing the product type will lead to the deletion of that “Previous Simple product” from Miravia.
- Product Auto Create: Enable to automatically upload products on Miravia when the product(s) are added to the PrestaShop store
- Product Auto Delete: Enable to automatically delete product(s) from Miravia when it is deleted from the PrestaShop store.
- Threshold Inventory: Specify a minimum inventory limit, which, when reached, marks the product as “Sold Out” on Miravia Marketplace, thus saving from overselling.
- Currency Conversion: Convert your PrestaShop currency into Miravia currency.
- Select Custom DNI value: Customize the DNI value by adding buyer ID, order ID, or enter a custom value in the field provided. If disabled is selected, please make sure to disable the DNI option in the PrestaShop store also.
- PrestaShop Order Create Status: Select the status by which you want the order to be created on PrestaShop
- Customer Email in Order: If enabled, the app will send the Customer Email in Order. In case of disabling, buyerid@miraiva.es will be sent as email, Or enter a custom value to be sent as email.
- Remove Miravia Discount From Orders: If enabled, we will not send the Miravia Platform Discount.
- Sync Order: If enabled, we will sync orders automatically.
- Remove Shipping Cost: If enabled, shipping costs will not be added to the orders.
- Enter Payment Method: Enter the payment method to create an order at PrestaShop.
- Sync Settings: If you edit any field in the connector app and want to update it on Miravia, enable this. Disabling it will sync PrestaShop product information with Miravia.
- Attribute Sync Settings: This setting will allow you to sync attributes during product updates on Miravia, if unchecked that attribute will not be synced on Miravia.
- Save the changes; you are good to go.
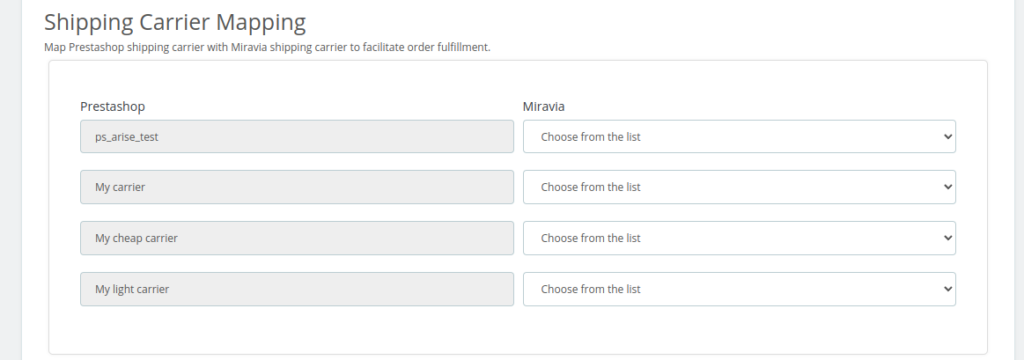
For Example, if the shipping carrier in your PrestaShop store is ABC, you can map it with UPS. So, when you ship products using the ABC shipping carrier from your PrestaShop account, it will automatically be reflected as a UPS shipping carrier in your Miravia account.
12. Order Status Mapping: The next step is to map the order status. As on the Miravia marketplace, there are three accepted order statuses, i.e., shipping, delivered, and canceled. On the contrary, PrestaShop may have varied order statuses. So you must map the relevant PrestaShop order status with the Miravia order status.
Once all the changes are saved, proceed. Next, you will be redirected to the profile page.


