
Cdon Configuration Settings
- Once the extension is successfully installed in the PrestaShop store, the CDON INTEGRATION menu appears on the left navigation bar of the Prestashop Admin panel.
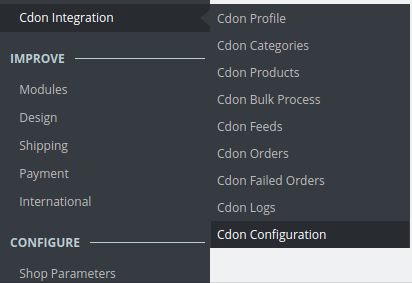
- Click on Cdon Configuration and the configuration page will open.
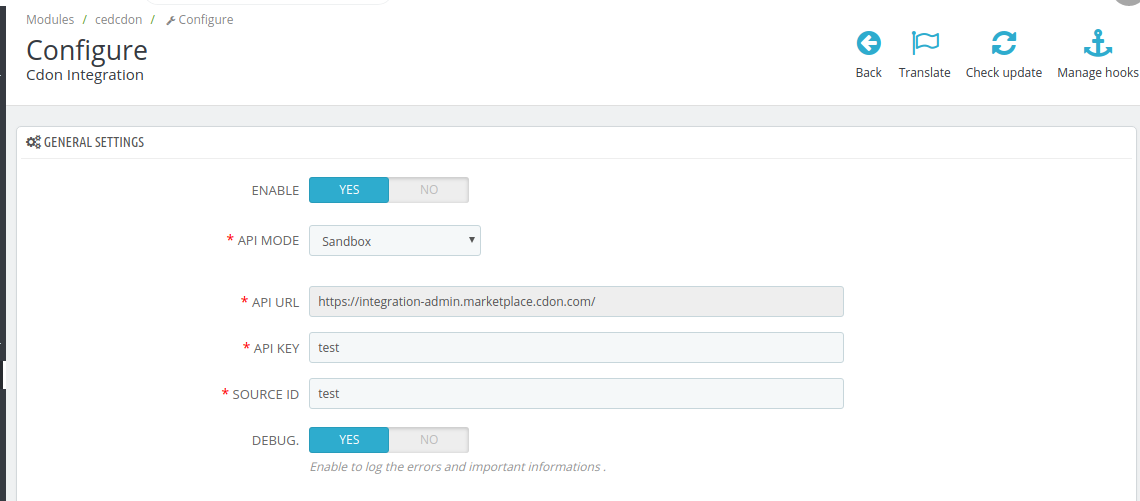
General Settings:
- In the Enable part, select Yes so that your module gets enabled.
- In the API Mode, select Sandbox or live as per your requirement.
- In the API Url bar, enter the URL of the Seller Panel of Cdon Marketplace.
- In the API Key bar, enter the Secret Key that you had retrieved from the Cdon Seller Panel.
- Enter the Source ID in the next column.
Product Settings: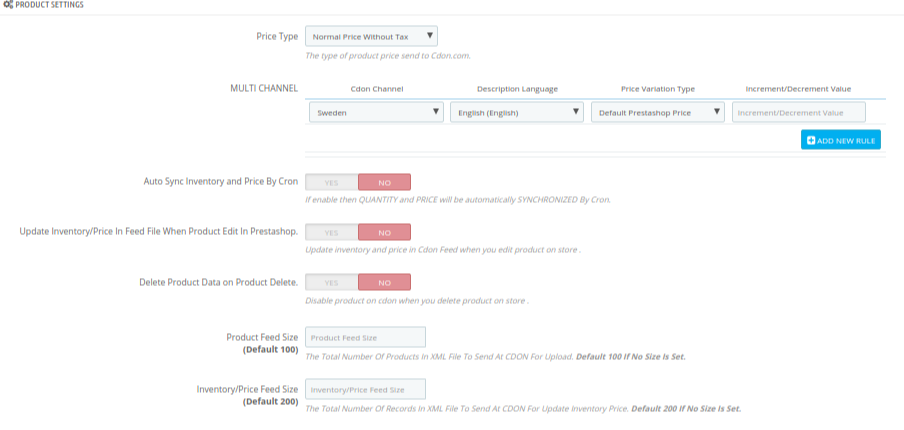
- In the Price Type, select either Normal Price Without Tax or Normal Price With Tax. Note that this is the type of product price to be sent to Cdon.com.
- In the next section,
- Click on Add new rule button,
- Choose the Country you wish to sell in under Cdon Channel section.
- Select the Cdon Price type variation to variate your Cdon price with your PrestaShop store.
- In the Description language, select the language in which you want the data to be processed.
- In the Auto Sync Inventory and Price By Cron, If enabled the inventory and price will automatically get sync with Cdon.
- In the Update Inventory/Price on Product Edit, select Yes or No, if you want the inventory and price to be updated on Cdon when you edit product on the store.
- In the Delete Product Data on Product Delete, select Yes or No, if you want to disable product on Cdon when you delete product on the store.
- Select Product Feed size and Inventory Feed Size.
Order Settings: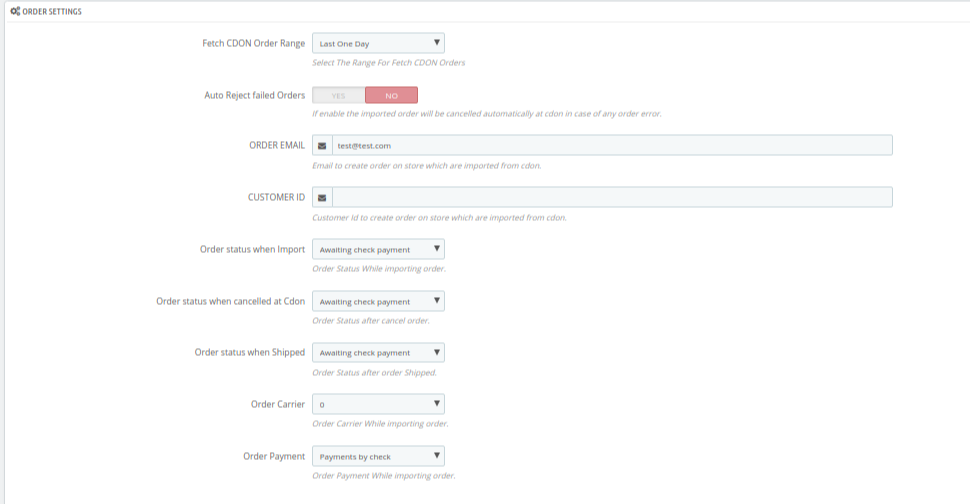
- Select the Fetch Cdon Order Range from the drop-down menu.
- Select Yes/No Under Auto Reject Failed Orders
- Enter the e-mail address in the section Order Email.
- In the CUSTOMER ID, enter the ID for customers to be used, for orders which are imported from Cdon.
- In the Import Cdon Order of status, select the status to appear when the order has been imported.
- In the Order status when canceled at Cdon, select the status to appear when the order has been canceled.
- In the Cdon Order shipment status, select the order status to appear when the order has been shipped.
- In the Order Carrier, select the order carrier set for orders which are imported from Cdon.
- In the Order Payment, select the order payment method set for each order which are imported from Cdon.
- The next section is Cron Info.
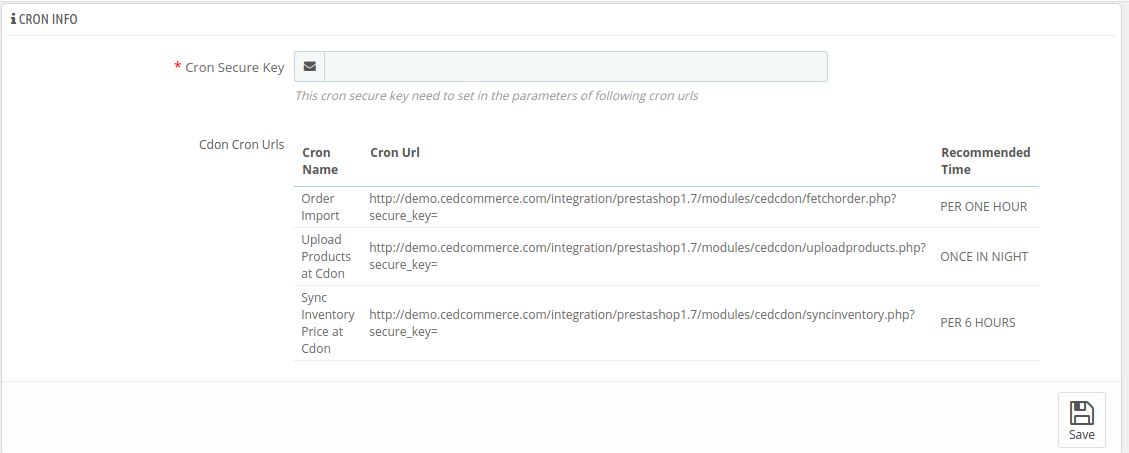
- Put these Cron urls at your server if you want to automate product syncing and order importing.
Once you are done with entering and selecting all these needed information, click on Save to save all the configuration settings you have made changes for.
Your configuration will be saved.
×


