
6.Reverb Product Setting ↑ Back to Top
To perform the Reverb Product Settings,
- Go to your OpenCart admin panel.
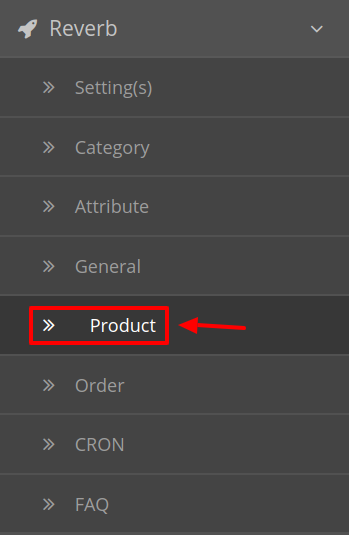
- Place the cursor on Reverb Symbol which is on the left navigation bar, as shown in the figure below:

- From this menu, click on Product.
- On clicking Settings, you will be navigated to the Reverb Product Settings Page as shown:
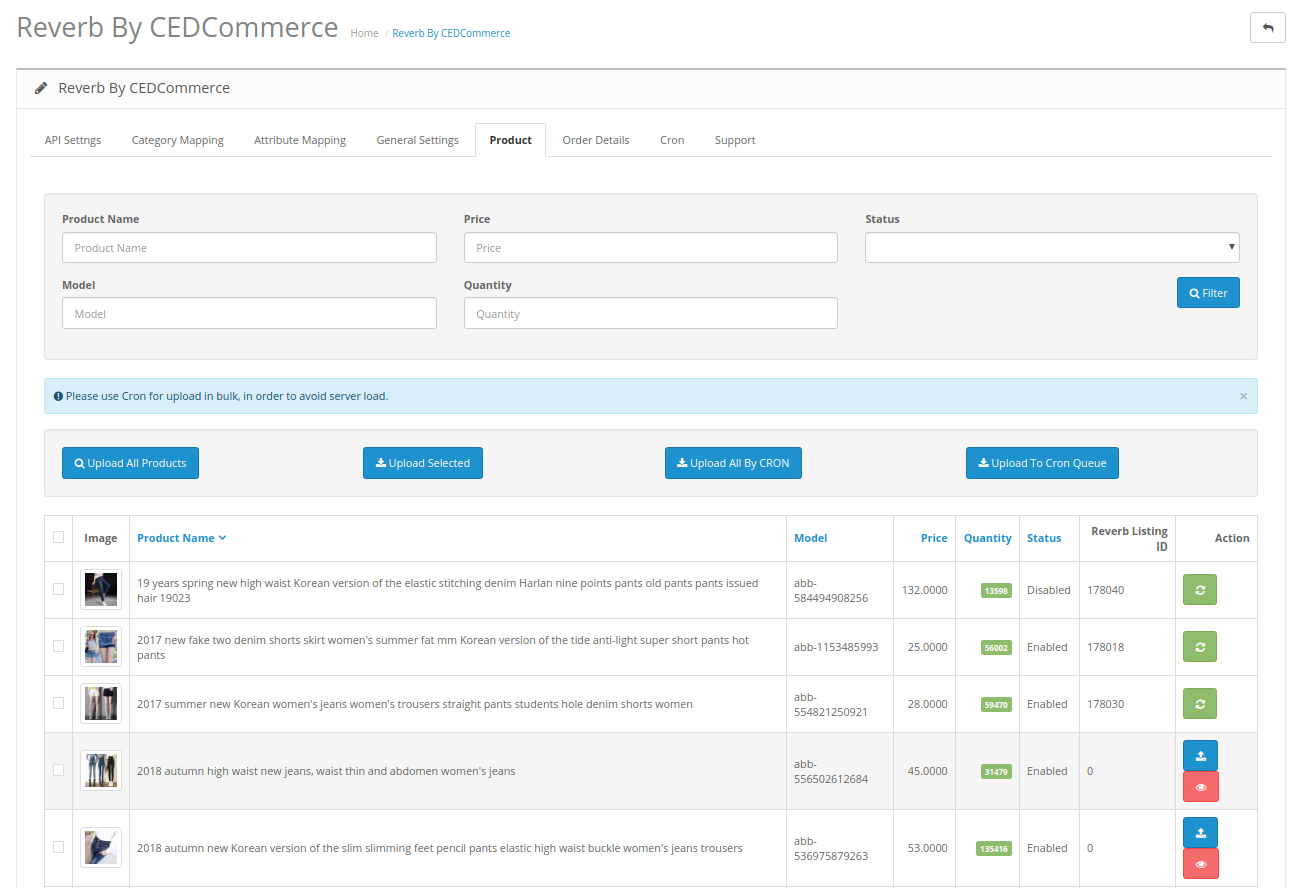
- All the products are listed here.
To Upload A Single Products:
- To Upload a single product Click on the upload button associated with the product as shown:
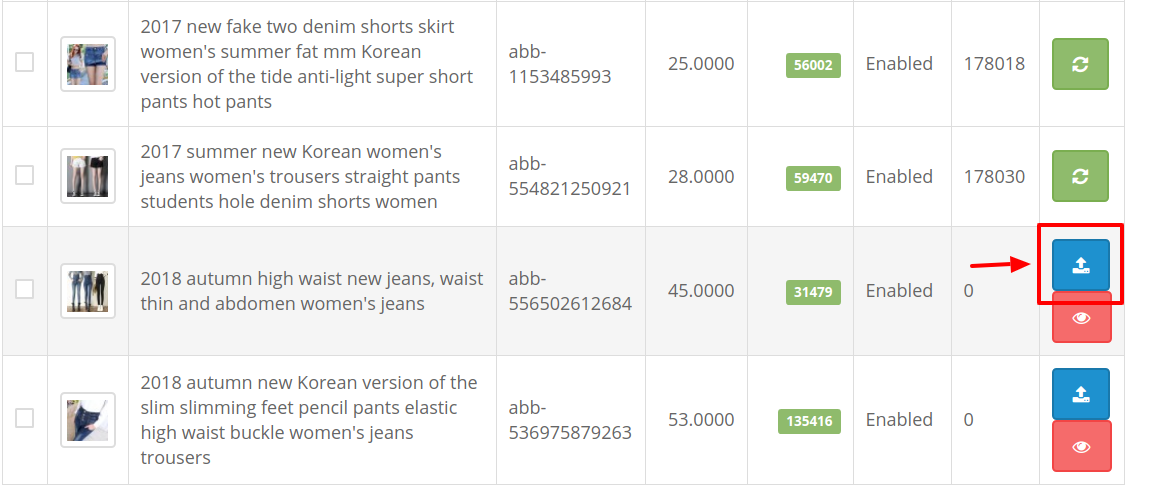
- By doing so the selected product gets Uploaded to the Reverb Store.
To Upload Selected Products:
- To upload multiple products first select all the products you wish to upload on Reverb.
- After doing so Click on the Upload Selected Button on the top as shown in the figure:
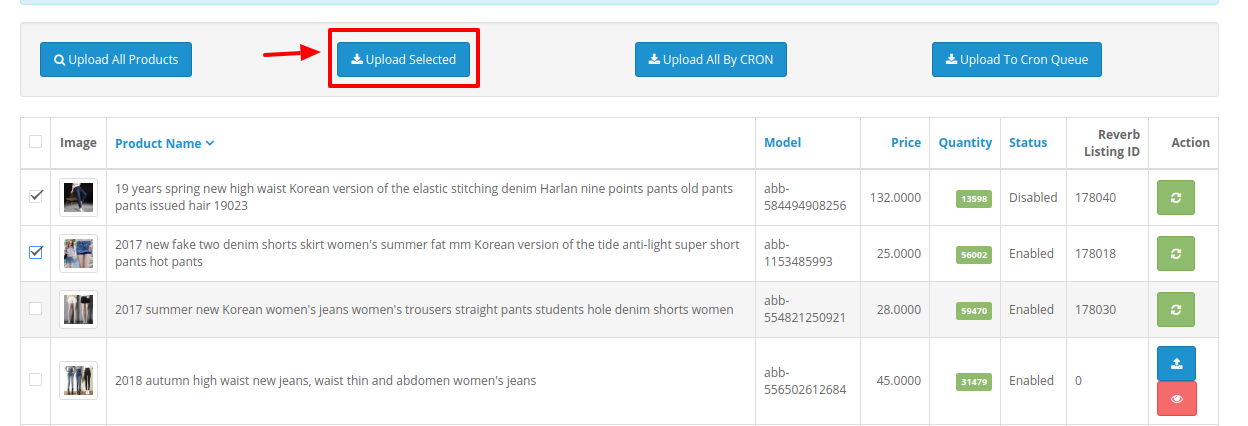
- The selected products will get uploaded on Reverb.
To Upload All The Products:
- If you wish to upload all the products from your Opencart store to the Reverb marketplace, Click on the Upload All Products Button on the top as shown:
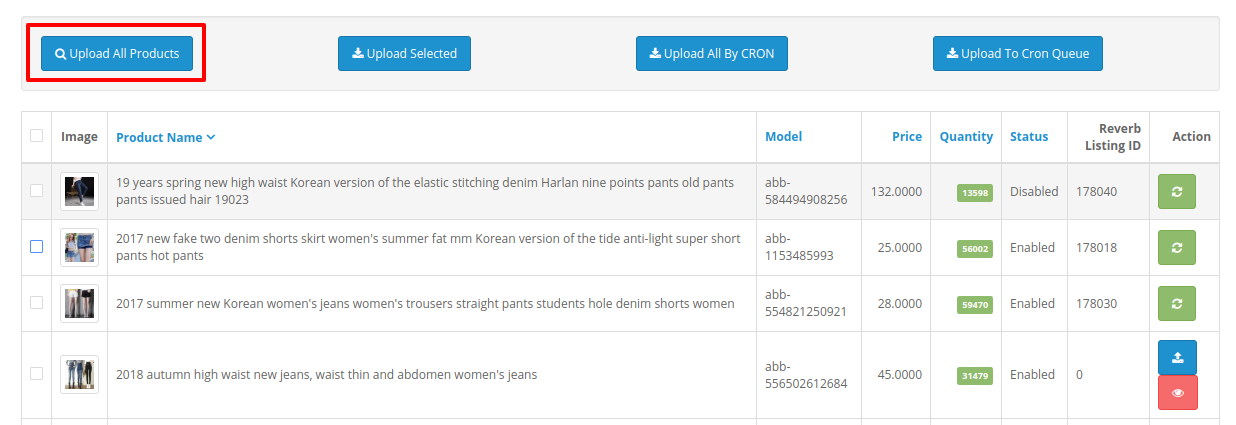
- All the products from this panel will get uploaded to the Reverb Marketplace.
To Upload Products by Cron
- The best way to upload products on Reverb is through cron.
- To upload products by cron, Click on Upload To Cron Queue button on the top as shown:

- By doing so all the products will go in the queue. Once in a while when the cron runs and it will upload all the products in a single go.
- You can also upload all the products instantaneously through Cron by clicking Upload All by Cron button on the top as shown:
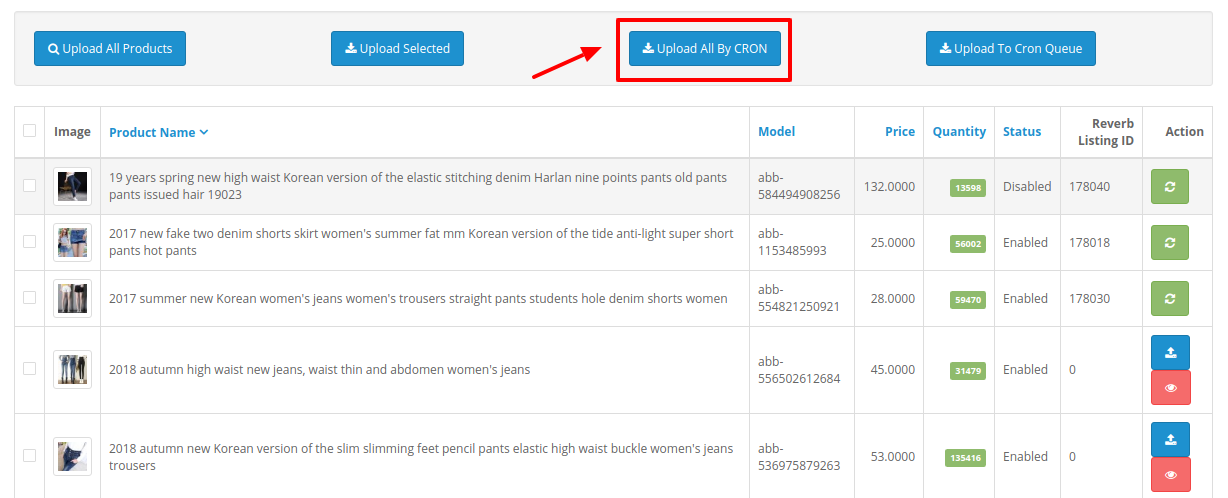
- By doing so the cron starts to run instantaneously and the products will get uploaded to Reverb.
To View the Error in Products
- To view the error in the products (if occurred ) sellers can check it on their Opencart panel only.
- Go to the products where you see the error symbol and click on the button associated with it as shown in the figure:

- By doing so the error message is displayed and you can get to know what is causing that error.

×


