
Configuration Settings
To configure the extension,
- Go to the Magento Admin Panel.
- On the left navigation bar, click on Zalando Retail Integration.
The menu appears as shown below:
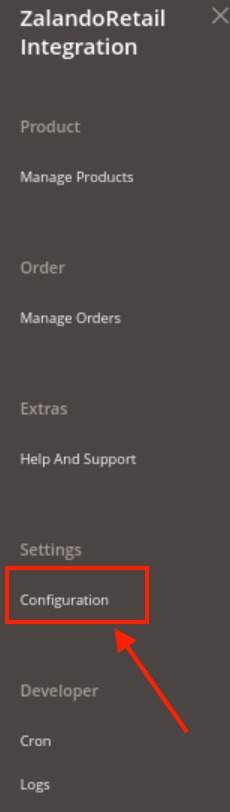
- Click on Configuration.
The Configuration Settings page appears as shown below:
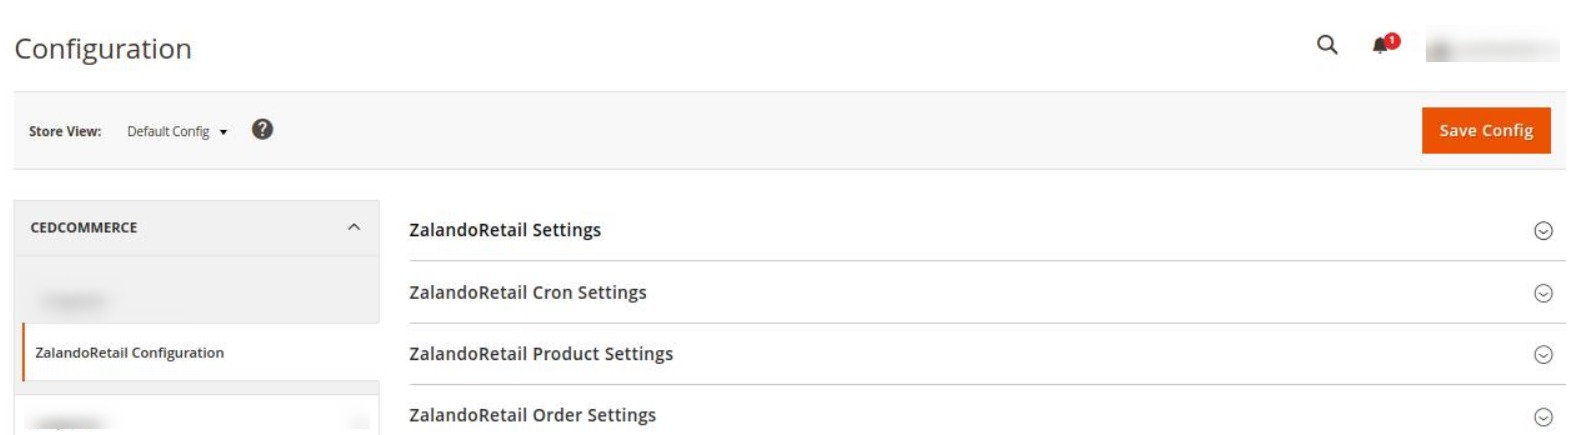
- In the right panel, click on ZalandoRetail Settings. The section expands as shown below:
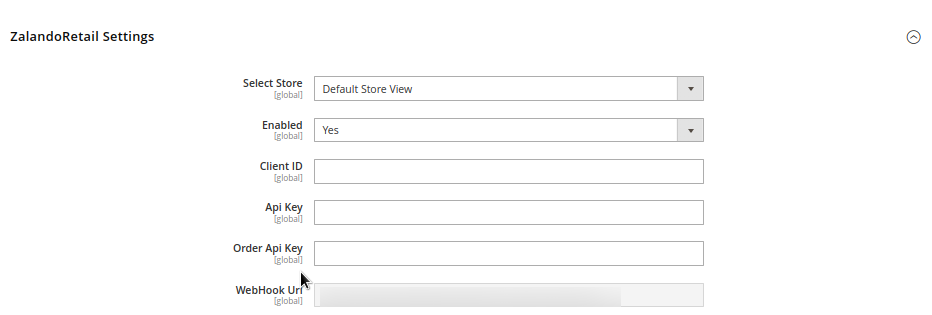
- Under Zalando Retail Settings, do the following steps:
- In Select Store, select the store view.
- In the Enabled list, select Yes to enable the extension features for configuring the settings.
- In Client Id, copy the client id from the Zalando Retailer panel and paste it here.
- In API Key, copy the API Key from the Zalando Retailer panel and paste it here.
- In Order API Key, you need to mention the order API key here. With the order API key, you will receive the orders that will be sent by Zalando Retail and it will act as a password.
- In WebHook Url, the URL on which marketplace orders are received is displayed.
- Scroll down and click on Zalando Retail Cron Settings, the section is expanded as shown below:
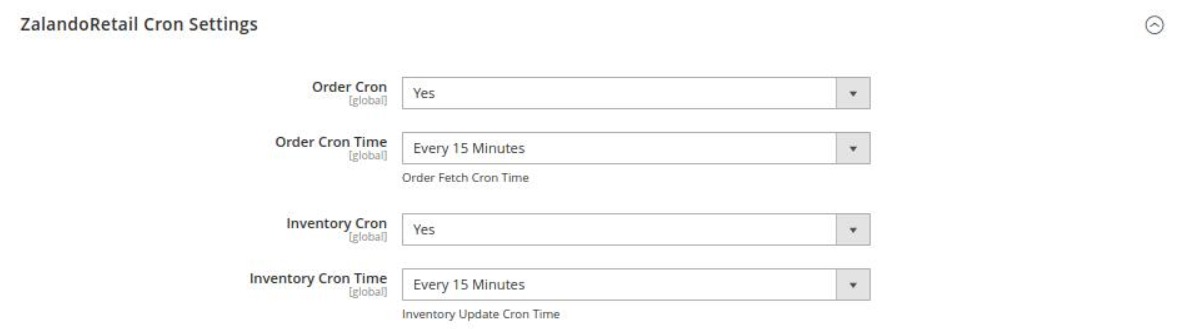
- Under Zalando Retail Cron Settings, do the following steps:
- In the Order Cron, select Enable if you want to fetch the orders automatically. Order Crons are used to fetch the orders at regular intervals of time.
- In Order Cron Time, select the duration for running the order cron. Whatever time is selected by you at that duration the order cron will run and import the order.
- In the Inventory Cron list, select the Enable option to enable the synchronization of the inventory automatically at regular intervals of time.
- In Inventory Cron Time, select the duration to run the cron for syncing the inventory in real-time.
- Now scroll down and click on Zalando Retail Product Settings, the section is expanded as shown below:
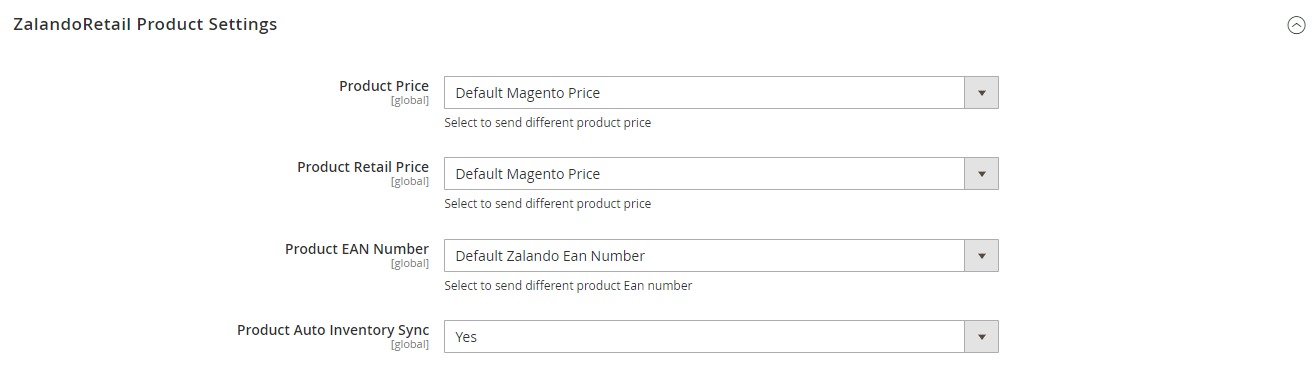
- Under Zalando Retail Product Settings do the following steps:
- In Product Price, select the increased/decreased/individual product price.
- In Product Retail Price, select the retail product price.
- In Product EAN Number, select the Zalando product EAN number.
- In Product Auto Inventory Sync, select Yes to synchronise the products in the inventory automatically.
- Scroll down and click on Zalando Retail Order Settings. The section is expanded as shown below:
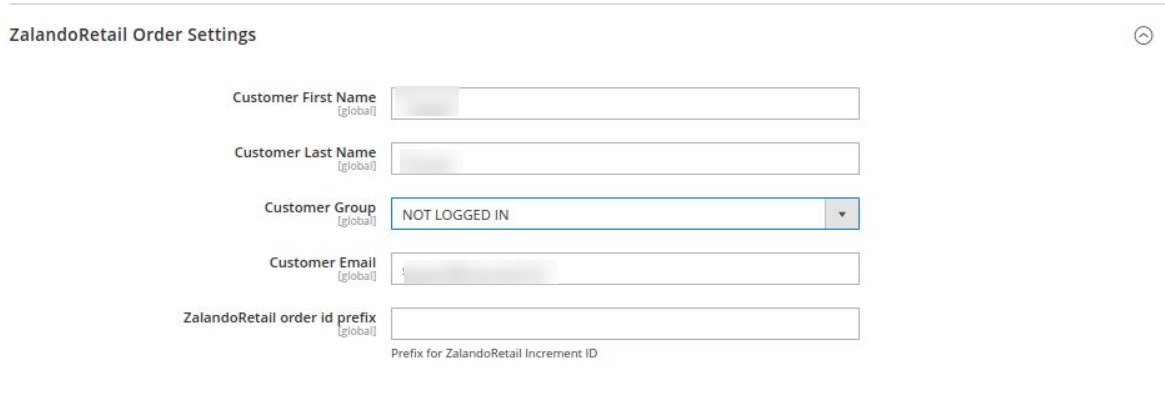
- Under Zalando Retail Order Settings do the following steps:
- In Customer First Name. enter the first name of the customer that you are creating.
- In Customer Last Name, enter the last name of the customer for the order creation.
- In Customer Group, select the group from the drop-down list in the customer you are creating belongs to.
- In Customer Email, enter the email id of the customer on which he will receive notifications related to the order.
- In Zalando Retail Order Id Prefix, enter the unique id for your orders that will be mentioned along with the orders.
×


