
Configuration Settings
Once the extension is successfully installed on the Merchant’s store, the Walmart menu appears in the Magento store Admin Panel. The merchant has to fill in the API credentials in the Walmart Configuration page of the admin panel.
To copy the API Credentials from the Walmart Seller account:
- Click on API Settings under Settings.
- You will be redirected to a new page where you need to select the desired login type.
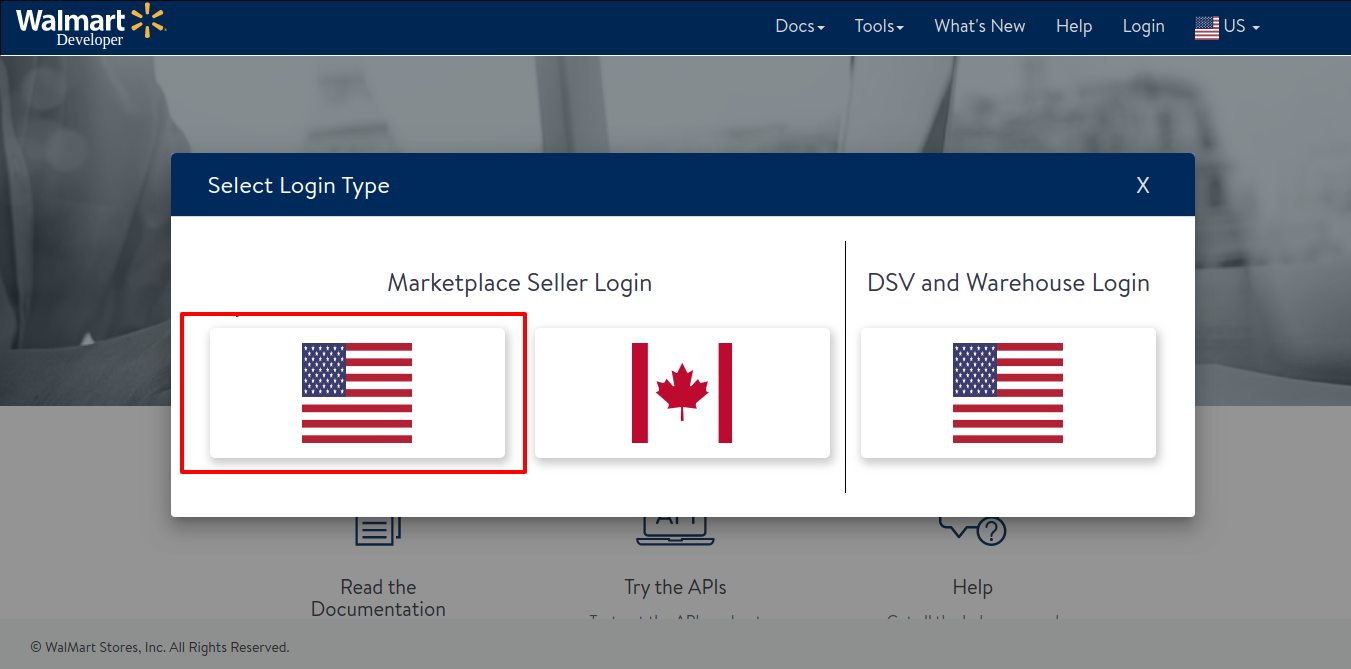
- Click on the ‘US option’ to proceed ahead.
- Once you choose the US as the desired marketplace login, you’ll be redirected to a new page where you need to enter your seller ID.

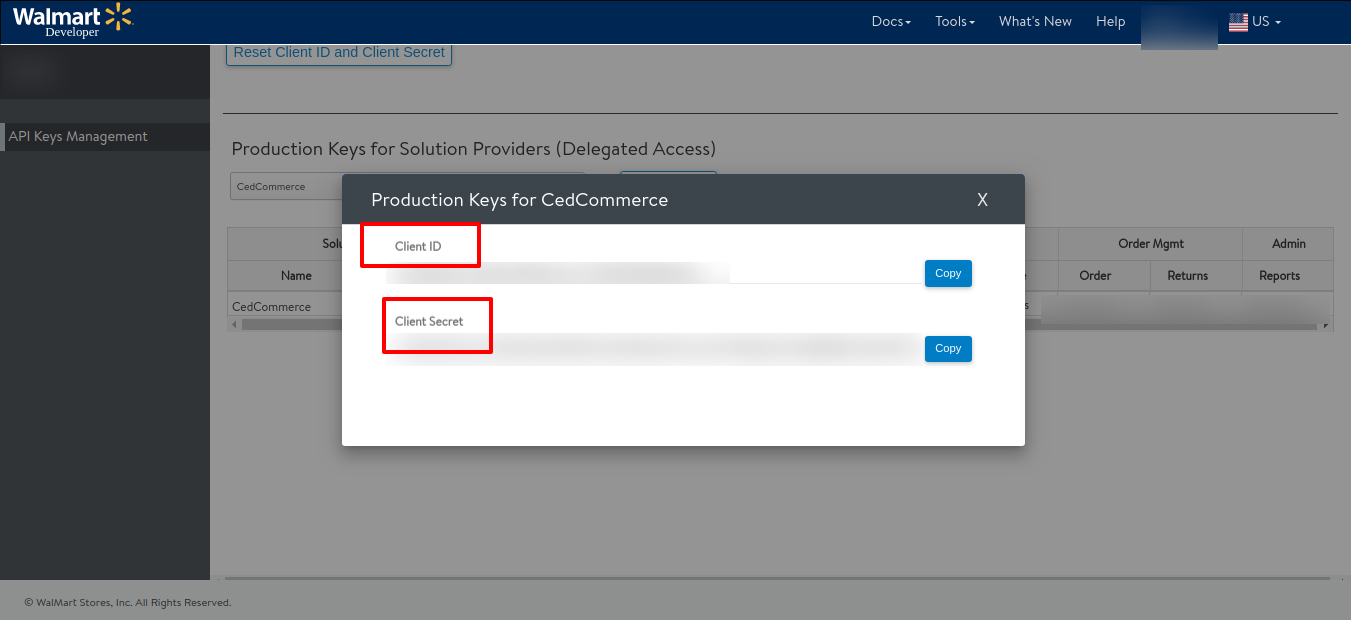
- After logging in, the Client ID and Client Secret Key which are generated in the Oauth Access Tokens are for your use as a seller.
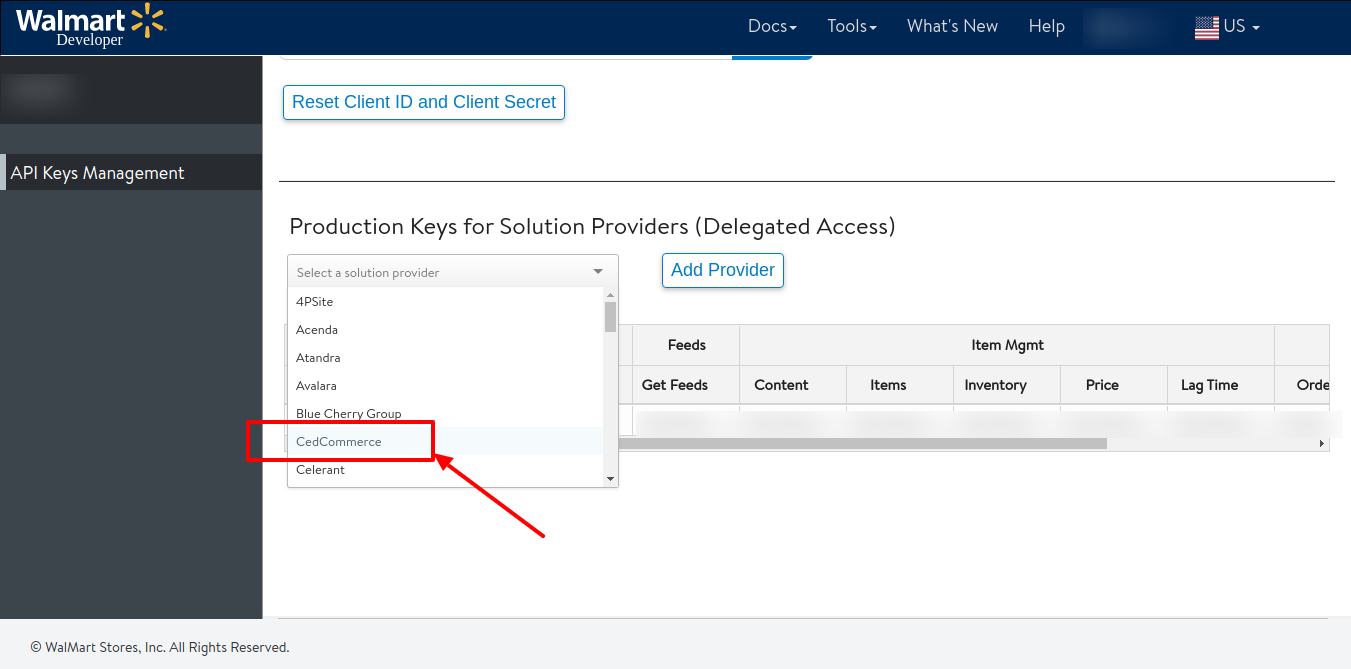
- Now scroll down to the heading Production Keys for Solution Provider and select CedCommerce from the dropdown list and add as the Provider.
- Now to retrieve the API credentials by assigning the highest access to all the options in Cedcommerce then Click on API Key.
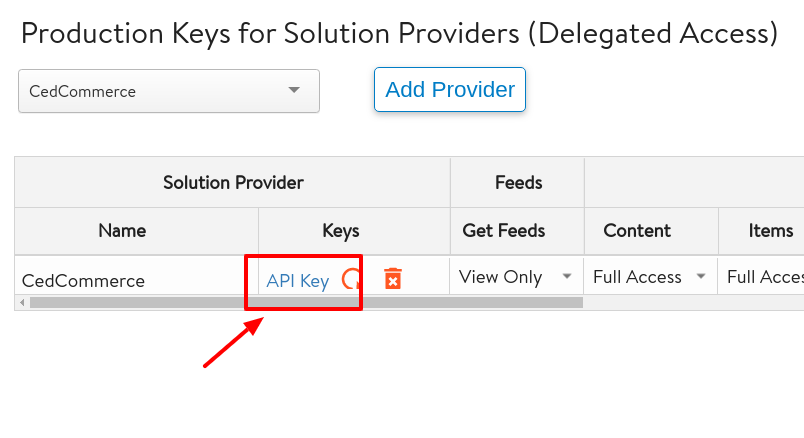
- The Production keys will be generated that is required by CedCommerce.
To Set up the Configuration settings in the Magento store Admin panel
- Go to the Magento Store Admin panel.
- On the left navigation bar, click the WALMART INTEGRATION menu.
The menu appears as shown in the following figure:
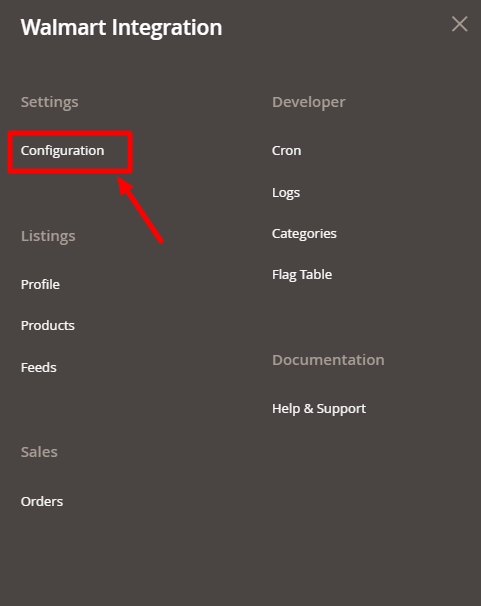
- Click Configuration.
The Configuration page appears as shown in the following figure;
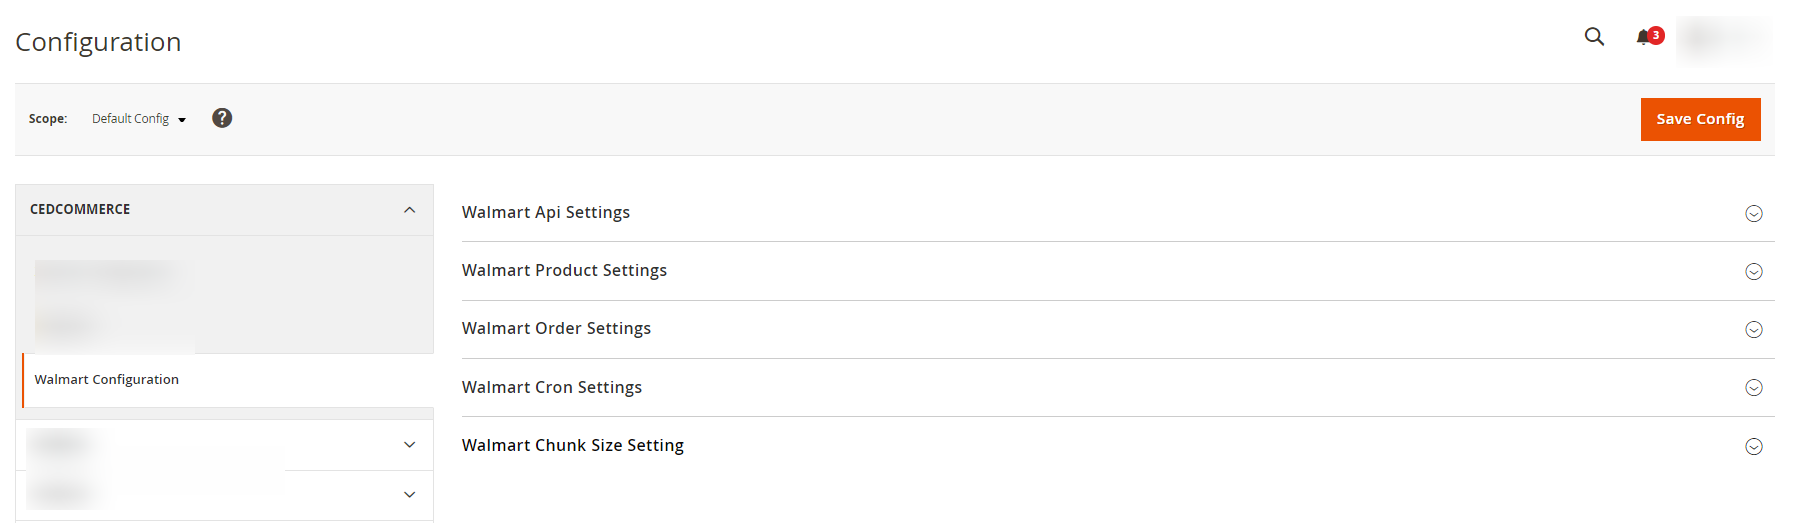
- Click on Walmart API Settings, the section expands as shown below:
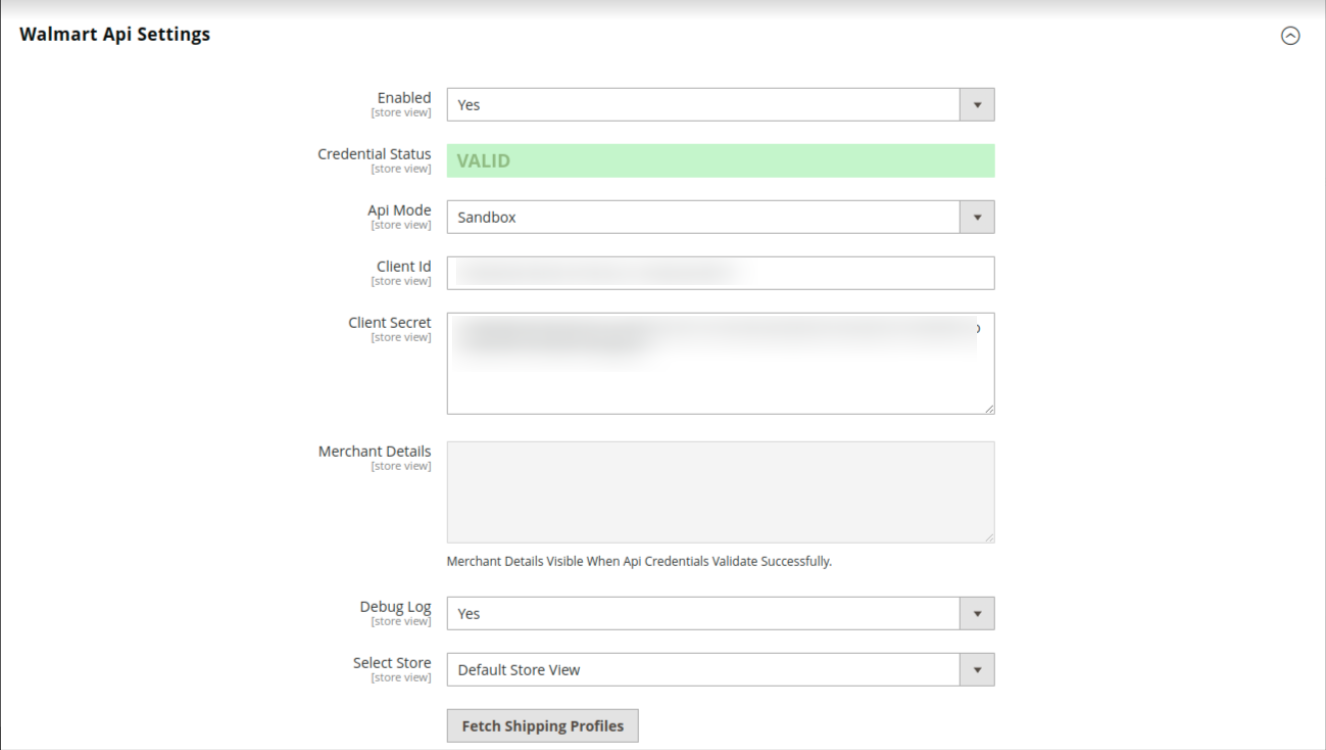
- In the right panel, under Walmart API Settings, do the following steps:
- In the Enabled list, select Yes.
Note: The No option hides all the relevant fields that appear under the Walmart API Settings section. The WALMART INTEGRATION menu does not appear on the left navigation bar. - The Credential Status shows Valid if the details entered are correct else it shows Invalid.
- In API Mode, select the store mode, i.e., sandbox or live.
- In Client Id, enter the Id fetched from the Walmart seller account.
- In Client Secret, enter the secret key fetched from the Walmart seller account.
- In the Debug Log list, select Yes to capture the log. It captures the log for the debug process.
- In Select Store, select your store view.
- In the Enabled list, select Yes.
- Click the Walmart Product Settings tab.
The tab is expanded and the relevant fields appear as shown in the following figure:
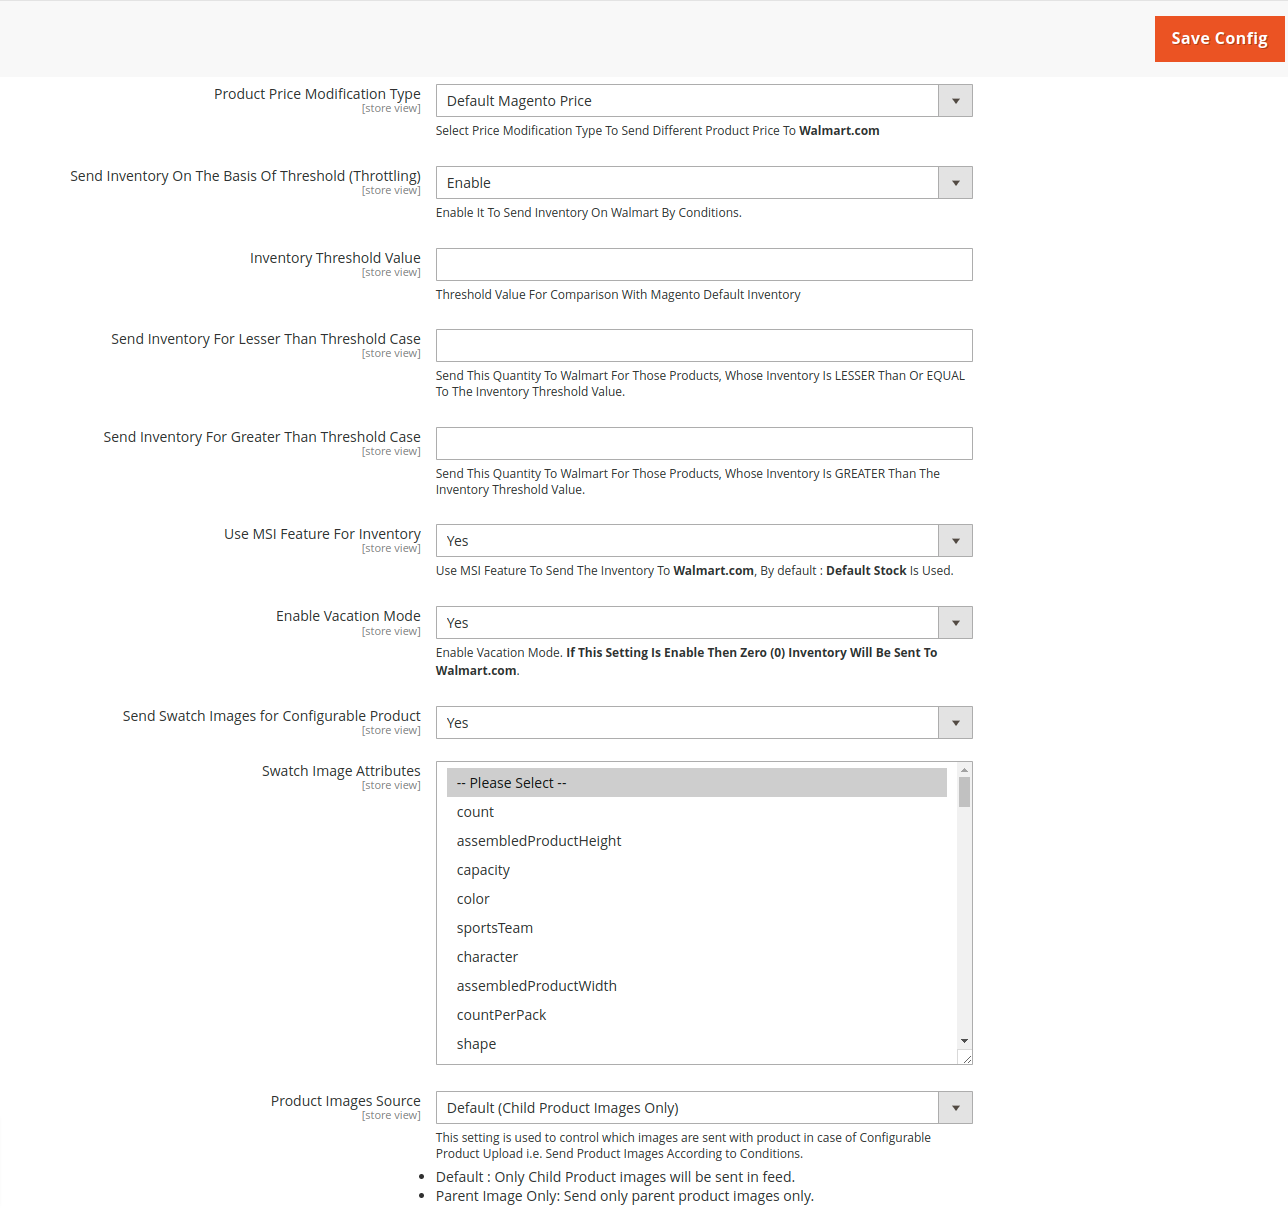
- Under Walmart Product Settings, do the following steps:
- In the Product Price Modification Type list, select the required option.
- Increase by Fixed Price: If selected, then the Modify by Fix Price field appears.
- Increase by Fixed Percentage: If selected, then the Modify by Percentage Price field appears.
Enter the numeric value to increase the price of the Walmart product price by the entered value % of Magento price
For Example: Magento price + 5% of Magento price.
Magento Price = 100
Select the Increase By Fixed Percentage option
Modify by Percentage Price = 5
100 + 5% of 100 = 100 + 5 = 105
Thus, Walmart Product Price = 105
- Decrease by Fixed Price: If selected, then the Modify by Fix Price field appears.
- Decrease by Fixed Percentage: If selected, then the Modify by Percentage Price field appears.
Enter the numeric value to decrease the price of the Walmart product price by the entered value % of Magento price
For Example: Magento price – 5% of Magento price.
Magento Price = 100
Select the Decrease By Fixed Percentage option
Modify by Percentage Price = 5
100 – 5% of 100 = 100 – 5 = 95
Thus, Walmart Product Price = 95
- In the Send Inventory on Basis of Threshold(Throttling) list, select Enable to send the inventory based on the threshold.
Note: Only when the admin selects Enable, the other fields appear. - In the Inventory Threshold Value box, enter the required threshold value of the products you wish to choose.
Note: The threshold value decides what number of products are sent on the Walmart website based on the number of products you currently have. - In the Send Inventory for Lesser Than Threshold Case box, enter the value you wish to send when the total number of products is less than the threshold value entered by you earlier.
- In the Send Inventory for Greater Than Threshold Case box, enter the value you wish to send when the total number of products is greater or becomes equal to the threshold value entered by you earlier. Let’s take an example to make things clear:
Suppose, you have entered the threshold value for your inventory to be 50.
The Greater value set is 100 and the lesser value is set as 25.
If you have a product whose quantity is 63, then the number of products available on the Walmart website will be shown as 100.
In the case of another product whose count is 47, then the number of product available will be shown as 25. - In Use MSI Feature for Inventory, select Yes to send the inventory to Walmart.
- In Enable Vacation Mode, select Enable to send zero inventory to Walmart.
- In Send Swatch Images for Configurable Product, select Yes send swatch images for the configurable products.
- In Swatch Image Attributes, select the attributes.
- In the Product Price Modification Type list, select the required option.
- Click the Walmart Order Settings tab and the section will expand as:
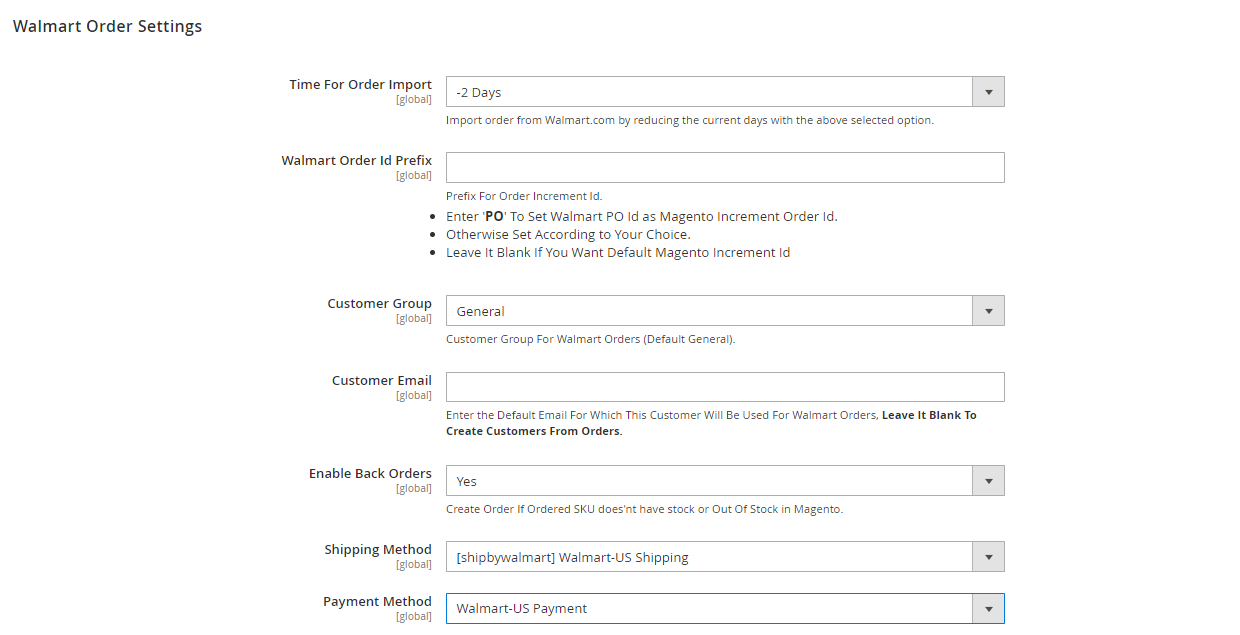
- In Time For Order Import, import orders from Walmart by reducing the current days with the selected option.
- In the Walmart Order Id Prefix box, enter a text as a prefix for Walmart Increment ID.
- In Customer Group, select the customer group for Walmart orders.
- In the Customer Email field, enter the email for which the customer will be created for Walmart Orders.
- In Enable Back Orders, select Yes to create an order if the ordered SKU doesn’t have stock or is out of stock in Magento.
- In the Shipping Method, select the shipping method from the options.
- In the Payment Method, select the payment method from the options.
- Click on the Walmart Crons Setting and the tab will expand as:
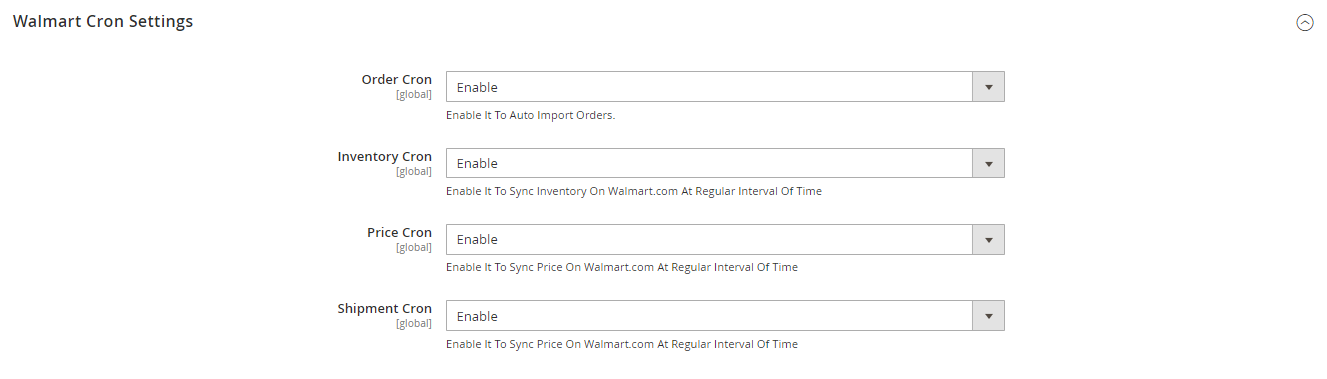
- Under Walmart Cron Settings do the following steps:
- In the Order Cron list, select Enable to enable the order fetch cron.
- In the Inventory Cron list, select Enable to enable the inventory sync cron.
- In the Price Cron list, select Enable to enable the price sync cron.
- In the Shipment Cron list, select Enable to automatically generate the shipment cron.
- Click the Chunk Size Setting tab and it will expand as:
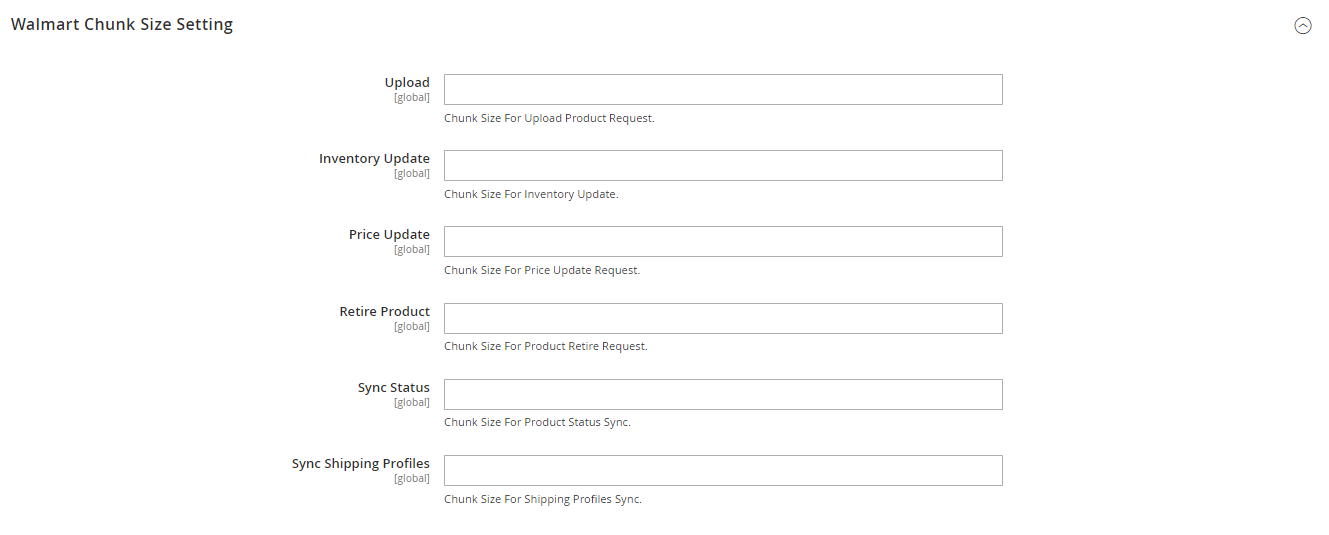
- Under Chunk Size Setting, do the following steps:
- In the Upload field, enter the number of products that you want to upload in one go from Magento to Walmart.
- In the Inventory Update field, enter the chunk size of the products. The inventory will be updated in one batch for the number of products that you enter in this field.
- In the Price Update field, enter the chunk size for the number of products. The price will be updated in one batch for the number of products that you enter in this field.
- In the Retire Update field, enter the chunk size of the products. The number of products that you will be able to retire on Walmart would be the same as the number that you enter in this field.
- In the Sync Status field, enter the chunk size of the products. The number of products that you will be able to sync the status for would be the same as the number that you enter in this field.
- In Sync Shipping Profiles, enter the chunk for syncing shipping profiles.
- Once you have taken all the steps mentioned above, click on the Save Config button on the top right side of the page. The configuration will be saved.
×


