
Configuration Settings
Once you’ve retrieved the API Key, you may start the Configuration.
To configure the extension,
- Go to your Magento 2 admin panel.
- On the left navigation bar, Click on RueDuCommerce Integration.
The menu appears as shown below:

- Click on Configuration, and you will be navigated to the configuration page as shown below:
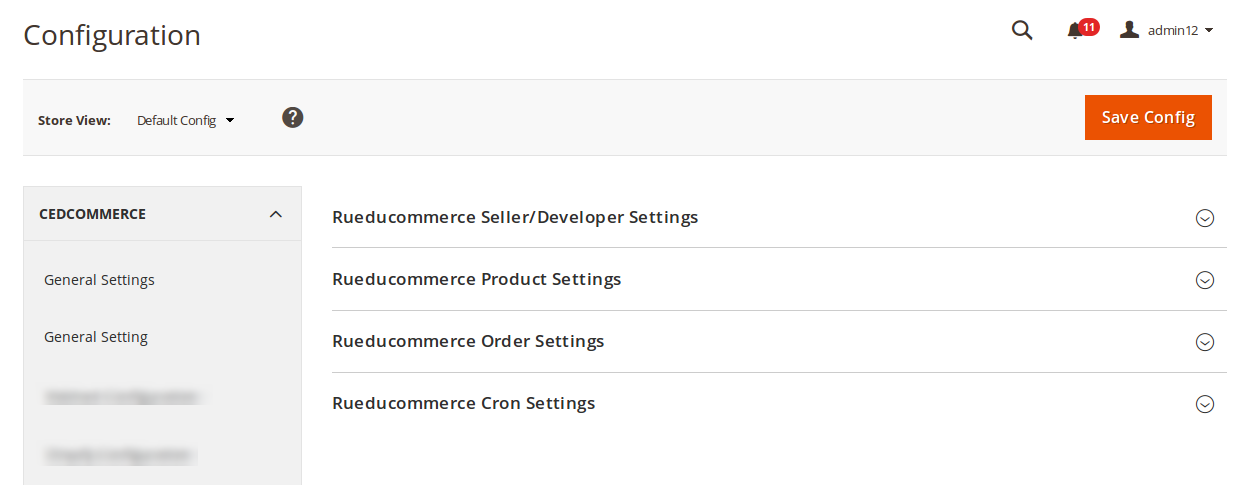
- Click RueDuCommerce Seller/Developer Settings and the section gets expanded as shown below:

- Under RueDuCommerce Seller/Developer Settings do the following steps:
- Select Yes as the status in the Enabled. The section gets expanded as below:
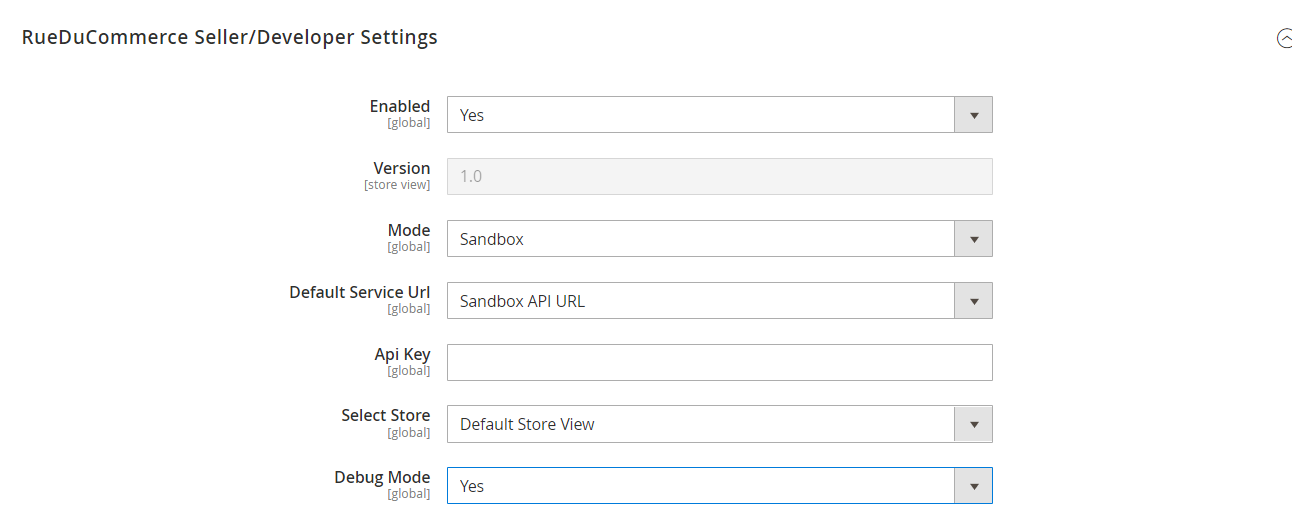
- In the Version field, the store view version will be displayed.
- In the Mode, select the store mode from the option.
- In Default Service Url, select the Live API URL option.
- In the API Key, enter the API Key that you retrieved from the RueDuCommerce seller panel.
- In the Api Key, enter the order Api key.
- In Select Store, select the store where you want to export your products to RueDuCommerce Marketplace. In other words, select the store which you want to integrate with RueDuCommerce.
- In the Debug Mode, select Yes to enable logging, or select No.
- Select Yes as the status in the Enabled. The section gets expanded as below:
- Now once you’re done with this section, click on RueDuCommerce Product Settings which gets expanded as shown below:
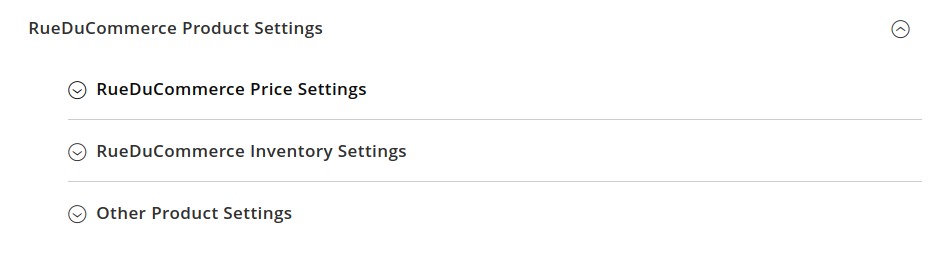
- Under RueDuCommerce Product Settings do the following steps:
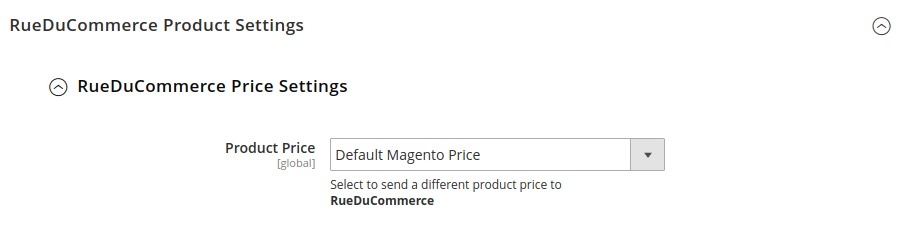
- Click on RueDuCommerce Price Settings, and the tab is expanded as:
- Click on RueDuCommerce Price Settings, and the tab is expanded as:
-
- Under RueduCommerce Price Settings, do the following steps:
- In the Product Price list, select one of the following options:
- Increase by Fixed Price: If selected, then the Modify by Fix Price field appears.
- Increase by Fixed Percentage: If selected, then the Modify by Percentage Price field appears.
Enter the numeric value to increase the price of the RueDuCommerce, product price by the entered value % of Magento 2 price.
For Example,
Magento 2 price + 5% of Magento 2 price.
Magento 2 Price = 100
Select Increase By Fixed Percentage option
Modify by Percentage Price = 5
100 + 5% of 100 = 100 + 5 = 105
Thus, RueDuCommerce Product Price = 105 - Decrease by Fixed Price: If selected, then the Modify by Fix Price field appears.
- Decrease by Fixed Percentage: If selected, then the Modify by Percentage Price field appears.
Enter the numeric value to decrease the price of the RueDuCommerce product price by the entered value % of Magento 2 price
For Example,
Magento 2 price – 5% of Magento 2 price.
Magento 2 Price = 100
Select Decrease By Fixed Percentage option
Modify by Fix Price = 5
100 – 5% of 100 = 100 – 5 = 95
Thus, RueDuCommerce Product Price = 95
- In the Product Price list, select one of the following options:
- Now Click on the tab RueDuCommerce Inventory Settings and the following steps:
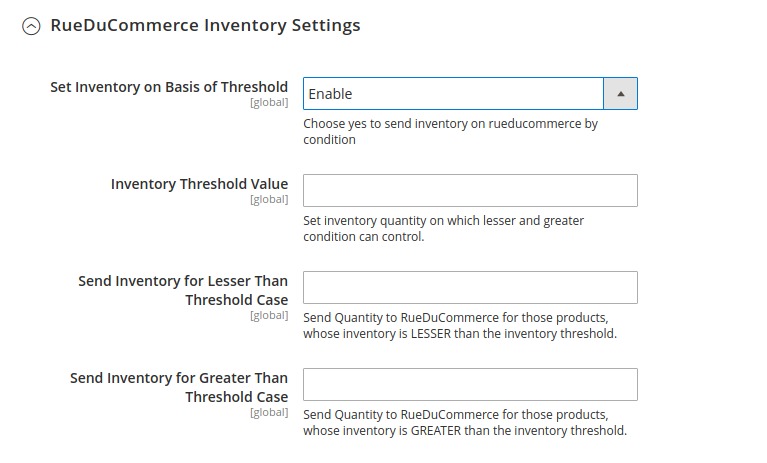
- Under RueDuCommerce Inventory Settings do the following steps:
- In the Set Inventory on Basis of Threshold list, select the Enable option if required to set the inventory based on a threshold.
- In the Inventory Threshold Value box, enter the required value.
- In the Send Inventory for Lesser Than Threshold Case box, enter the required value.
- In the Send Inventory for Greater Than Threshold Case box, enter the required value.
- Now click on Other Product Settings tab and do the following steps:
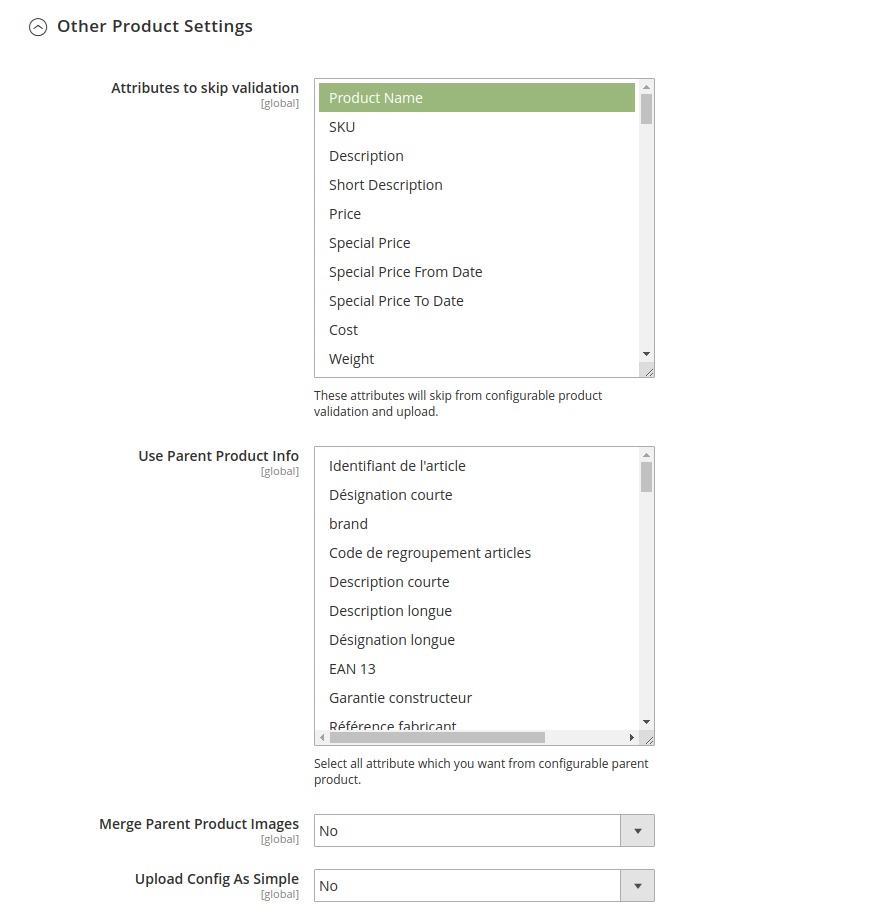
- Under Other Product Settings, do the following steps:
- In Attributes to Skip Validation, select the attributes from the list that you want to skip for validation.
- In Use Parent Product Info., select the attributes from the configurable parent product.
- In Merge Parent Product Images, select Yes if you want to merge the image.
- In Upload Config as Simple, select Yes if you want to upload a configurable product as simple.
- Under RueduCommerce Price Settings, do the following steps:
Click on RueDuCommerce Order Settings and the section will get expanded as shown below:
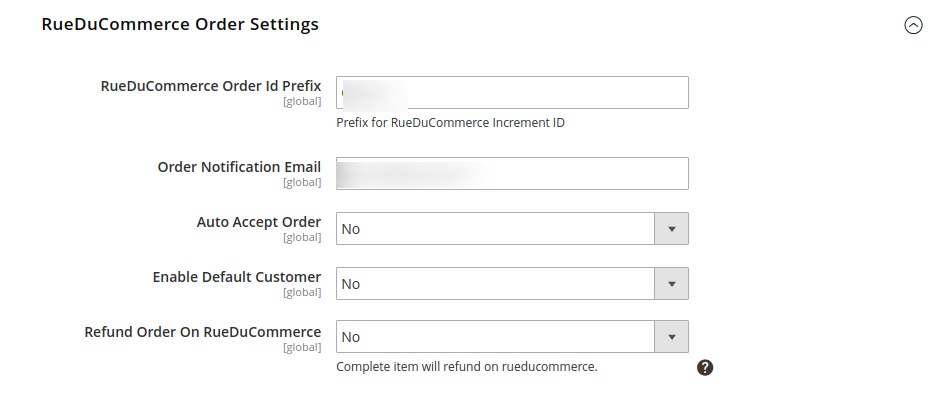
- Under RueDuCommerce Order Settings, do the following steps:
- In RueDuCommerce Order Id Prefix, enter the prefix which will be added to all the orders that will be placed for your products on RueDuCommerce Marketplace.
- In Order Notification Mail, enter the mail on which you want to get notifications about the orders placed for your products on RueDuCommerce.
- In Auto Accept Order, select Yes to accept orders automatically.
- In the Enable Default Customer list, select the Yes option to enable the default customer.
- In Refund Order on RueDuCommerce, select Yes for the refund.
Now click on RueDuCommerce Cron Settings, and it will expand as shown in the image below:
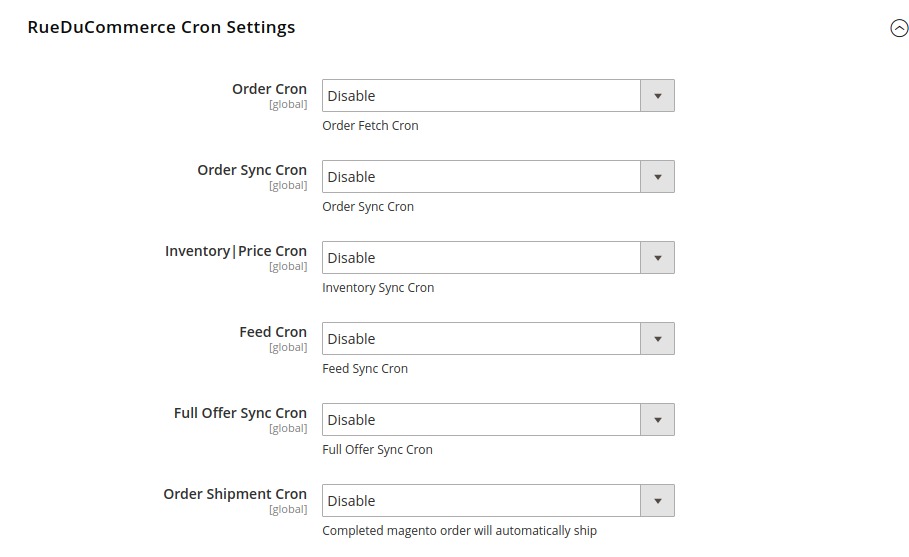
- In Order Cron, select Enable if you want to enable the order fetch cron.
- In Order Sync Cron, select Enable if you want to enable the order synchronisation cron.
- In Inventory/Price Cron, select Enable if you want to enable the inventory cron.
- In Feed Cron, select Enable if you want to enable the feeds cron.
- In Full Offer Sync Cron, select Enable if you want to enable the full offer sync cron.
- In Order Shipment Cron, select Enable if you want to enable the shipment cron.
- Click the Save Config button on the top right side of the page and the configuration will be saved.
×


