
Product Management
To Edit the OnBuy Product details,
- Go to the Magento 2 Store Admin panel.
- On the left navigation bar, click the OnBuy Integration menu.
A menu appears as shown in the following figure:
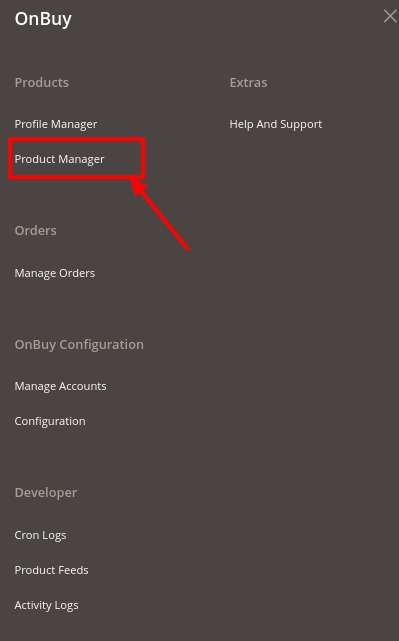
- Click Product Manager.
The OnBuy Product Listing page products appear which have been assigned to Profiles and will show as below in the following figure:
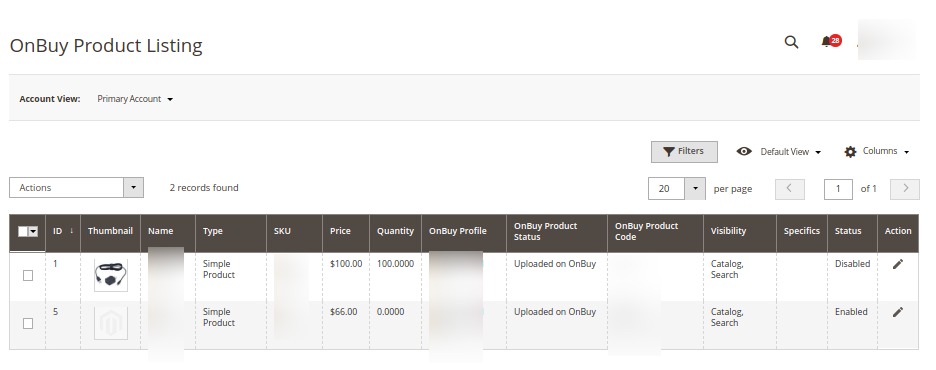
- On the top left side select the account in the Account View option. It is an Account Switcher. If you have selected the Primary account at the time of configuration then that will be selected as default and if you have not selected then the first account will be treated as a Primary account.
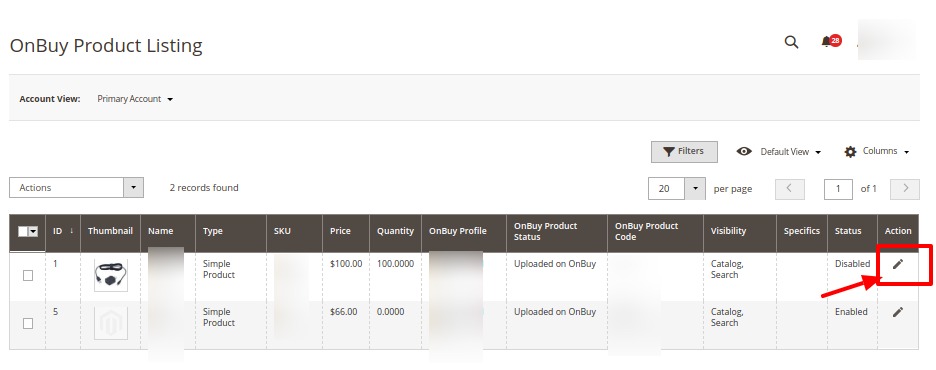
- Scroll down to the required product row.
- In the Action column of the respective row, click the Edit icon.
- The product editing page appears.
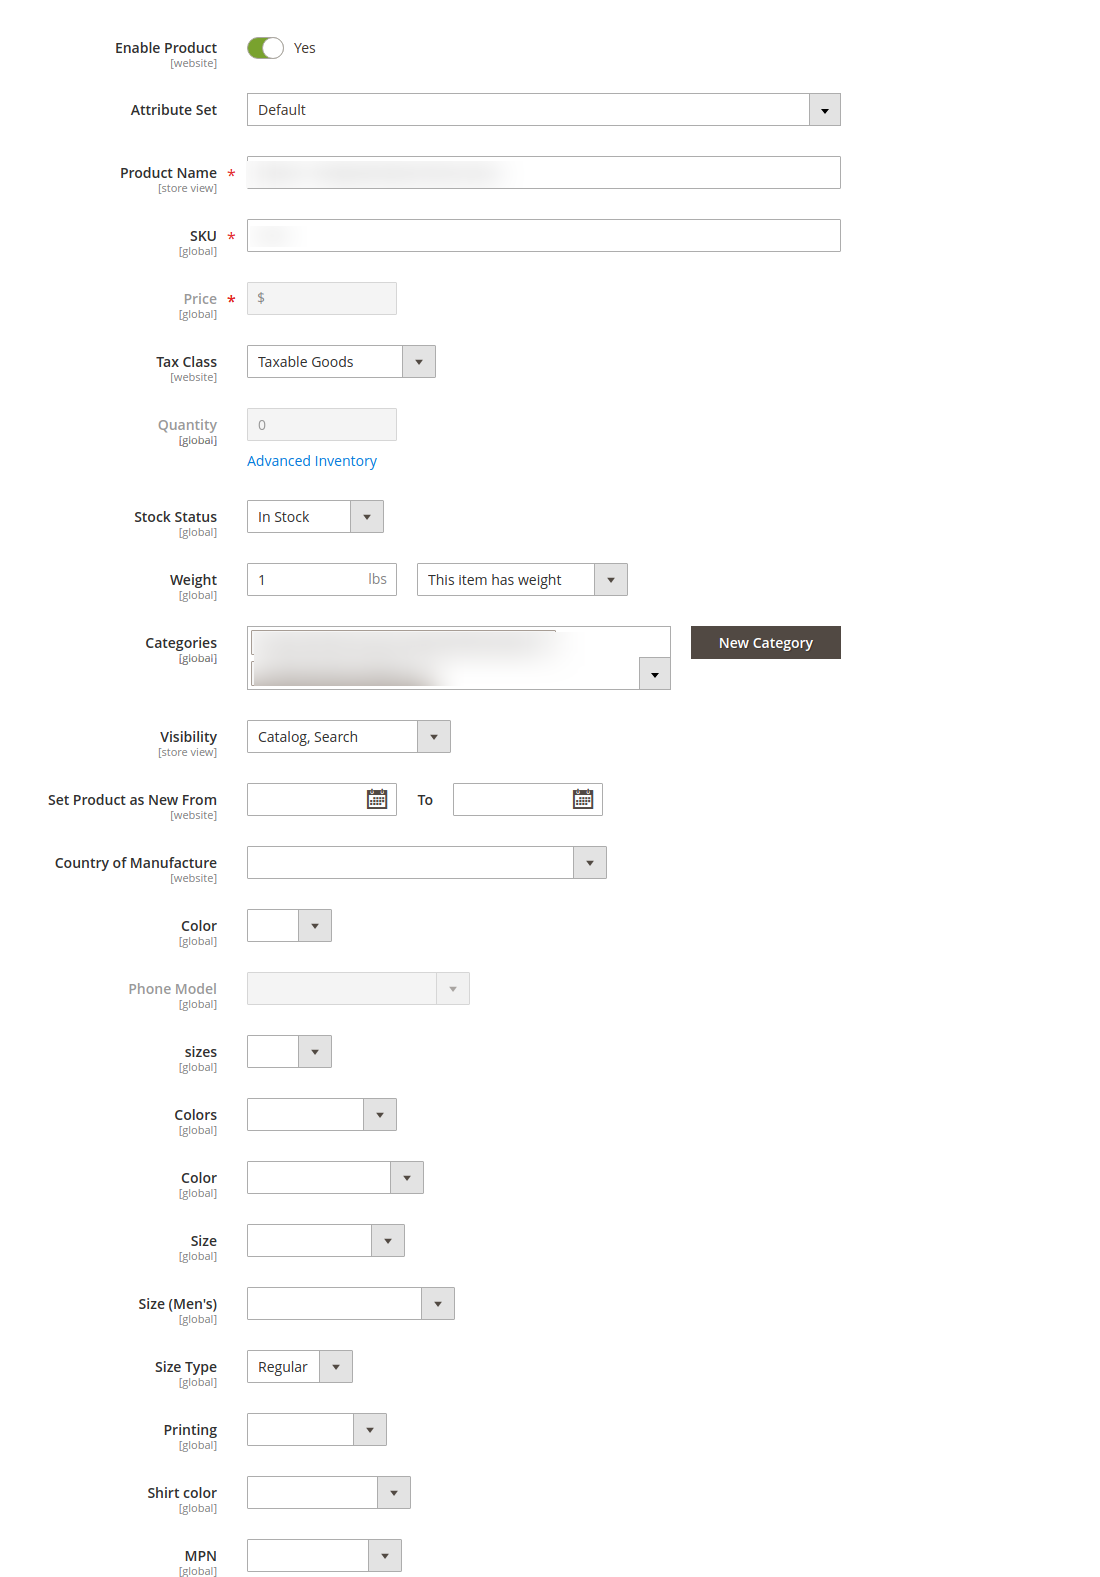
- Enter the required information or edit the values in the required fields, and then click the Save button.
The changes are saved and the success message appears on the OnBuy Product Listing page.
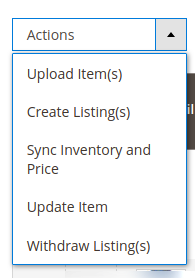
To Perform Bulk Actions on the Products,
- On the OnBuy Product Listing Page, in the left side click on Actions, a dropdown menu appears as:
- Select the products on which you want to perform the bulk action.
- Upload Items:
- To upload items in bulk click on Upload Item(s) option from the list.
- The confirmation dialog box will appear and then click OK to perform the action.
- Success Message appears on the page. The products will be uploaded.
- Create Listings:
- To export any product listing to OnBuy from your store, click on the Create Listing(s).
- The confirmation dialog box will appear and then click OK to perform the action.
- The success message appears on the page. All the selected products that you wish to import from OnBuy to your store are successfully imported and the listings are created.
- Synchronise inventory and Price:
- To synchronize the inventory and price of the products in bulk click on Sync Inventory and Price.
- The confirmation dialog box will appear and then click OK to perform the action.
- Success Message appears on the page. The product’s price and inventory will be synced.
- Update Item:
- Click on Update Item to update the items in bulk.
- The confirmation dialog box will appear and then click OK to perform the action.
- Success Message appears on the page. The products will be updated.
- Withdraw Listings:
- Click on Withdraw Listing(s) to withdraw the product listings.
- The confirmation dialog box will appear and then click OK to perform the action.
- Success Message appears on the page. The listings will be withdrawn.
To View the Errors in the Products,
To view, the error in any product follow the steps below:
- Go to the OnBuy Product Listing Page.
- Under the column Specifics you will see a view button
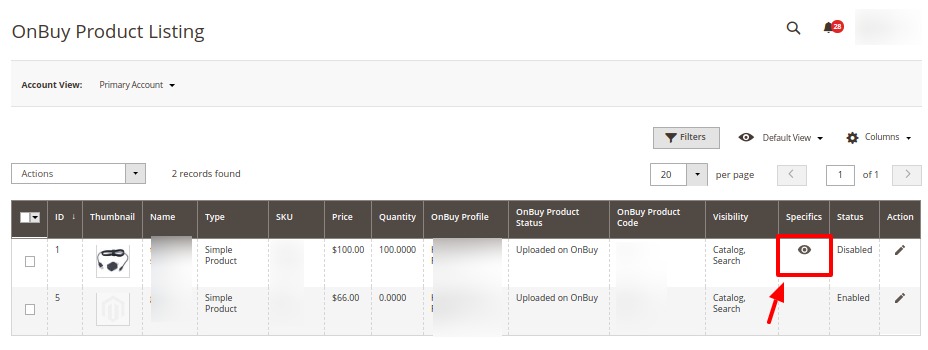
- Click on the Eye Symbol View button, the error will be displayed. However, if there is no error and the product was successfully sent, it will display ‘valid’.
×


