
Vendor Product Filter Configuration
After the successful installation of the Vendor Product Filter add-on in the Magento 2 store, the admin has to set up the configuration settings required to enable the features of the add-on.
To configure the settings
- Go to the Admin panel.
- On the left navigation bar, click the MARKETPLACE menu, and then click Vendor Configuration.
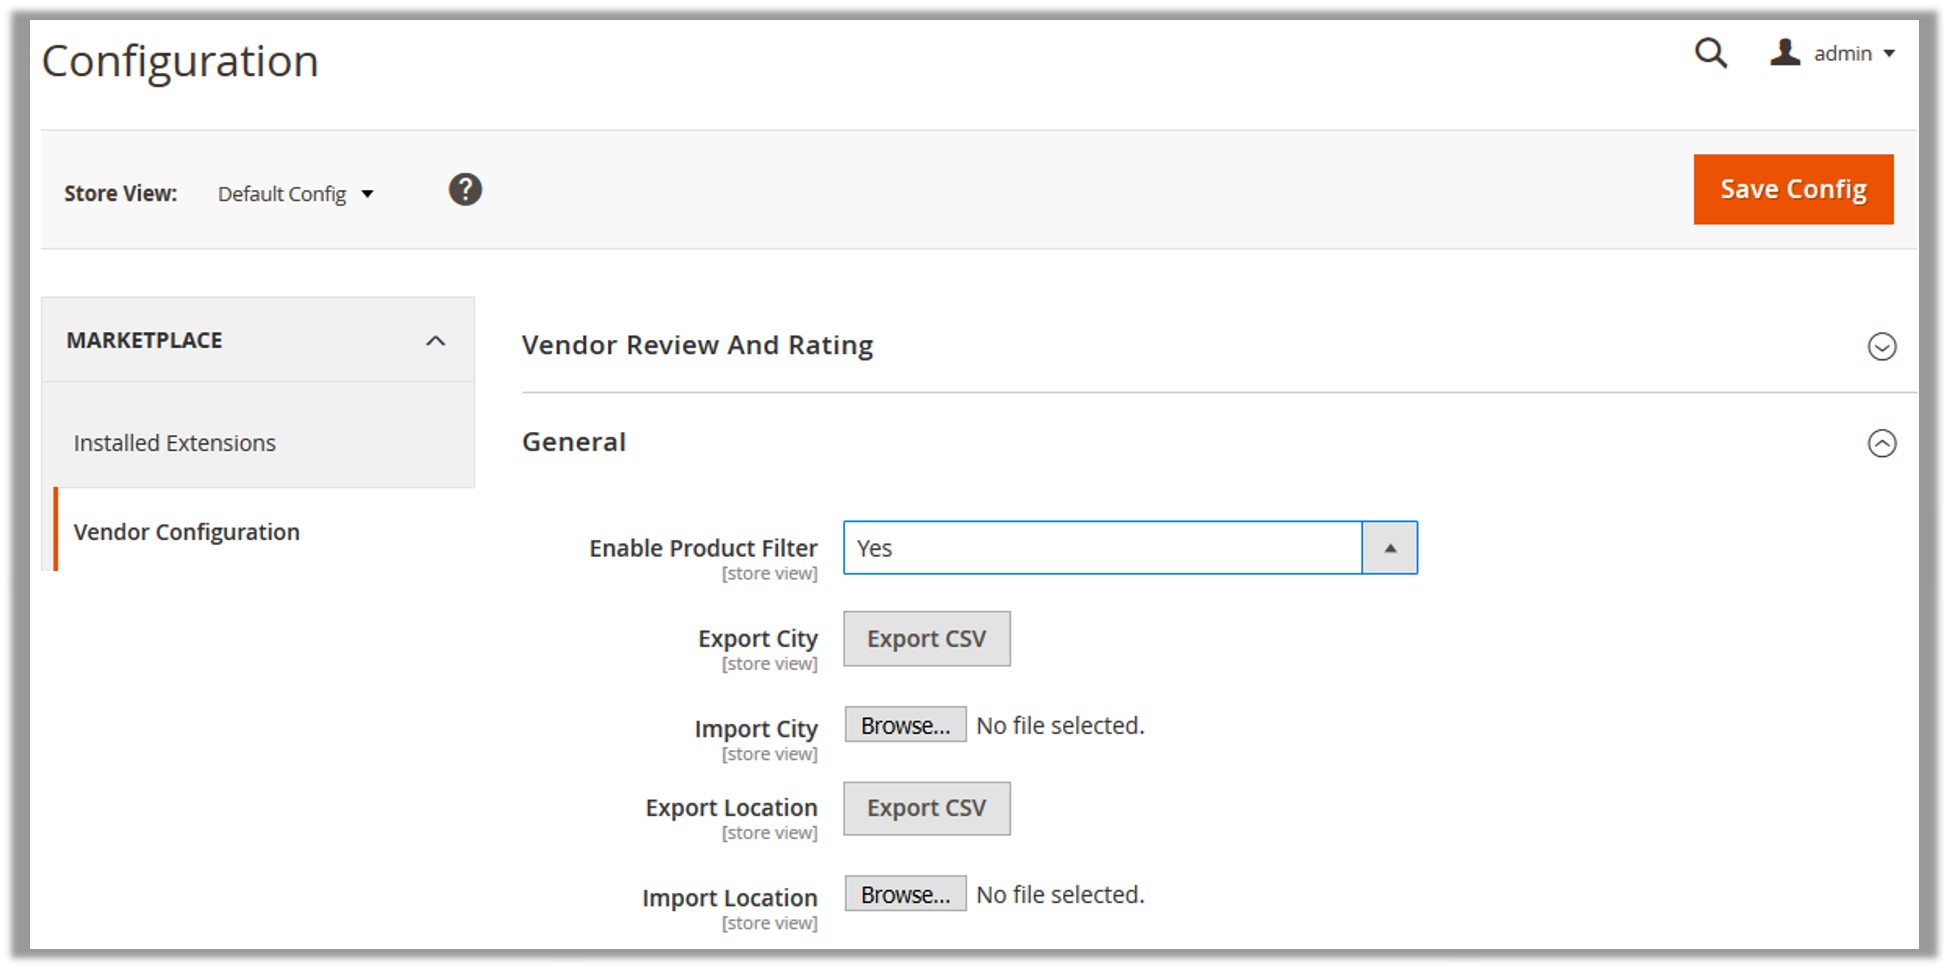
The Configuration page appears as shown in the following figure:
- In the right panel, under the General section, do the following steps:
- In the Enable Product Filter list, select Yes to enable the add-on features.
Note: On selecting Yes, the other fields appear. Using the Export CSV button the admin can export the respective CSV files of City and Location. After filling up the required data of the City and the Location in the respective files, the admin can import them back to the Magento store. This saves the time from adding the city and the location one by one to the store. - To export and import the City CSV file, do the following steps:
- Click the Export CSV button next to the Export City field.
The file is exported to the local system. - Add the data related to the cities in the CSV file and save the file.
- Click the Browse button next to the Import City field.
- Select the CSV file from the local system.
The file is imported into the store.
- Click the Export CSV button next to the Export City field.
- To export and import the Location CSV file, do the following steps:
- Click the Export CSV button next to the Export Location field.
The file is exported to the local system. - Add the data related to the locations in the CSV file and save the file.
- Click the Browse button next to the Import Location field.
- Select the CSV file from the local system.
The file is imported into the store.
- Click the Export CSV button next to the Export Location field.
- In the Enable Product Filter list, select Yes to enable the add-on features.
- Click the Save Config button.
The configuration settings are saved.
×


