
Vendor CMS Configuration
After the successful installation of the Vendor CMS add-on in the Magento 2 store, the admin has to set up the configuration settings required to enable the features of the add-on.
To configure the settings
- Go to the Admin panel.
- On the left navigation bar, click the MARKETPLACE menu, and then click Vendor Configuration.
The Configuration page appears. - In the right panel, scroll down to the Vendor CMS Page tab.
- Click the Vendor CMS Page tab.
The tab is expanded as shown in the following figure:
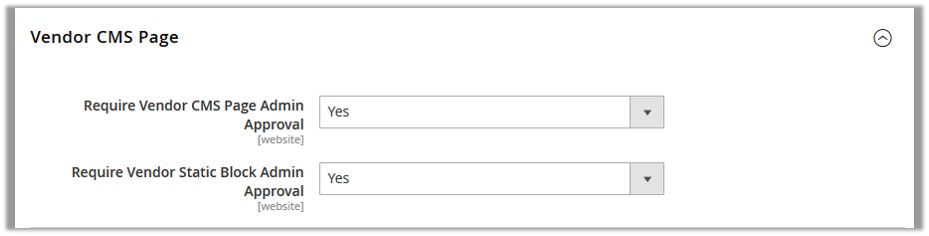
- In the Require Vendor CMS Page Admin Approval list, select Yes if the vendors are required to get the admin approval to display their CMS page in the front-end view.
Note: If it is set to No, then the vendors are not required to get the admin approval for their CMS pages, that is, the created CMS pages are auto-approved. - In the Require Vendor Static Block Admin Approval list, select Yes if the vendors are required to get the admin approval to display their CMS page in the front-end view.
Note: If it is set to No, then the vendors are not required to get the admin approval for their CMS pages, that is, the created CMS pages are auto-approved. - Click the Save Config button.
×


