
Configuration
To Setup Discogs Integration Configuration Settings,
- Go to the Magento 2 Admin panel.
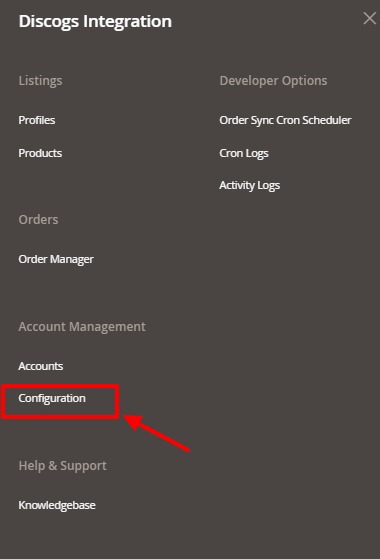
- On the left navigation bar click the Discogs Integration menu.
The menu appears as shown in the following figure:
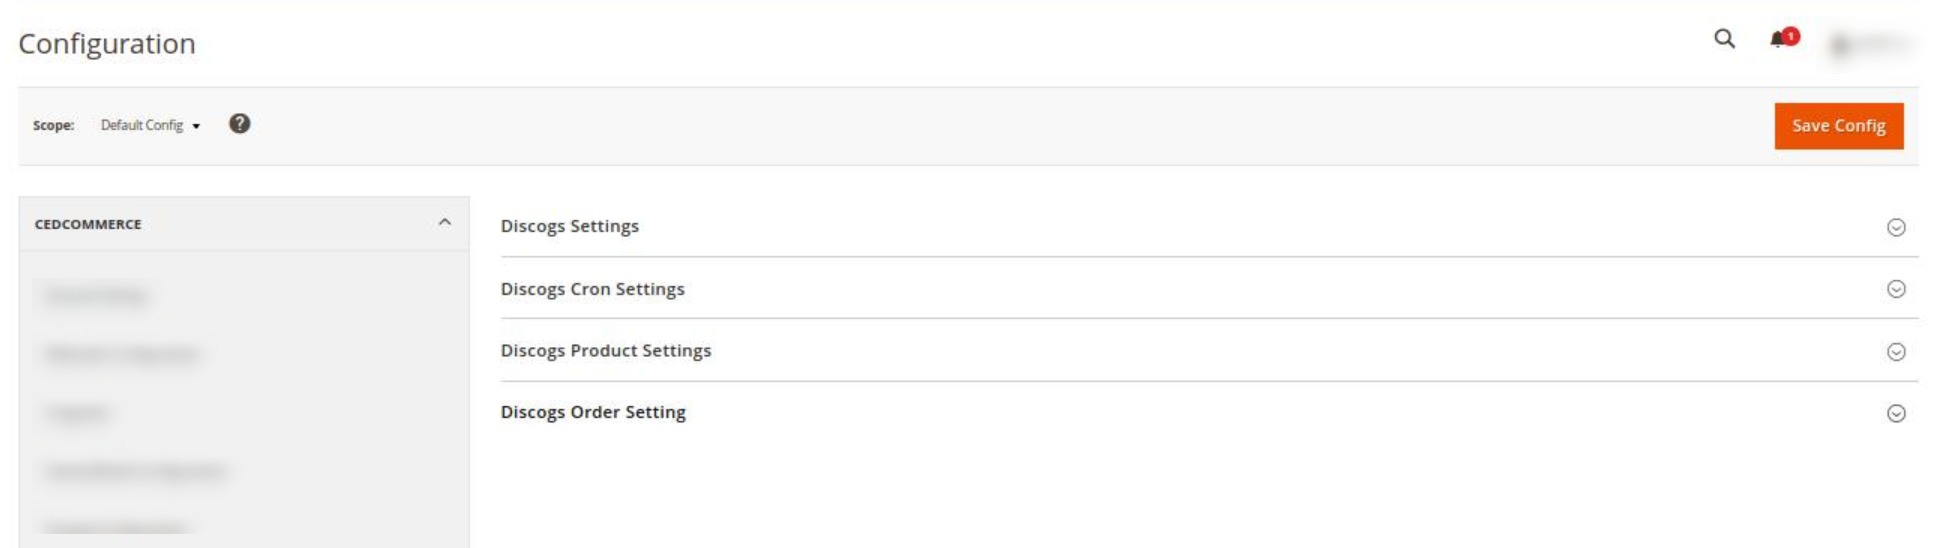
- Click on Configuration.
The Configuration page appears as shown in the following figure:
- In the right panel click the Discogs settings tab.
The Discogs Settings tab is expanded and the relevant fields appear as shown below:

- Under the Discogs Settings tab, do the following steps:
- In the Enabled list, select the Yes option.
- Scroll down and click on the Discogs Cron Settings tab.
The Discogs Cron Settings tab is expanded as shown below:

- Under Discogs Cron Settings, do the following steps:
- In the Order Cron, select the Enable option to fetch the orders.
- In the Order Sync Cron, select Enable to synchronise orders automatically through cron.
- Now scroll down and click on Discogs Product Settings. The section is expanded as shown below:

- Under Discogs Product Settings, do the following steps:
- In Auto Upload Feature, if Enabled, then On Save Product With ‘For Sale’ Status, The Product Will Go For Direct Upload. (Note: The Product Will Assign In The First Profile Created)
- In Use MSI Feature for Inventory, select Yes if you want to use the MSI for the salable quantity.
- Scroll down and click on the Discogs Order Setting tab.
The Discogs order Settings tab is expanded as shown below:
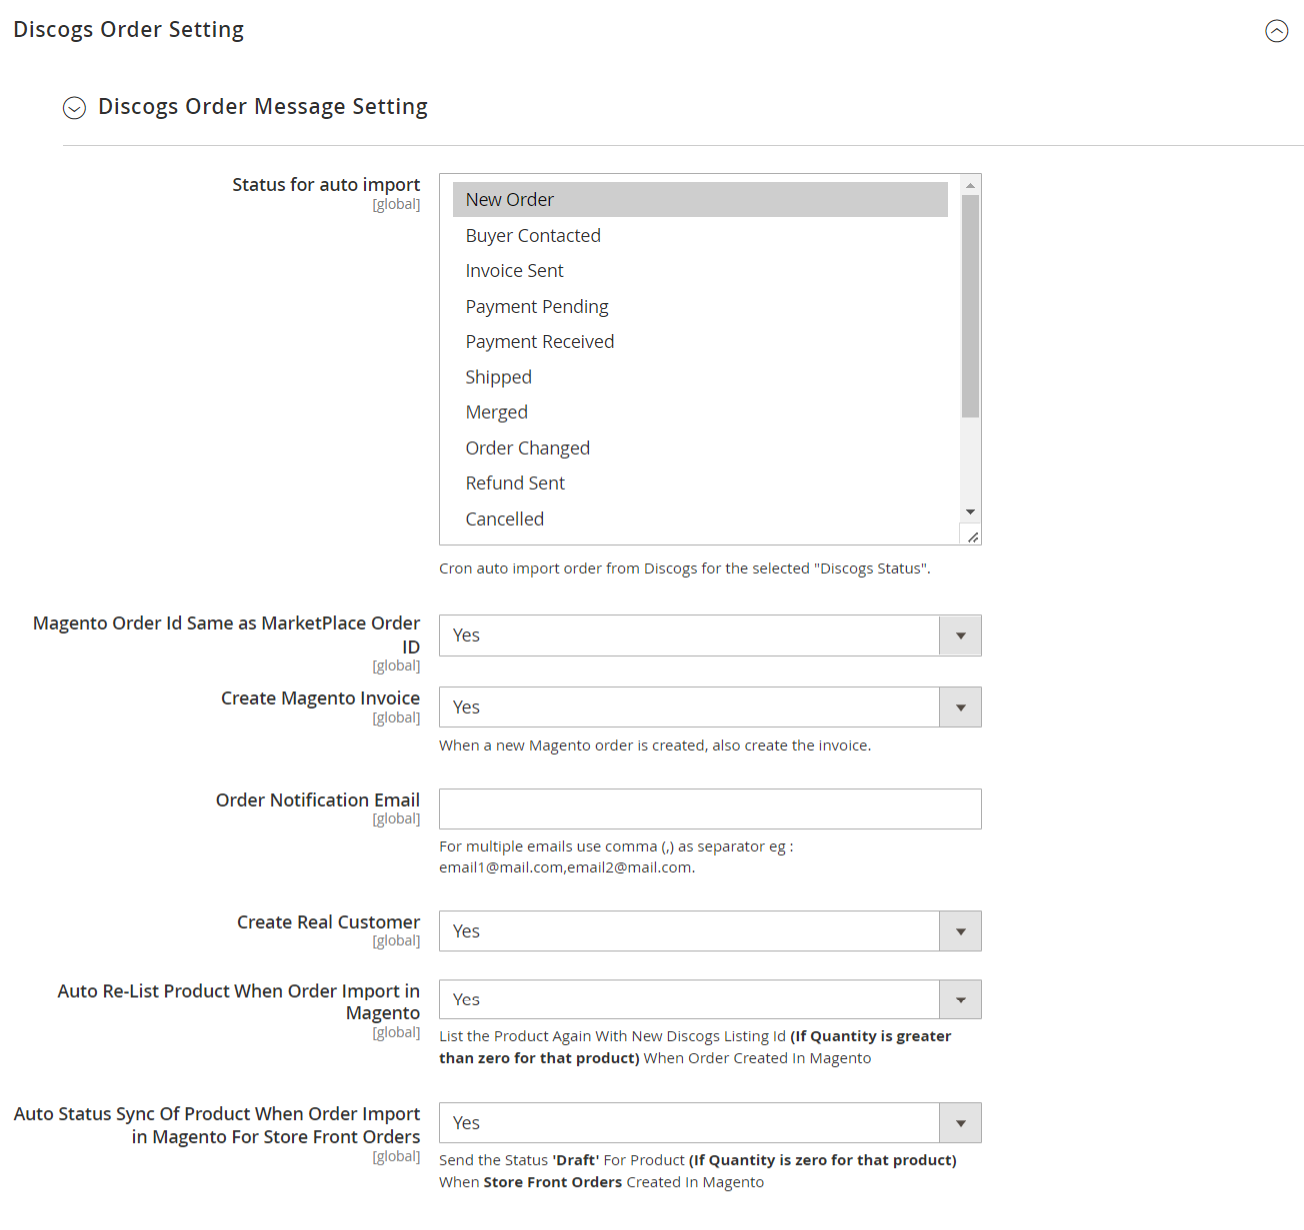
- Under Discogs Order Settings, do the following steps:
- In Status for Auto Import, select the Discogs order status from the dropdown menu.
- In Magento Order Id Same as Marketplace Order Id, if you want the same Id on Magento store and marketplace.
- In Create Magento Invoice, select Yes if you want to create an invoice when a new Magento Order is created.
- In the Order Notification Email, enter the email id on which you wish to receive notifications.
- In Create Real Customer, select Yes if you want the customer’s details to be the same.
If you select No then the section is expanded as:
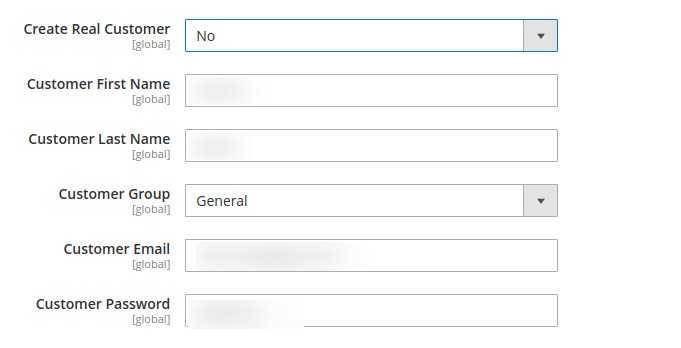
- In Customer Last Name, enter the last name of customer,
- In Customer Group, select the group of the customer from the dropdown menu.
- In Customer Email, enter the mail id of the customer.
- In Customer Password, enter the password.
- Now in Customer First Name, enter the first name of the customer.
- In Auto Relist Product When Order Import in Magento, if you select Yes it lists the Product Again With New Discogs Listing Id (If Quantity is greater than zero for that product) When Order is Created In Magento.
- In Auto Status Sync Of Product When Order Import in Magento For Store Front Orders, if you select Yes it Send the Status ‘Draft’ For Product (If Quantity is zero for that product) When Store Front Orders Created In Magento
- Once you are done with these actions click on the Save Config button.
- The configuration will be saved.
×


