
3.Configuration ↑ Back to Top
Admin Panel:
Login to admin panel- A dashboard opens up refer below image:
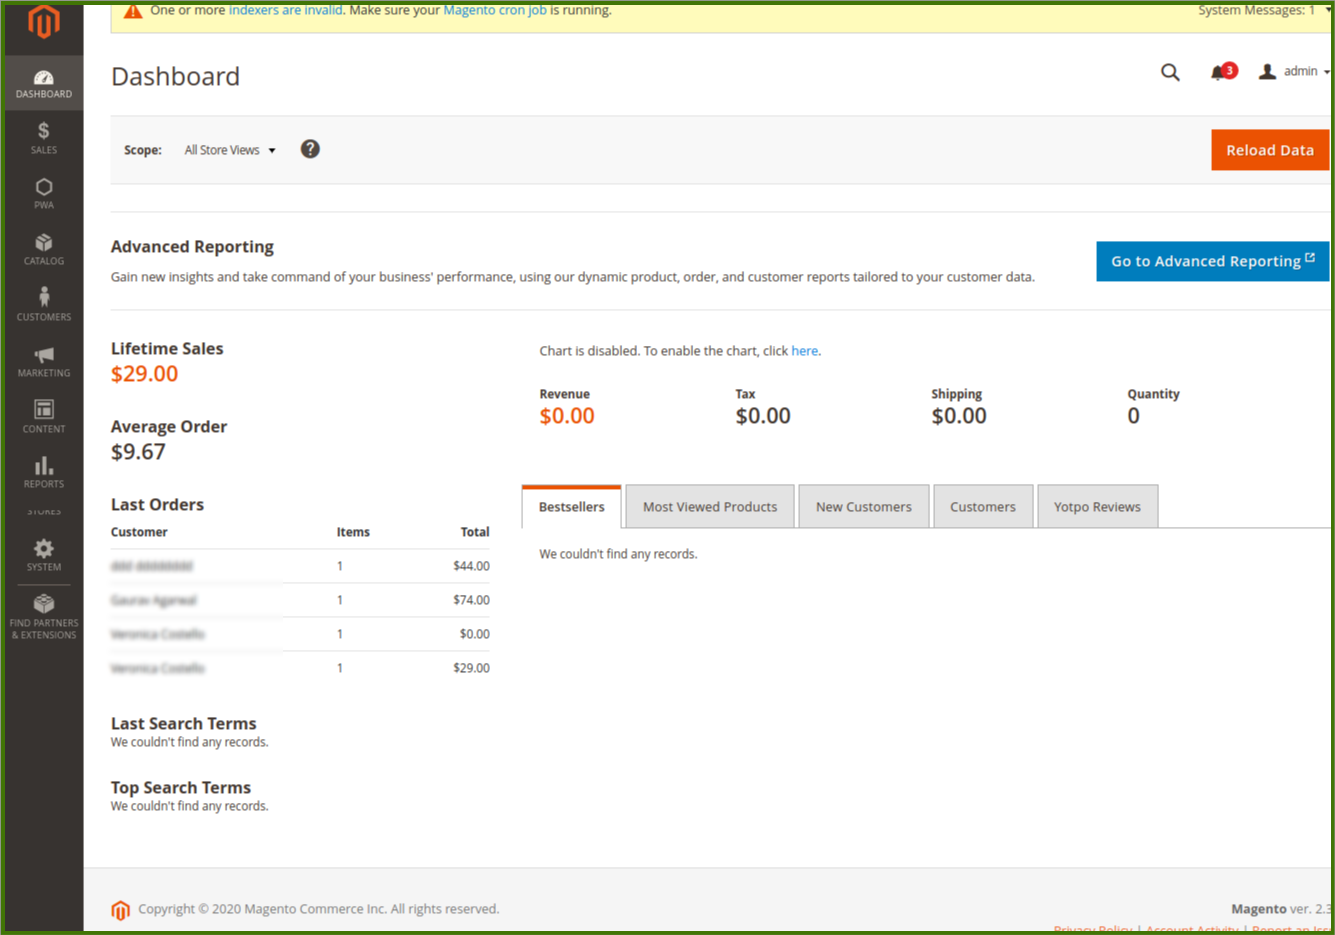
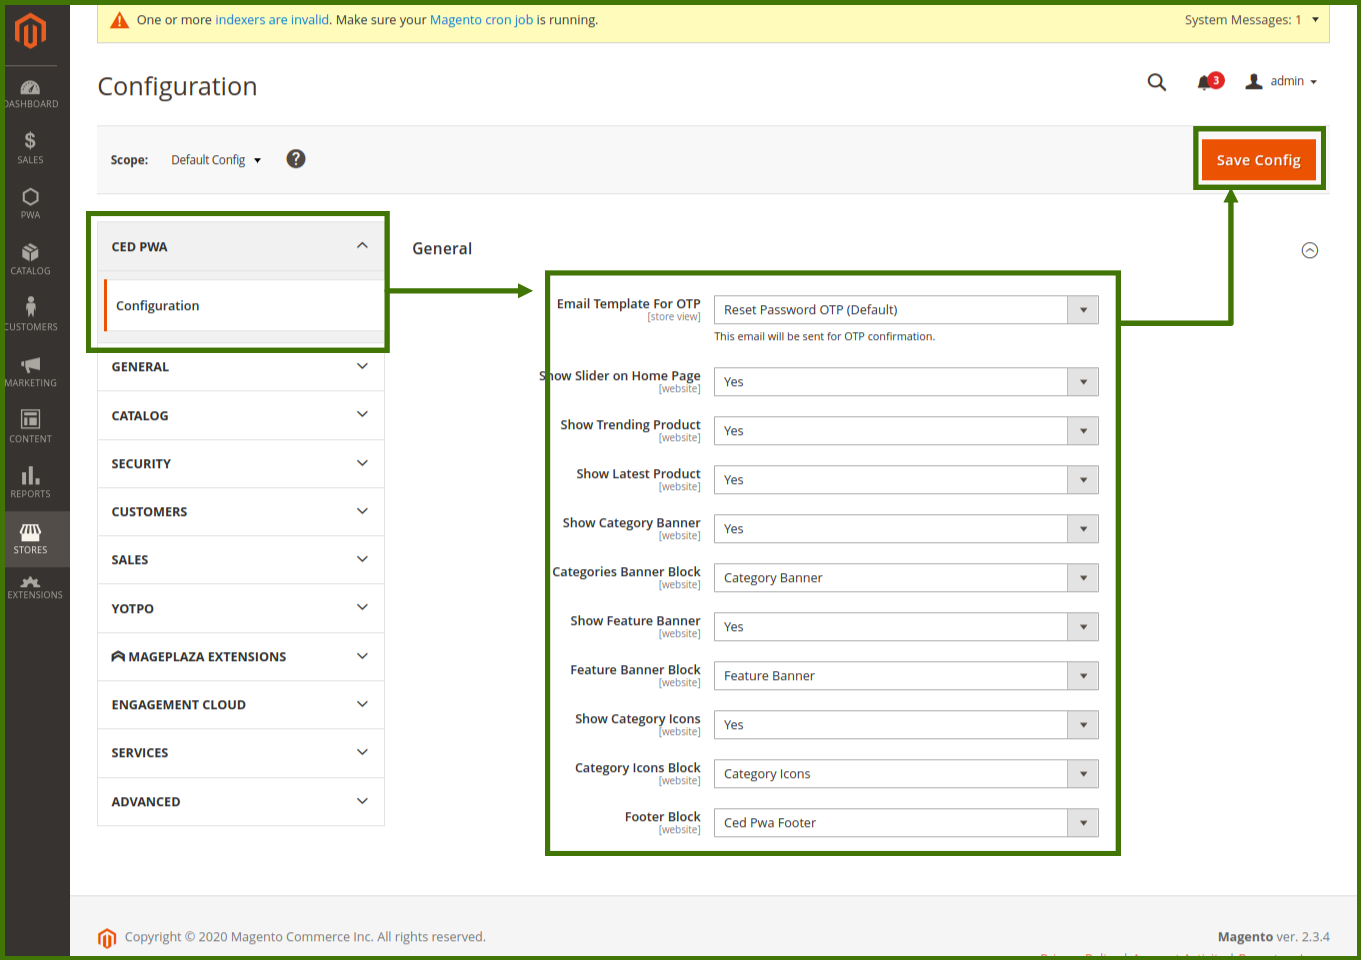
On the dashboard left side, there is an option PWA, Click on PWA, upon selecting it will show two options, Manage Slider and Configuration. Select the option Configuration. A new window will open up with details of configurations.
LOGIN TO ADMIN ACCOUNT-> SELECT PWA->CONFIGURATION.
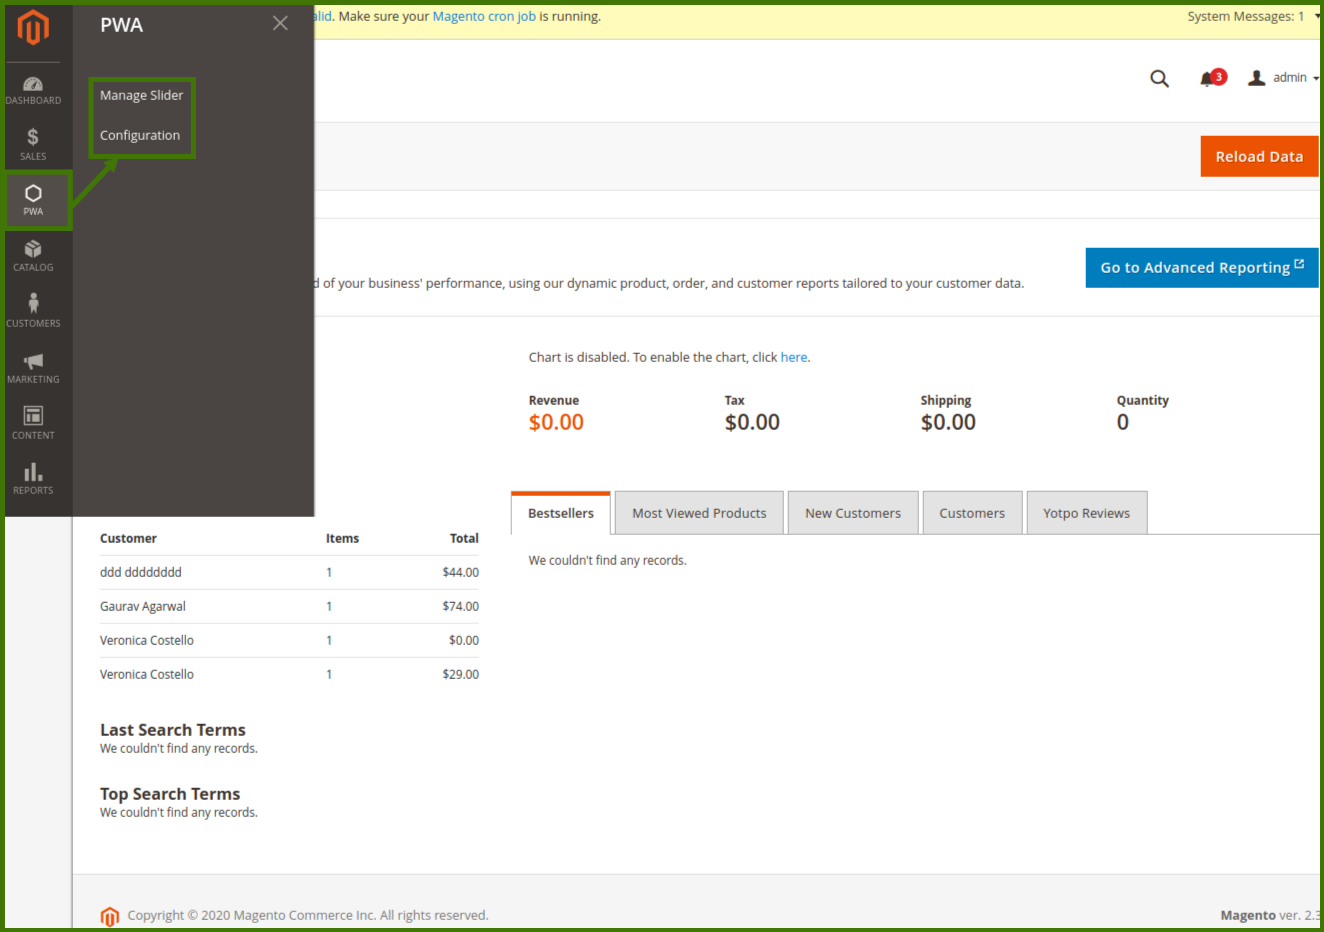
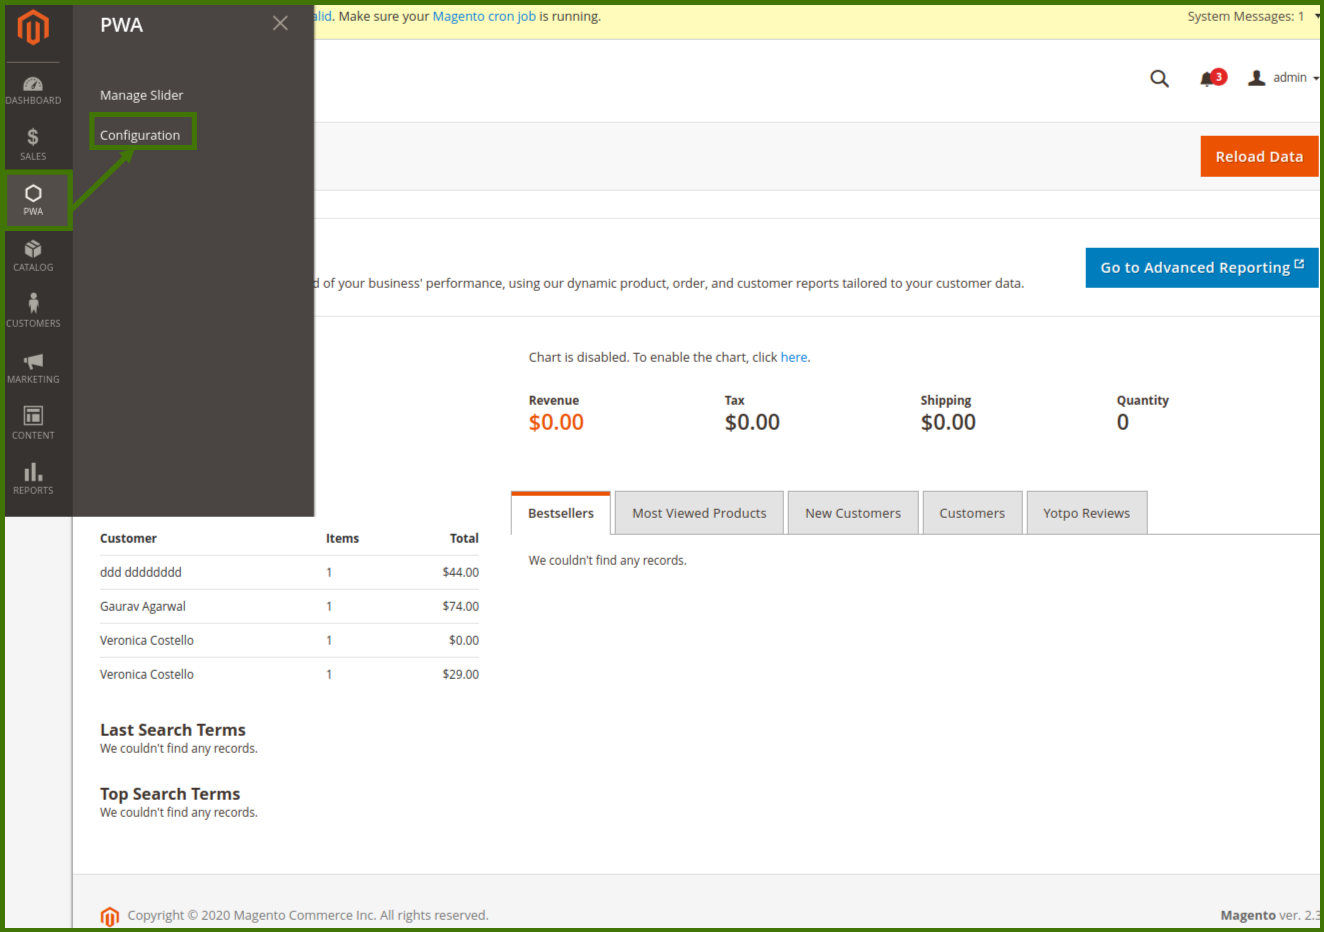
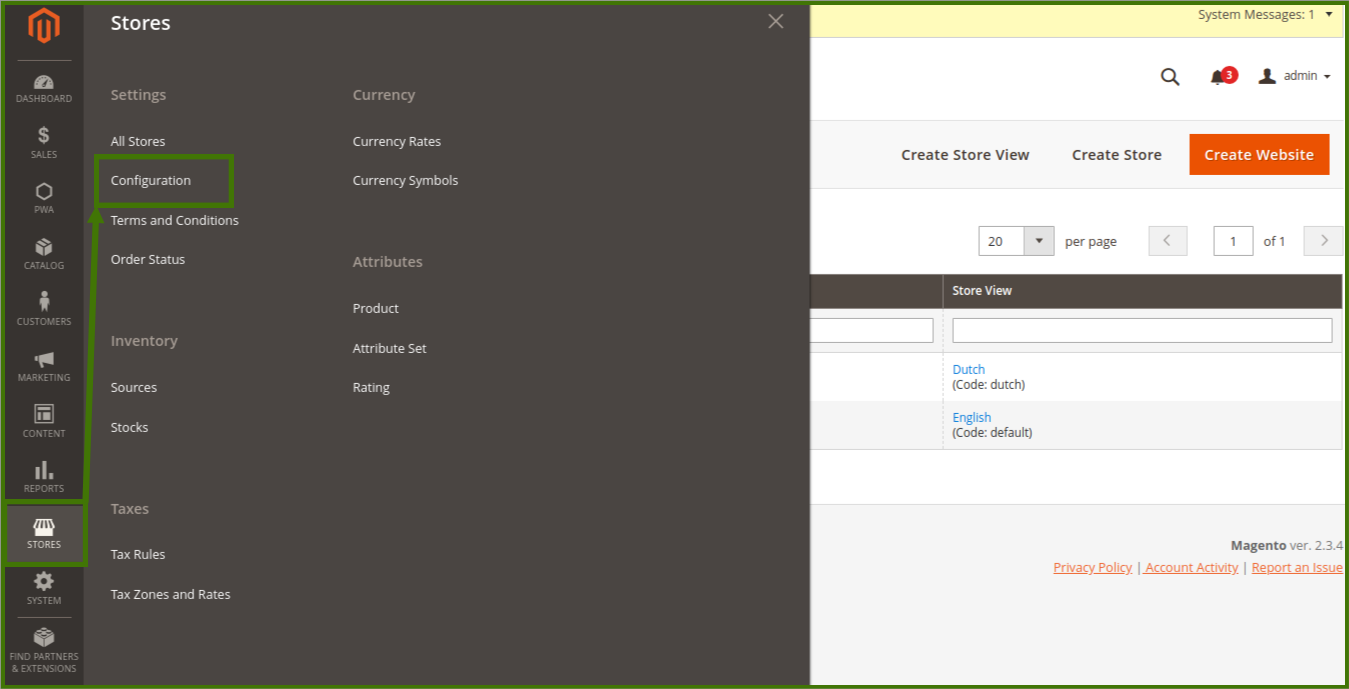
OR THERE IS ALSO THE SECOND OPTION TO OPEN THE PWA CONFIGURATION:
LOGIN TO ADMIN ACCOUNT->GOTO STORES->SELECT CONFIGURATIONS-> CED PWA -> CONFIGURATION.
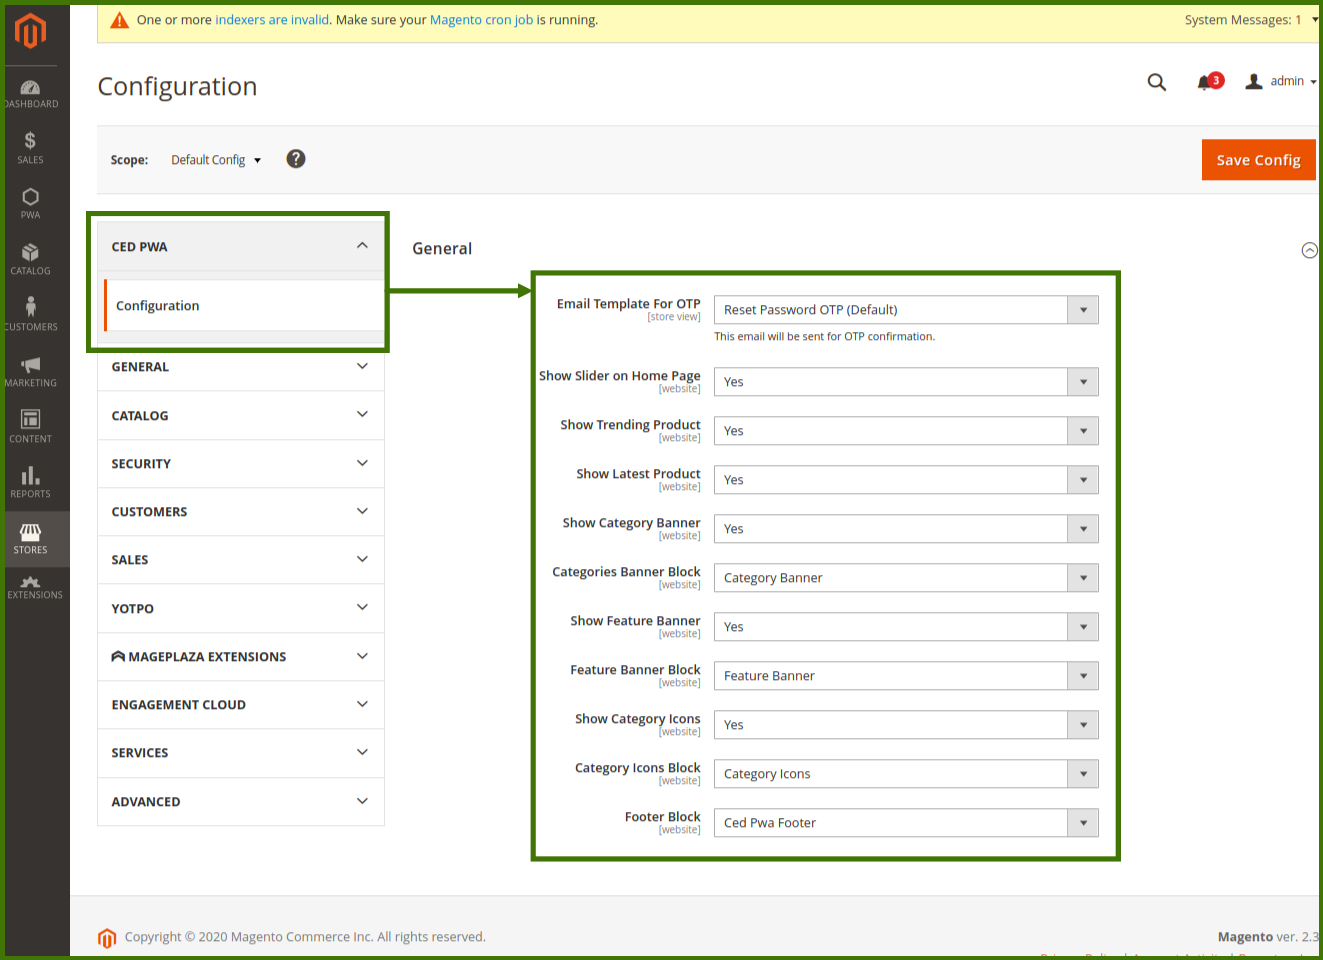
Configuration:
Email templates for OTP:
Admin can customize the email template sent to customers to verify their identity with a one-time password (OTP). The email templates include a verification code that users enter to prove their identity, similarly, admin can create another email templates for the customer to verify and reset the password.

Show Slider on Homepage:
The admin enables it to YES/NO, once it is Yes then the slider start showing on frontend. Sliders let you display more than just one image. Calls to action. Sliders provide opportunities to display multiple CTAs for your important content.

Show Trending Product:
The admin enables it to YES/NO, once it is Yes then the new trending list show the products in the category that is new and popular along with the pricing as well as product interest, can attract more customers on your website, admin can accordingly choose to sell it and price it right.

Frontend View:
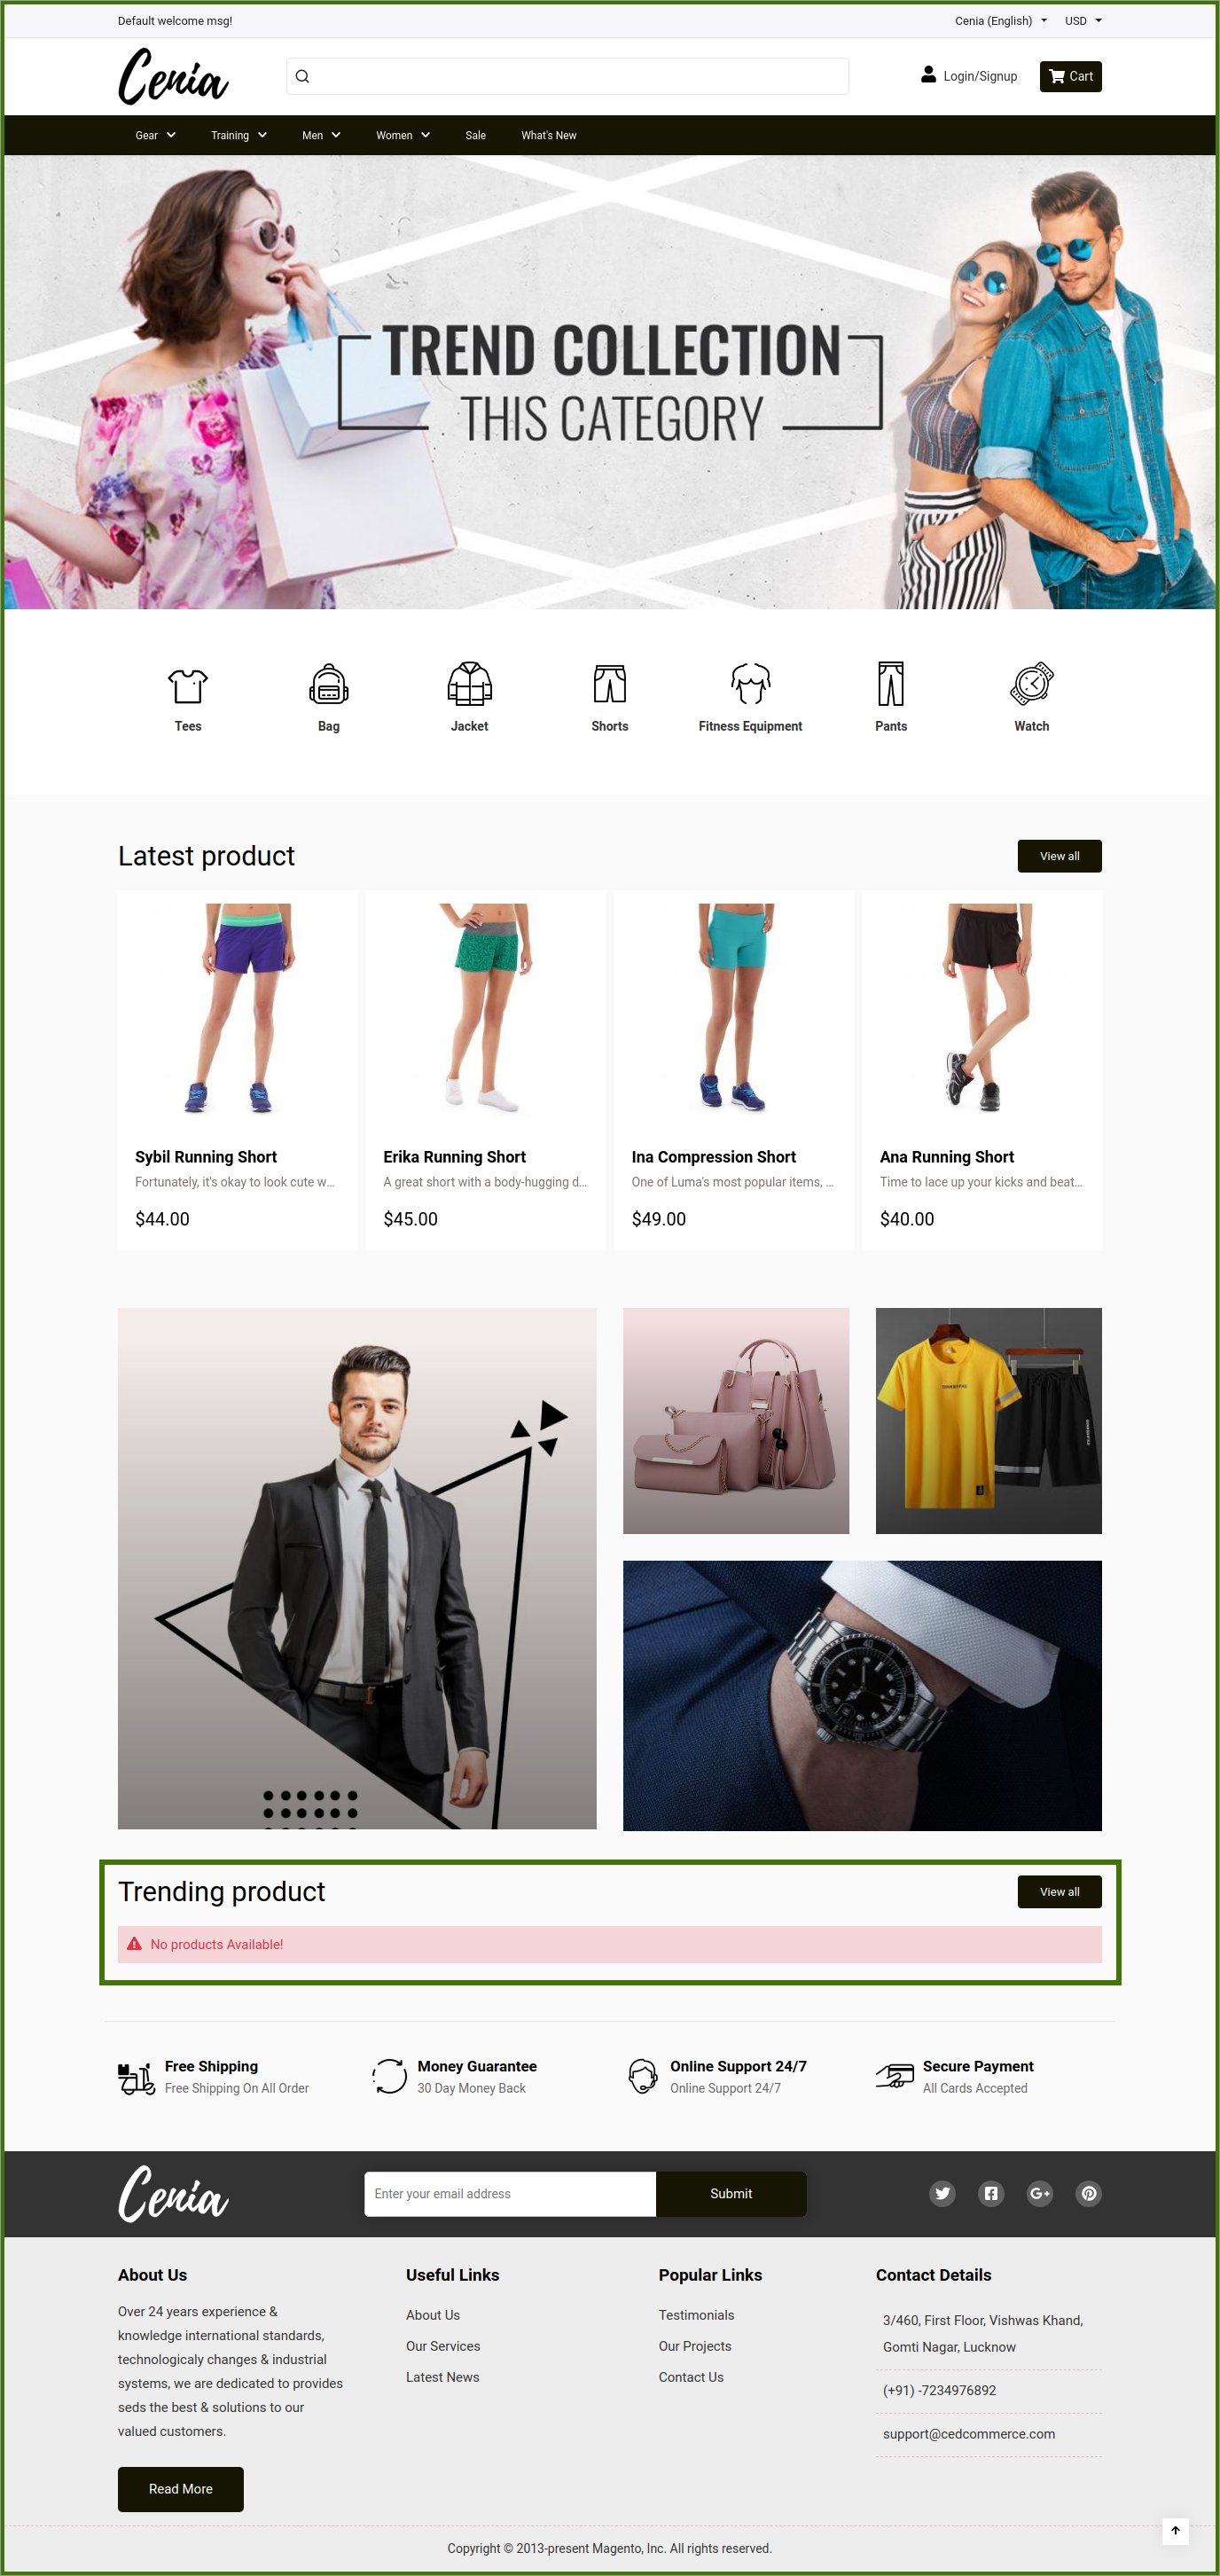
Show Latest Product:
The admin enables it to YES/NO, once it is Yes then the new latest Product list will shows in the category that is popular in the market along with the pricing as well as product interest, can attract more customers on your website, admin can accordingly choose to sell it and price it right.

Frontend view:
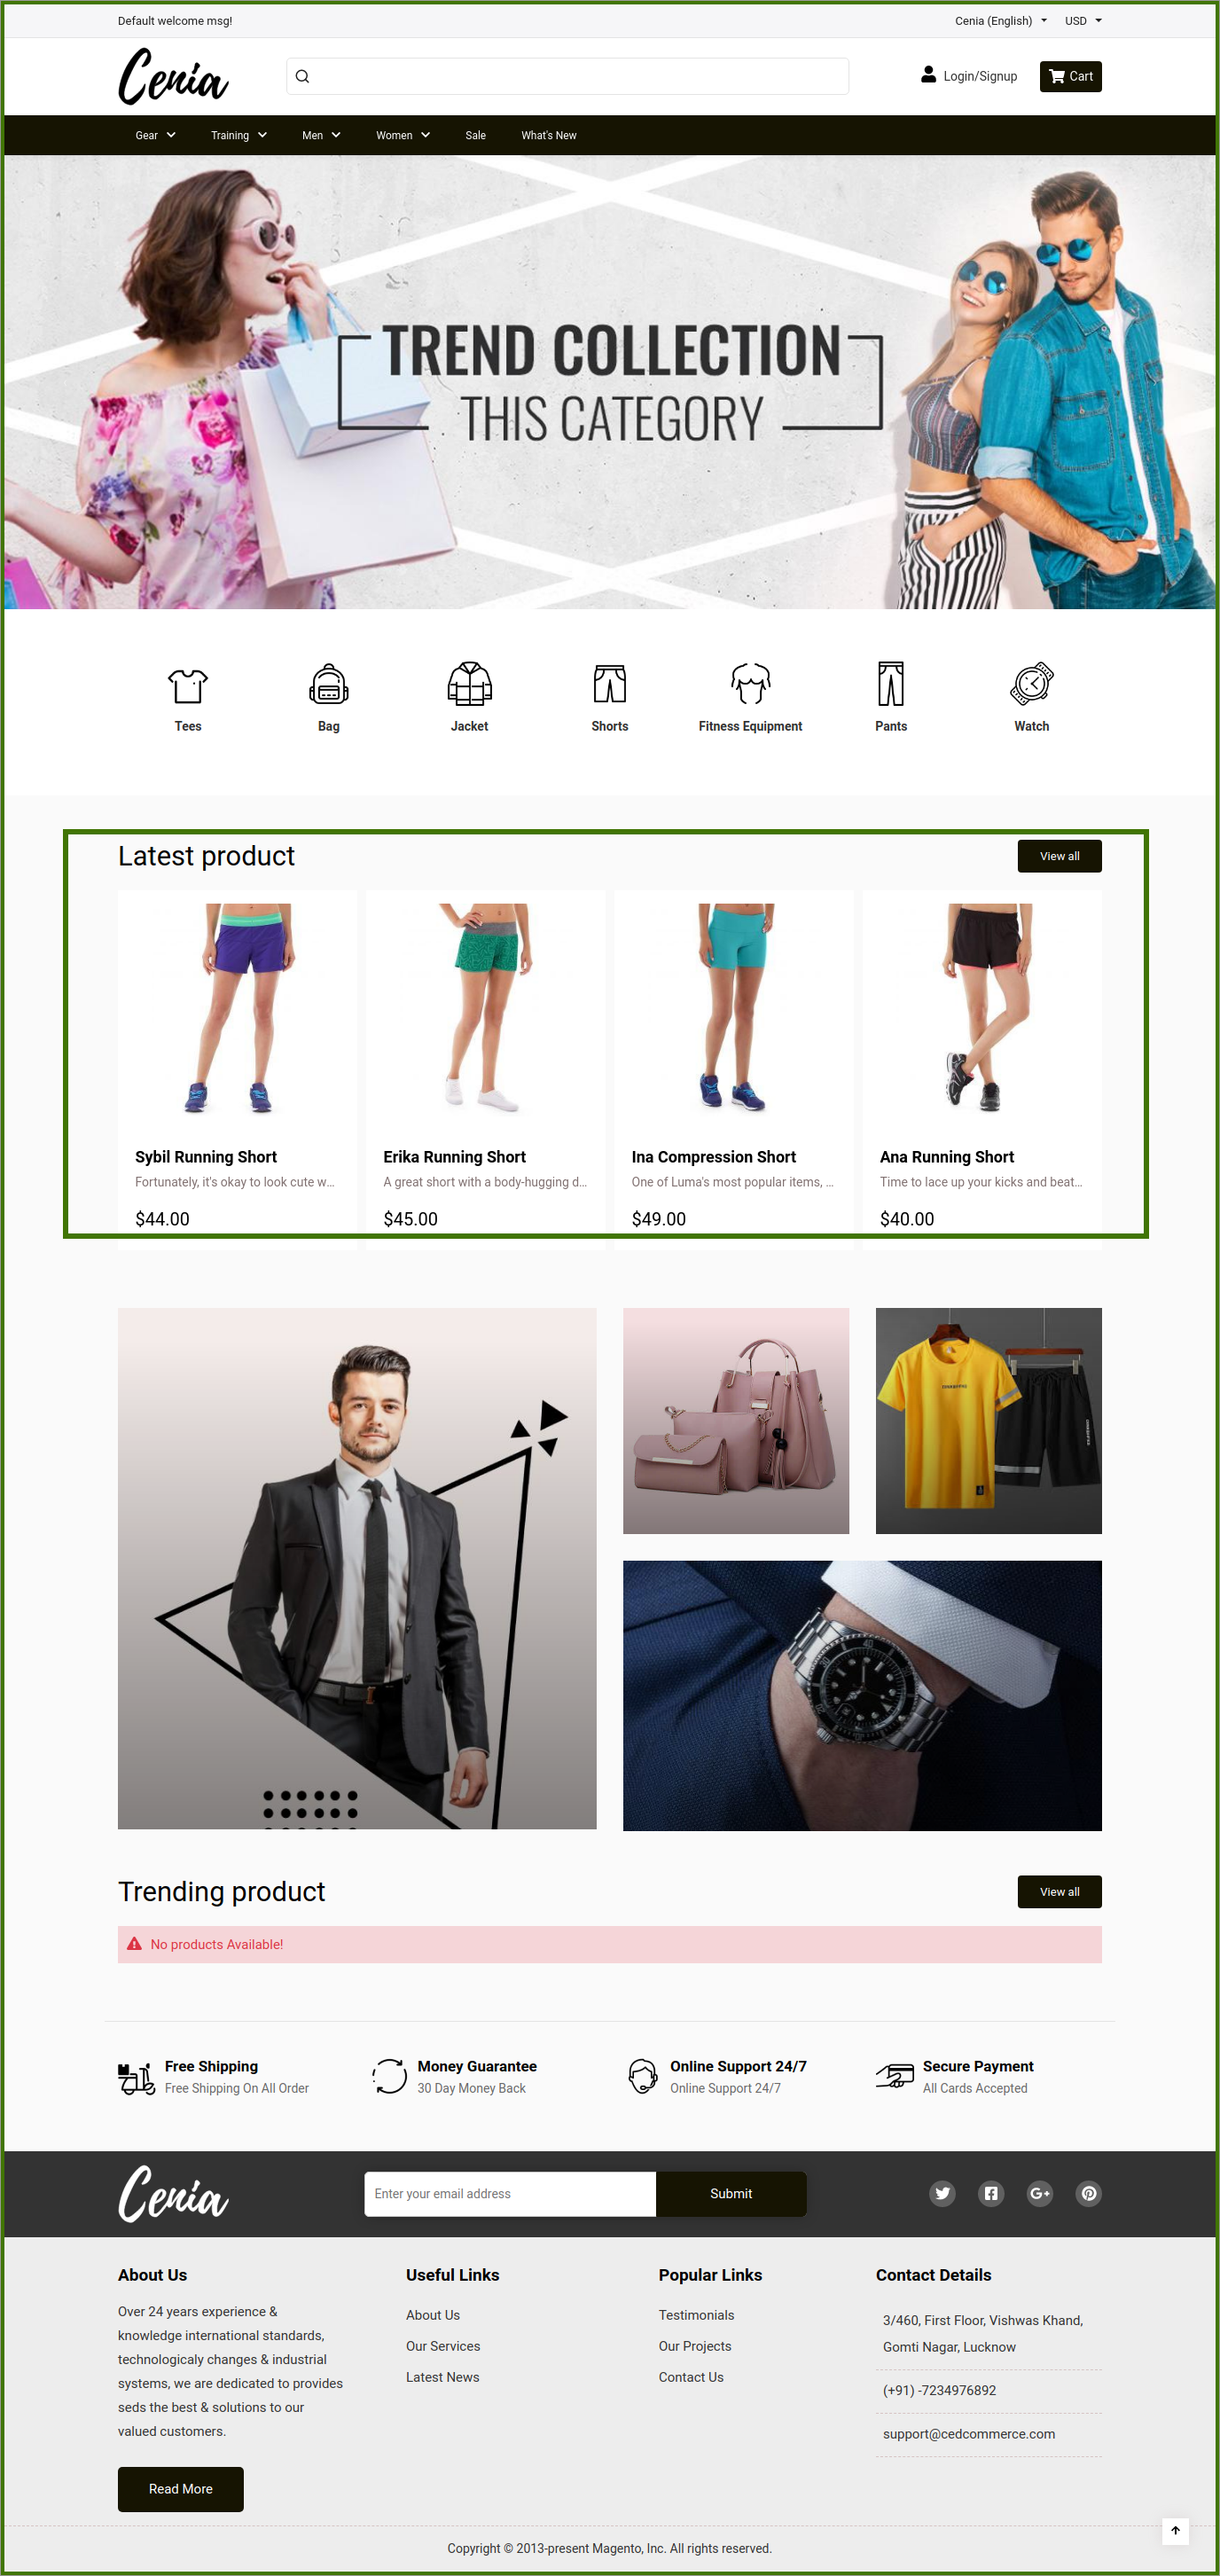
Show Category Banner:
The admin enables it to YES/No, once it is Yes, then it will start showing on the frontend, Category Banners focus all of the shopper’s attention on your product by highlighting its shelf space. It offers the versatility to frame small product sections or an entire brand family. Separates your brand from competing brands. Directs the shopper to your brand.

Frontend View:
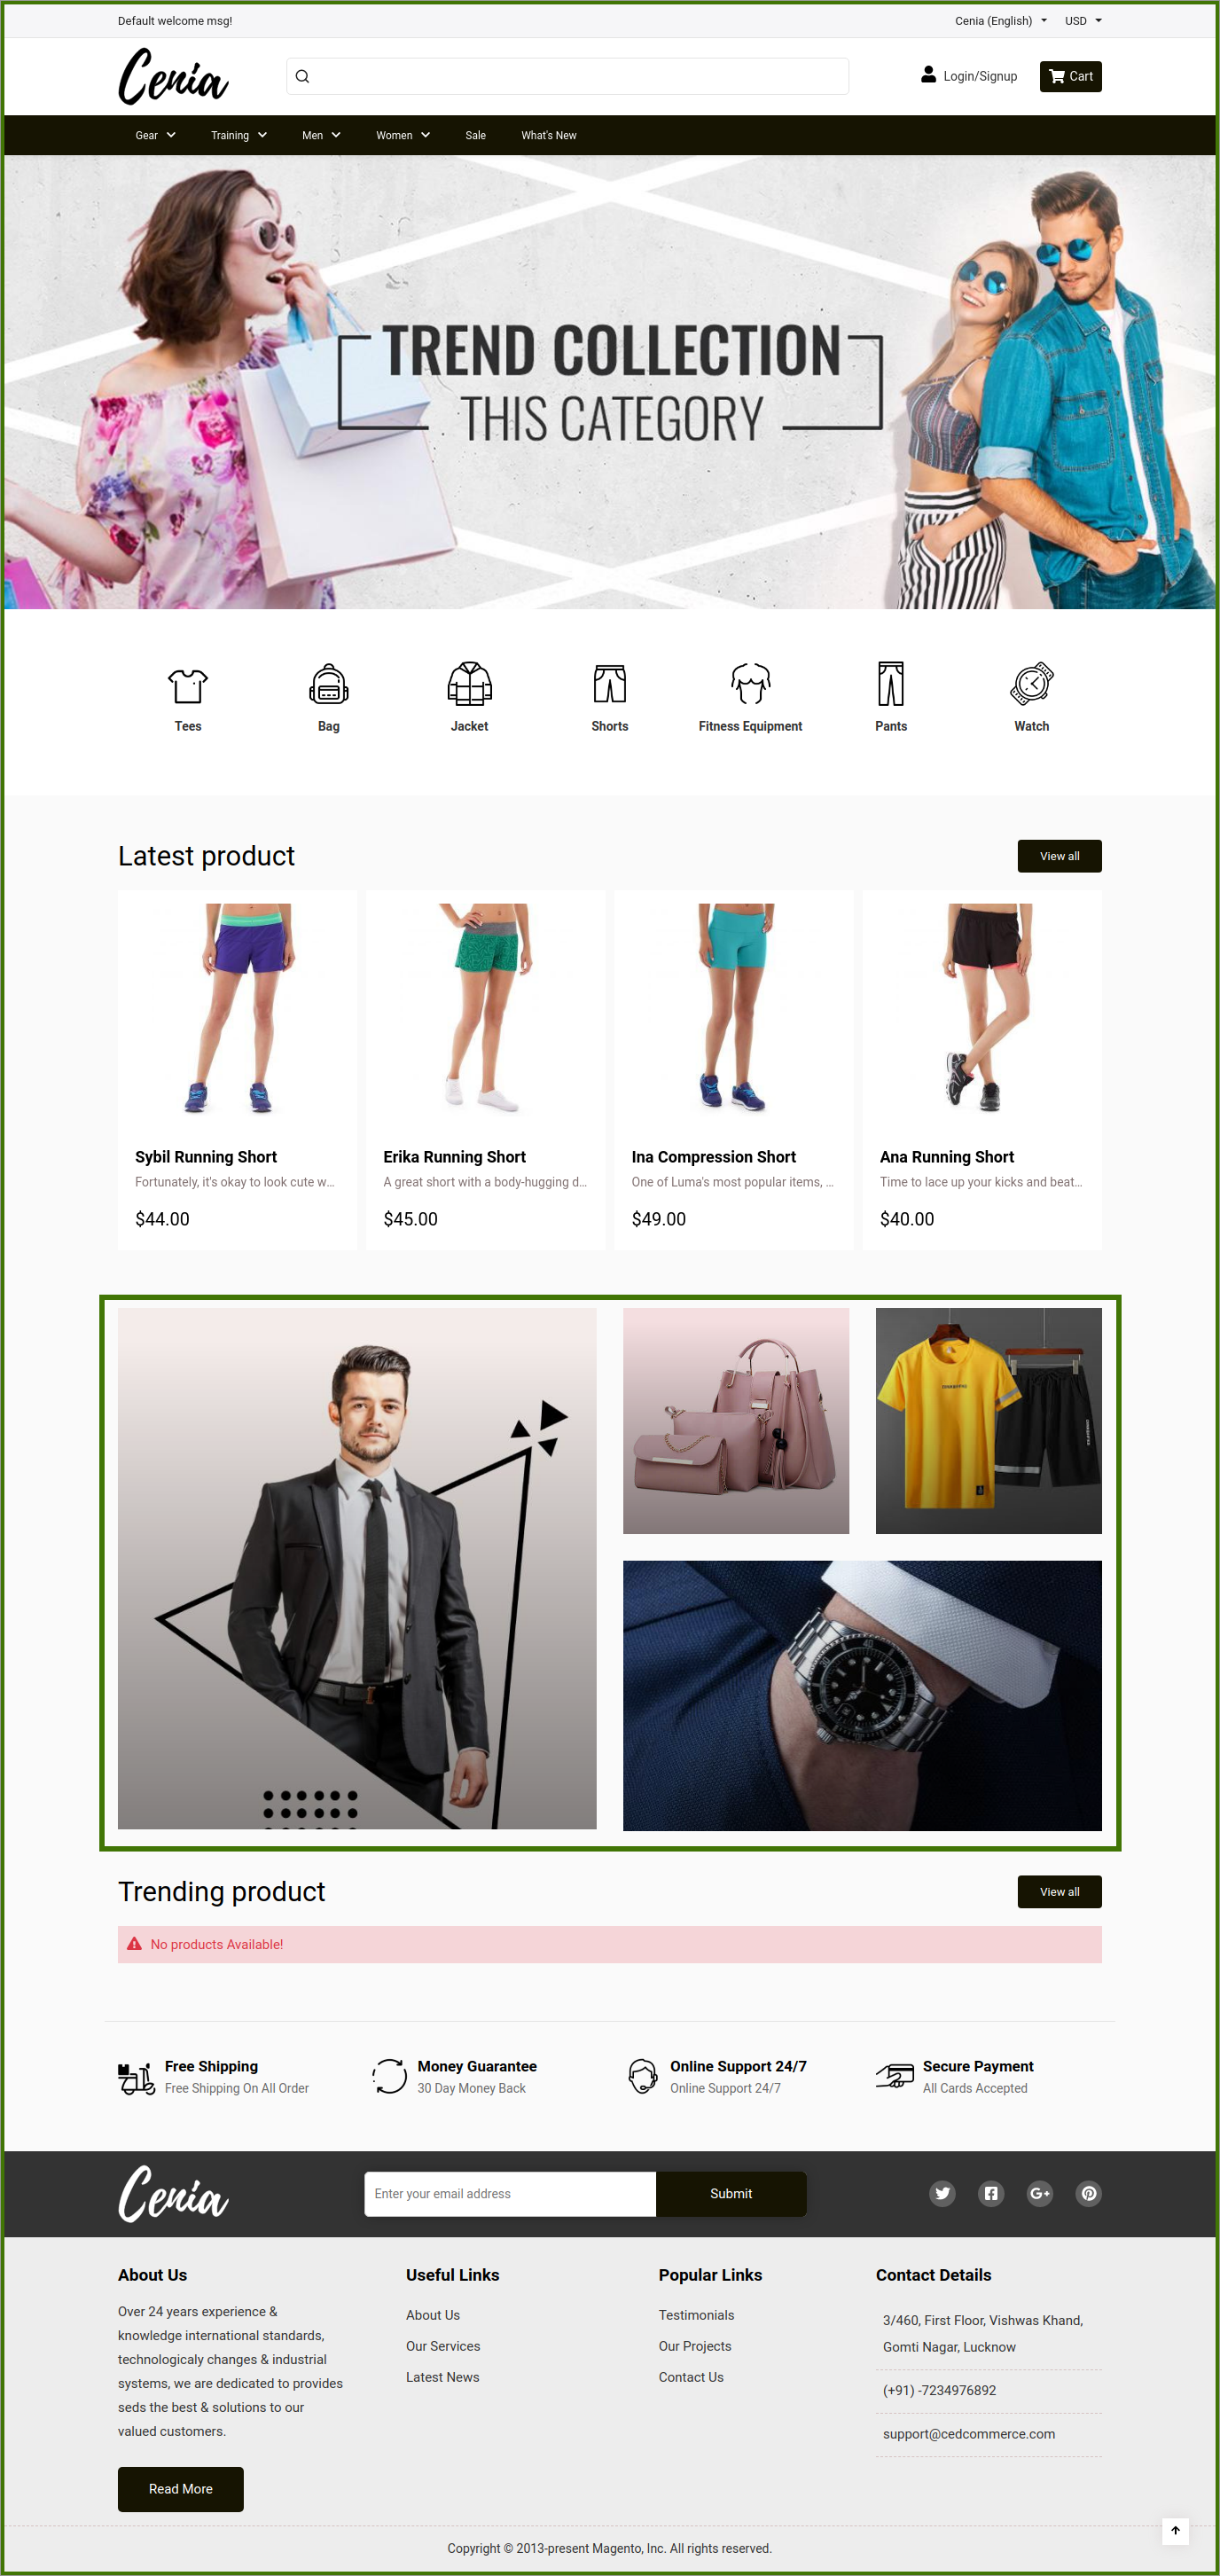
Categories Banner Block:
Categories Banner blocks are used as hero images for category pages to draw attention to a specific product or service. Banners are placed above or below the main content blocks, or on the website’s sidebars, once a banner clicks it will redirect to category blocks as well and show the products. When you view categories on the front end, you should be seeing the different banners, based on the category block.

Select the Category Banner from the drop-down list and apply it will start showing on the frontend website.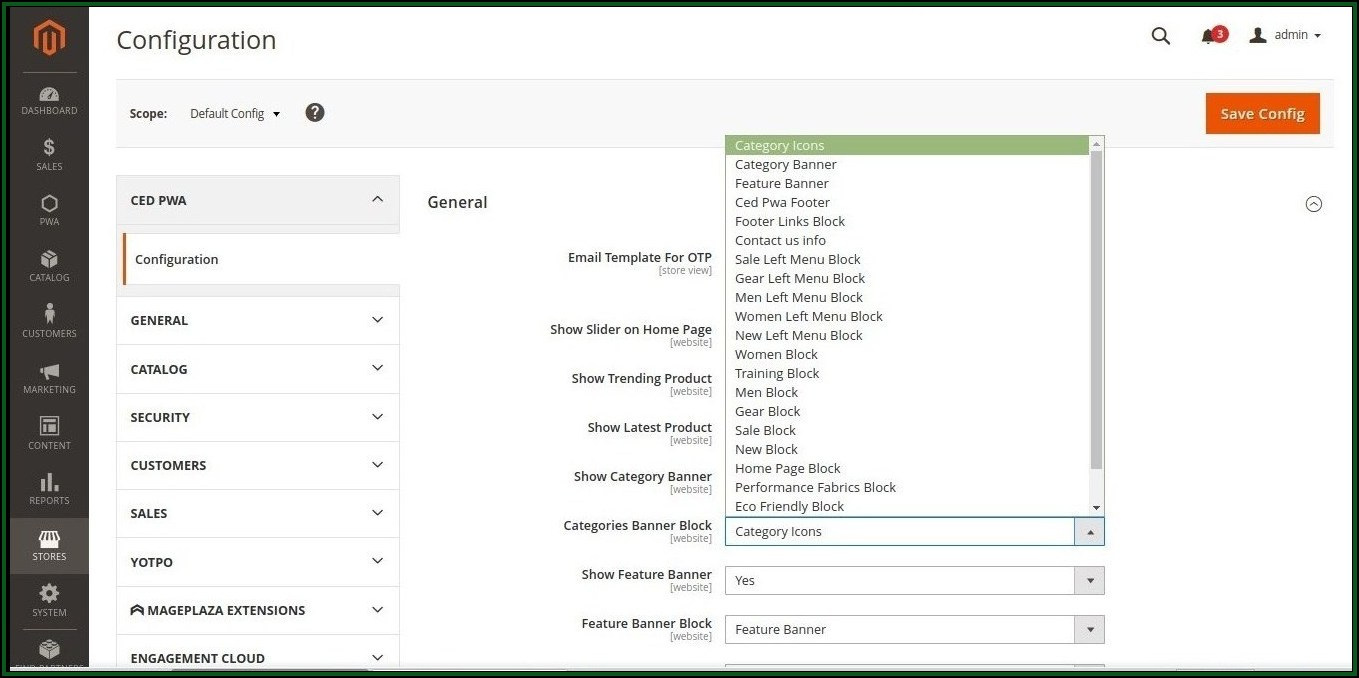
Show Feature Banner:
Show feature banner is one of the important visual assets, admin enables it to YES/NO, once it is enabled to yes, then most feature banners for specific products or categories will be highlighted and displayed.

Frontend view:
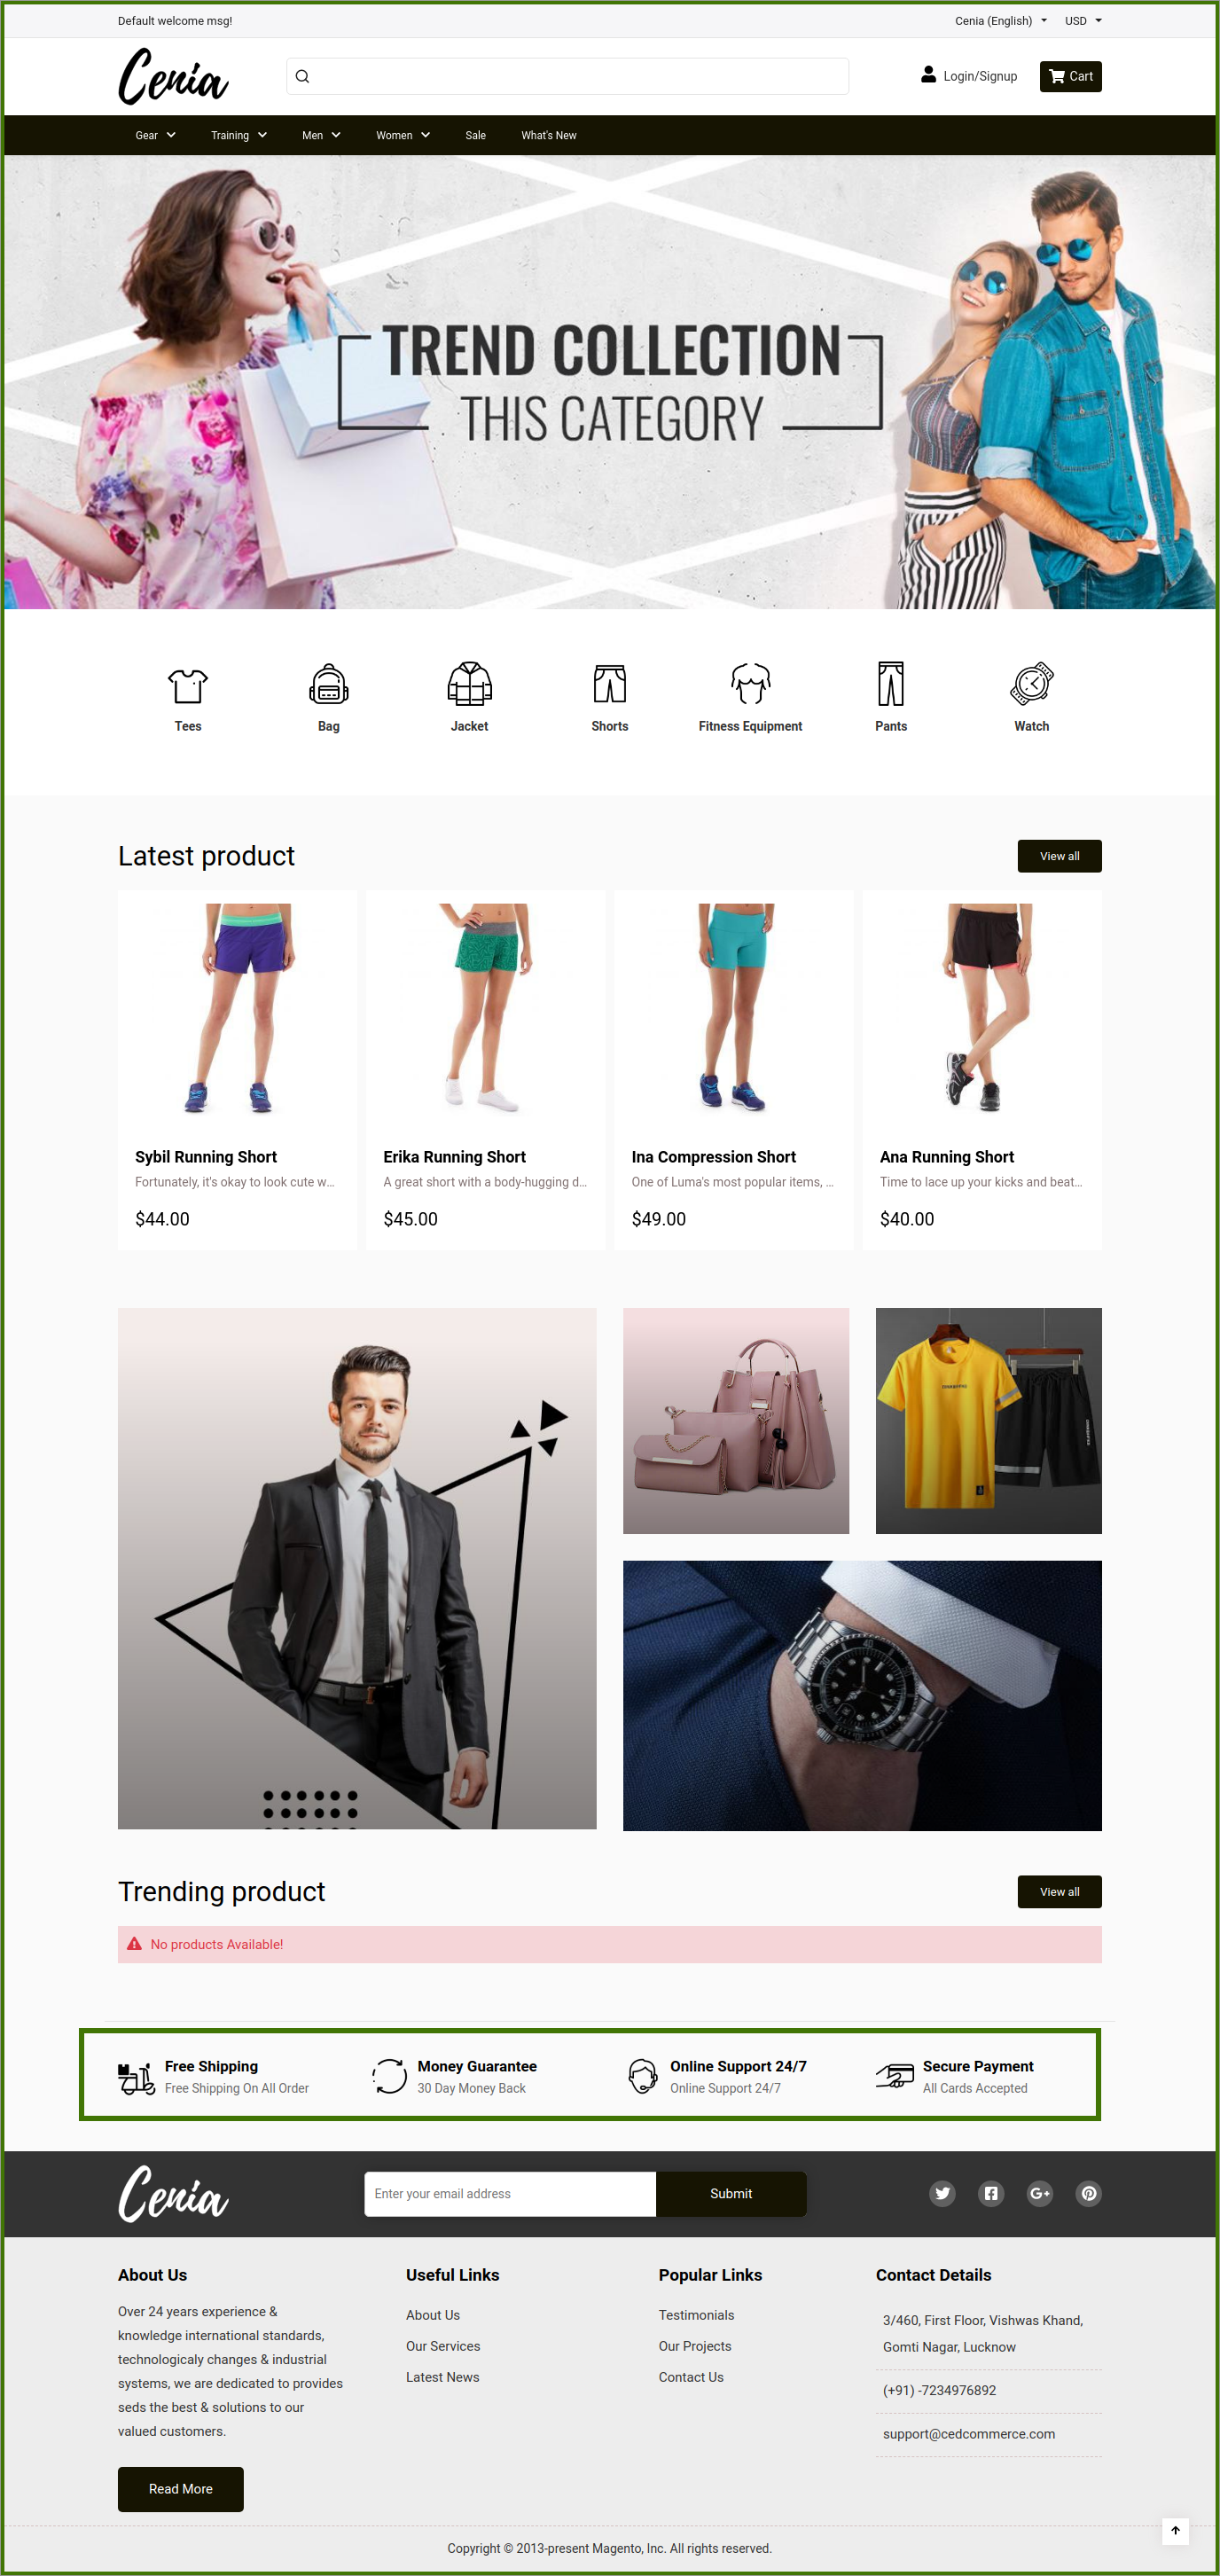
Feature Banner Block: This feature allows admin to feature the selected banner block from the drop-down list, these banner blocks are added in dropdown by admin.

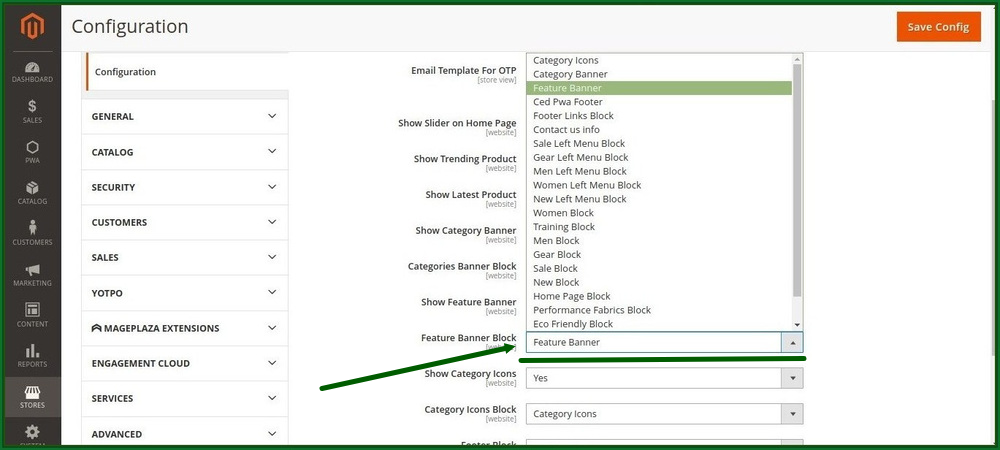
Show Category Icons: This feature allows the admin to show the category icons on the website or not by selecting it to YES/NO.

Category Icons Block: This defines the Icon of any specified category blocks to show. Admin Select the different category icons block from the drop-down menu list, added by admin, and select to show on the website.

Footer Block: This allows admin to show the footer block by selecting from the drop-down list, added by admin.

Frontend Side Footer Block: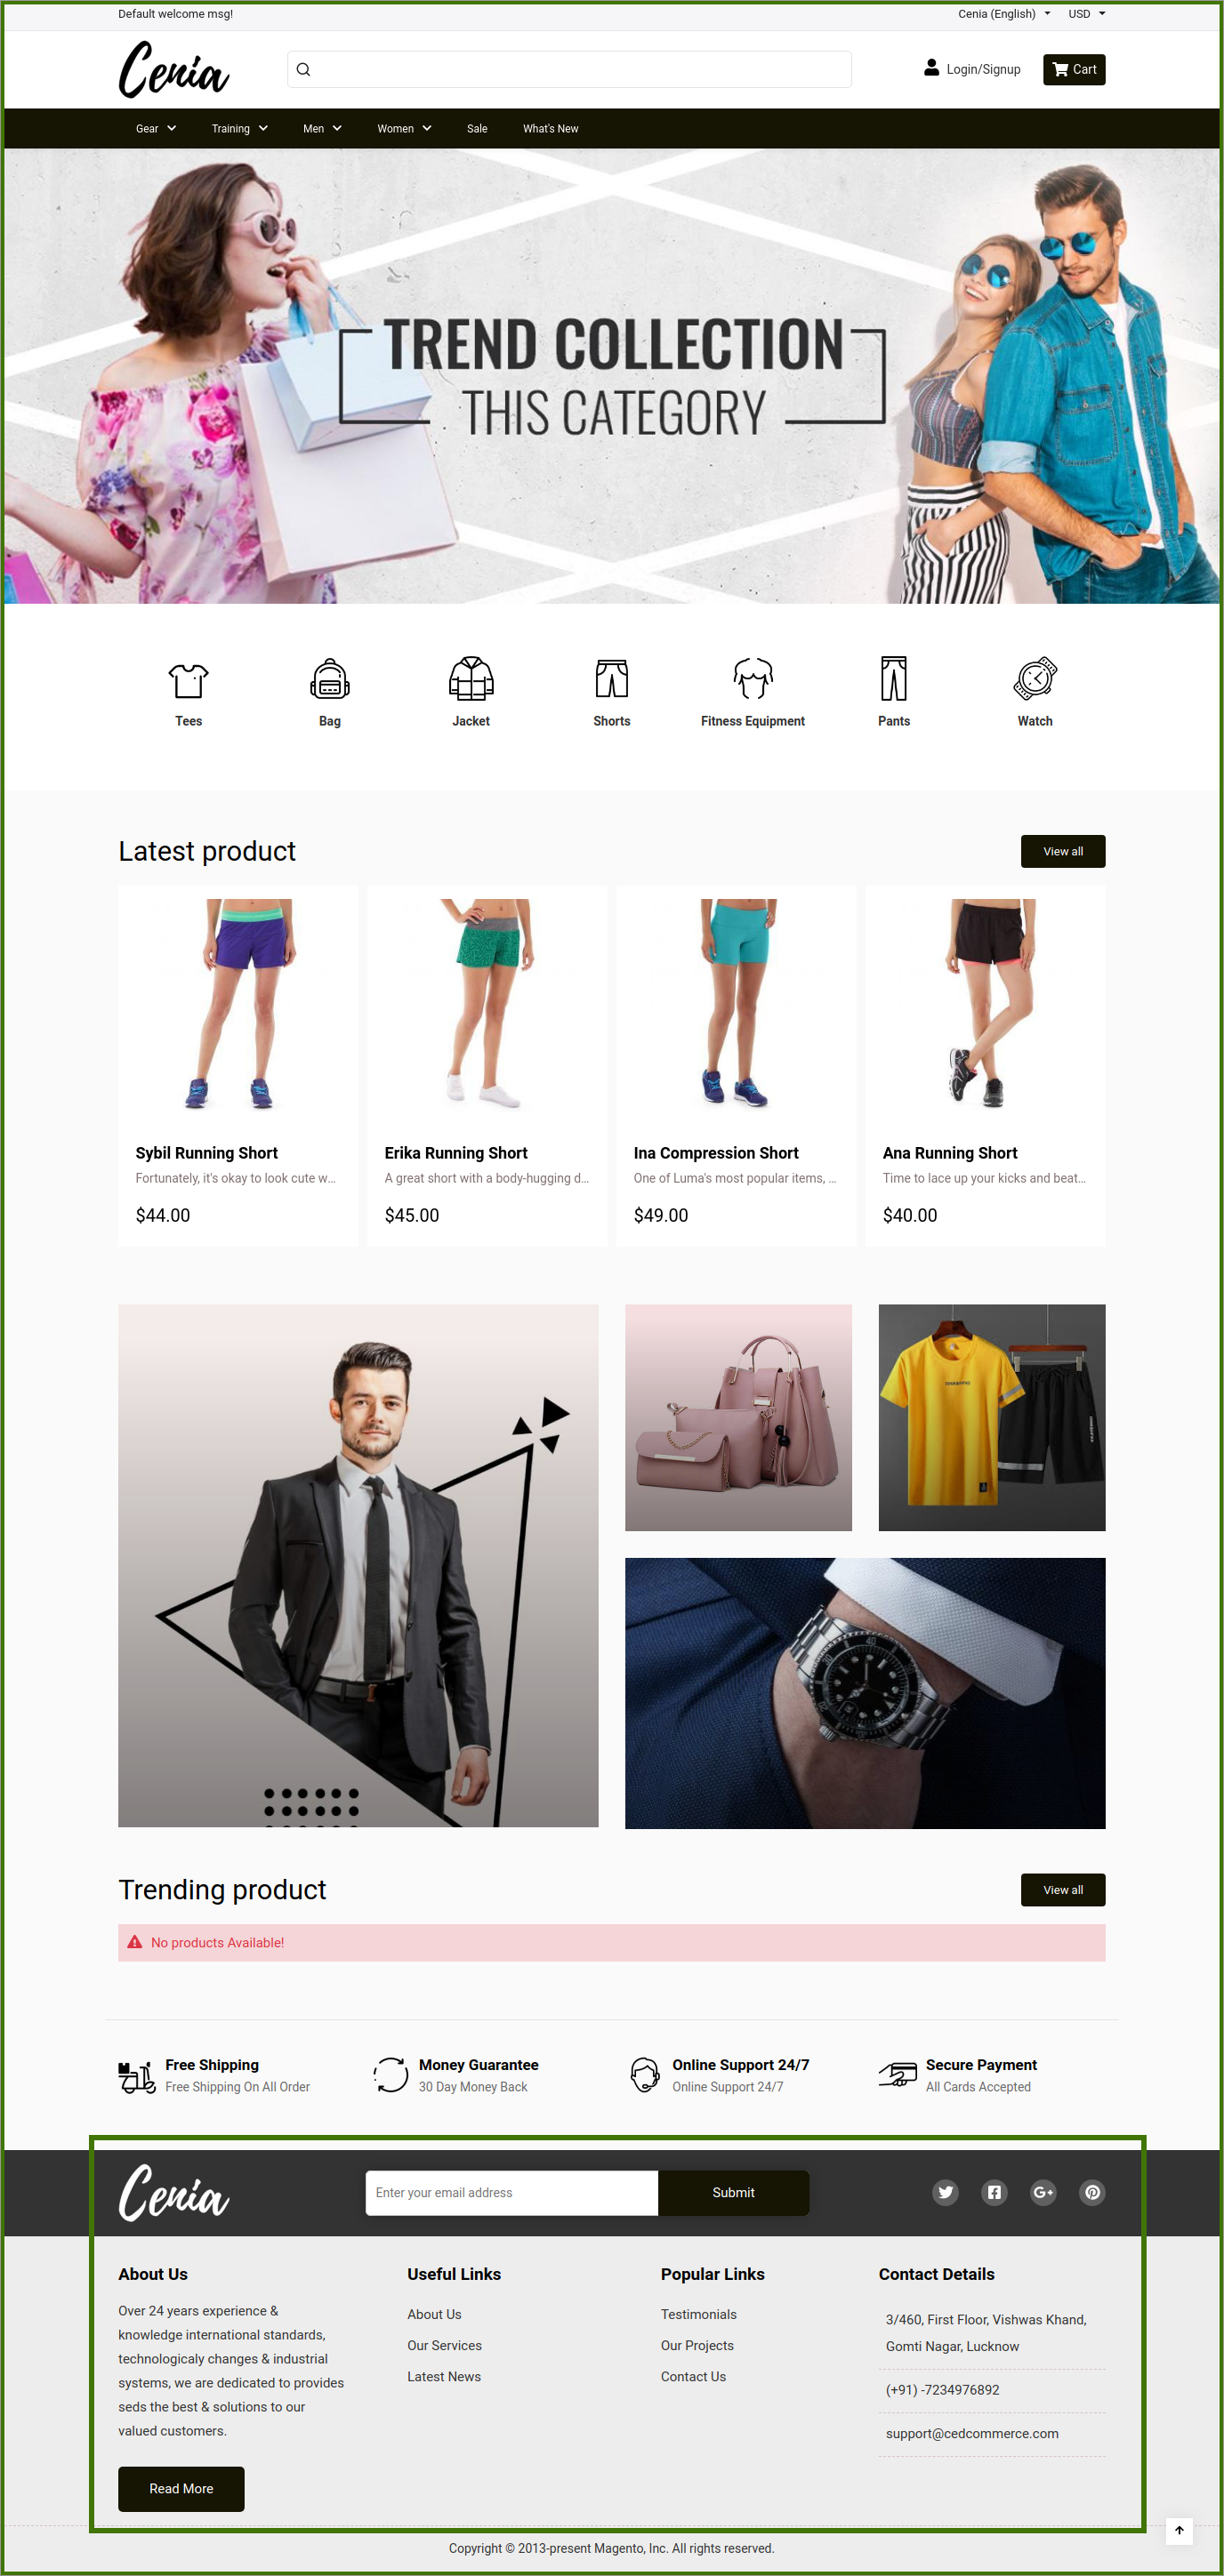
After all the changes in configuration Click on the save button so that changes will appear on the frontend side.
For Adding a Category/Feature Banner/Slider/Block go to the Content Management section of this Guide.


