
eBay Configuration Setting
Once the extension is successfully installed on the WooCommerce store, the Ebay menu appears on the left navigation bar displayed in the WooCommerce Admin Panel. Before starting with the configuration settings, the pre-requisite is to have an eBay seller account.
To set up the eBay Integration Configuration settings
- Go to the WooCommerce Vendor panel.
- On the left navigation bar, click the Ebay menu.
- Click the CONFIGURATION tab
The EBAY CONFIGURATION page appears as shown in the following figure:
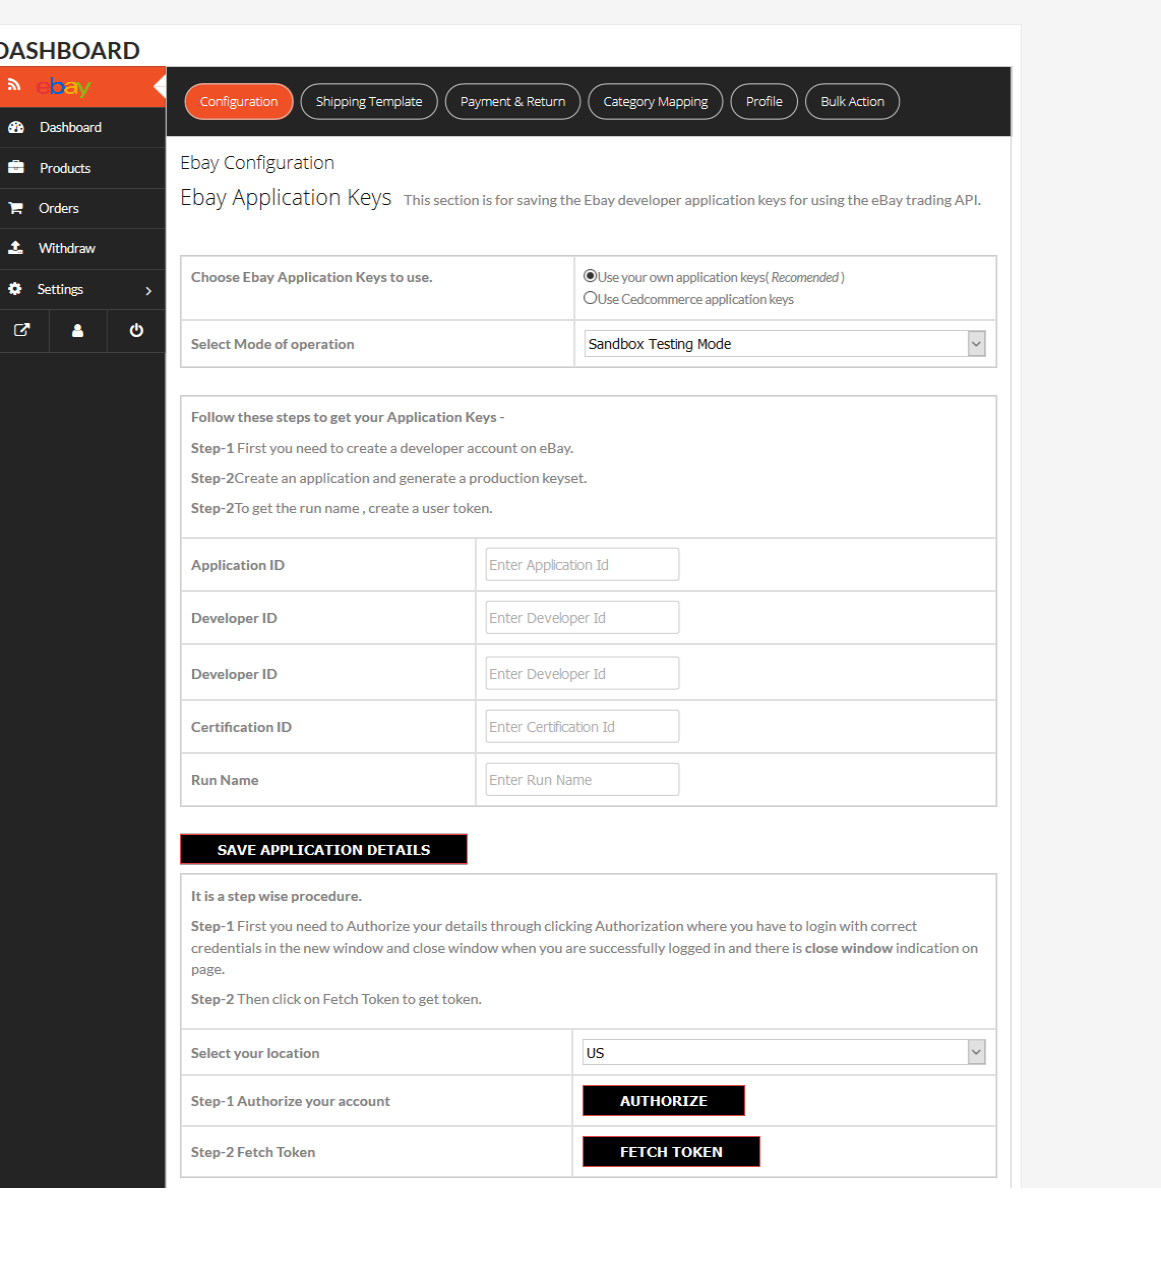
- Choose Application Keys you wish to use, either Cedcommerce or create your own developer account on ebay and use those keys. We recommend to create your own application keys. Once you get your application keys, fill in the provided fields.
- Select Mode of Operation , either Sandbox or Production whichever you wish to use and then click on SAVE APPLICATION DETAILS button.
- In the Select your location list, select the required location.
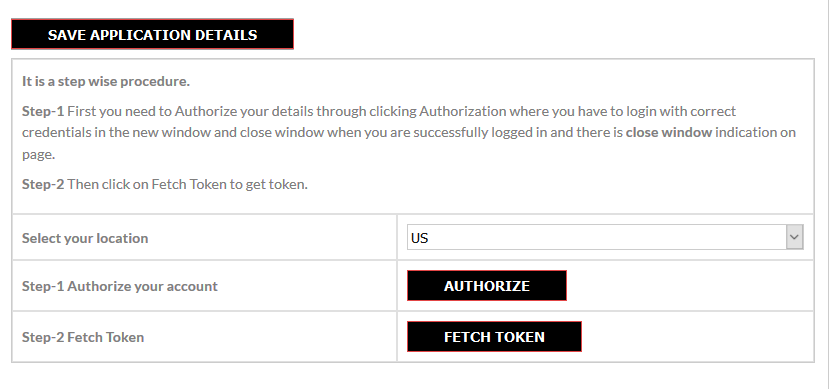
- Click the Authorize button.
The eBay Sign In dialog box appears as shown in the following figure:
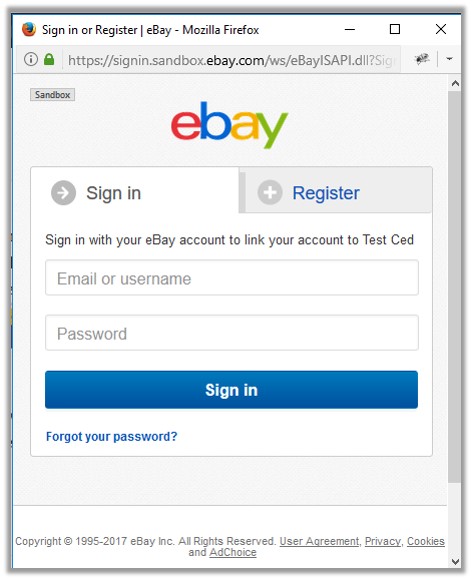
- Enter the eBay login credentials, and then click the Sign in button.
The page appears as shown in the following figure:
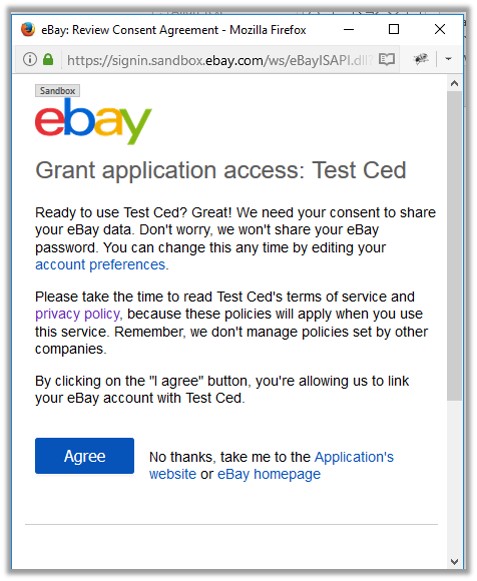
- Click the Agree button.
A message appears as shown in the following figure:

- Move back to the WooCommerce Admin panel.
- Click the Fetch Token button.
The token is fetched. - Scroll down to the PAYMENT AND RETURN section.
The section appears as shown in the following figure: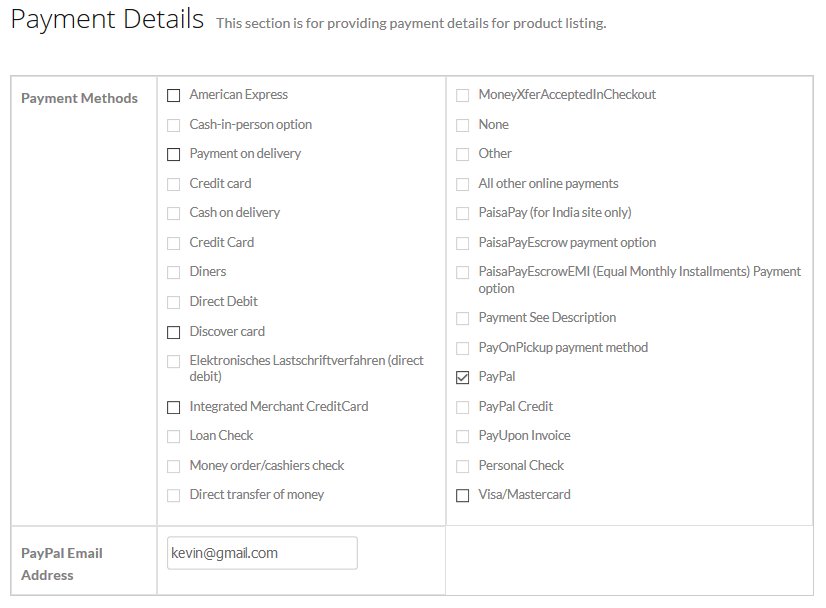
- Under the PAYMENT DETAILS section, select the check boxes associated with the required payment details, and then click the SAVE DETAILS button.
- Scroll down to the SHIPPING DETAILS section.
The section appears as shown in the following figure:
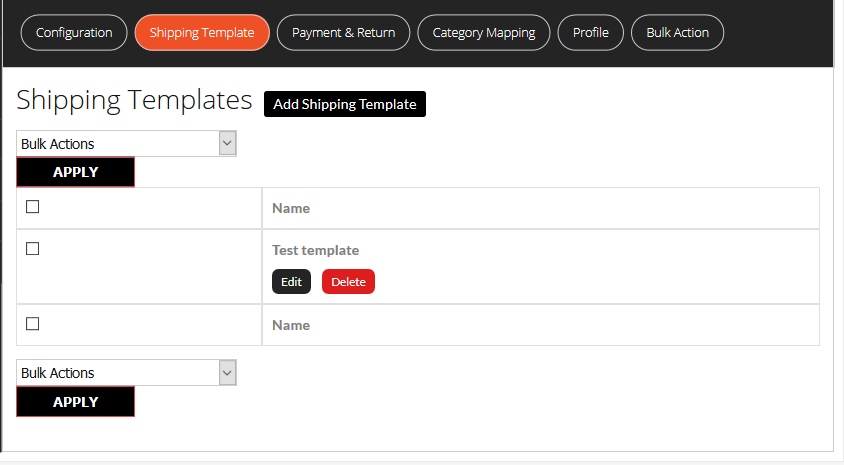
- Under SHIPPING TEMPLATE, do the following steps:
- In the Service Type list, select the required option.
- In the Postal Code box, enter the zip code of the area where the shipping is required.
- In the Domestic Shipping Service list, select the required shipping method if required.
- In the text box associated with the Domestic Shipping Service list, enter the shipping charges.
- In the another text box, enter the additional cost if required.
- Click the Add More button to add more shipping methods and details.
- In the International Shipping Service list, select the required shipping method if required.
- In the another text box, enter the additional cost if required.
- In the list, select the required Countries.
- Click the Add More button to add more shipping methods and details.
- Click the SAVE DETAILS button.
- Scroll down to the RETURN POLICY section.
The section appears as shown in the following figure:
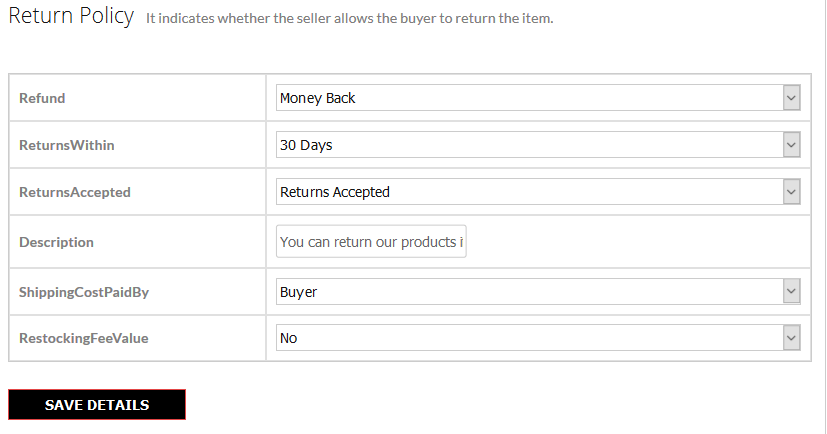
- Under RETURN POLICY, do the following steps:
- In the Refund list, select the required refund type.
- In the ReturnsWithin list, select the required number of days within which the customer can return the product based on the Return and Refund policy.
- In the ReturnsAccepted list, select the option to mention whether the return is accepted or not.
- In the Description box, enter the description of the return and refund.
- In the ShippingCostPaidBy list, select the payer of the shipping cost.
- In the Re-StockingFeeValue list, select the required value or option.
- Click the SAVE DETAILS button.
×


