
5.From Prestashop to WooCommerce Dashboard ↑ Back to Top
To migrate data from Prestashop, visit the homepage of the Ecart migrator plugin and select Prestashop under the ‘from’ option, and click submit.
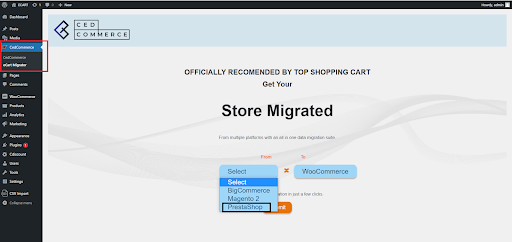
You will be directed to the settings page which will have the following options-
- General settings
- Product import settings
- Customer import settings
- Order import settings
General settings
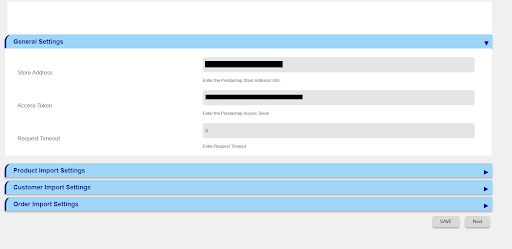
Store Address – You need to enter the URL of your Prestashop store here.
Request timeout – Request timeout is the maximum execution time for the plugin in seconds for every detail that is being imported.
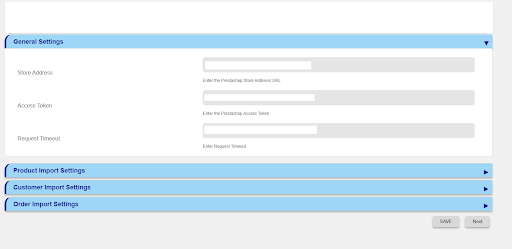
Access token –
- The access token will be generated from the admin panel of your Prestashop store.
- Login to your Prestashop admin panel with your credentials.
- Locate ‘advanced parameters’ and search ‘webservice’ options under it.
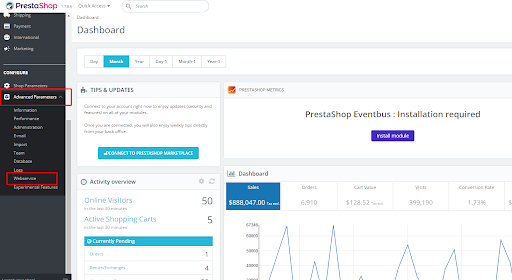
- Click on the web service option and you will be directed to a page where you will get the option to add a new webservice key.
- Click on the add new webservice key to proceed ahead.
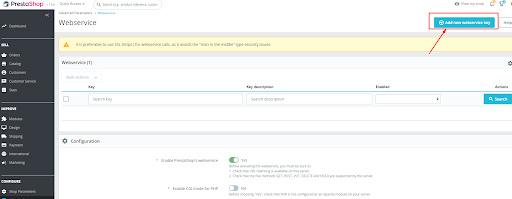
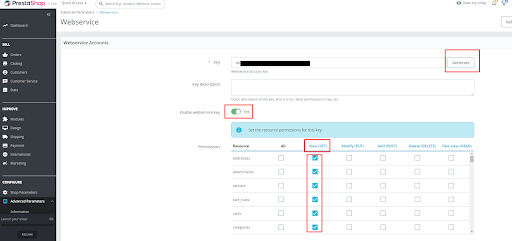
- On the next page you will have the option to generate the API key for your Ecart plugin.
- Click on generate, and you will have a new key to establish the connection.
- Mark on to enable the webservice key and set up your page, as shown in the image below.
- Now copy the generated key from your Prestashop admin panel.
Paste the copied key into the API token space of your Ecart migrator plugin
Product import settings
- All of the settings under this section are the same as explained in the BigCommerce section. Kindly follow those guidelines to import your product data without any hassles.
Customer import settings
- All of the settings under this section are the same as explained in the BigCommerce section. Kindly follow those guidelines to import your customer data without any hassles.
Order import settings
- All of the settings under this section are the same as explained in the BigCommerce section. Kindly follow those guidelines to import all your orders related data without hassles.
Once all the settings are done, hit the save button and get your details validated instantly by the plugin. If all the details provided are correct, the plugin will notify as settings saved successfully, but if the details don’t match up, the plugin will display the error as an invalid access token.
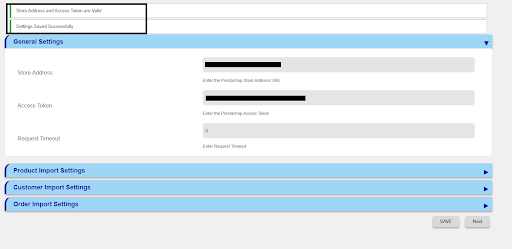
Click on next and proceed to the data import process-
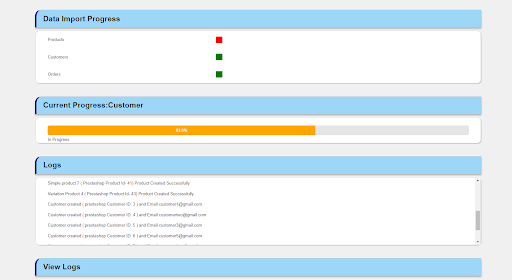
Once done with the data importing you can save all your log files and check the imported data on the WooCommerce dashboard.
The data will reflect under the products, orders, and users section as explained earlier in the BigCommerce guide section.


