
7.3.4.5.2.How to manage Amazon Local Selling via the CedCommerce Amazon Channel App? ↑ Back to Top
Here are a few simple steps to get you all set and ready for seamless Amazon Local Selling operations from Shopify itself.
Configure BOPIS Settings:
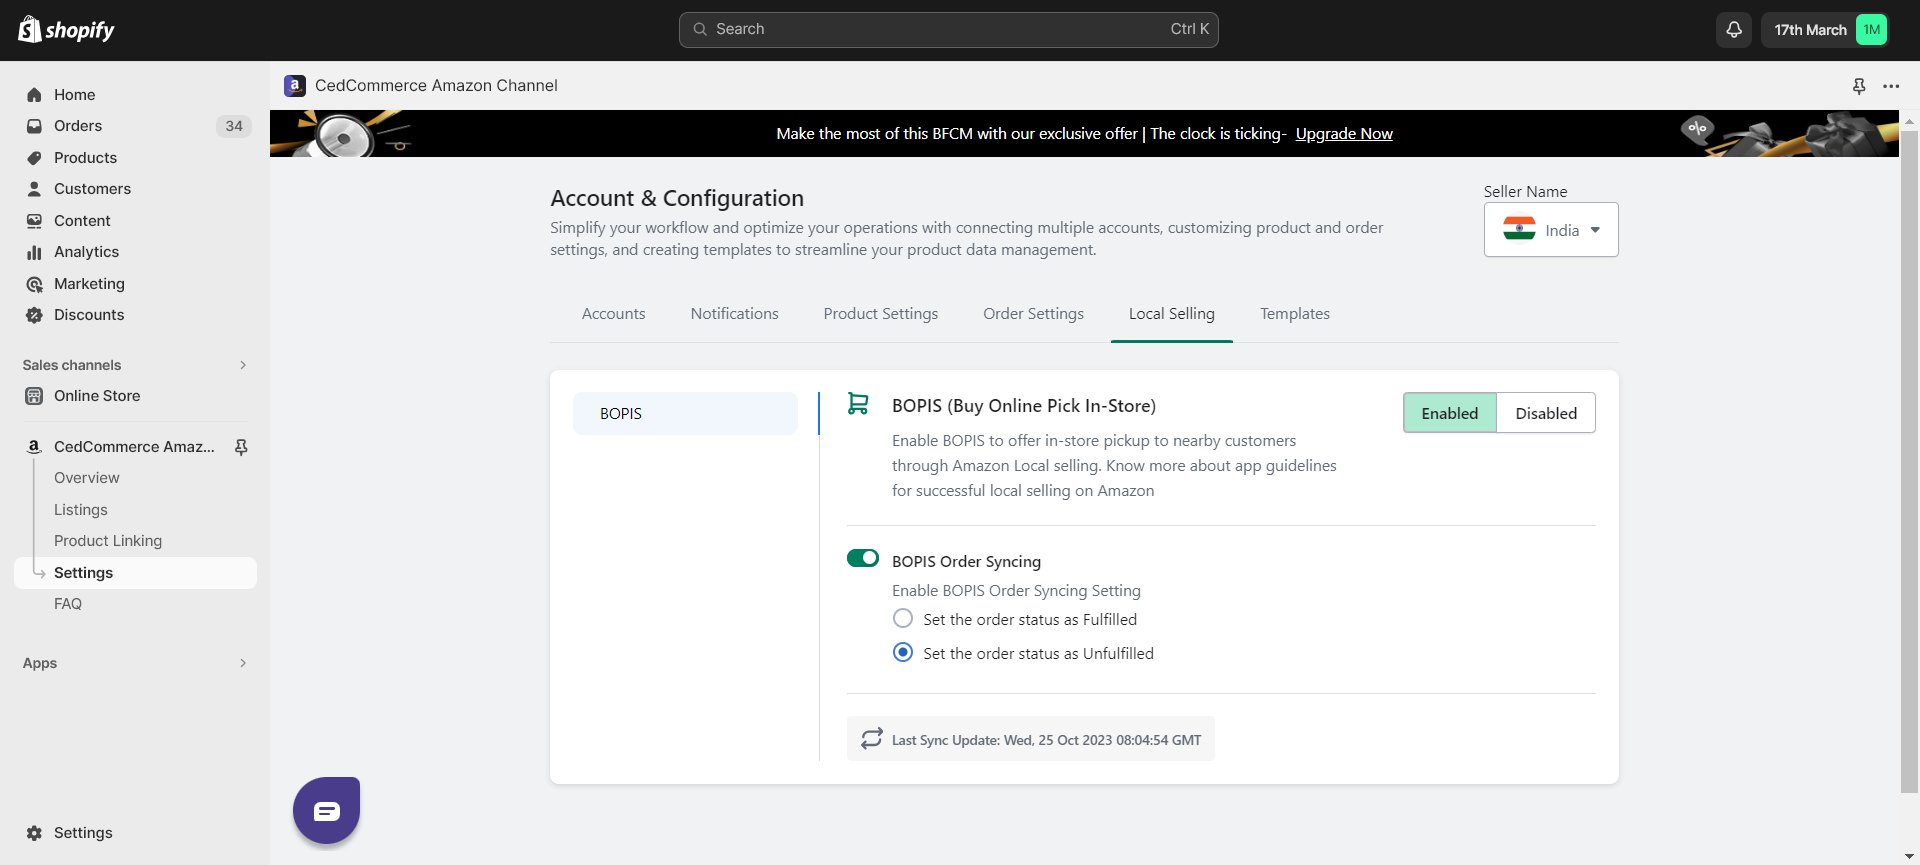
- Log in to your account.
- Go to the “Setting” section.
- Look for the “Local Selling” tab.
- Click the “Enable” button next to the BOPIS (Buy Online Pick In-store) option.
- Choose to create BOPIS orders in your Shopify store by enabling “BOPIS Order Synching”.
- Choose what status your BOPIS order should assume: Fulfilled or Unfulfilled.
Manage Stores and Orders:

- Once the settings are in place, go to the Overview page.
- Scroll down until you find Local Selling.
- Click “Manage” to initiate Store and Order management.
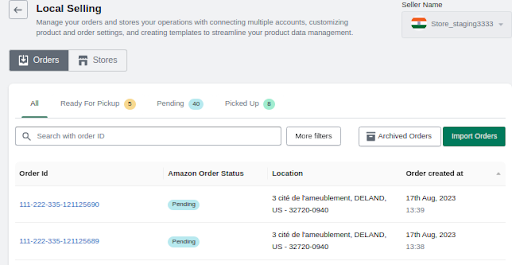
- You will find two options here: Orders and Stores.
- Choose stores to set up or import your local stores.
Set Up Local Stores:
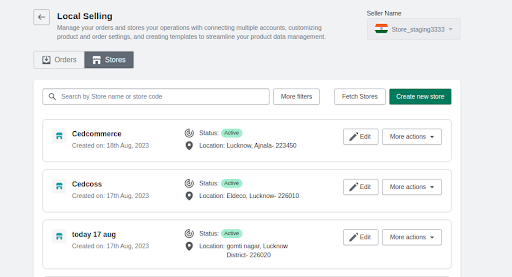
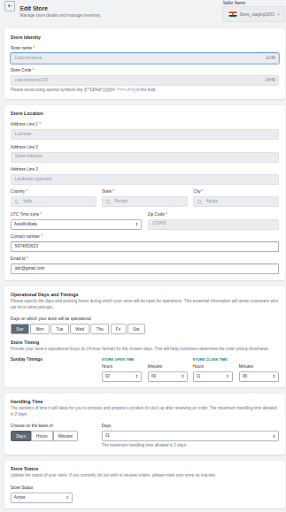
- Click on “Create New Store” to start setting up your store.
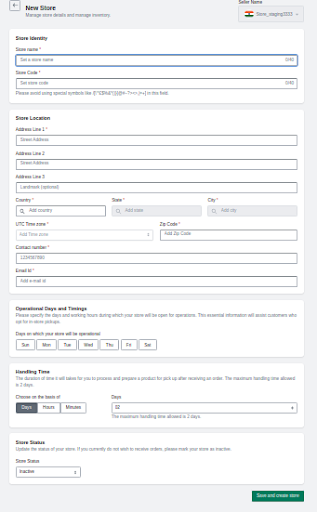
- Once you see the form, start placing the necessary details such as Store name, code, address, hours, and handling time. Please note that, once set, you cannot change the address.
- Here, if you want to keep your store disabled for some time, you can set the status as “Inactive” or if you are ready to use it, update the status as “Active”. Remember, you can change this status at a later point in time as per your requirement.
- Once done, you will see your saved stores in a list.

- You can now edit or perform other actions like changing the status or deleting the store.
Manage Orders:
- Click Orders to find the list of orders. Here you can check the Order Status, corresponding store location, and date of order creation.
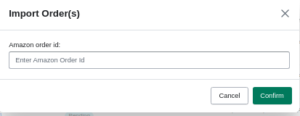
- Click Import Orders to import Amazon BOPIS orders.
- Insert Amazon Order ID and click import.
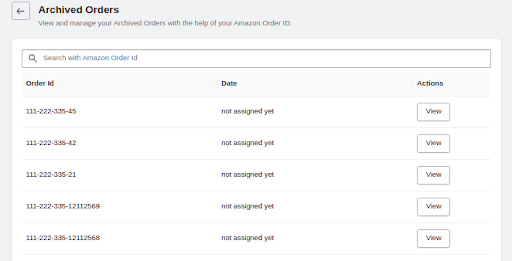
- To find archived orders, you can check the “Archived Orders”.
- There are three Amazon order statuses: Ready For Pick-up, Pending, and Picked-up. You can check filtered orders from corresponding tabs.
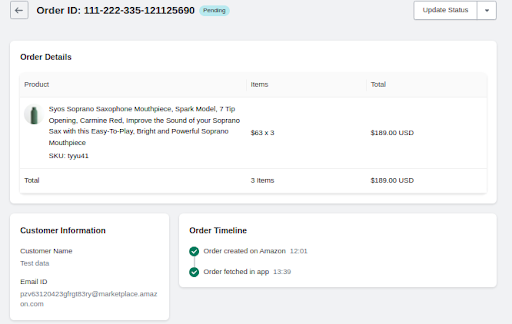
- To change the status of orders or check details, click on the order you want and you will find the Order Detail page.
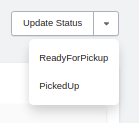
- To update the status click the “Update Status” button and choose the “Ready For Pick-up” option when your product is ready for pick-up in-store. Once your customer has picked up the order from the store you can update the status to “Picked-up”.
Enable BOPIS for Selective Products:
- Go to the “Listings” section.
- Choose the product you want to apply Local selling to and click on it to edit.
- Once the edit window opens, you can scroll down to find Online Selling and Local Selling options.
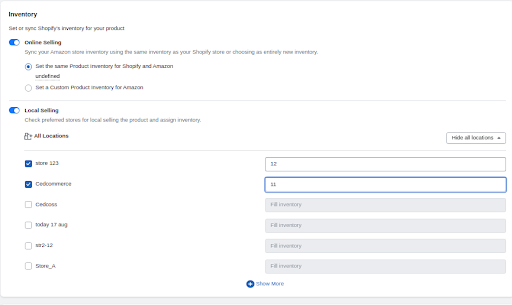
- You can choose both or either based on your needs and preferences.
- For Local Selling, select the stores where the product is available and enter the inventory count.
×


