
Registration and Fruugo Configuration Setup
The merchant has to first create a seller account in the Fruugo seller panel. Once the seller account is created and is approved by Fruugo, then the Shopify store owner receives the Fruugo Seller Email ID and Password.
After the Fruugo Marketplace Integration app successful installation in Shopify, the store owner has to use the provided Fruugo Seller Email ID and Password while setting up the Fruugo Configuration settings.
To follow the registration process and set up the configuration settings
- Go to the Shopify store admin panel.
- In the left navigation panel, click the Apps link.
The page appears as shown in the following figure:
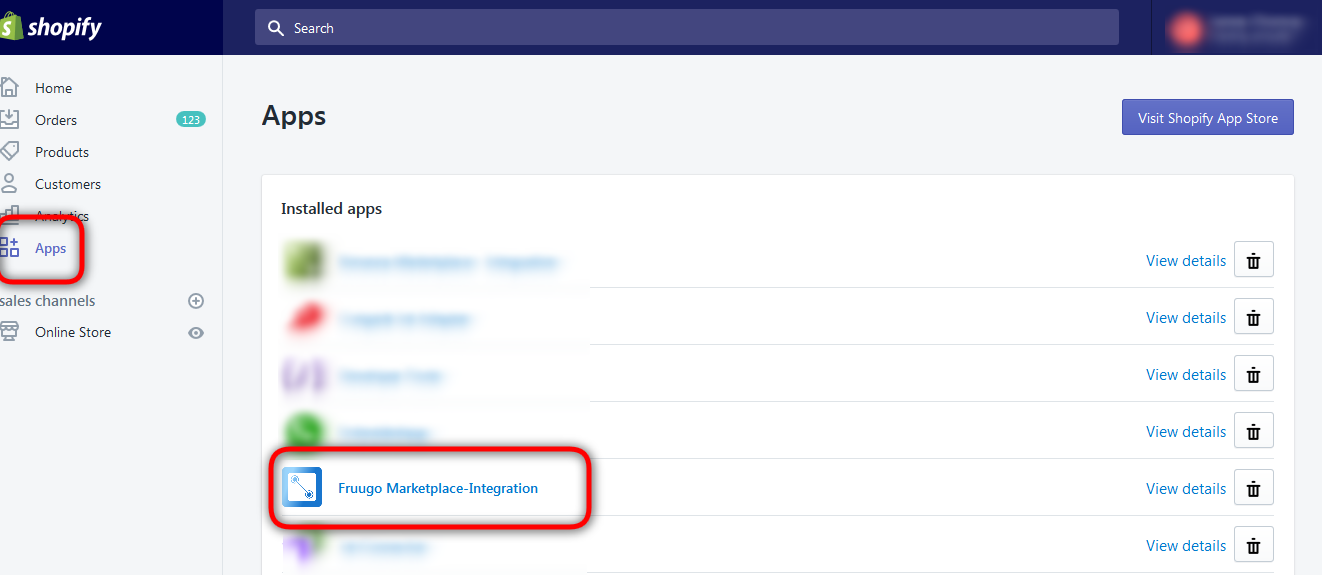
- In the right panel, click the Fruugo Marketplace – Integration app link.
The Step 1: Enter seller login details page appears as shown in the following figure:
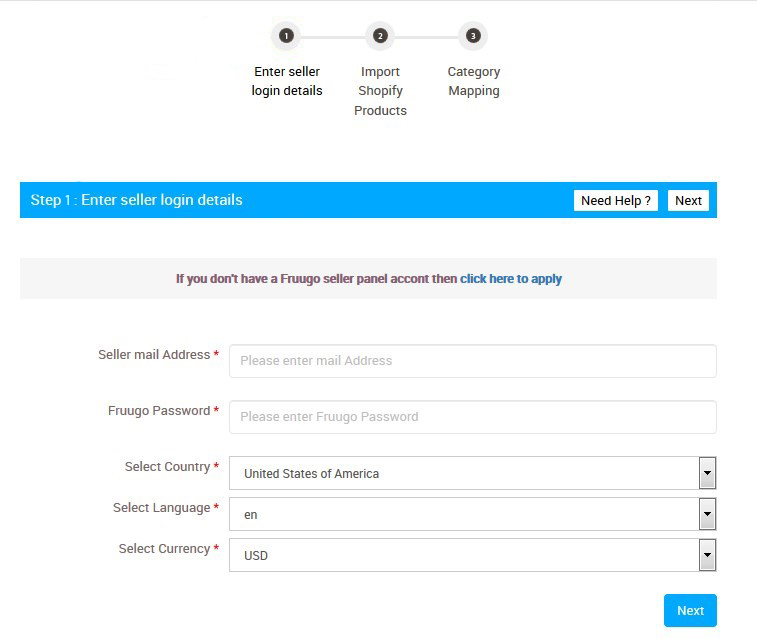
- In the Seller mail Address box, enter the email Id of the Seller account provided by Fruugo.
- In the Fruugo Password box, enter the password of the Seller account provided by Fruugo.
- In the Select Country list, select the required country name.
- In the Select Language list, select the required language.
- In the Select Currency list, select the required currency.
- Click the Next button.
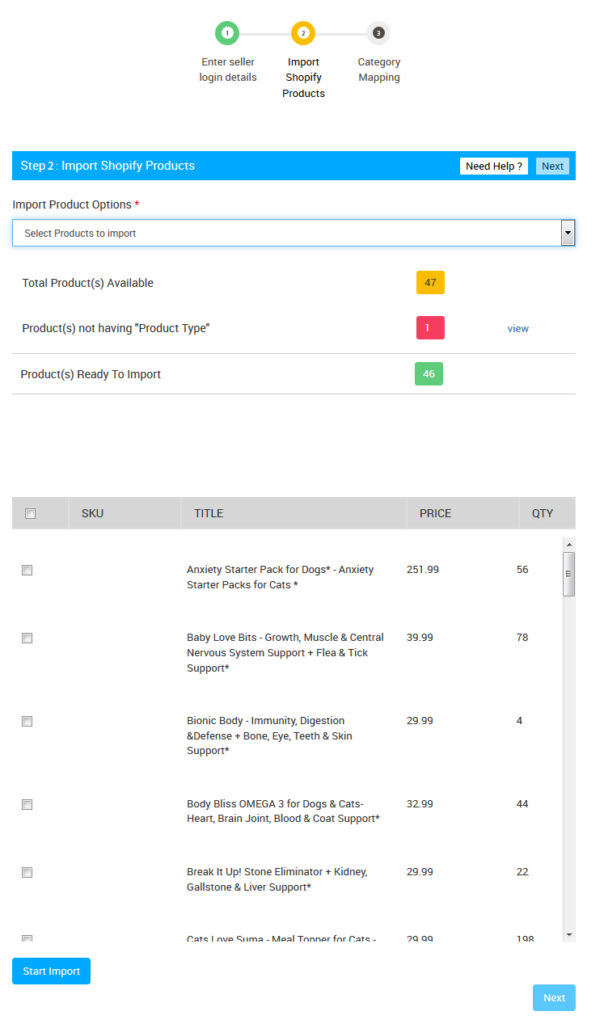
The Step 2: Import Shopify Products page appears as shown in the following figure:
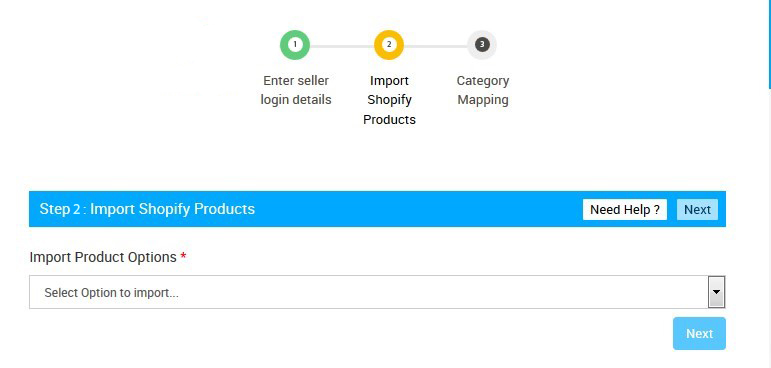
- In the Import Product Options list, select one of the following options:
- All products: It enables the store owners to import all the Shopify store products in the app.
- Published Products: It enables the store owners to import only those products which are available at the Shopify store front-end.
- Filter Products to Import: It enables the store owners to import the filtered products based on product type, title, or vendor.
- Select Products to Import: It enables the store owners to import only those products which they want to upload from their Shopify store to the app.
- If selected the All Products or the Published Products option, then the page appears as shown in the following figure:
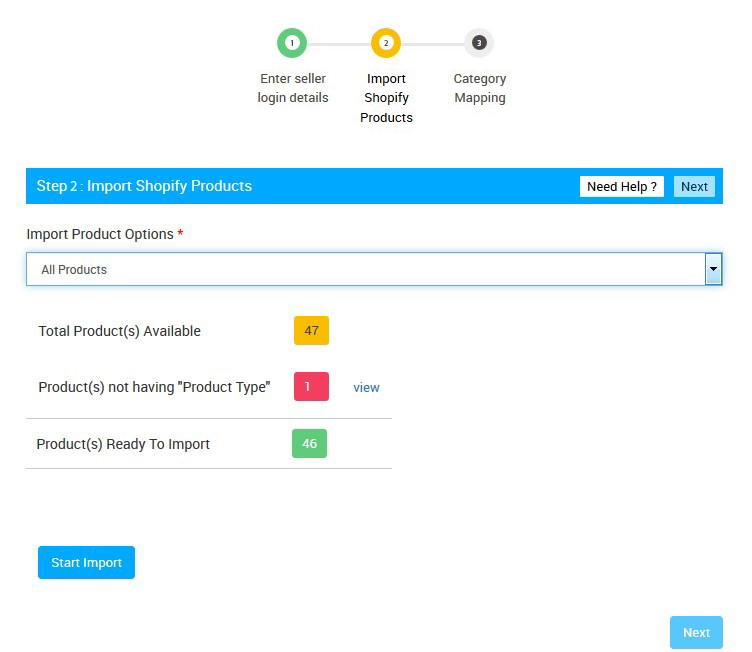
- Click the Start Import button.
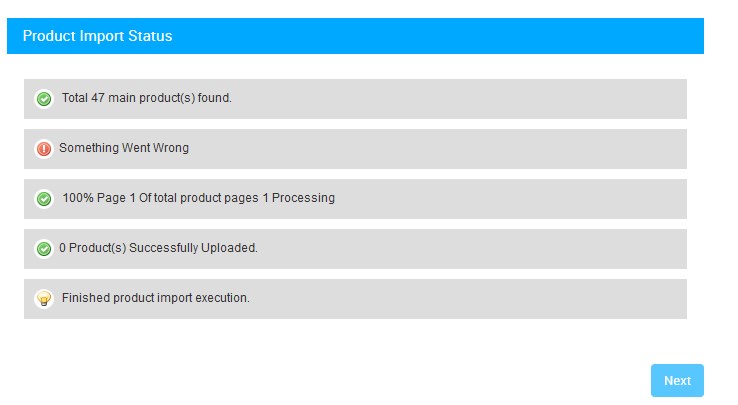
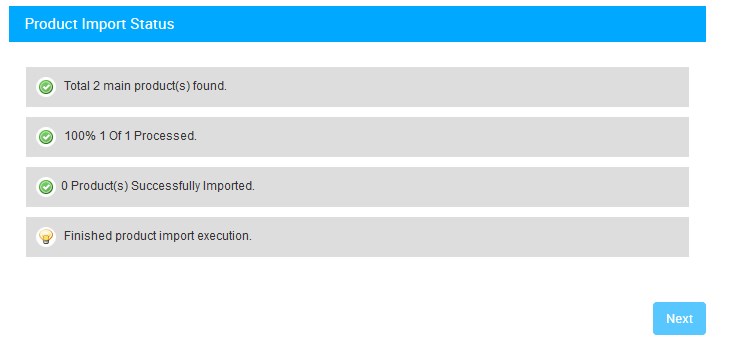
The Product Import Status section appears as shown in the following figure:
OR - If selected the Filter Products to Import option, then the page with filter lists appears as shown in the following figure:
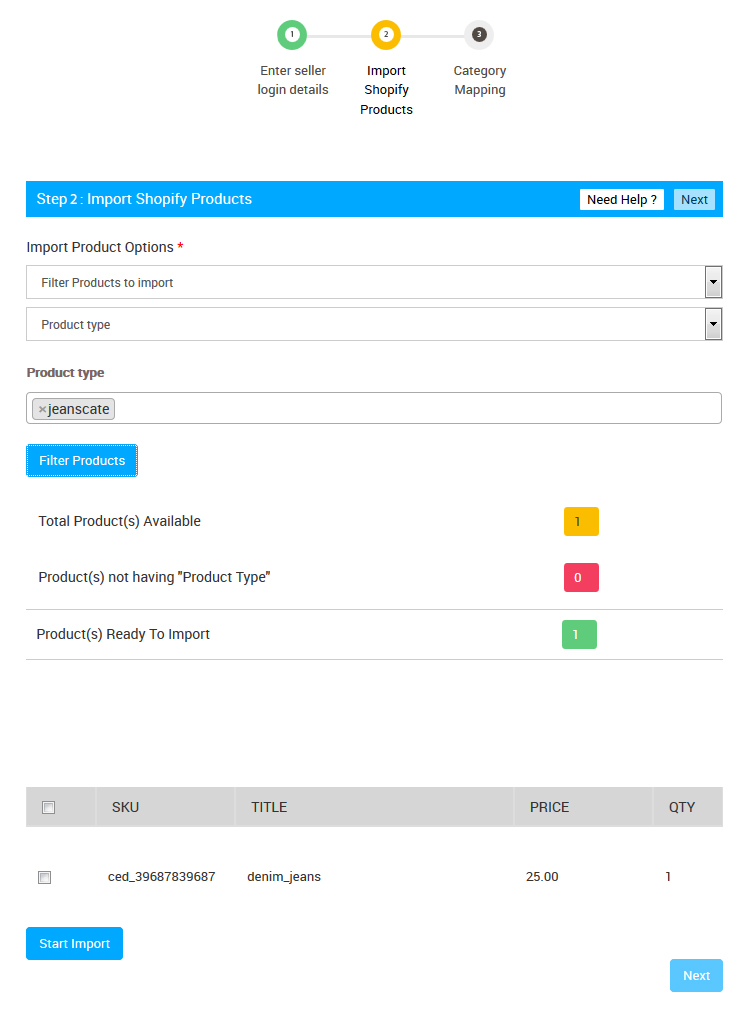
- In the filter list, select Product Type, Product Title, or Product Vendor as per the requirement.
Based on the selected option, another list appears. - Select the required filter options, and then click the Filter Products button.
- Do one of the following steps:
- Select the checkboxes associated with the required product SKU.
Or - Select the checkbox associated with the SKU label to select all the products listed on the page.
- Select the checkboxes associated with the required product SKU.
- Click the Start Import button.
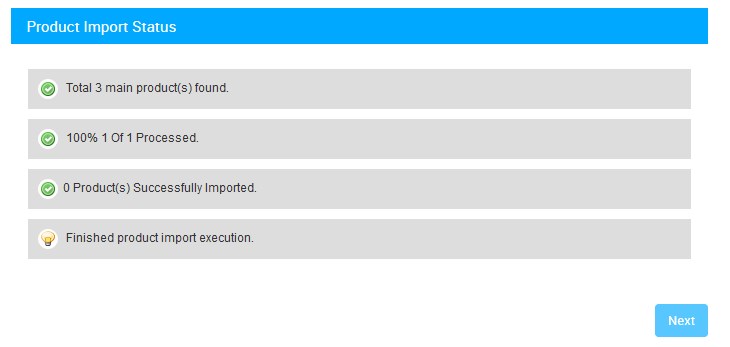
The Product Import Status section appears as shown in the following figure:
OR - If selected the Select Products to Import option, then the page appears as shown in the following figure:
- Do one of the following steps:
- Select the checkboxes associated with the required product SKU.
Or - Select the checkbox associated with the SKU label to select all the products listed on the page.
- Select the checkboxes associated with the required product SKU.
- Scroll down to the Start Import button and then click the button.
The Product Import Status section appears as shown in the following figure:
- Click the Next button.
The Step 4: Category Mapping page appears as shown in the following figure:
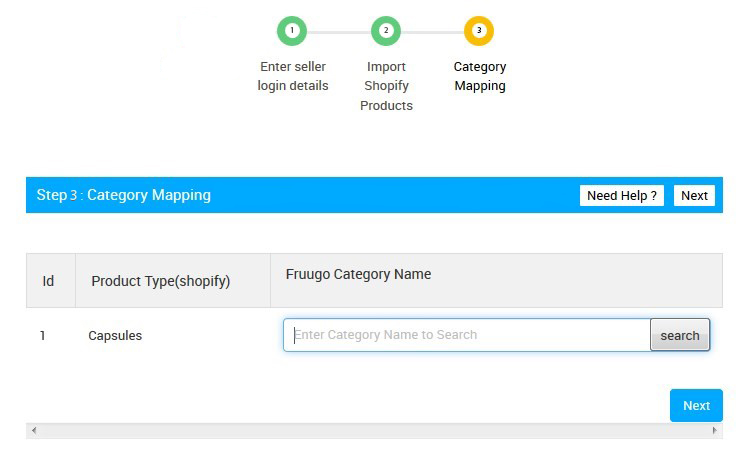
- Under Fruugo Category Name, enter the category name to search, and then click the search button.
A category list appears. - Select the required category from the list.
The selected category appears in the box.
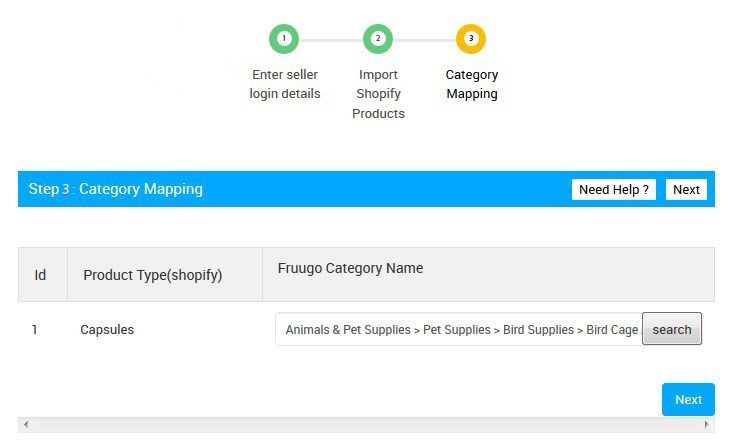
- Click the Next button.
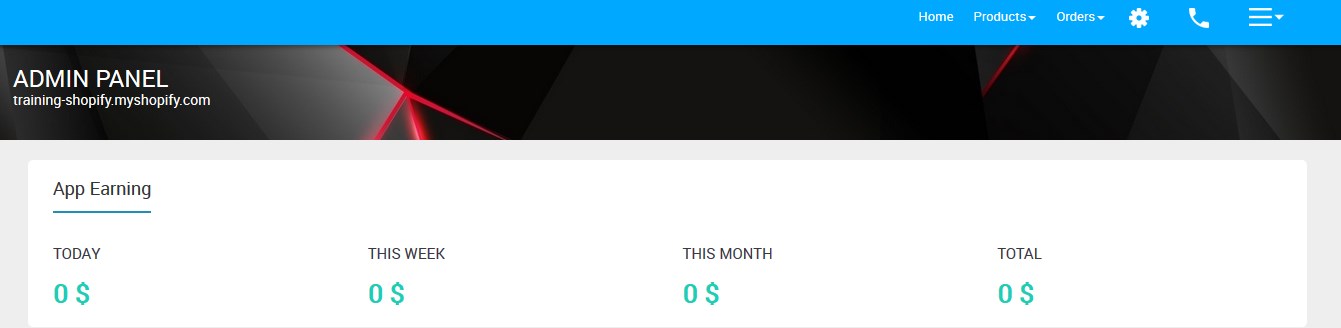
The Fruugo Marketplace Integration App Admin panel appears as shown in the following figure:
×


