
Shipping Template
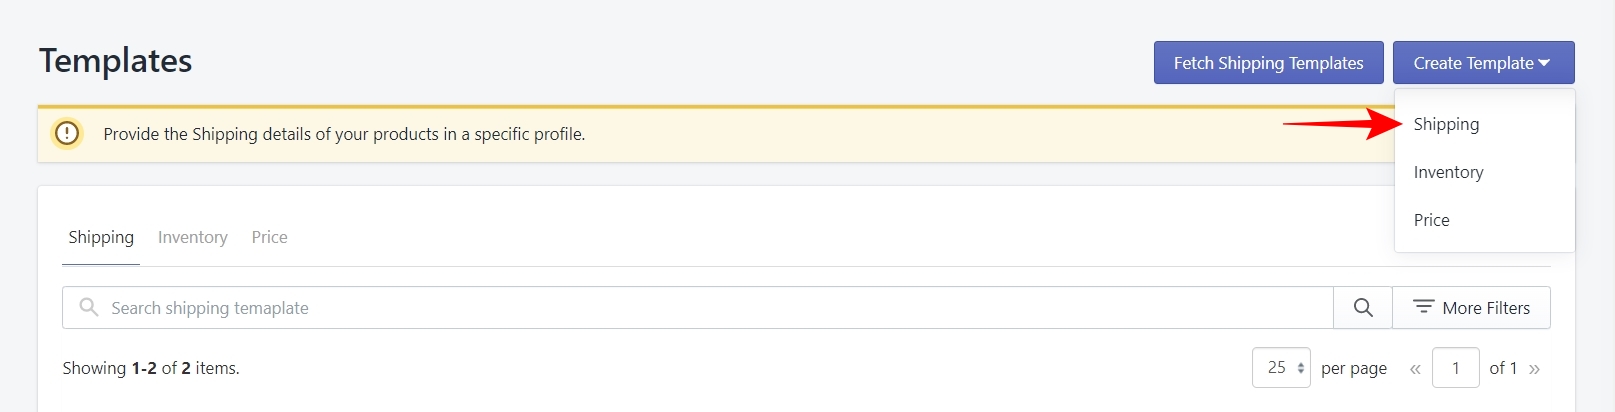
A shipping template is basically a template that contains all the information required to ship your orders. You can’t complete the process of creating a profile without assigning a shipping template to the profile. You can either create a new shipping template or if you are an existing Etsy seller then you can use a template that you created in the past.
In case you are selling all your products in a single country or location, you can use just one shipping template for all your profiles. But if you are selling different products in multiple countries or even multiple continents, you may need to create separate profiles and separate shipping templates for each profile and location.
Weight options
The first step in creating a shipping template is to decide whether you want to do shipping based on the product weight. There may or may not be products on your Etsy shop that come in different weights. But if they do, you can use the weight options in the shipping template.
Note – It must be noted that you can only add one weight range per shipping template, so you may need to create multiple profiles and shipping templates for different weight ranges of a product which we will not recommend.
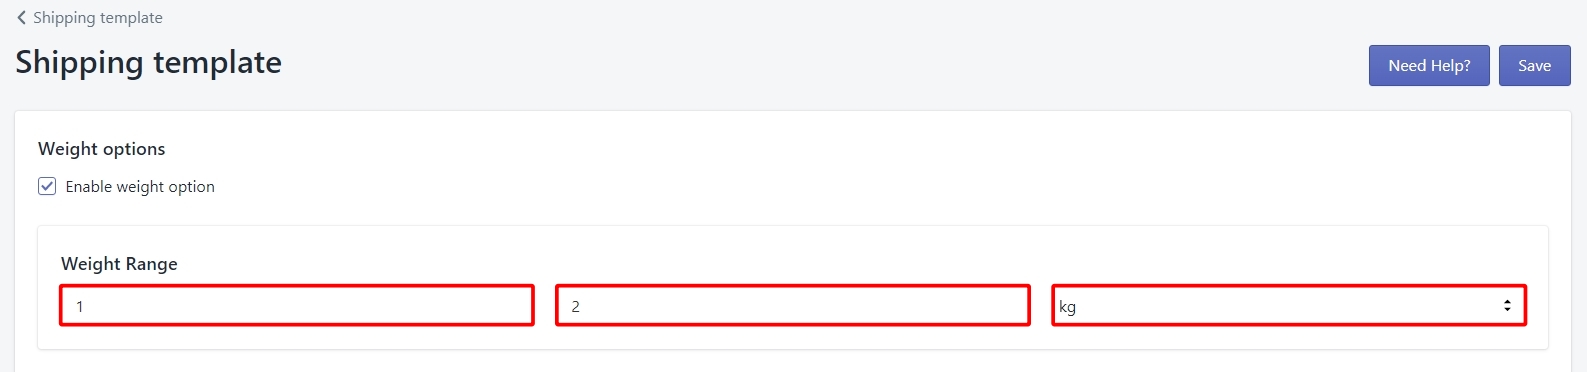
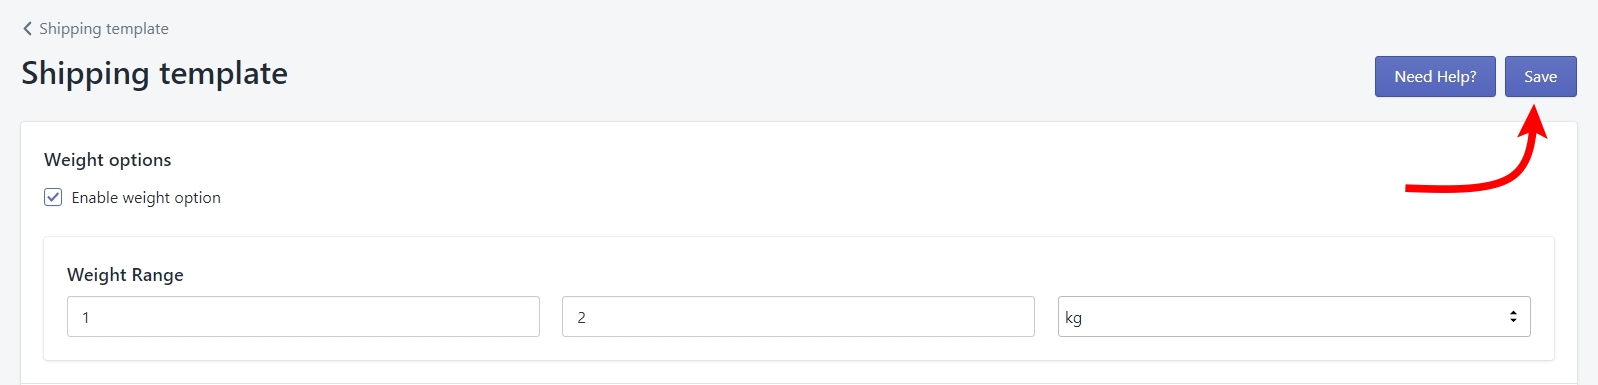
Click on the checkbox to enable the weight options. Once you do, you will be asked to input the weight range followed by a dropdown to select the unit of weight. See the image below for reference.
Shipping Info
This is the section where you will enter all the details related to how you will ship your products. You will need to provide the following information –
Dispatch Origin
In this option, you will need to provide the name of the country from which you are shipping the products. In simple terms, this is the country where your shop is located. Click on the dropdown and select the country by either scrolling through the list or typing in the name of the country.
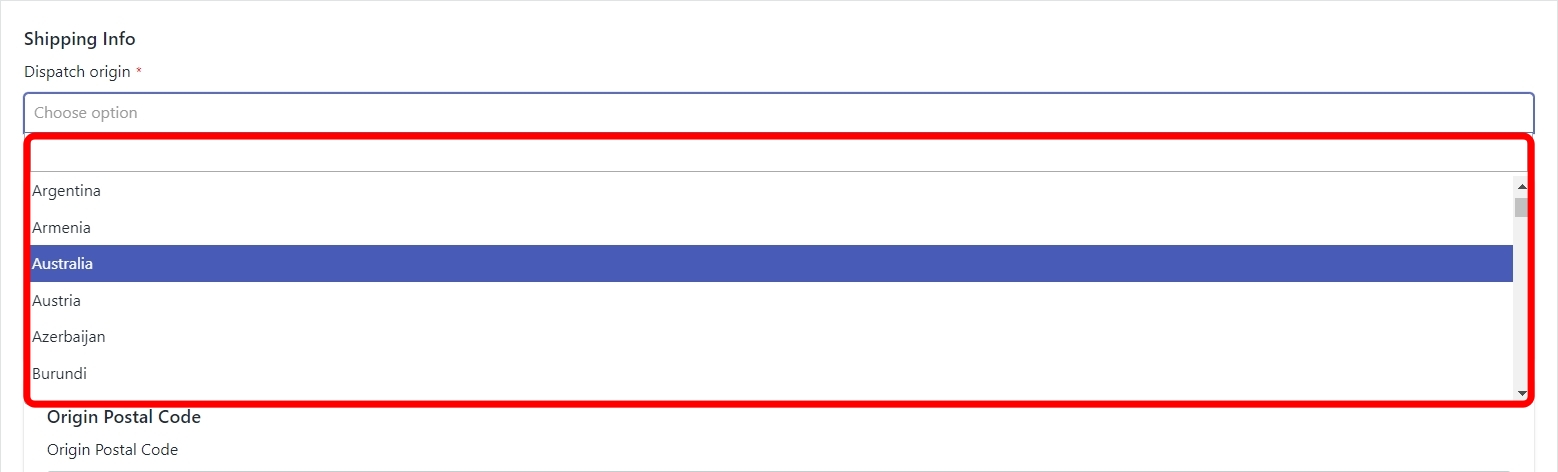
Note – As soon you select the dispatch origin, the Standard Shipping panel will open. More on that later.
Processing Time
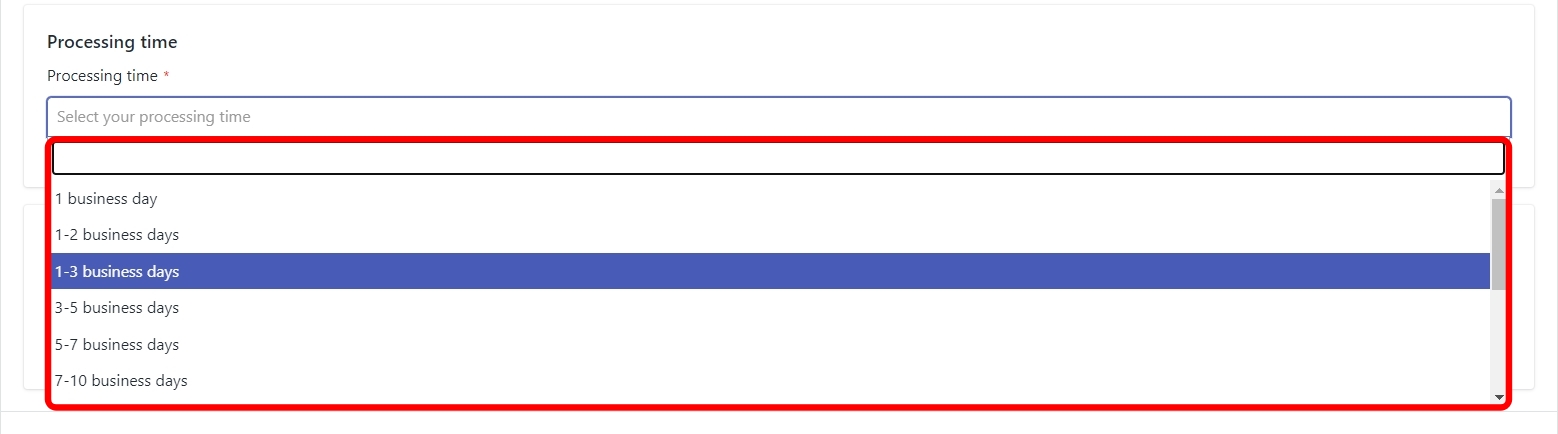
Processing time is the amount of time that you take, as a seller, to ship an order after it’s created. Notice that this is not the delivery time. The delivery time will be specified in the Standard Shipping panel. This is the amount of time that you will take to process and then ship the order. Click on the dropdown to select a processing time range that will be enough for you to process and ship the order. See the image below for reference.
However, in such a case when you can’t find the right processing time range for the products – for example, you may take 2 months to finish a made-to-order product – then you can also create your own custom processing time. Scroll to the bottom of the dropdown list and select ‘Custom Range’. You will see that a new custom field will appear where you can choose your minimum and maximum processing time.
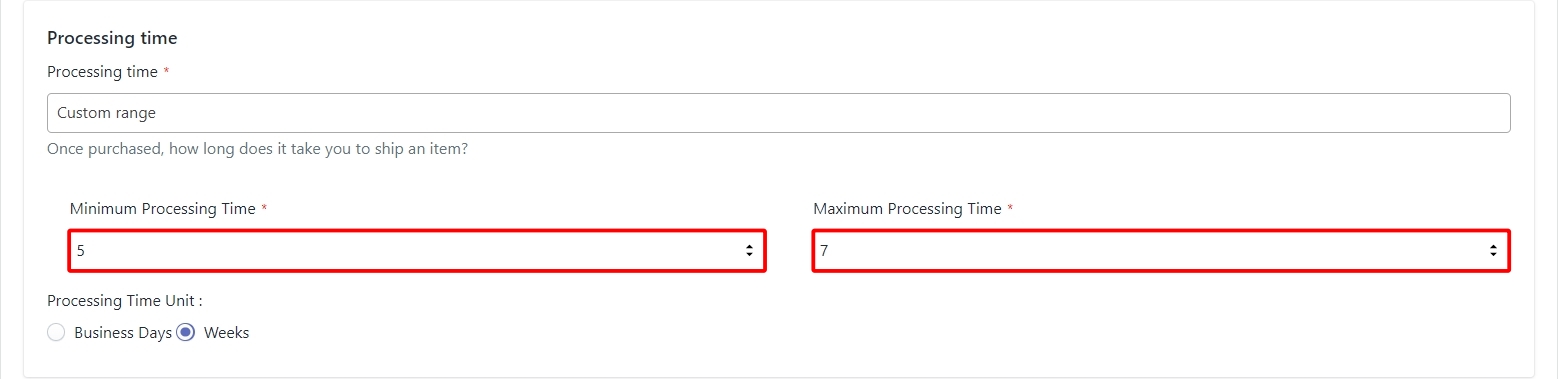
Once you have decided on the custom range, make sure to choose the right processing time unit. It can be either Business Days or Weeks.
Note – You should keep in mind that you can’t provide a processing time that is more than 10 weeks.
Origin Postal Code
This is a simple one, you just need to provide the postal code for the shipping location. It is not a mandatory field so you can choose to just leave it blank.
Standard Shipping
The Standard Shipping panel only appears once you have selected the dispatch origin for the shipping template. Let’s take a look at all the options available in this panel. Use the image below for reference.
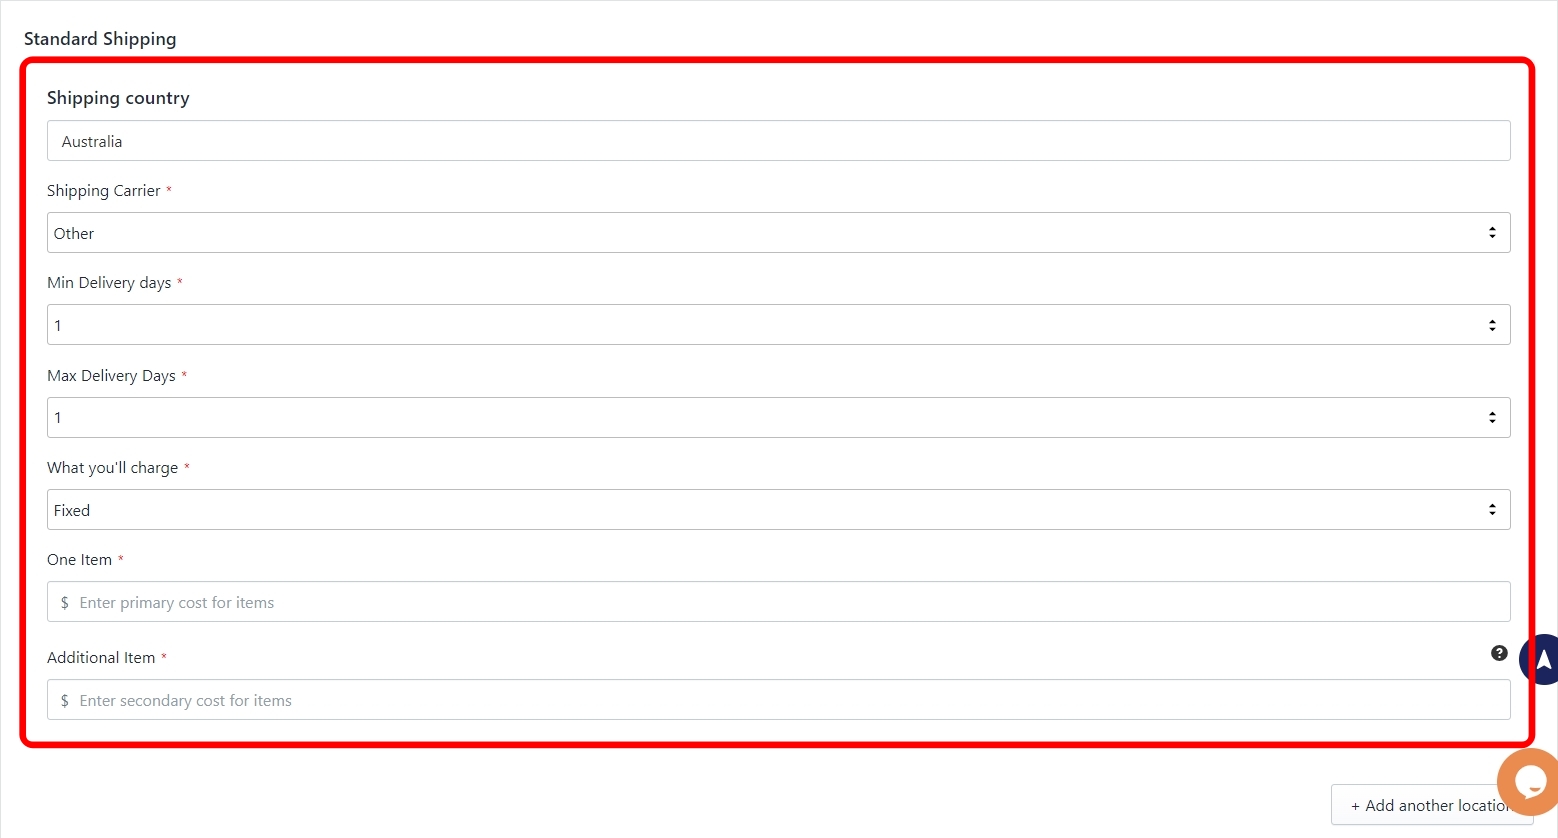
Shipping country
The shipping country is the same country you provided in the ‘Dispatch Origin’ field. You need to change the dispatch origin to change the Shipping country. However, if you want to ship your products in multiple countries then you can add other shipping locations as well. We will discuss how to add multiple shipping locations after we’ve discussed all the options in the standard shipping panel.
Shipping Carrier
You need to choose the name of the shipping carrier from the dropdown list that you will use to ship your orders. By default, it will show ‘other’ which will be applicable in case you want to fulfill the orders using any local courier service.
The dropdown list will be populated with the Shipping carriers that Etsy has partnered with. So you will see different shipping carrier names depending on where you are located.
For example, if your shipping country is the United States then you will see USPS, FedEx, and UPS as the standard shipping carriers. If your shipping country is India then you will see India Post as the standard shipping carrier and so on.
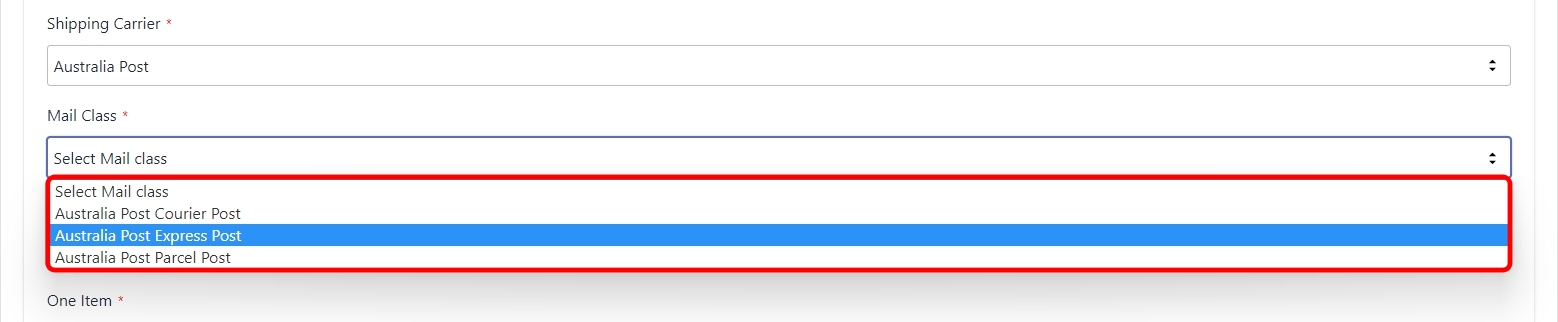
Mail Class
The mail class field will only appear when you choose a Shipping carrier from the list. It will be in the form of a dropdown which will be populated by the Shipping methods available for the shipping carrier you selected.
Note – The options for Minimum Delivery Days and Maximum Delivery Days will only be applicable if you have not selected a standard Shipping Carrier because otherwise the minimum and maximum delivery days will be decided by the Mail class.
Minimum Delivery Days
In this option, you need to select the minimum number of days in which the order will be delivered to the buyer after it has been shipped. You will get this option only when you have not selected a standard shipping carrier.
Maximum delivery Days
In this option, you need to select the maximum number of days in which the order will be delivered to the buyer after it has been shipped. You will get this option only when you have not selected a standard shipping carrier.
Note – The limit for the minimum and the maximum number of days is 45. So once the order has been shipped it has to be delivered within 45 days when your orders are self-fulfilled.
What you’ll charge
This option gives you the ability to choose whether you want to offer free shipping or you want to charge a fixed rate for the orders. Click on the dropdown to select the shipping charge as shown in the image below.
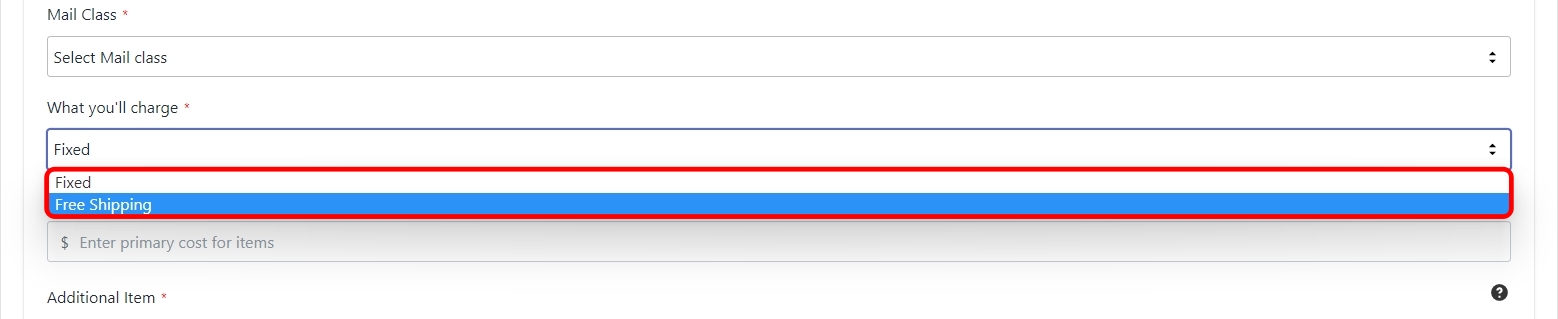
If you select ‘Free Shipping’ then that is all you need to do. But if you choose ‘Fixed’ then you need to further configure how much you will charge for one item and how much you will charge if a buyer purchases more than one quantity of an item.
One item
In this field, you need to mention the amount of money that you will charge from a buyer who purchases just one item.
Note – You need to enter only the numeric value in this field because the currency will automatically be fetched from your Shopify store.
Additional Item
Let’s say that a buyer purchased 5 quantities of a product. In this case, whatever value you have entered here will be charged for each quantity. So in this case, the buyer will be charged 5 times the Additional Item value.
Note – The value of shipping cost for ‘Additional item’ will always be less than the ‘One item’ cost. So, let’s say you are charging $5 for one item, in this case, the additional item cost will always be less than $5.
Add another location
Up until this point in the shipping template, we have discussed every detail that you need to provide for shipping in your own country (the country where your shop is located).
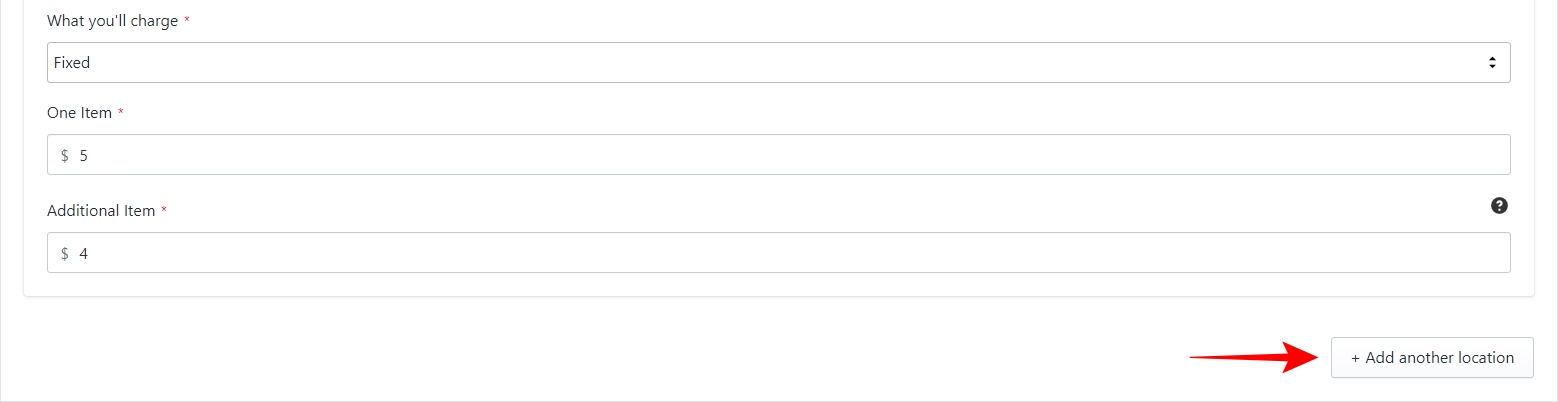
But what if you want to ship your products to multiple countries at the same time? In such a case, you can add multiple locations to your shipping template by clicking on the ‘Add another location’ button as shown in the image below.
Once you have added another location, a new Standard Shipping panel will appear beside the original one. You can see the image below for reference.
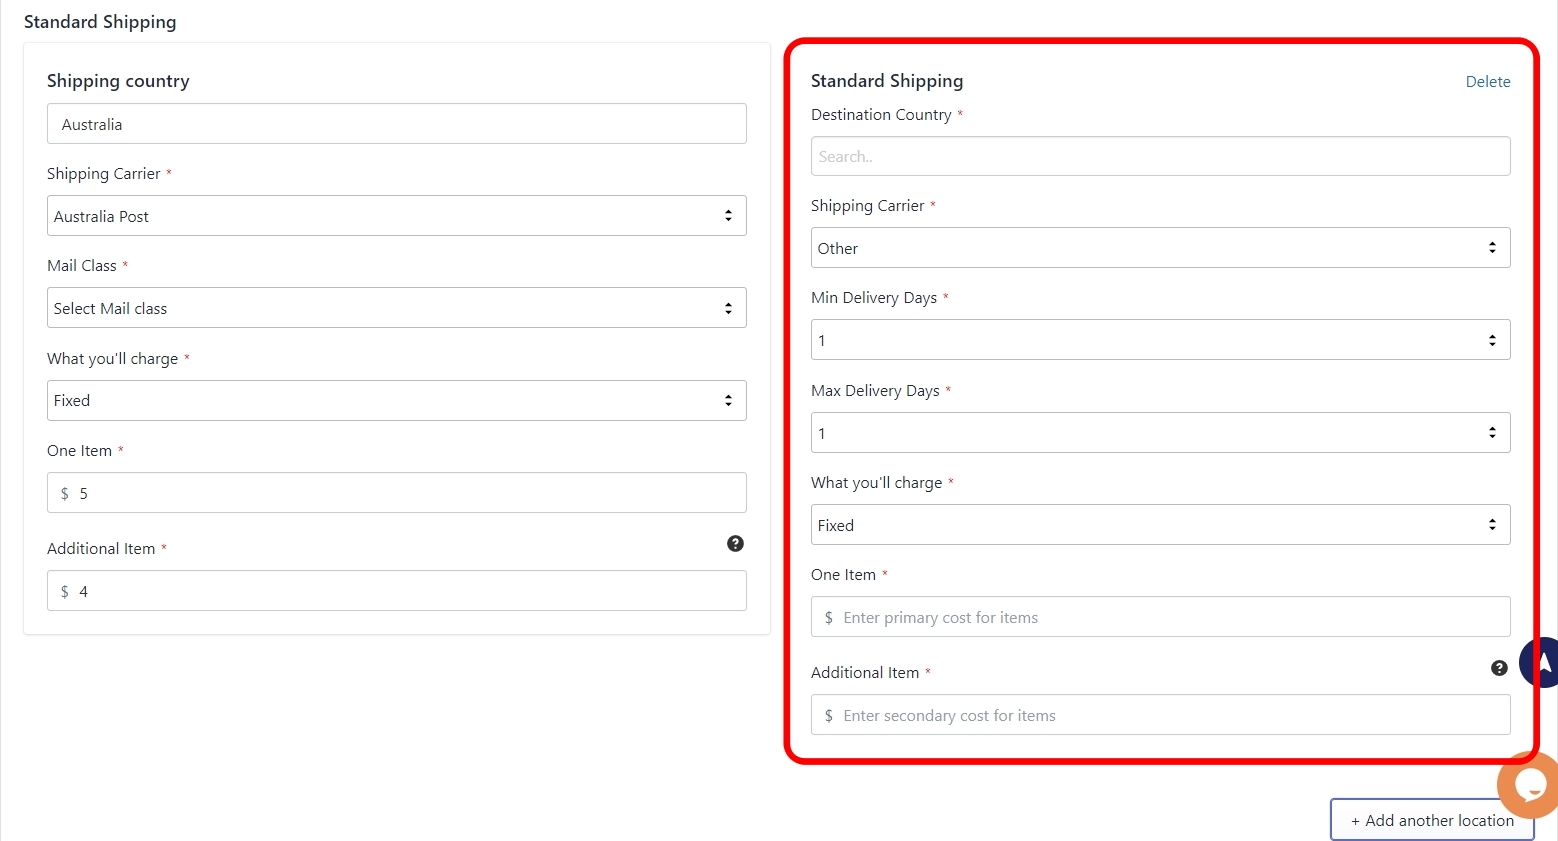
In this new panel for the second shipping location, you need to mention the Destination Country, but other than that, all other fields are the same as we discussed earlier.
You can add all the different locations to your shipping template where you are planning to sell or already selling your products. And with this, you have successfully created a shipping template for your profile. All that’s left is to give a name to your template and save it.
Template name
The app automatically creates a template name based on the dispatch origin, but you can give a unique name to your shipping template so that you can easily find it in the future. You may or may not need to create many shipping templates based on how many countries you are shipping in so it’s always a good practice to give relevant names to your templates.
Once you have named the template, click on the ‘Save’ button as shown in the image below to save your template. The app will notify you of errors if there are any. If not, your template will be saved and will be available to attach to the profiles you will create from now on.
The term 'Etsy' is a trademark of Etsy, Inc. This application uses the Etsy API but is not endorsed or certified by Etsy, Inc.


