
All Products
The ‘All Products’ page is divided into three main parts. The first part, on the top, gives you the option to export & import products and sync the data with Etsy. The second part includes the different product tabs: Profile assigned, Not Profiled, Profile disabled, and Error. The third part is the product grid, where you’ll perform all the actions.

Part #1 – Export, Import, and More action – Sync with Etsy
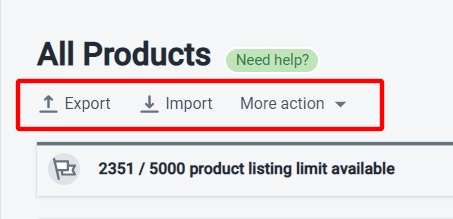
Export
The export option is useful when you have to make changes to product details in bulk, and you prefer working with excel spreadsheets. You can also do this using a bulk action from the product grid, but you’ll often see that we have given multiple ways to do the same thing so that the app is easy to use for everyone.
Note – If you have to change the Etsy attributes for the products, then you’ll have to edit the products one by one.
Click on the export button to open the panel, as shown below.
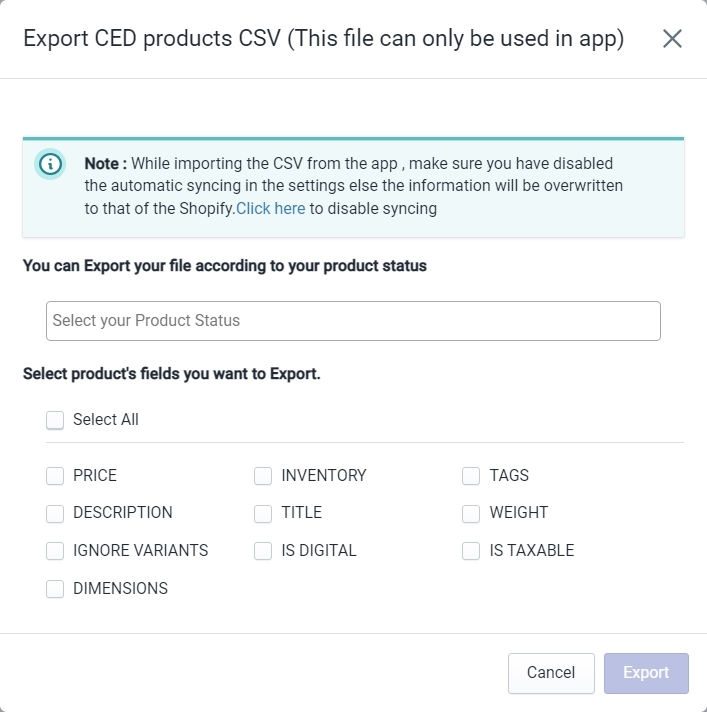
In the export panel, you have two options –
- Selecting the product status – Choose one or multiple statuses of the products on Etsy. For example, you can choose Draft and Sold-out
- Select product fields you want to export – Choose the fields you need to edit for your products.
Click on export, and the app will download a CSV file with the selected product fields on your system. Make the necessary changes and then import the CSV using the import option.
Import
The import option will allow you to import products from a CSV file on your system into the app.
Note – When importing the products through a CSV file, make sure that you have disabled automatic syncing for the attributes which are supposed to be different on Shopify and Etsy otherwise the app will override those attribute values with those of Shopify.
More Action > Sync With Etsy
This action will allow you to sync Product status between the app and your Etsy Shop.
Part #2 – The Product tabs
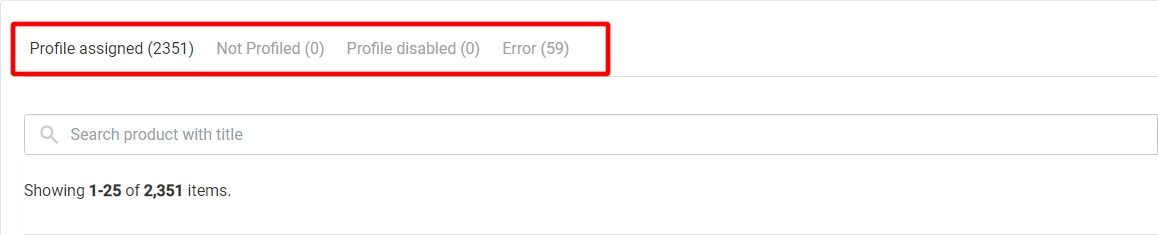
The product tabs allow you to work with products based on their profiling status. The Error tab, however, will show you products that have encountered an error regardless of their profiling status.
- Profile Assigned – This tab will show you all the products that have been assigned to a profile.
- Not Profiled – This tab will show you all the products that have not been assigned to a profile.
- Profile Disabled – This tab will show you products from all the profiles that have been disabled.
- Error – This tab will show you all the products that have encountered an error regardless of their profiling status.
Part #3 – The Product Grid
The product grid section contains the products depending on which tab you have selected and allows you to perform all the different actions on those products. This is where real product management happens. So let’s talk about how the grid works.
Product Grid Columns
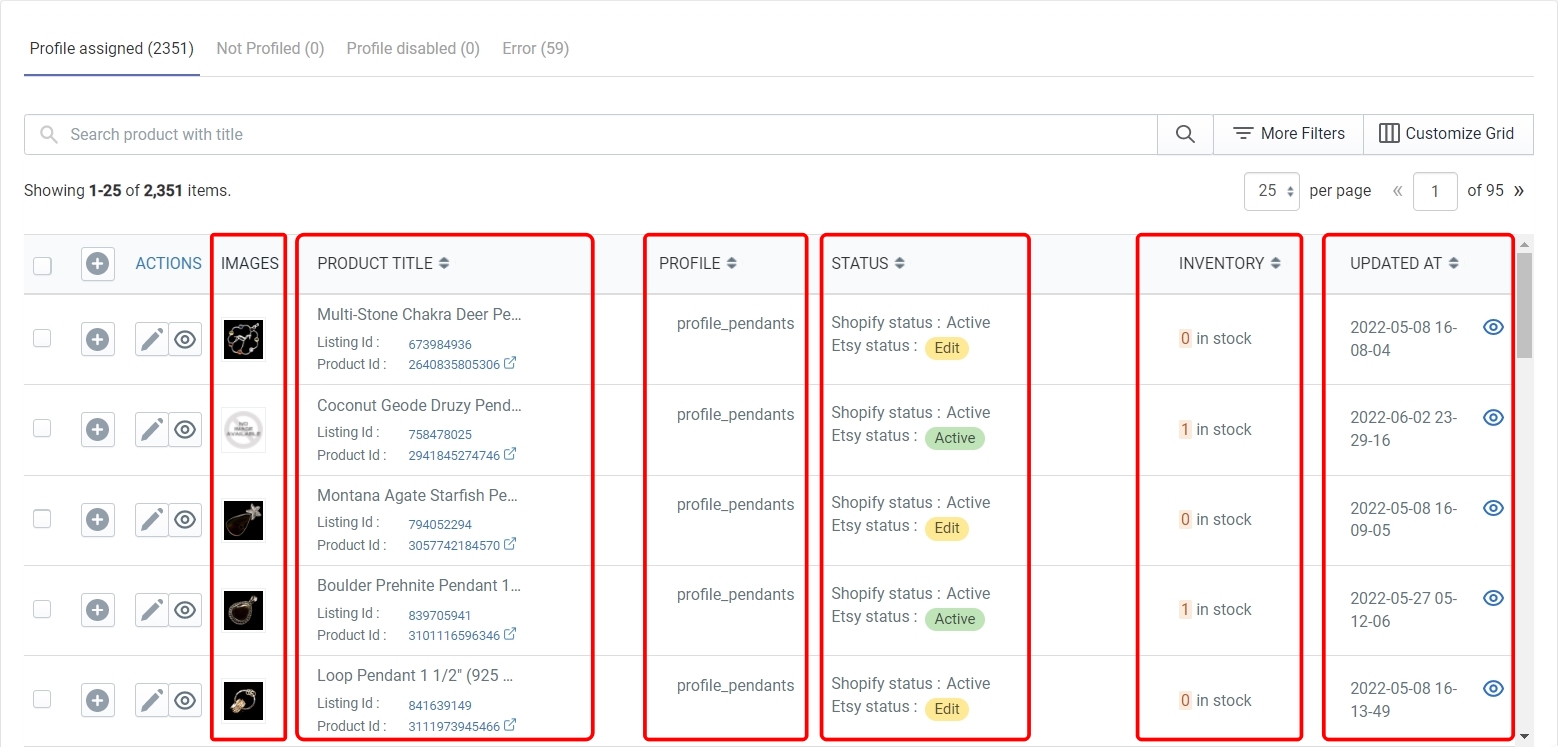
The columns in the grid give you specific details about your products except for the ‘ACTIONS’ column which allows you to edit your products and shows you the listing analytics.
- Product Selection column – This is the first column in the grid, and it contains radio buttons to select products on which you have to apply bulk actions.
- Expansion column – Click on the ‘+’ button in this column to see all the different variants of a product and apply bulk actions to specific variants.
- Actions – This column allows you to edit product attributes and see the listing analytics for published products.
- Images – This column will show you the Primary image of your product on Shopify.
- Product Title – This column will show you the product title, the Etsy listing Id, and the Shopify Product Id.
- Profile – This column will tell you the profile name to which the product has been assigned.
- Status – This column will show you the status of the products on both Shopify and Etsy.
- Inventory – This column will show you how much inventory you have across your product variations.
- Updated At – This column will show you the date on which the product was last updated inside the app. You can click on the ‘Eye’ button in this column for a particular product to see the complete product and variants update details.
These are the only columns you will see in the product grid by default, but you can customize the grid to your liking. You can add more columns, remove the columns or rearrange their order of appearance on the grid. And this brings us to the next option in the product grid.
Customize Grid

Click on the ‘Customize Grid’ button to access the customization options. You will see a list of all the columns that can be added to the grid. You can perform the following actions here –
- Click on the ‘Eye‘ button to enable or disable a particular column on the grid.
- Click and hold on the 6 dots to rearrange the order of the columns.
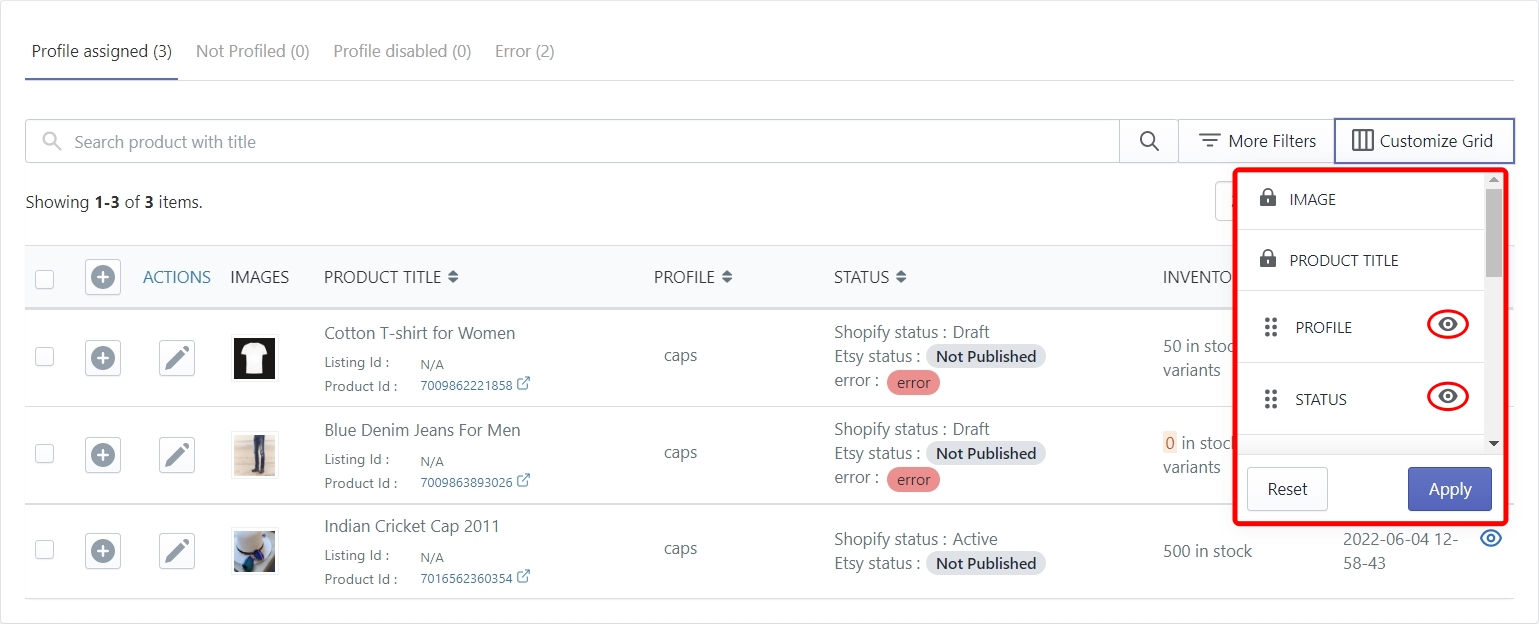
When you are done customizing the grid, click on the ‘Apply‘ button to save the changes. Use the ‘Reset‘ button to restore the default product grid.
Note – The Images and the Product Title columns can’t be disabled in the customize grid options.
The Search Bar and the Search Filters

It’s easy to find a specific product on the grid when you are selling limited items on Etsy, but what if you have 100s or 1000s of products or even more. In that case, you will use the Search Bar and/or the search filters to find a specific product or a group of products.
Type in the product title in the Search Bar to find a product as shown below.

Use the filters when you need to find products based on a specific condition. Click on the ‘More Filters‘ button to access the side panel as shown below.
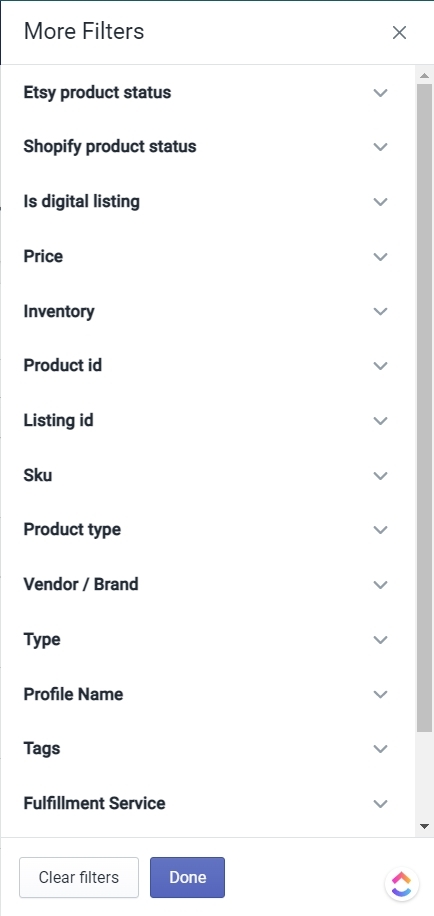
- Etsy Product Status – This filter will show you the products based on their status on Etsy. Click on the dropdown and select from the list of available Etsy product statuses.
- Shopify Product Status – This filter will show you the products based on their status on Shopify. Click on the dropdown and select from either Active or Archived or Draft.
- Is Digital Listing – This filter will either show you all the digital listings you have or exclude them from the grid depending on whether you choose ‘Yes’ or ‘No’ from the dropdown.
- Price – This filter allows you to enter a price range and will show you the products that lie within that range.
- Inventory – This filter allows you to enter an inventory range and will show you the products that have inventory within that range.
- Product Id – This filter allows you to search for products according to the Shopify Product Id.
- Listing Id – This filter allows you to search for products according to the Etsy listing Id.
- SKU (Stock Keeping Unit) – This filter allows you to search for products according to the Stock Keeping Unit.
- Product Type – This filter allows you to search for products according to a product type. All products created under the same product type will show up on the grid.
- Vendor/Brand – This filter allows you to search for products based on the Product Vendor provided on Shopify.
- Type – This filter allows you to select between ‘simple’ and ‘variation’ products. When you select ‘Simple’ from the dropdown, the app will show you the products that don’t have any variation.
- Profile Name – This filter allows you to search for products that are assigned to a specific profile.
- Tags – This filter allows you to search for products based on the tags that have been assigned to them.
- Fulfillment Service – This filter allows you to search for products that have the same fulfillment service.
- Created At – This filter allows you to enter a date range and will show you all the products that have been created in that date range.
ACTIONS COLUMN
The Actions column will allow you to edit product attributes.
Edit Product Attributes
There may be times when you want certain products to have different information on Shopify and Etsy. The ‘Edit Product Attributes‘ Action will allow you to do exactly that. You can customize the attributes and information for a product by clicking on the ‘Pen‘ icon in the ‘ACTIONS‘ column of the product grid.
![]()
You will now see the ‘Product Edit’ page.
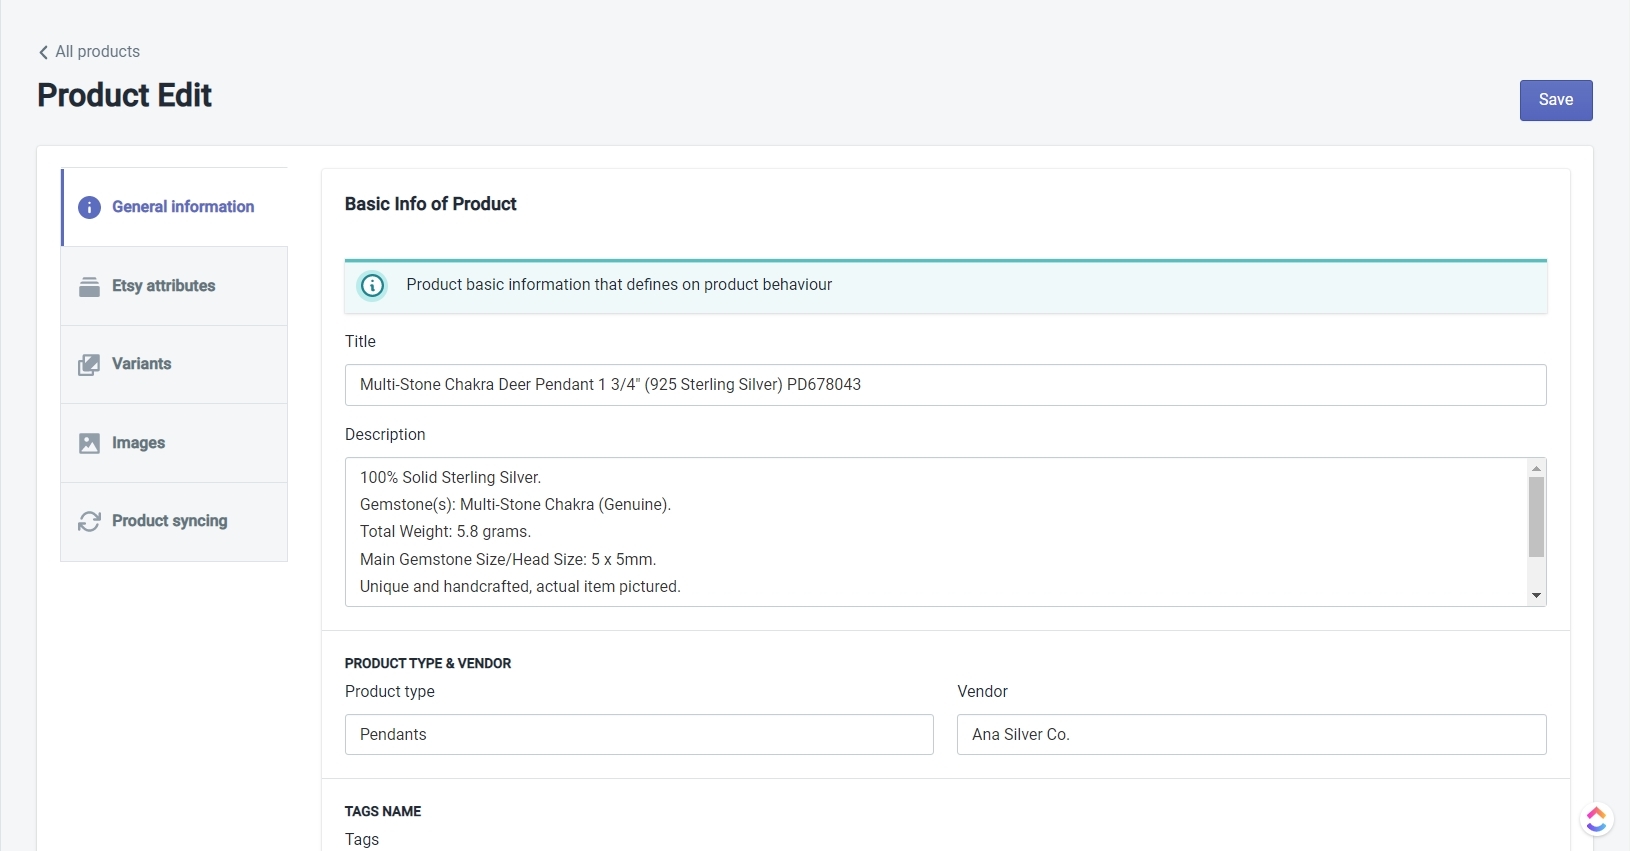
The Product Edit page is divided into 5 tabs for editing different attributes of a product. There is a ‘Save‘ button at the top right corner, use it to save any changes you’ve made in your product information.
General Information
The General Information tab will allow you to change the Title, Description, and the Tags associated with your product.
Etsy Attributes
In the Etsy attributes tab, you have 3 different sections for editing Required Attributes, Etsy Listing Enhancement Attributes, and Optional Attributes.
Required Attributes
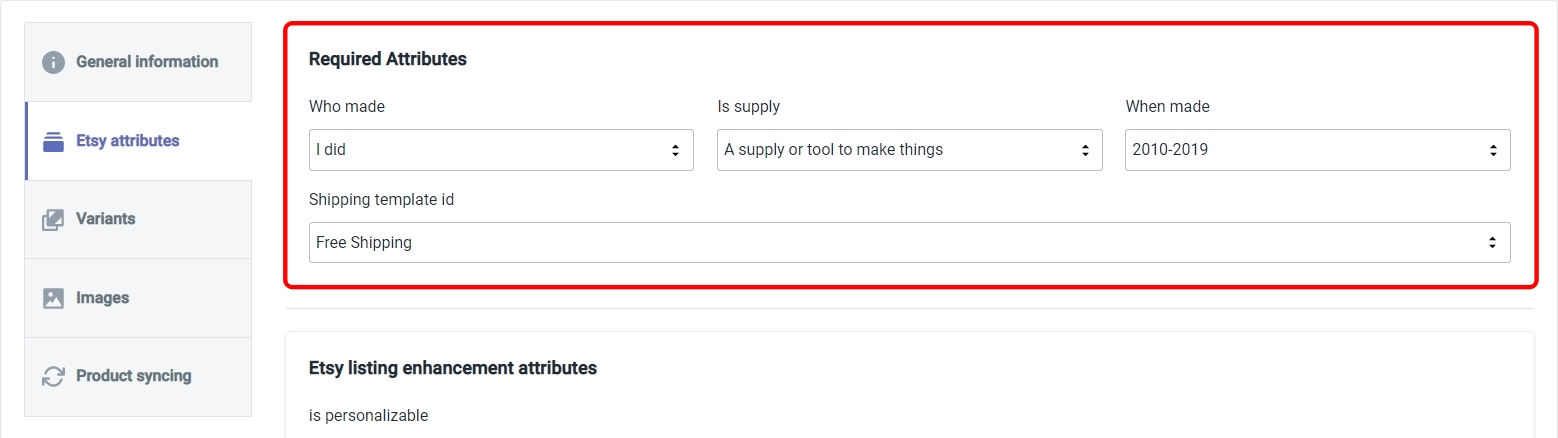
This section allows you to change the required attributes that you specified while creating the profile which contains this product. You can change the following attributes –
- Who Made It?
- What Is It?
- When Did You Make It?
- Image Linking Option – Only available when editing a product with variants
- Shipping template
Note – If you change the ‘Who Made It?’ Attribute to ‘Another company or person’, you need to go back to the profile and specify the production partner otherwise the product will encounter an error while publishing.
Etsy Listing Enhancement Attributes
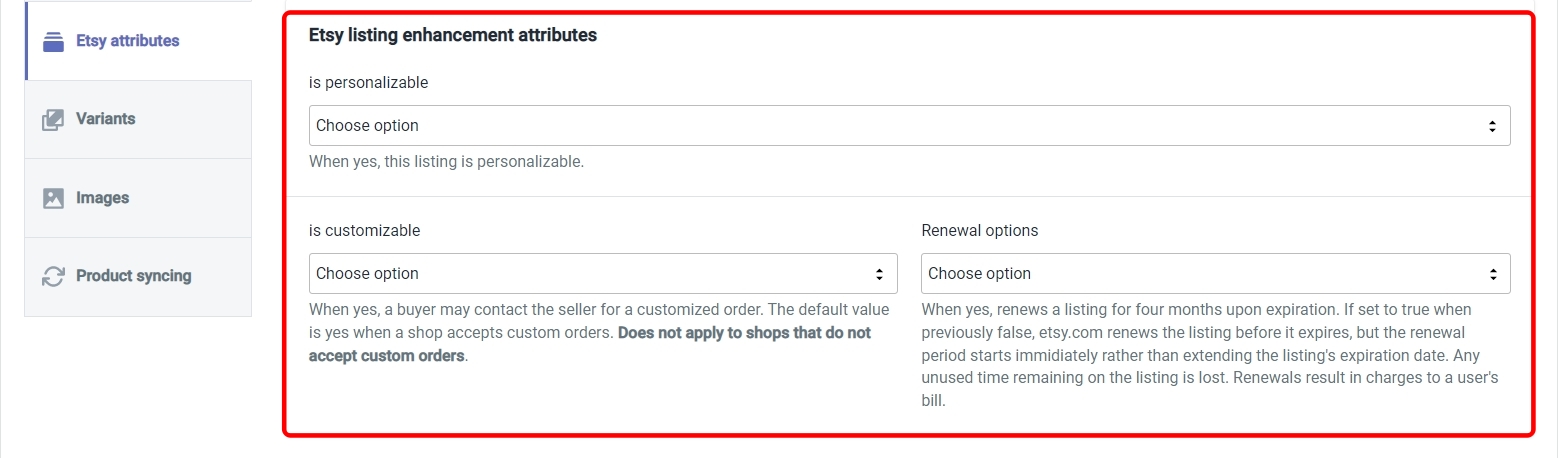
In this section, you can specify the following settings –
- Whether the product is Personalizable or not?
- Whether or not the product is Customizable?
- Whether the product listing renewal is Automatic or Manual.
Optional Attributes
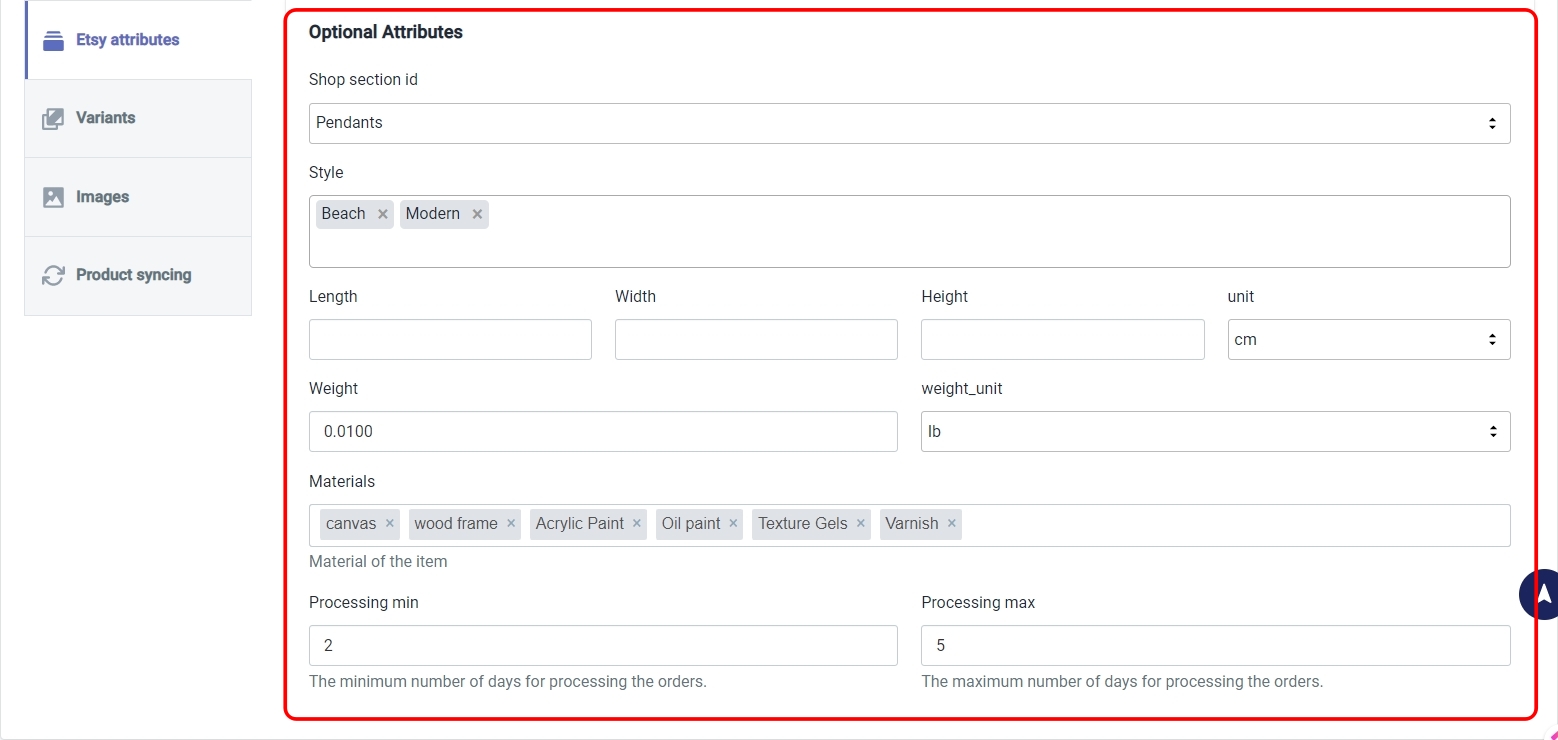
This section allows you to provide some optional attributes for the product –
- Style – Click on the dropdown to select a maximum of 2 style options for the product.
- Length, Width, and Height – Specify the dimensions of the product along with the unit for the dimensions.
- Weight – Specify the weight of the product along with the unit for the weight.
- Material – Specify the materials of the product. Input the name of the material followed by the enter key. You can input multiple materials if applicable.
- Minimum and Maximum processing time (in days) – Specify the minimum and the maximum number of days that you will take to process and ship the order from your end.
Variants
In this tab, you can manage the different variants of your product and its attributes. You can specify the following options on this tab –
Ignoring a product Variant
You can choose to ignore a certain number of variants of the product from being published on Etsy by clicking on the ‘Ignore‘ radio button as shown in the image below.
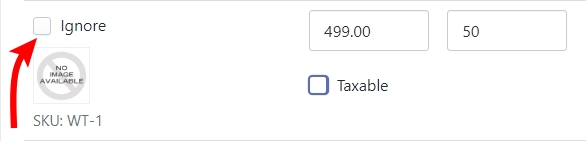
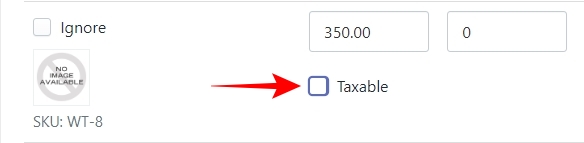
Whether the variant is taxable or not
You can choose whether a product variant is taxable or not by clicking on the ‘Taxable’ radio button as shown in the image below.
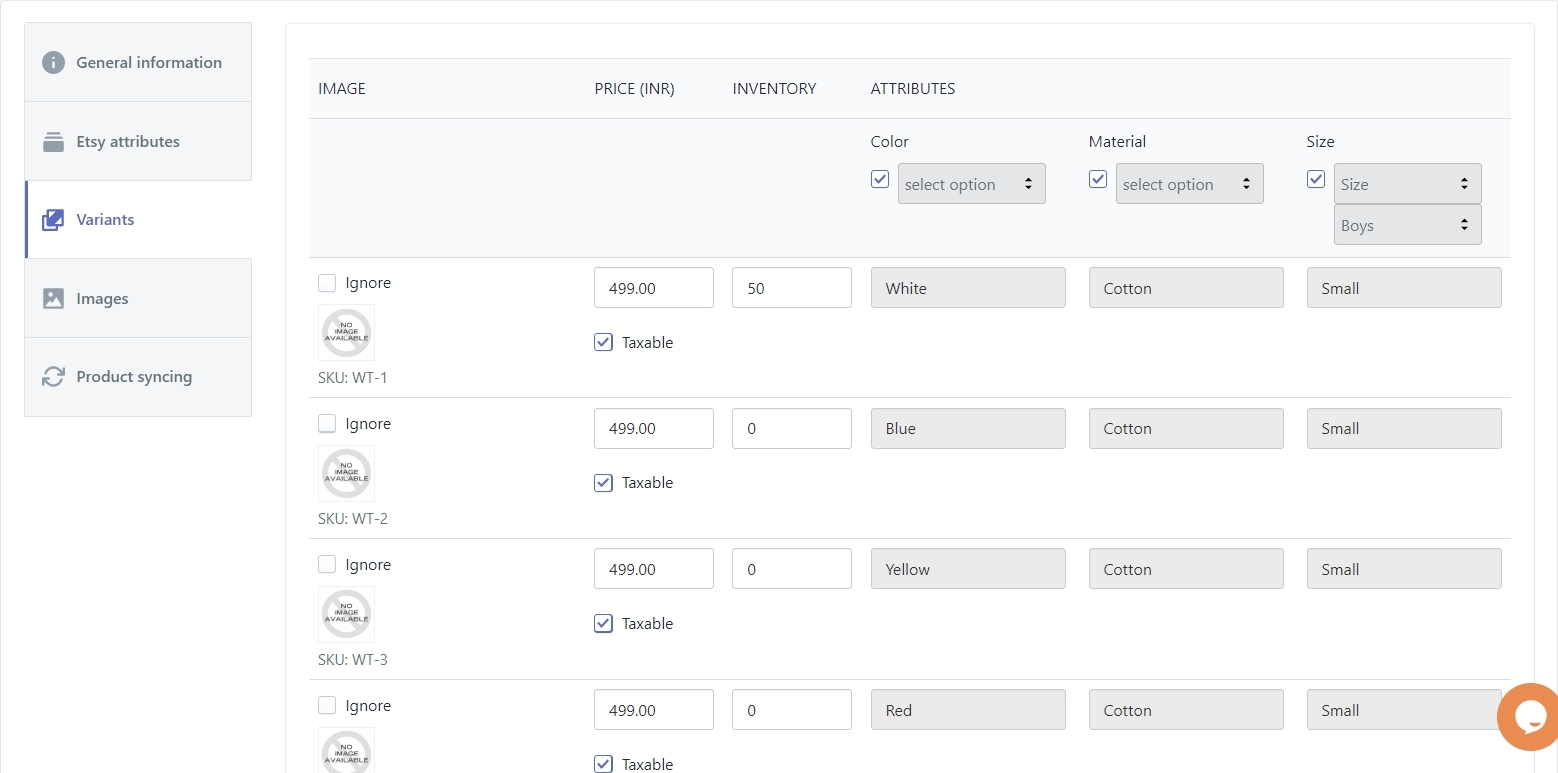
Choosing the Variation Option
You can choose the options that will be used to list the variants for your product. However, you must remember what we discussed earlier. Etsy only allows a maximum of 2 options and 70 variations to be listed on the marketplace. So even if you have all the options selected, the app will only use the first 2 active options to create the variations. See the image below for reference.
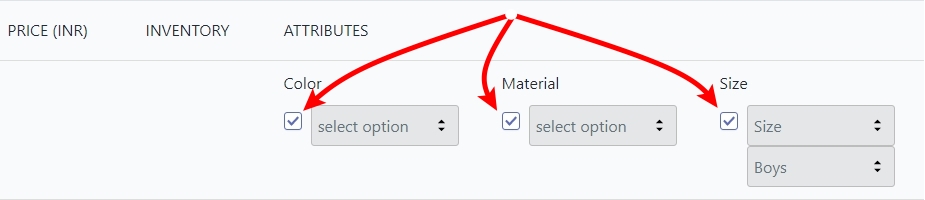
Note – In this case, the option which is left unchecked will be considered active.
Images
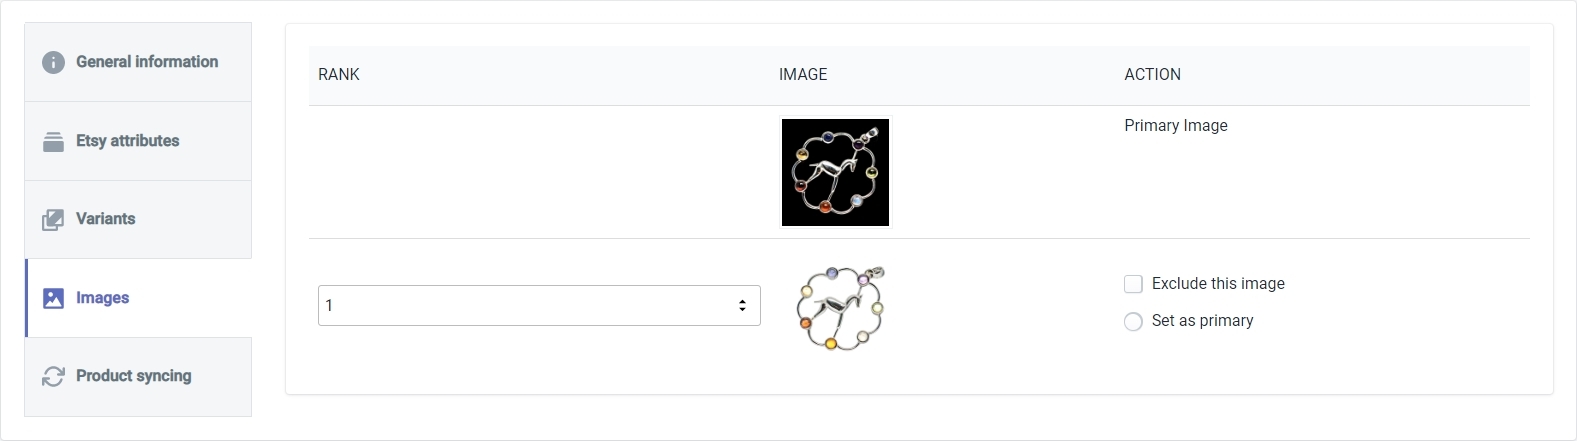
This tab will allow you to manage the images of a product. There are 2 actions that you can perform in this tab. You can set any of the images as the primary image for your product by clicking on the ‘Set as Primary’ radio button, and also, you can exclude certain images from being published on Etsy by clicking on the ‘Exclude this image’ radio button.
Product Syncing
The settings on this tab are very important when you’re editing a product. This is the place where you will specify which product attributes must not be synced between Shopify and the app. If you don’t do this, then the app will override any changes you made when you run the ‘Sync from Shopify’ bulk action.
To disable a particular attribute from syncing, first, you need to uncheck the ‘Use global settings’ radio button to get access to individual attributes, as shown in the image below.
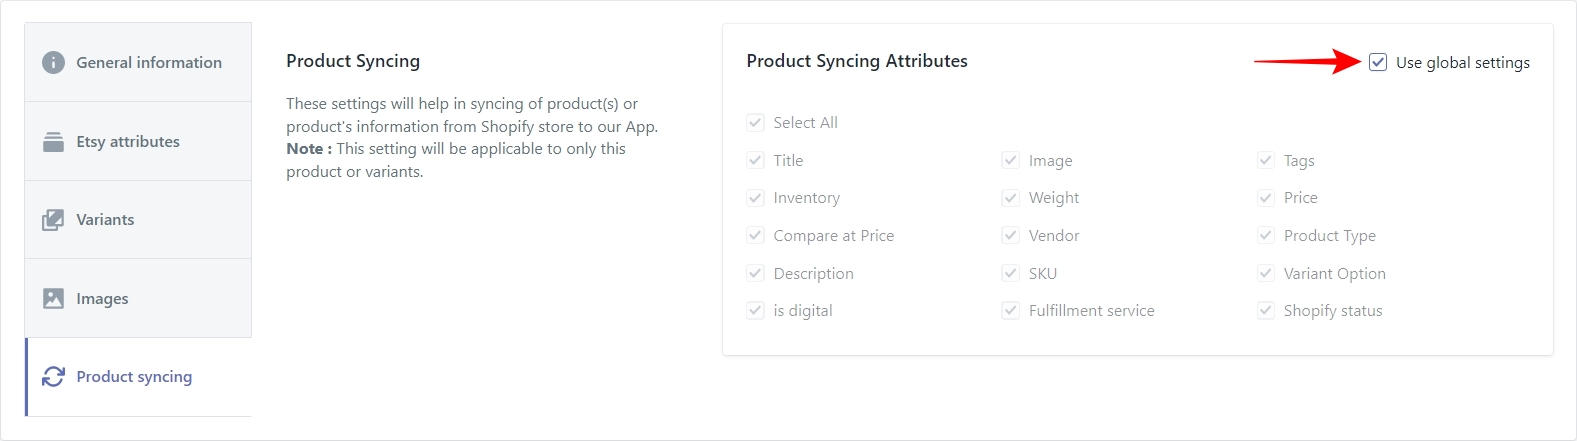
Now leave all those attributes unchecked that you have changed while editing the product, and check all the other ones. This will ensure that whenever you sync your products from Shopify, the changes are not lost.
Finally, click on the ‘Save‘ button to confirm all the changes you made to the product and go back to the ‘All Products’ page.
PRODUCT SELECTION
It’s important to understand how to select the products because performing any ‘Bulk Action’ will require you to select multiple products.
You can approach product selection in three different ways –
Selecting individual products
You will use individual product selection when you don’t need to select all the products on any given page. Let’s say there are 25 products on a page, and you need to perform a bulk action on 5 of them. In this case, you will select only those 5 individual products as you can see in the image below.

Selecting all products on a page
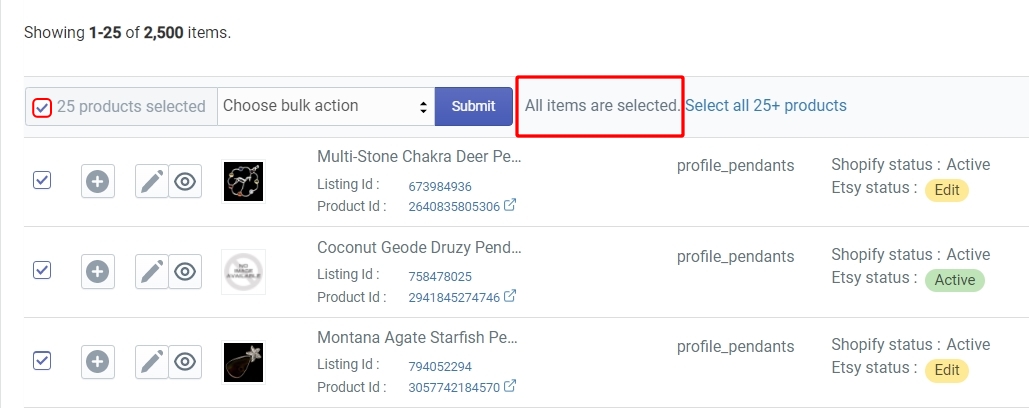
You will use this method of product selection when you need to select all the products on a page. Just click on the top-most product selection radio button to do so. You will see the message that All products are selected as you can see below.
But what if you want to select all your products. Not just on a page, but all the products spanning multiple pages. In that case, you will use the next method.
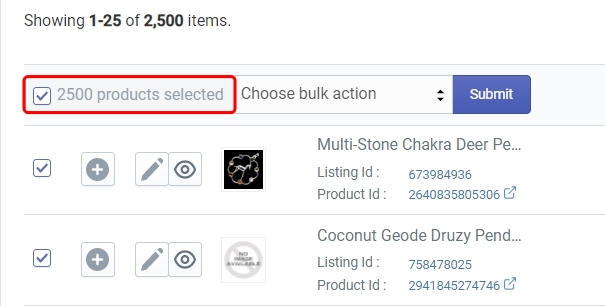
Selecting all products on all pages
You will use this method of product selection when you need to run a bulk action on all your products at once. To do so, first select all the products on the current page. You will see an option that says ‘Select all 25+ products’. Click on this option and the app will ask you to confirm your action. Once you do, it will select all your products on all the pages.
The term 'Etsy' is a trademark of Etsy, Inc. This application uses the Etsy API but is not endorsed or certified by Etsy, Inc.


