
Authorize the PrestaShop
In the next step, you need to connect the PrestaShop account with the connector module. To establish the connection between your PrestaShop account and the connector module, please configure these options once the module is installed and you’re on the connection configuration page:
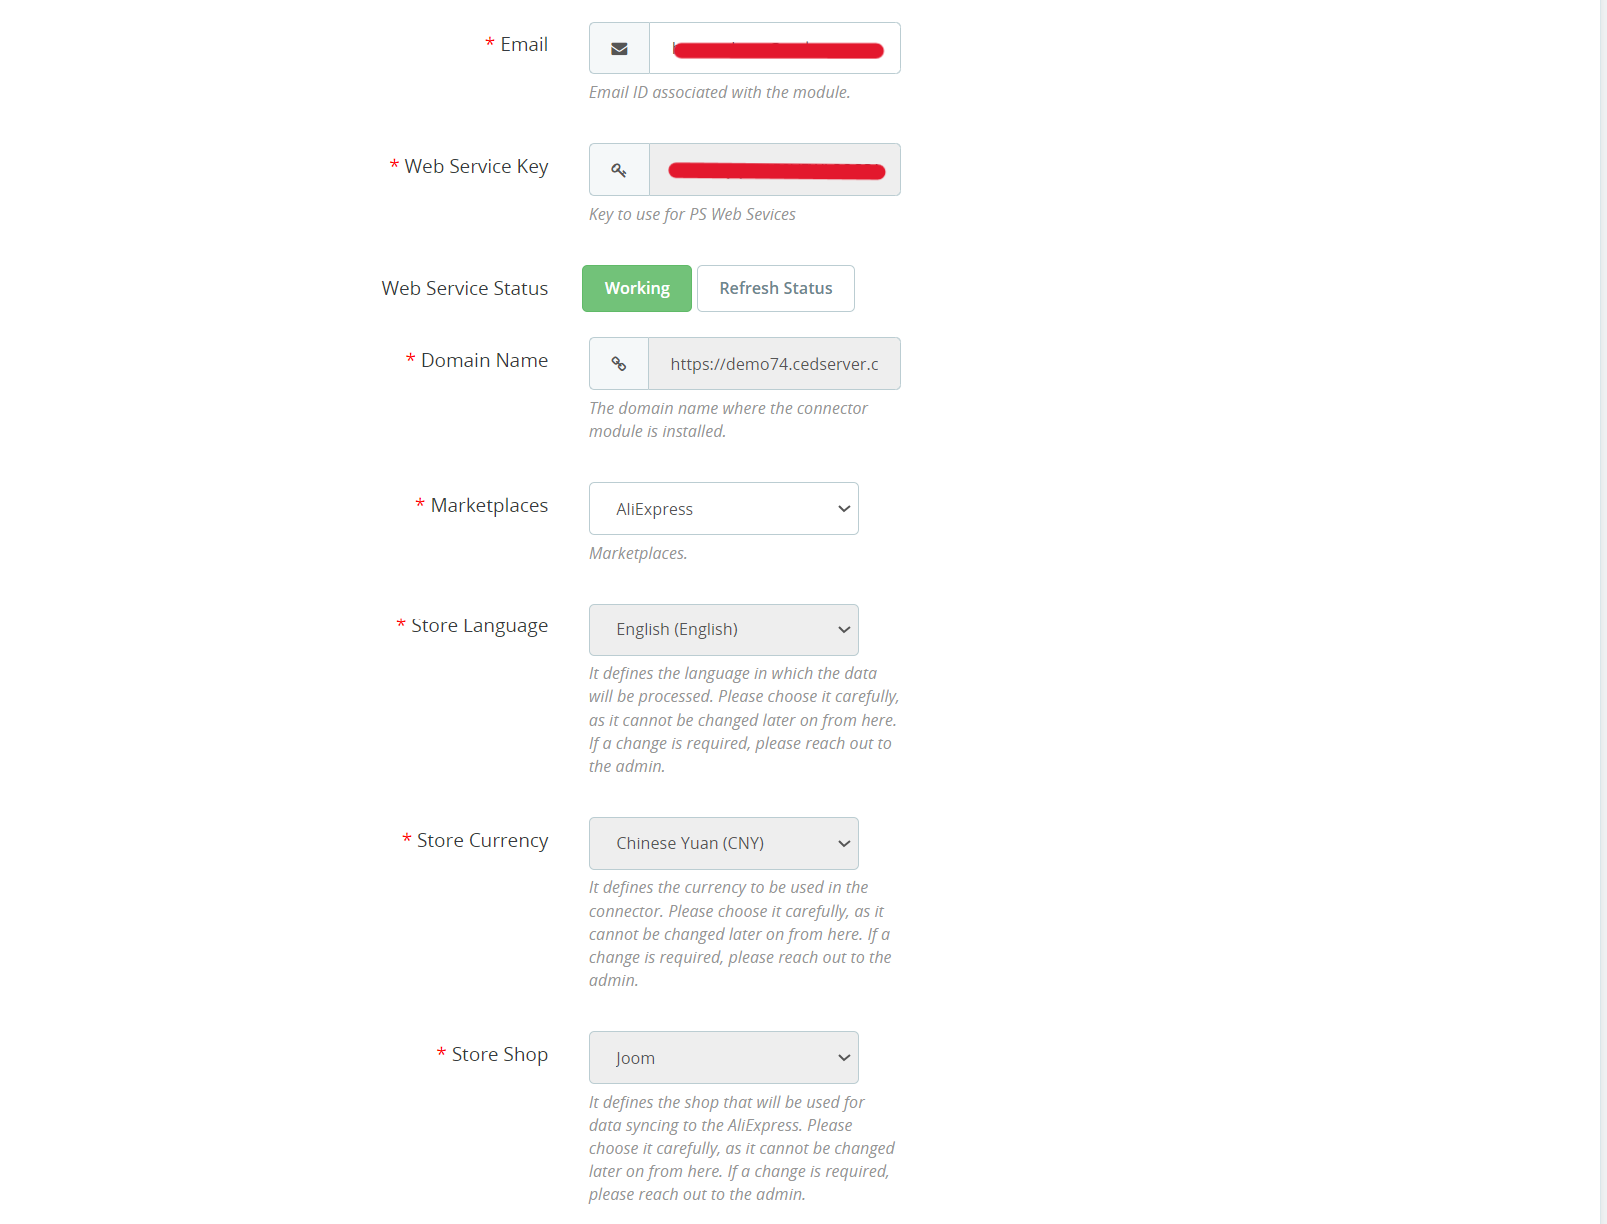
- Email: Provide an email ID here to create your account on CedCommerce and associate with the connector.
- Web Service Key: It is the key for using PrestaShop Web Services.
- Web Service Status: It will display the status of the PrestaShop Web Service.
- Domain Name: It shows the domain name where the connector module is currently installed.
Web Service Key, Web Service Status, and Domain Name will be pre-filled and cannot be modified. However, you can refresh the Web Service Status through a dedicated button available there.
- Marketplace: Under the “Marketplace” section, select “AliExpress” from the drop-down menu.
- Store Language, Currency & Shop: Select the appropriate store language, currency, and store shop.
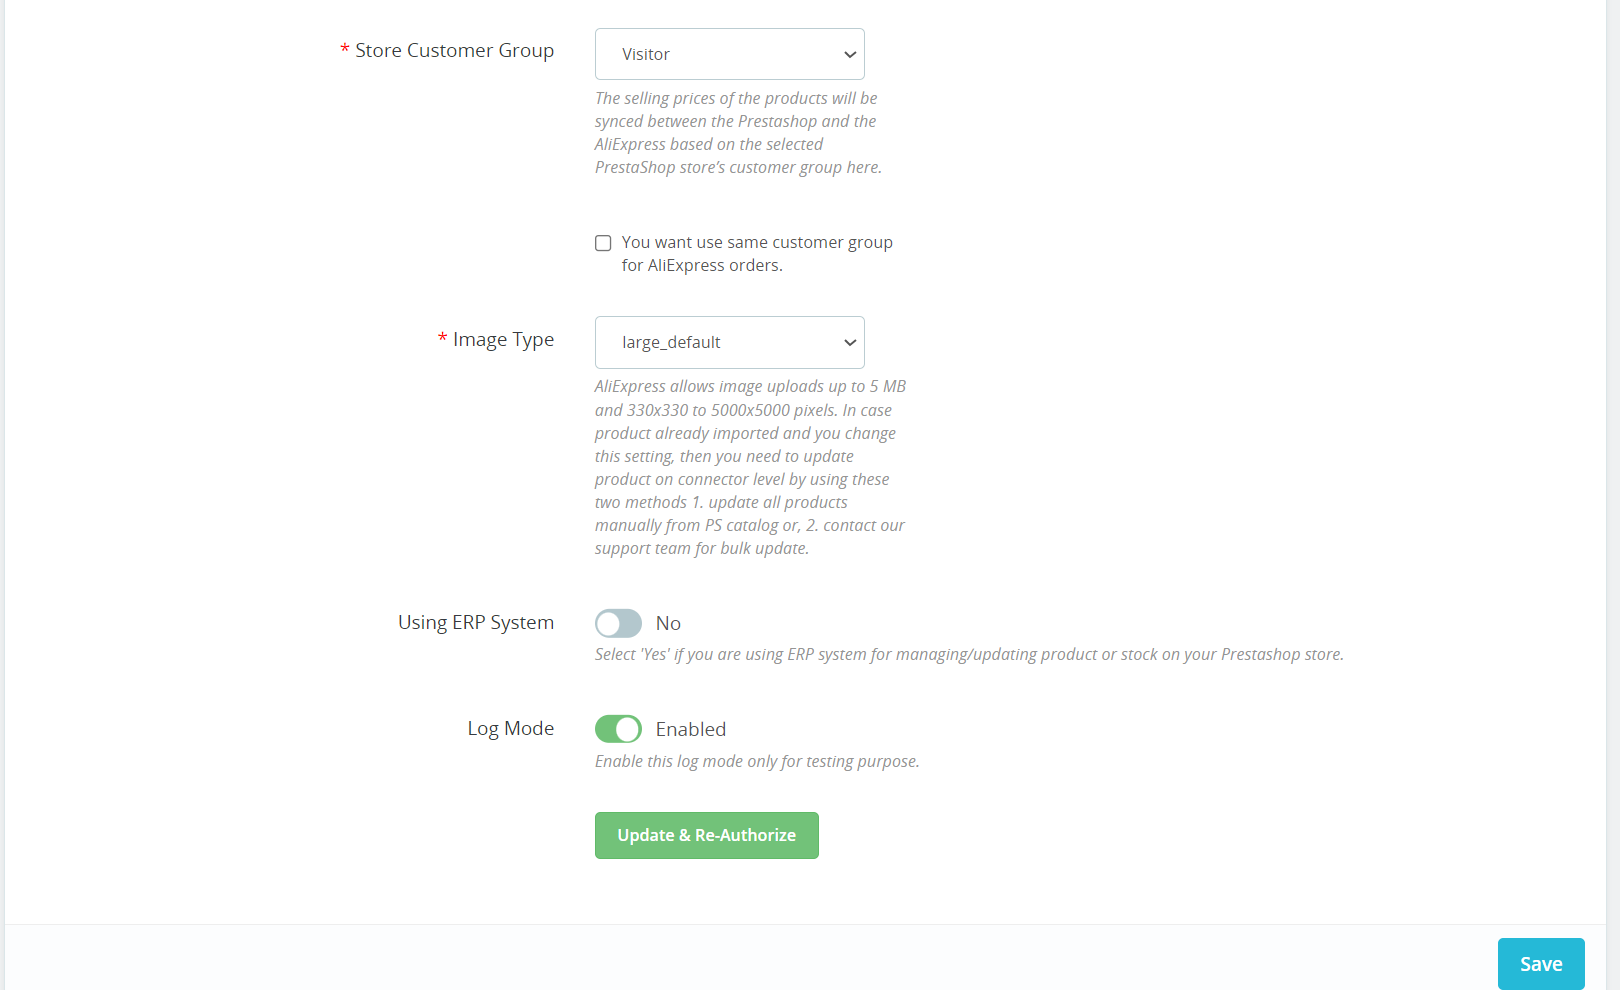
- Store Customer Group: Choose a relevant store customer group based on your requirements. The selling prices of the products will synchronize between PrestaShop and AliExpress based on the selected customer group.
- Image Type: Choose the relevant Image Type for the product images that will be uploaded on AliExpress.
- Using ERP System: Enable this option if you are using the ERP system for managing/ updating products or stock on your PrestaShop store.
- Debug Mode: If you want to test the connector module, you can enable Debug Mode. Enabling this will create a log of all the activities performed by the connector.
Save & Authorize: Once you’ve filled in the required information and configured the settings per your needs, click “SAVE & AUTHORIZE” to save your settings and authorize the connector module.
×


