
5.1.Adding a new profile ↑ Back to Top
To add a new profile, a seller needs to:
- Go to Prestashop Admin Panel
- On the left navigation bar, place the cursor on Mlibre Integration and you will see it getting expanded as below:
- Click on Mlibre Profile and you will see the page as shown below:
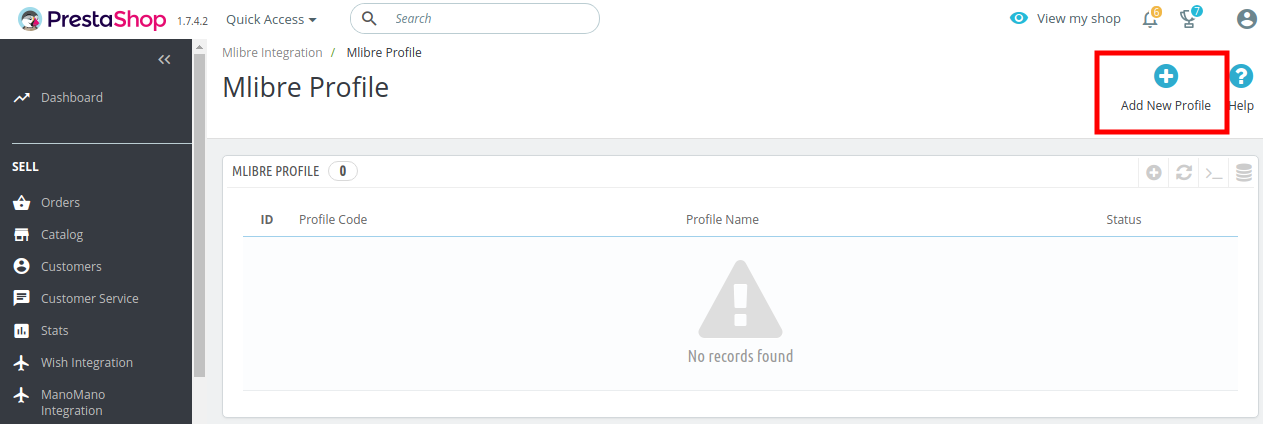
- Now click on Add New Profile. You will be taken to the page as shown below:
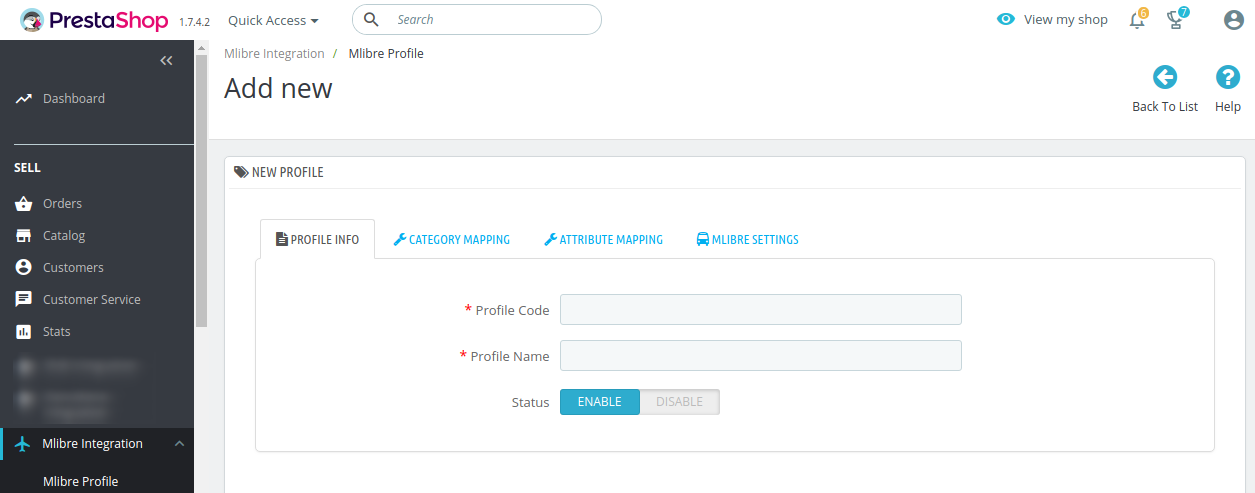
- In the Profile code, enter the code for the profile you are making.
- In the Profile name, enter the name of the profile.
- Select Enable as the status to enable the profile.
- Click on the Save button.
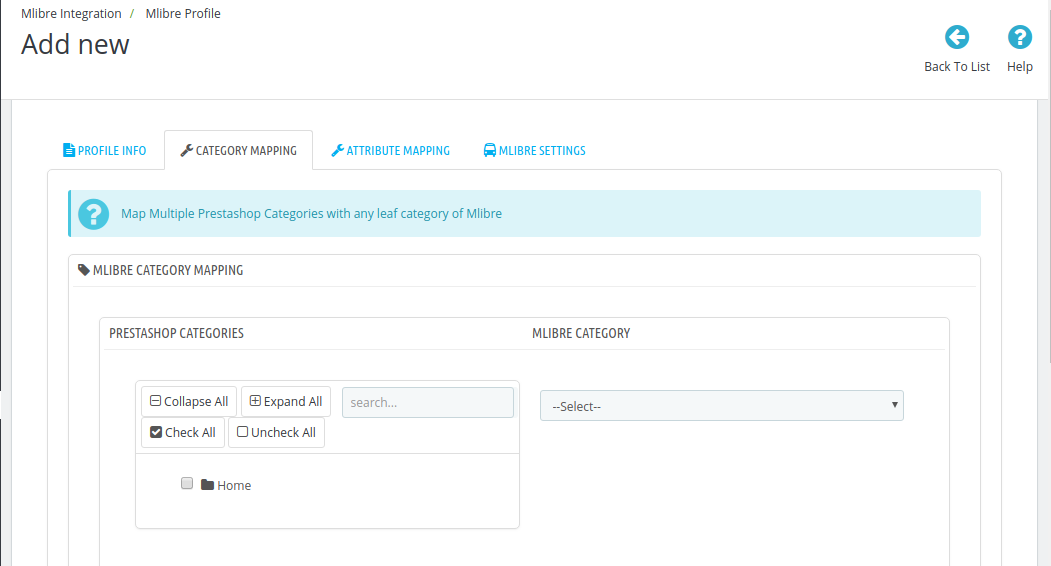
Now Click on Category Mapping adjacent to the Profile Info tab, and you’ll come across a section as below:
- In this section
- Here you need to map your prestashop categories with Mercadolibre category.
(Note: Module uses the default category of product to assign products in profile.) - Select the options Collapse All, Expand All, Check All, Uncheck All to perform these operations to select the directory.
- Select the category of Mercadolibre.
- Here you need to map your prestashop categories with Mercadolibre category.
Now Click on Attribute Mapping adjacent to the Category Mapping tab, and you’ll come across a section as below:
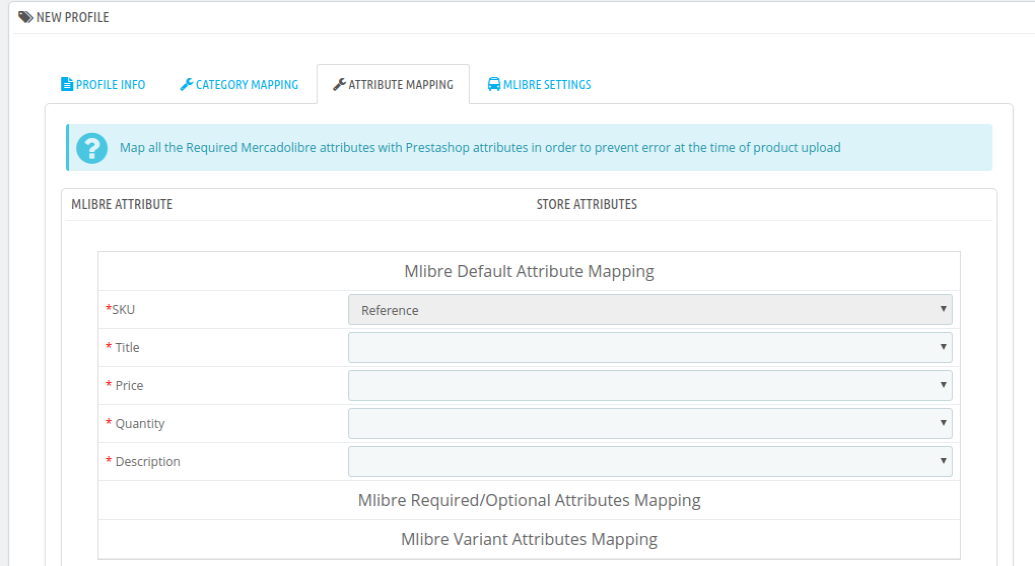
- Map the mercadolibre title attribute with prestashop attribute.
- Map the mercadolibre price attribute with prestashop attribute.
- Map the mercadolibre quantity attribute with prestashop attribute.
- Map the mercadolibre description attribute with prestashop attribute.
- Click on Save button, and the attribute mapping will be saved.
Click on the Mlibre Settings adjacent to the Attribute Mapping and you will see the section as shown below: 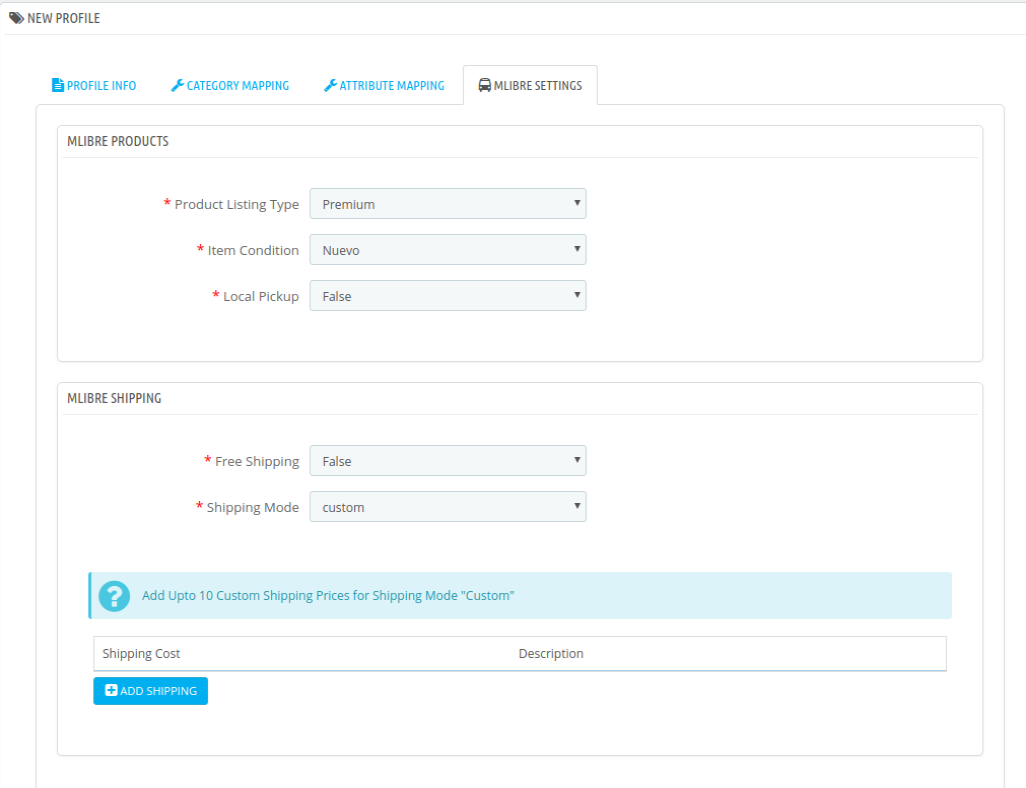
In Mlibre products
- Select the Product Listing type.
- Select the Item Condition.
- Select the Local Pickup
In Mlibre Shipping
- Select the Free Shipping option.
- Select the Shopping Mode.
To add the custom shipping mode
- Click on the Add shipping button
- Enter the cost and the description.
- Now click on Save button and your profile will be created.
×


