
Fyndiq Profiles
This tab contains information about creating product profiles which can later be utilized to implement bulk product functionality for particular product types.
To set up the Fyndiq Profile settings in the PrestaShop Admin panel
- Go to the Prestashop admin panel.
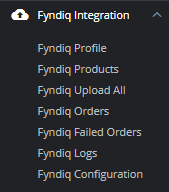
- In the left navigation panel, place cursor on Fyndiq Module menu.
The menu appears as shown in the following figure:
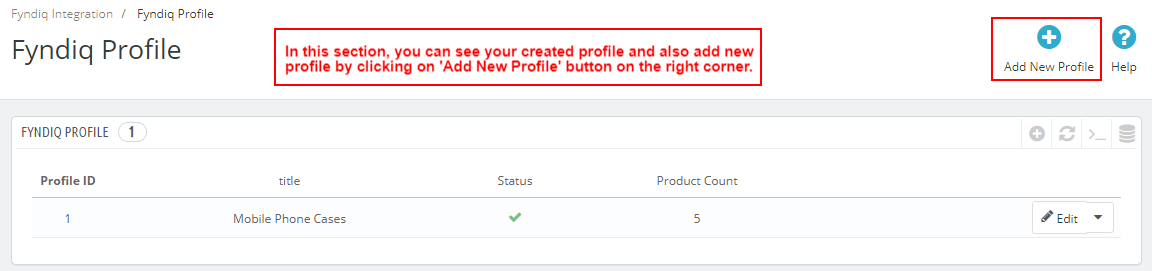
- Once you click on Fyndiq Profile,
The following page appears:
- Now click on Add New Profile. You will be taken to the page as shown below:
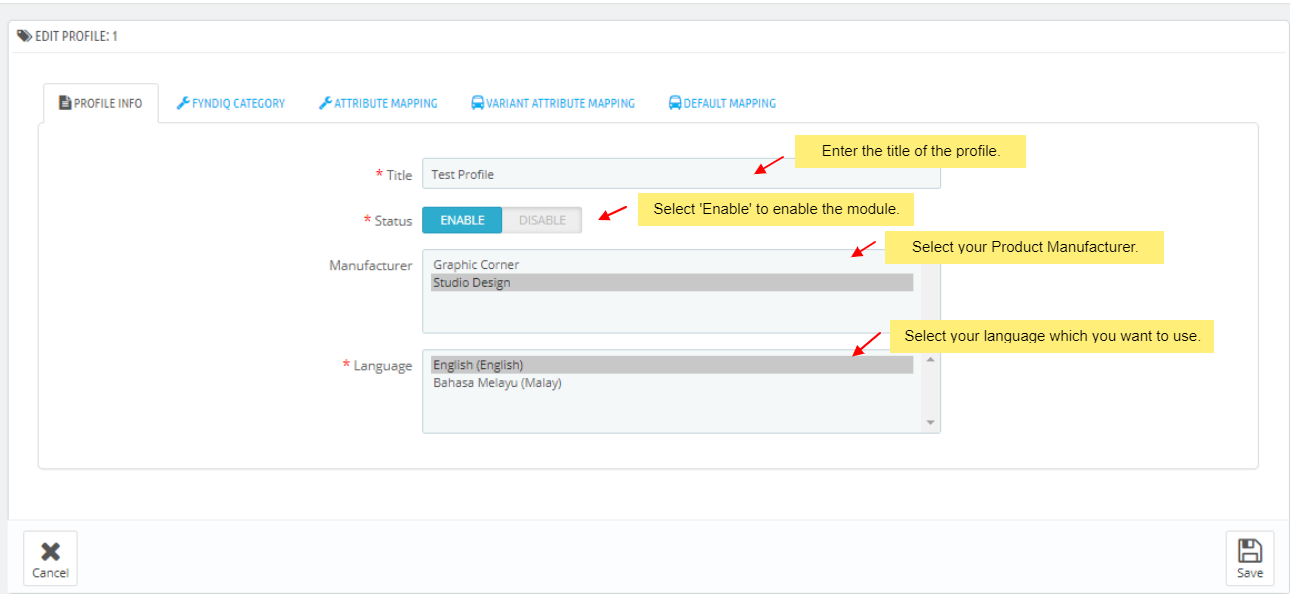
- In the title, enter the title for the profile you are making.
- Select Enable as the status to enable the profile.
- In the Manufacturer, select your Product manufacturer.
- In the Language, select your language which you want to use.
- Now Click on Fyndiq Category adjacent to the Profile Info tab, and you’ll come across a section as below:
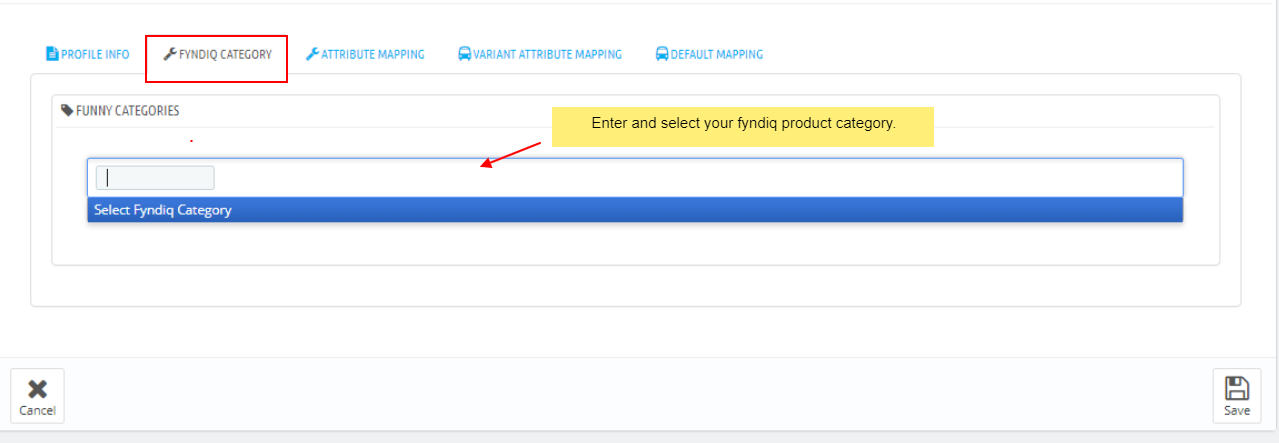
- In this section, enter and select your Fyndiq products category.
Note: You can choose maximum 5 category.
- In this section, enter and select your Fyndiq products category.
- Now Click on Attribute Mapping adjacent to the Fyndiq Category tab, and you’ll come across a section as below:
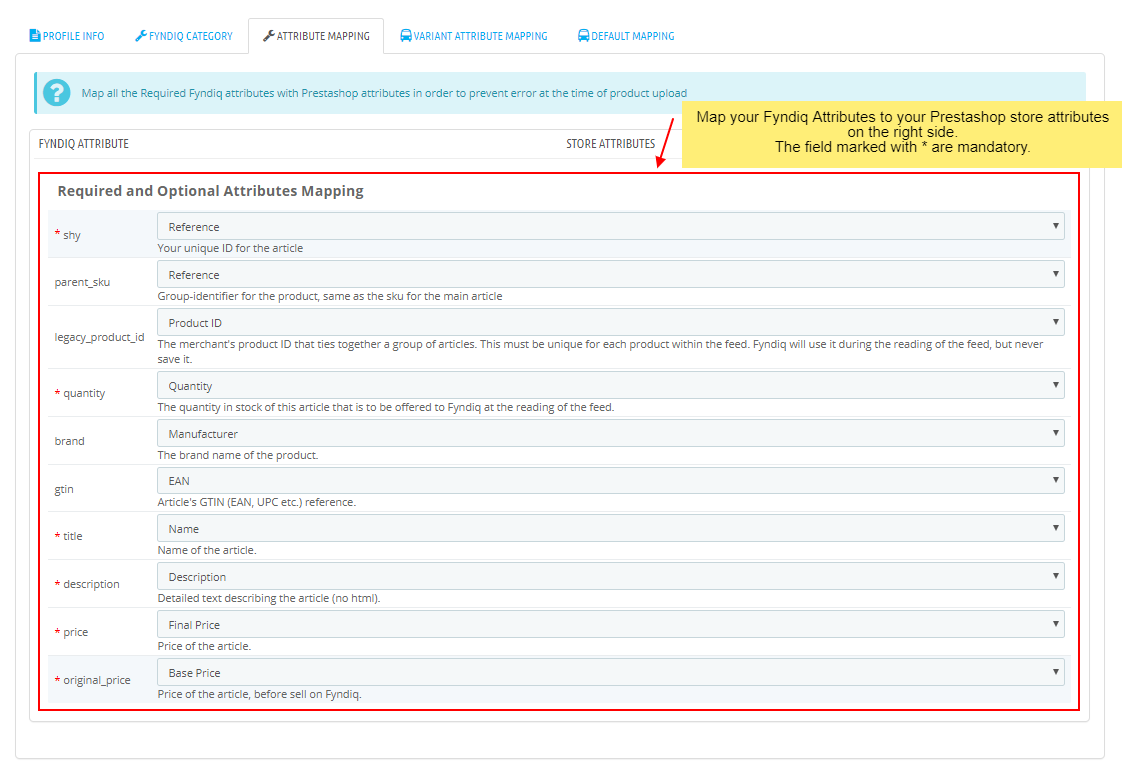
- In this tab, map the relevant attributes of the product profiles with that of attributes of items on Fyndiq.
- Now Click on Variant Attribute Mapping adjacent to the Attribute Mapping tab, and you’ll come across a section as below:
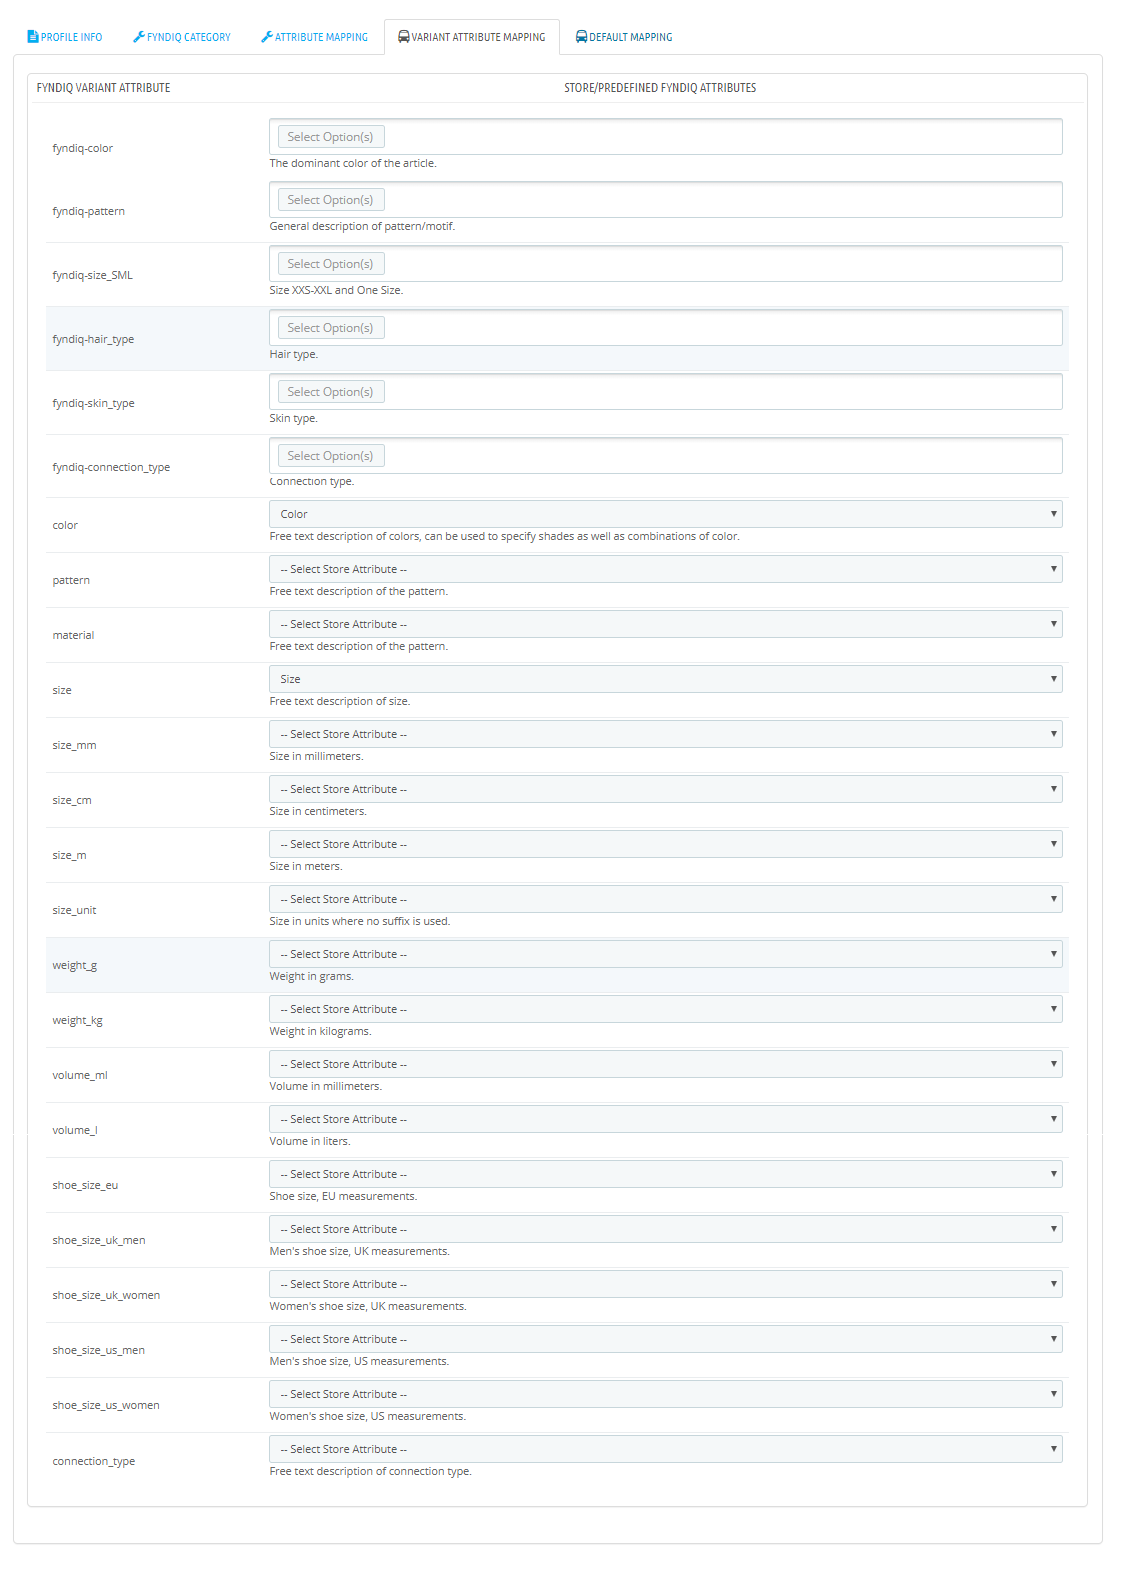
- In this section, choose your fyndiq variant attribute with your Store Attributes on the right side.
- Now Click on Default Mapping adjacent to the Variant Attribite Mapping tab, and you’ll come across a section as below:
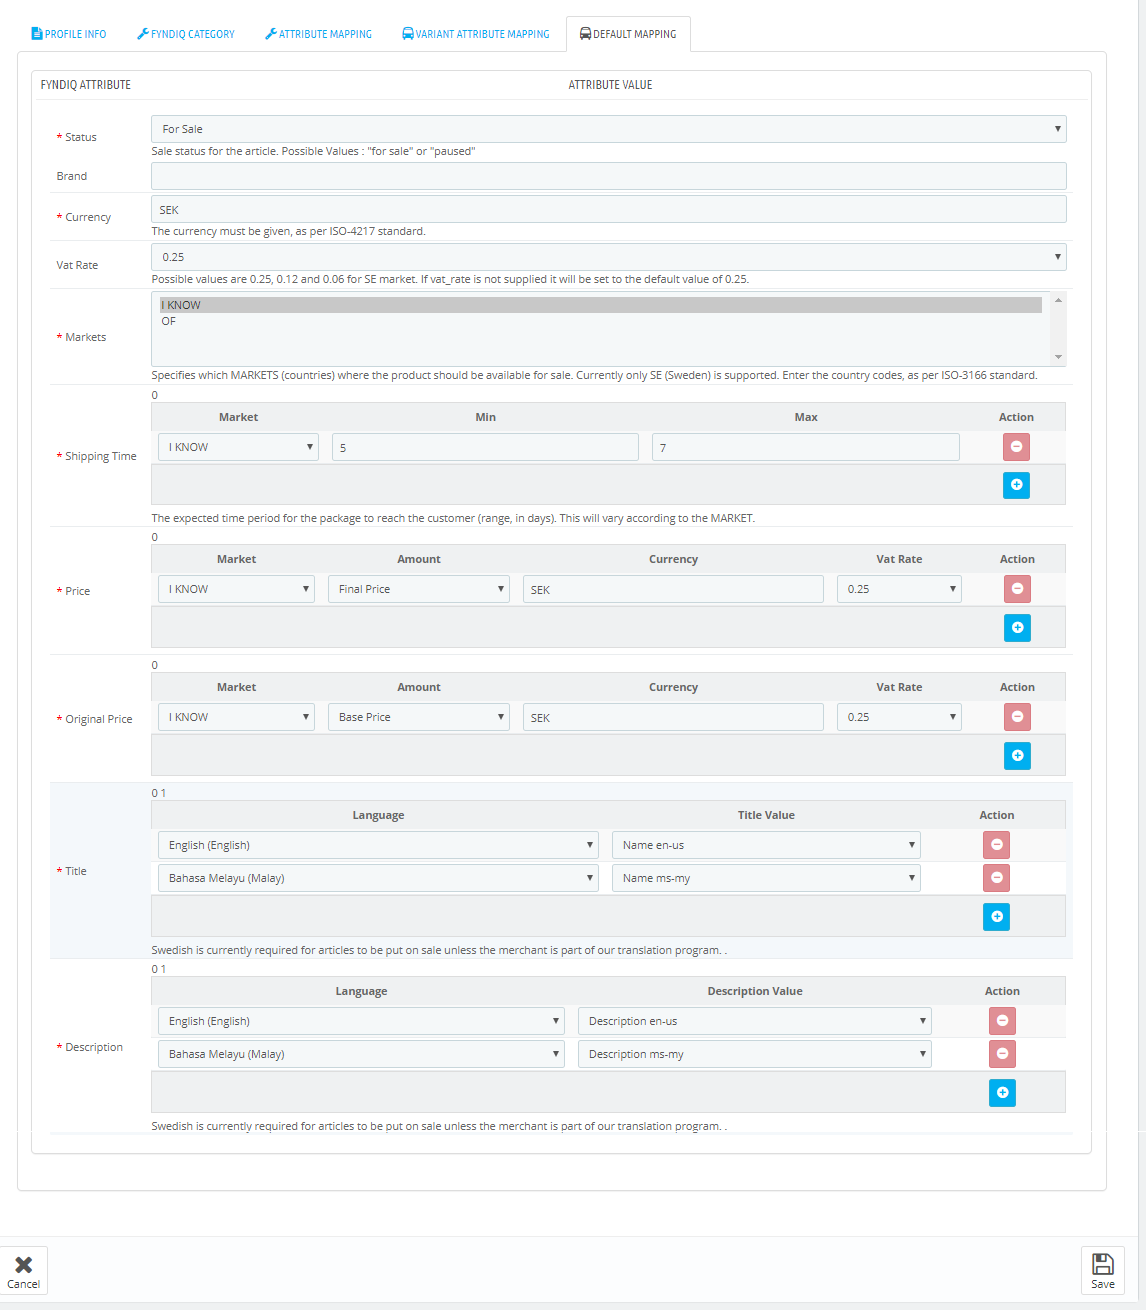
- In this tab, map the relevant attributes of the product profiles with that of attributes of items on Fyndiq.
- Once you’re done profiling everything proceeds to Save to store the changes and Cancel to discard them.
×


