
Catch Configuration Settings
Once the module gets installed, you get navigated to the Configuration page.
To perform Configuration settings:
- Go to the Prestashop Admin panel.
- In the left navigation panel, place cursor on Catch Integration and the section expands as:

- Now click on Catch Integration:
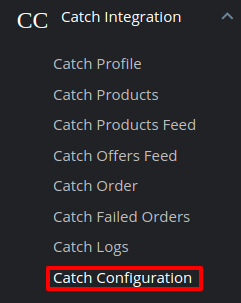
- Now click on Catch configuration and the configuration settings page opens up:
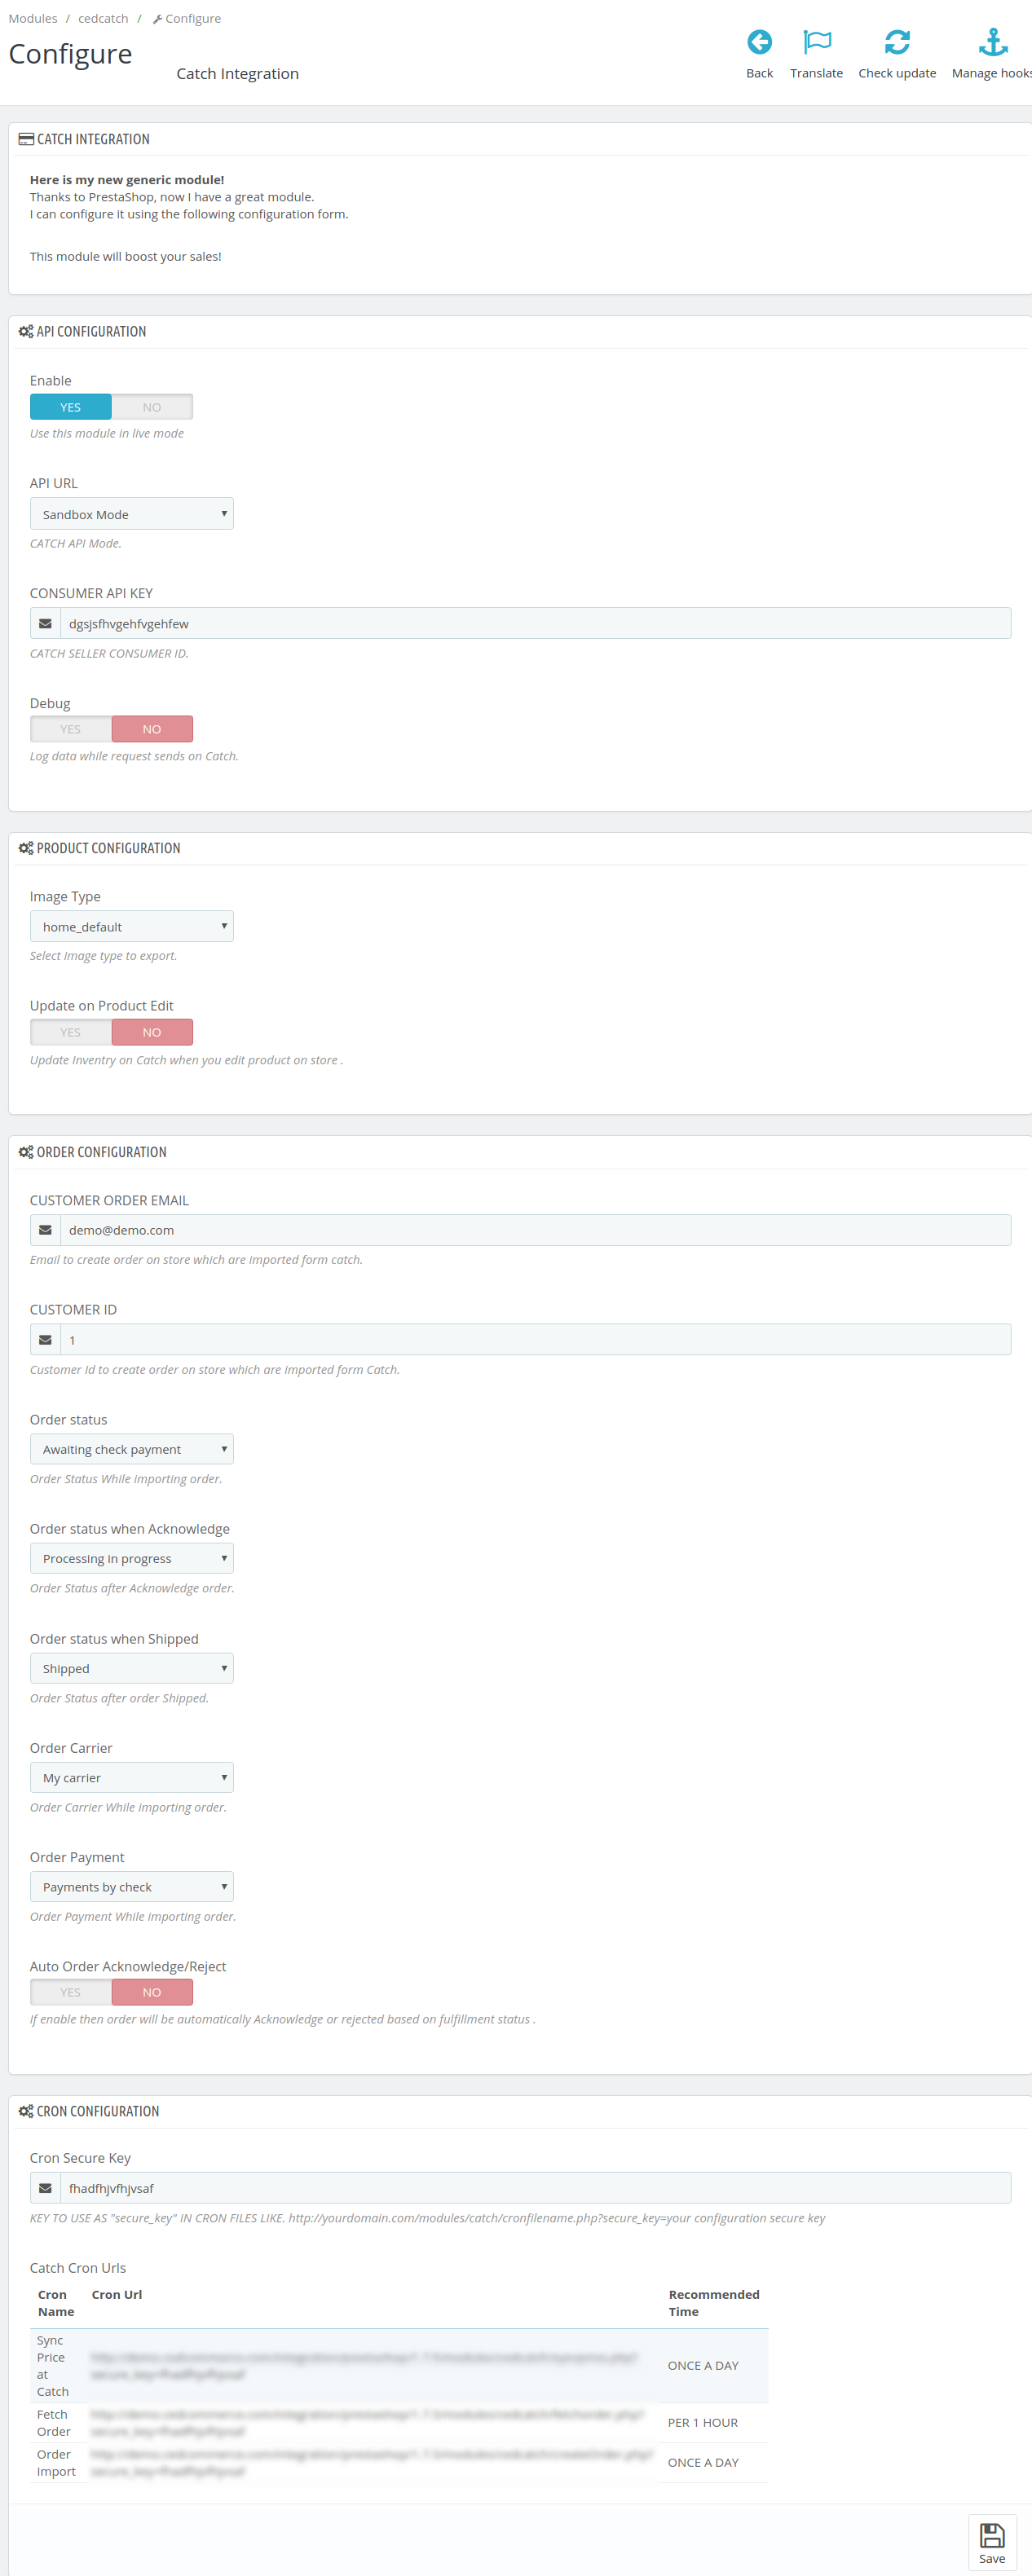
- There are 4 types of configuration settings:
- API
- Product
- Order
- Cron
- You must begin one by one. First is the API Configuration Settings:
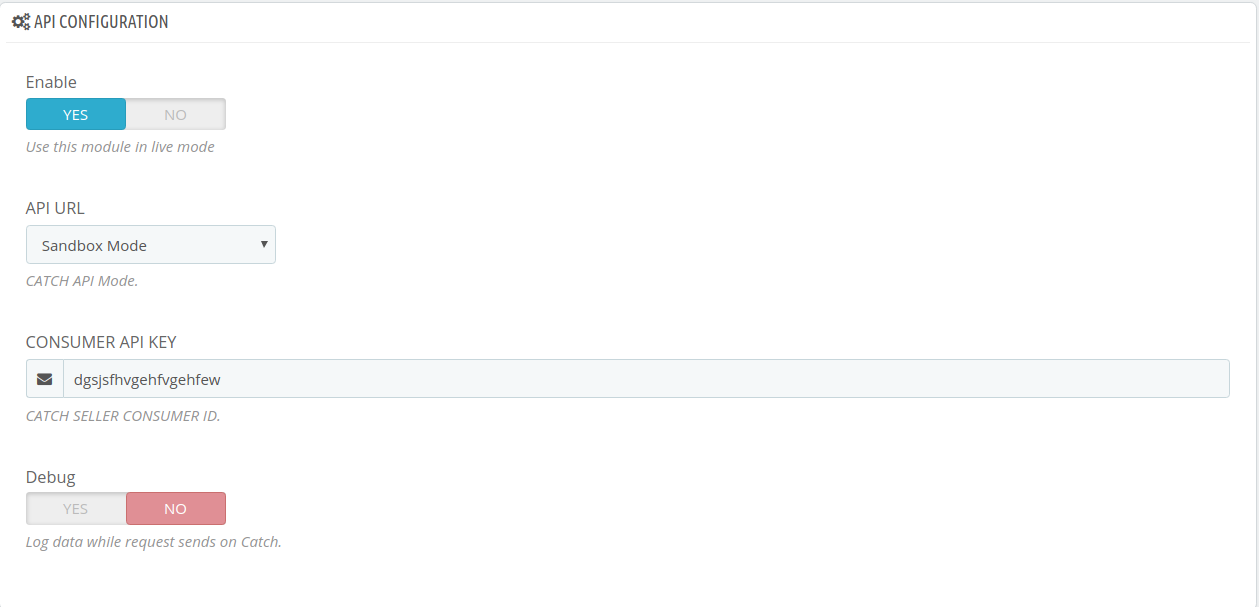
- Select Yes in the Enable part so that your module gets enabled.
- In API Mode, select from Sandbox or Production. The sandbox mode is for testing and the Production mode is for the live changes on Catch Marketplace.
- Enter your Catch API Key in the next section. This is available on your Catch Seller Panel.
- In Debug Mode, select Enable if you want the Debug log to be created.
Product Configuration:
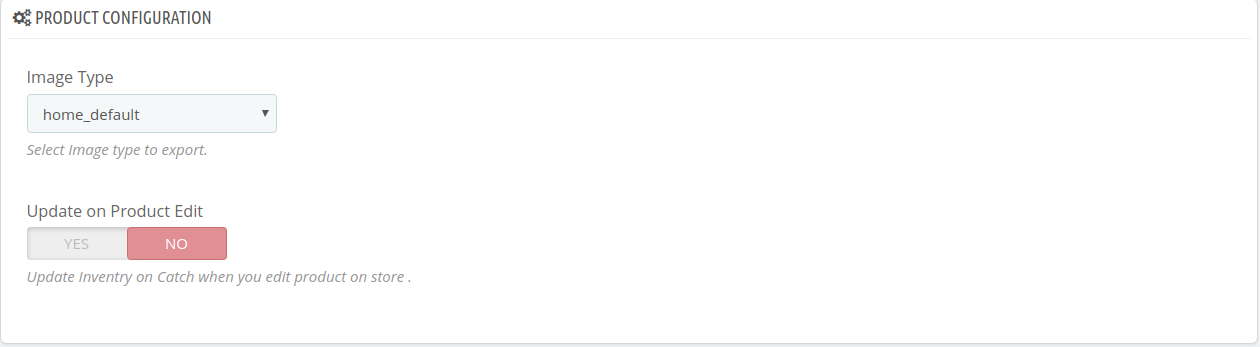
- In Image Type, choose the image type to export from the dropdown menu.
- In Update product on edit, the details of the product will vary as you make changes or edit the product.
Order Configuration:
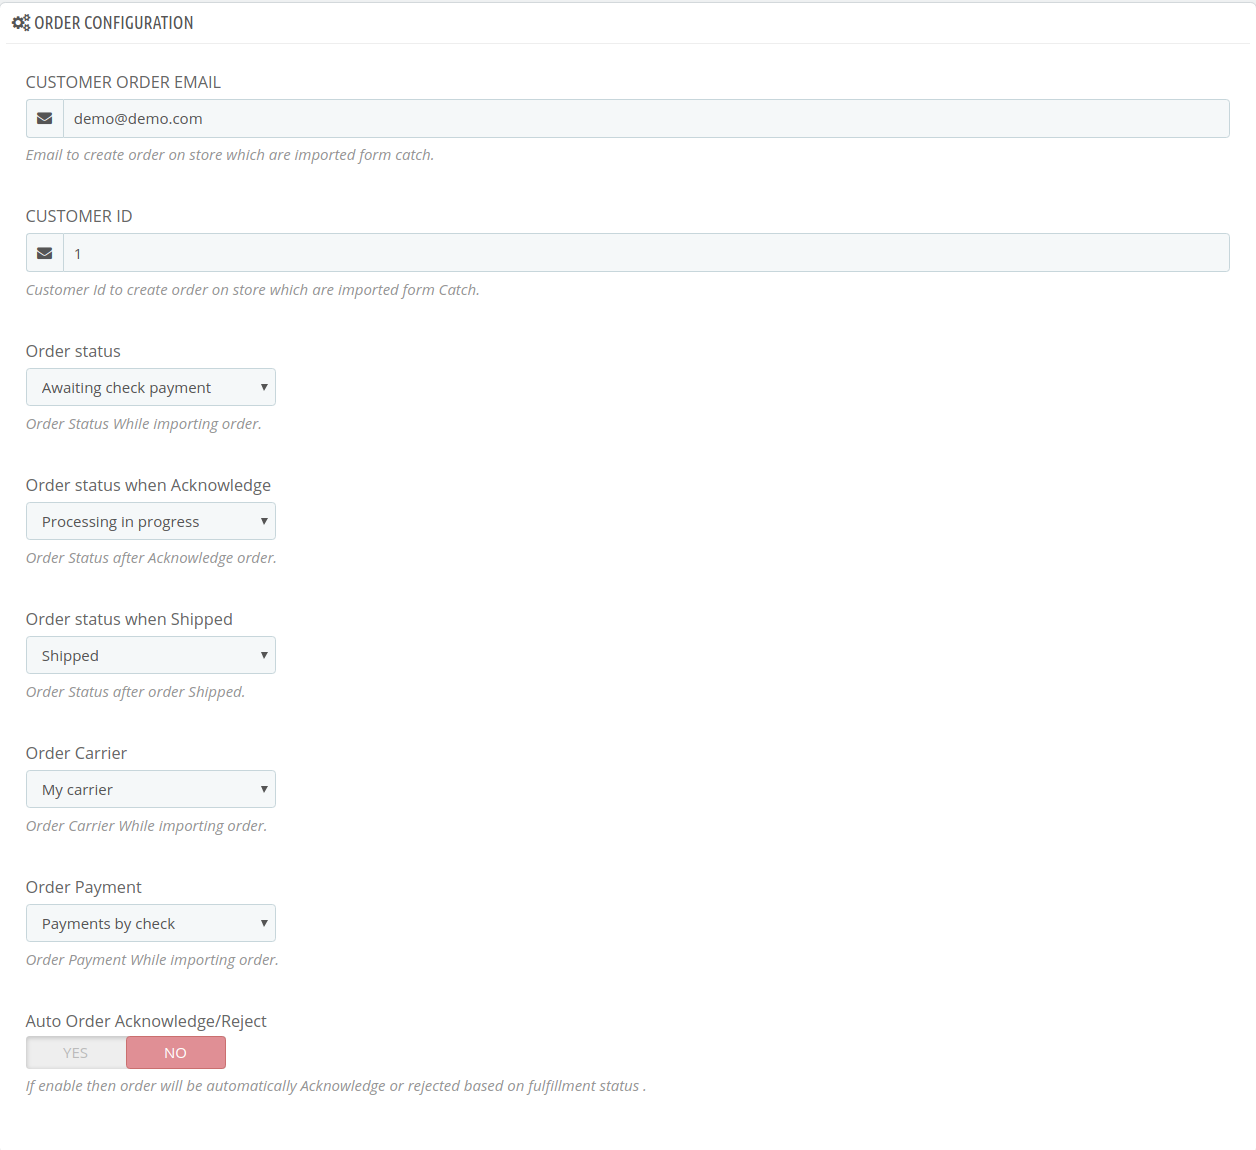
- In the Customer Order Mail, you need to provide the Email to create order on the store which is imported from Catch.
- Enter the Customer Id in the next section. Customer Id is a unique id which is used to create order on the Prestashop store which is imported from Catch.
- In the Order status, select the current order status which appears by default.
- In the Order status when acknowledge, select the order status to appear when the order has been acknowledged.
- In the Order status when shipped, select the order status to appear when the order has been shipped.
- In the Order Carrier, select the order carrier set for particular orders while importing the Catch order.
- In the Order Payment, select the order payment method set for each order while importing the Catch order.
- In Auto Order Acknowledge/Reject, if Yes is selected, the order will be automatically accepted or rejected based on fulfillment status.
Cron Settings:
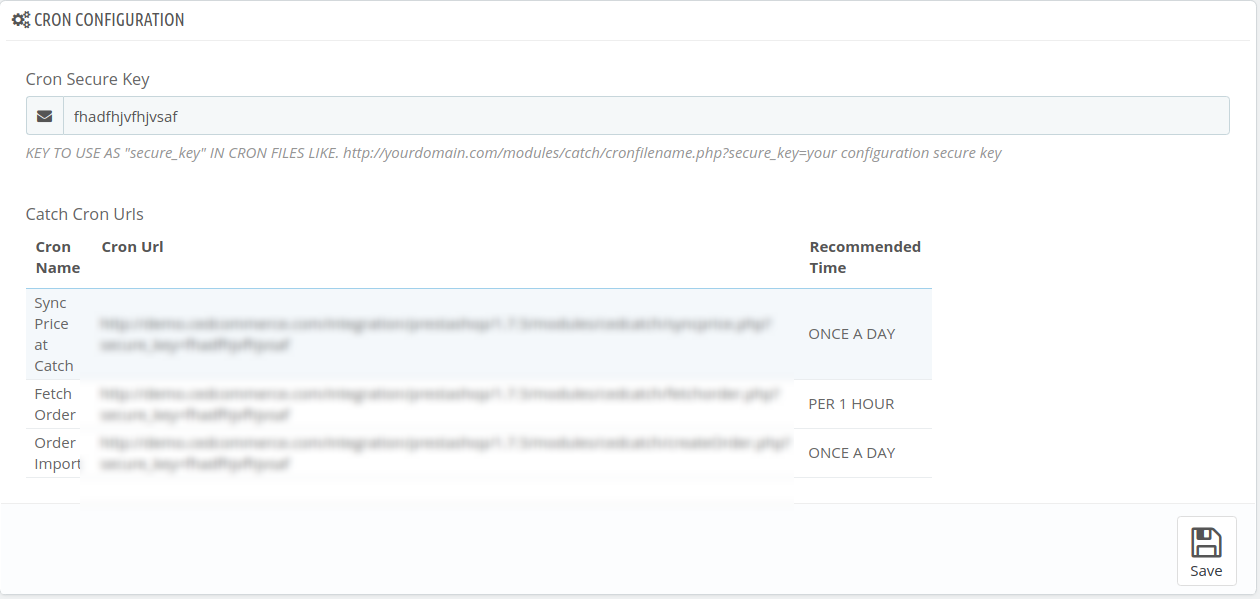
- The Sync Inventory Price, Fetch and Create Order Crons are mentioned below.
- Click on the Save Button to save all the settings.
×


