
4.1.Add a Profile ↑ Back to Top
To add a new profile
- Go to your OpenCart admin panel.
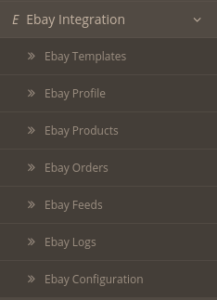
- On the left navigation bar, place the cursor on eBay Integration as shown:
- When the menu appears, click on eBay Profile.
On clicking the eBay Profile, you will be navigated to the page as shown below: - Here all the profiles are mentioned.
- Now to add a new profile click on the + Button mentioned and you will be redirected to eBay New Profile Page:
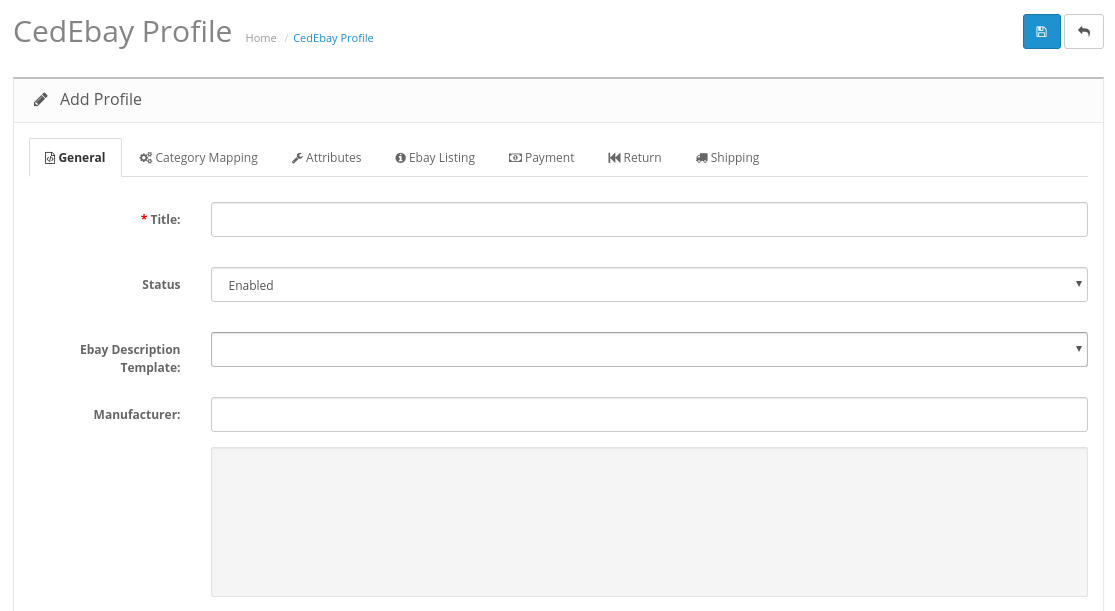
- In the General Settings, do the following steps:
- In the Title, enter the title that you want to give to your profile.
- In the Status, select Enable to enable the profile that you are creating.
- In the eBay Description Template, select your eBay description template.
- In the Manufacturer box, enter the name of the product manufacturer whose product you want to add in the profile.
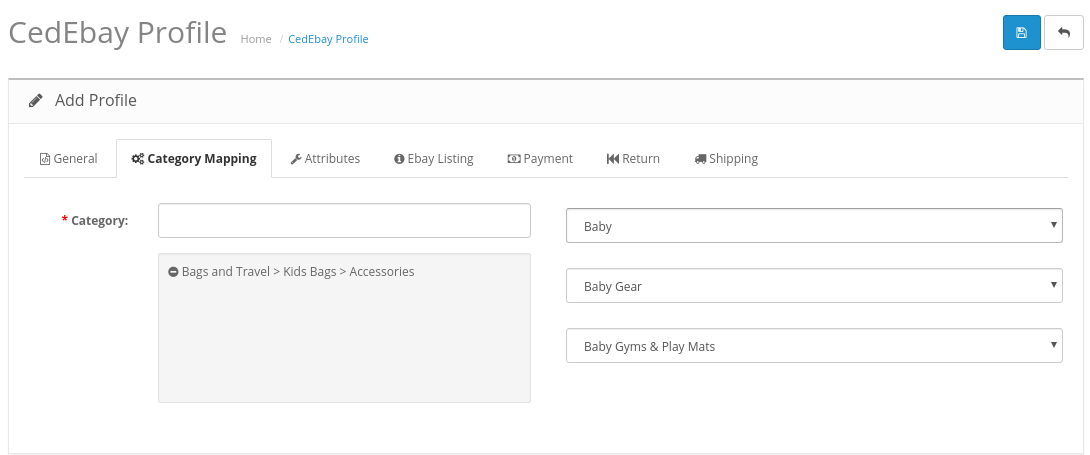
- Now click on the Category Mapping button on the top and the section expands as:
- In the Category Mapping, do the following steps:
- On the left-hand side, choose the Opencart category, where you want this profile to appear.
- On the right-hand side, choose the relevant categories and sub-category of the eBay.
- Once done, click on Save to store or Cancel to discard the changes.

Now move on to Attribute Mapping and the section expands as:
- Click on Attribute Mapping,
- In this tab, map the relevant attributes of the product profiles with that of attributes of items on eBay.
- This option is to match the attribute of a particular product type with that of values of product attributes at Prestashop.
The tab appears as shown in the following figure:

- Note: Since these attributes depend on the product categories, they vary with individual product categories.
- Fill all the required details and click on Save button to save the settings,
Move to eBay Listings section now:
- Click on eBay Listings.
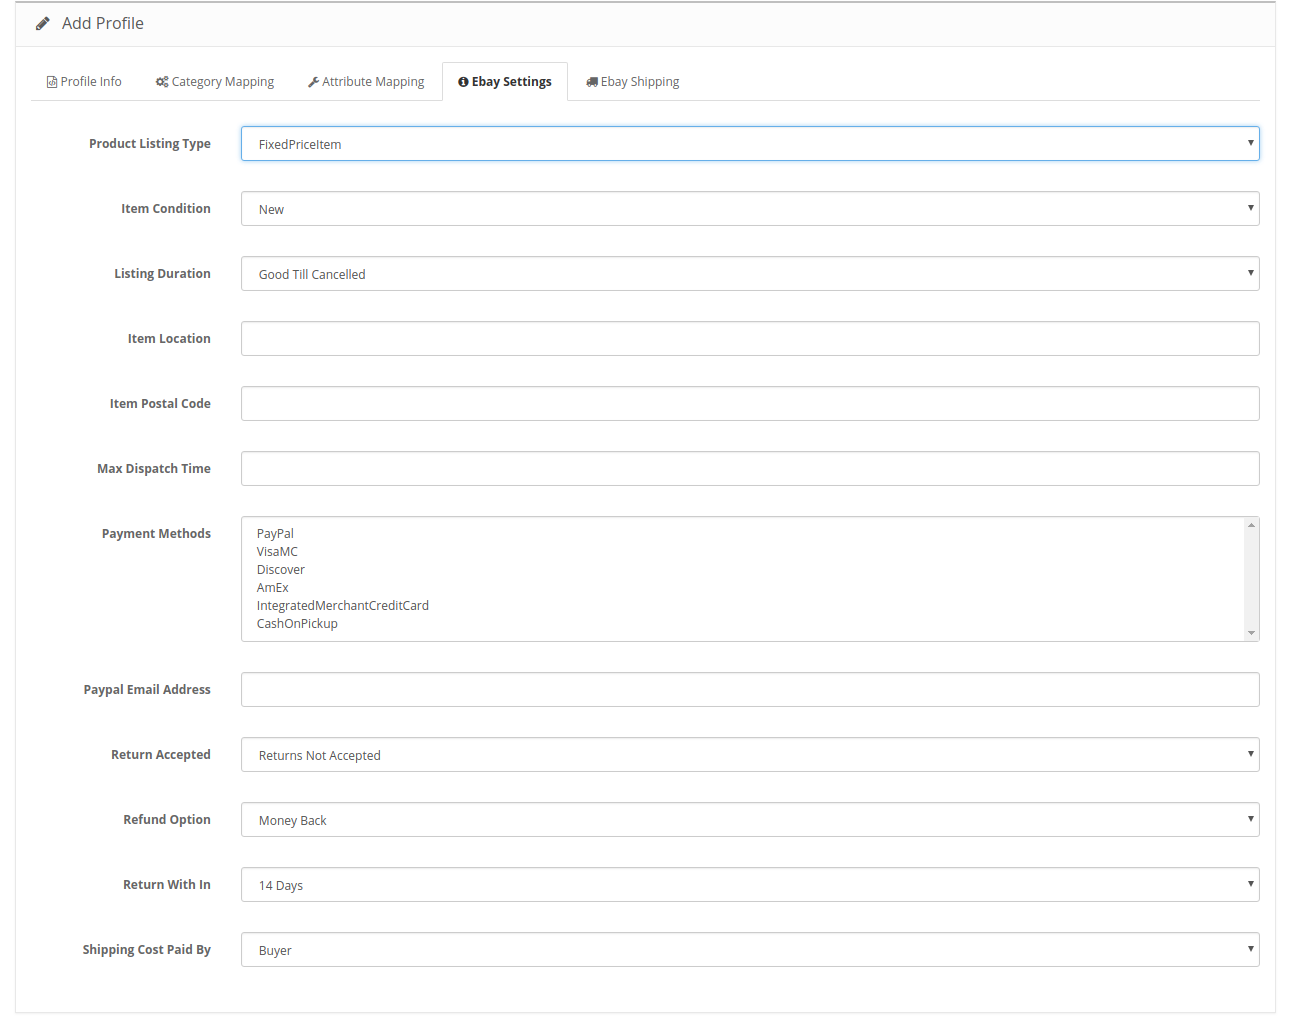
The tab appears as shown in the following figure: - In the eBay Listings, do the following figure:
- In Product, Listing Type choose the type of products you wish to enter in this profile.
- In the Item Condition, Choose the item’s condition.
- In Listing Duration, Choose the time interval you want your listing to be live at eBay.
- In the Item Location box, enter the location where the product is stocked.
- In the Item Postal Code, enter the area code/zip code.
- In the Max Dispatch box, enter the time taken to dispatch an item once an order is received.
- In the payments method, choose the desired
- Enter your
- If you accept returns of products then select Return Accepted or else Return Not Accepted.
- In the Refund Option, choose the desired option for refund.
- Set the time duration of return in the Return With In section.
- You can select who pays the shipping cost under Shipping Cost Paid By this can be either seller or buyer.
Now move to the Payment Settings
- Click on Payment settings.
- In the Payment Settings, do the following steps:
- In the Use Predefined Payment Policy, select Enable to use the predefined payment policy.
- In the Payment Methods drop-down menu, choose all the desired payment methods.
- In the Paypal email address field, enter the email address related with your PayPal account.
- In the COD cost, enter the COD costs.
The tab appears as shown in the following figure:

Now move on to Return Settings.
- Click on Return Settings
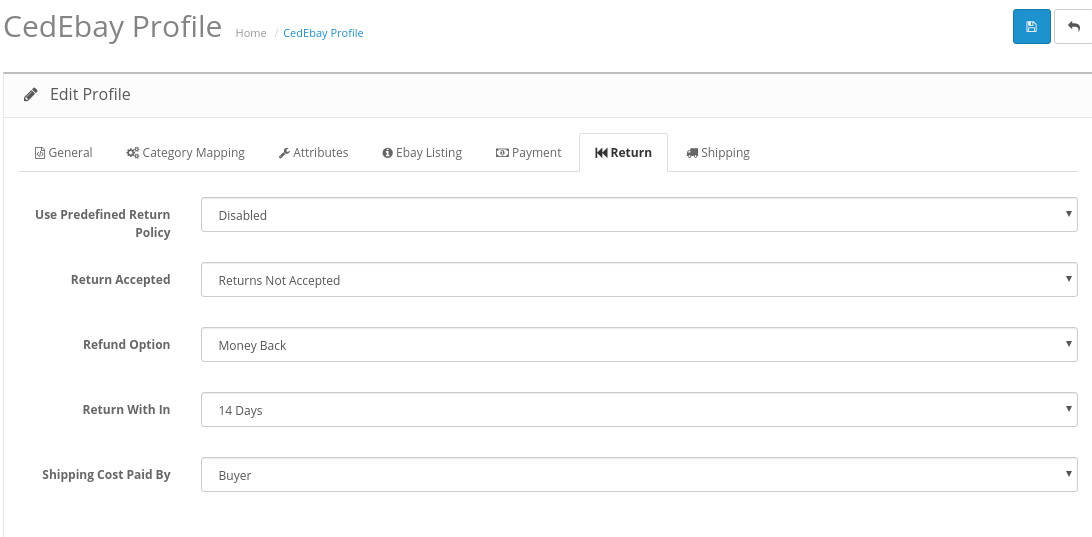
The page appears as shown in the following figure: - In the eBay Return Settings, do the following steps:
- In the Use Predefined Return Policy, select enable to use the predefined return policy,
- In the Return Accepted field, select if you want to accept returns or not.
- In the Refund Option, choose the type of Refund you want to offer.
- In the Return Within, enter the minimum number of days to return the product
- In the Shipping Cost Paid by, choose if the cost is to be beared by Seller or Buyer.
Now move on the last section Shipment
- In the Third tab, Go to eBay Shipping:
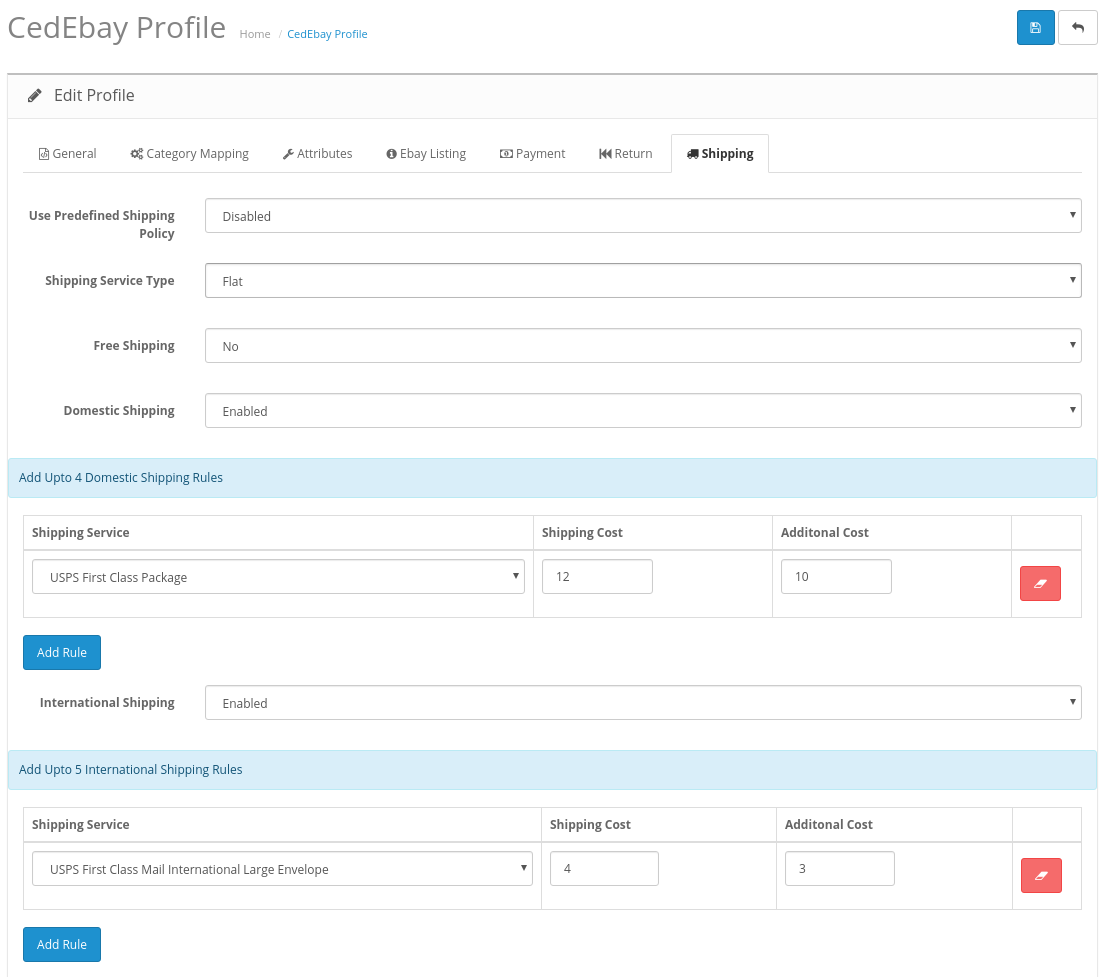
The tab is shown in the following figure: - In the eBay Shipment settings, do the following steps:
- In the Predefined Return Policy field, select the option whether you need to use return policy or not.
- In Shipping Service Type, enter the shipment method you wish to choose for delivery.
- In the Free Shipping, choose True to enable free shipping and false to disable it.
- In the Enable Domestic Shipping option, select True, to enable the domestic shipping.
- In the Domestic Shipping:
- In this tab, choose the desired domestic carriers for your profile.
- Click on Add Rule to add new domestic shipment carries, you can add as many carriers for your country.

In the International Shipping
- In this tab, choose the desired International carriers for your profile.
- Click on Add Rule to add new international shipment carries, you can add as many carriers for your country.
- Once you’re done profiling everything proceeds to Save to store the changes and Cancel to discard them.
- A success message appears as shown:


×


