3.Cdiscount Configuration Settings ↑ Back to Top
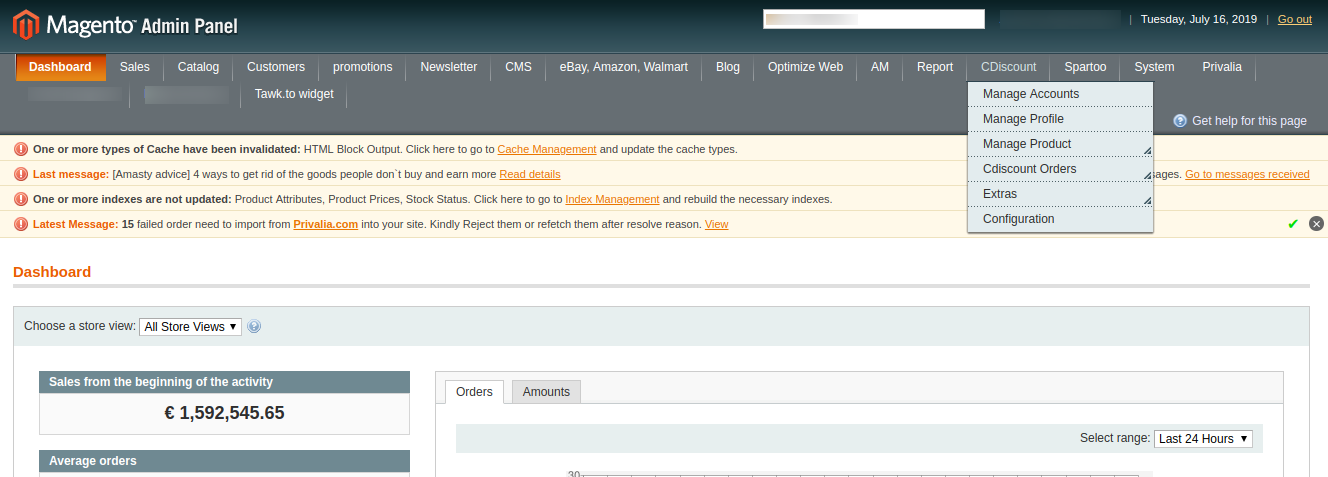
Once the extension is successfully installed in the Magento store, the Cdiscount menu appears on the top navigation bar of the Admin Panel. The merchant has to first create a seller account in the Cdiscount seller panel. Once the seller account is created and is approved by Cdiscount, then the Magento store owner can use the Cdiscount Username and Password while setting up the Cdiscount Configuration settings in the Magento Admin panel.
Procedure to set up the configuration settings in the Magento Admin Panel:
- Go to the Magento Admin panel.
- On the top navigation bar, point to the Cdiscount menu.
The menu appears as shown:

- Click Configuration.
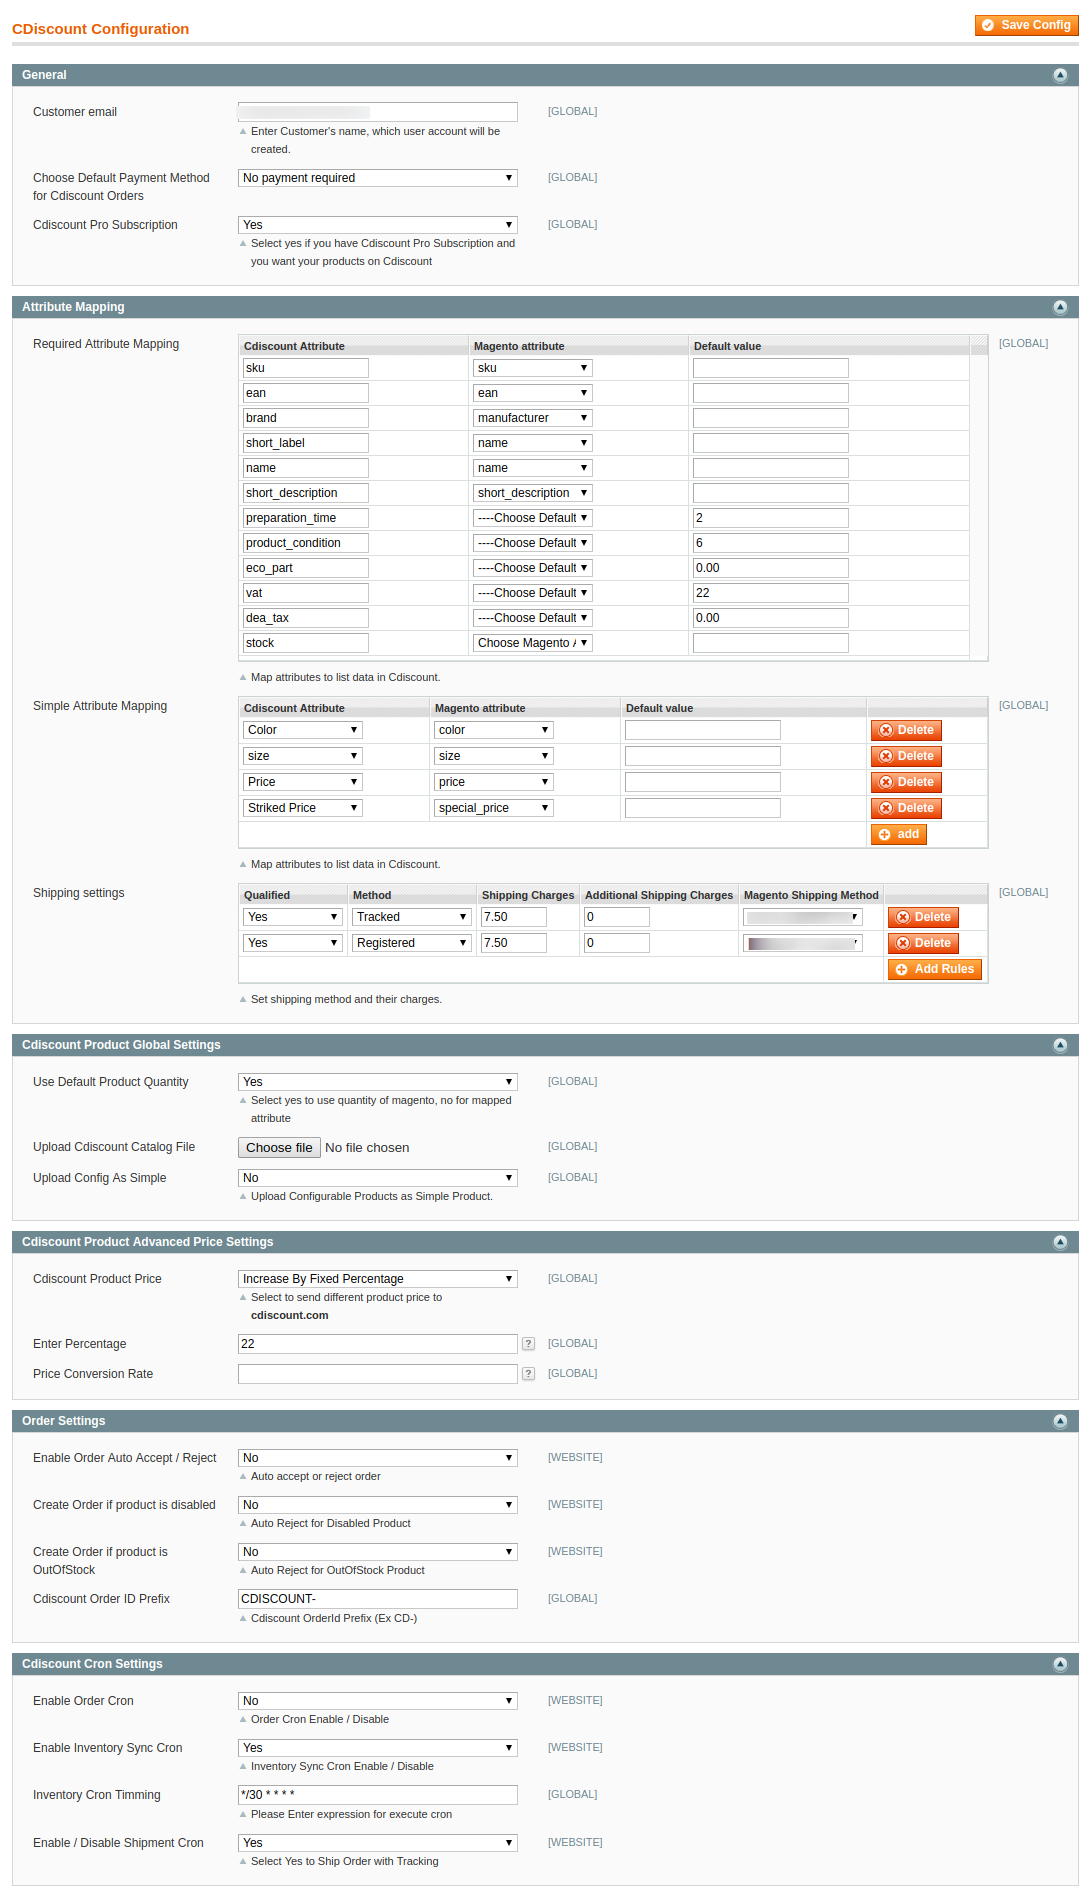
The Cdiscount Configuration page appears as shown in the following figure:
 4. In the right panel, under the General Setting section, do the following steps:
- In the Customer Email list, enter Customer’s name, which user account will be created.
- In the Choose Default Payment Method for Cdiscount Orders box, select the payment method for Cdiscount orders.
- In the Cdiscount Pro Subscription box, select Yes option, if you have Cdiscount Pro Subscription and you want your
products on Cdiscountpro.com. - In the Required Attribute Mapping, you can map the Cdiscount attributes to Magento attributes.
- In the Simple Attribute Mapping map the attributes to list data in Cdiscount.
- In the Shipping Settings list, set shipping method and their charges.
5. In the Cdiscount Product Global Settings section, do the following steps:
- In the Use Default Product Quantity box, Select Yes to use a quantity of Magento, no for the mapped attribute.
- In the Upload Cdiscount Catalog File box, upload Cdiscount catalog file. This file you can generate from the product section of Cdiscount panel.
- In the Upload Config As Simple box, upload configurable products as a simple product.
6. In the Cdiscount Product Advanced Price Settings section, do the following steps:
- Click on Cdiscount Product Price Tab.
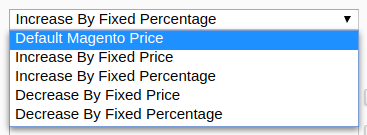
The Cdiscount Product Price Settings tab is expanded and the section appears as shown in the following figure:

- In the Product Price list, select one of the following options:
i. Increase by Fixed Price: If selected, then the Modify by Fix Price field appears.
ii. Increase by Fixed Percentage: If selected, then the Modify by Percentage Price field appears. Enter the numeric value to increase the price of the Cdiscount, product price by the entered value % of Magento price.
For Example,
Magento 2 price + 5% of Magento 2 price.
Magento 2 Price = 100
Select Increase By Fixed Percentage option
Modify by Percentage Price = 5
100 + 5% of 100 = 100 + 5 = 105
Thus, Cdiscount Product Price = 105iii. Decrease by Fixed Price: If selected, then the Modify by Fix Price field appears. iv. Decrease by Fixed Percentage: If selected, then the Modify by Percentage Price field appears.
Enter the numeric value to decrease the price of the Cdiscount product price by the entered value % of Magento price.
For Example,
Magento price – 5% of Magento price.
Magento Price = 100
Select Decrease By Fixed Percentage option
Modify by Fix Price = 5
100 – 5% of 100 = 100 – 5 = 95
Thus, Cdiscount Product Price = 95
7. In the Order Settings section, do the following steps:
- In the Enable Order Auto Accept / Reject box, select Yes option, to auto accept or reject Cdiscount orders.
- In the Create Order if a product is a disabled box, select Yes option, to create an order for those products which are only disabled.
- In the Create Order if a product is OutOfStock box, select the Yes option, to create an order for those products which are OutofStock in Magento.
- In the Cdiscount Order ID Prefix box, enter the prefix id for Cdiscount orders.
8. In the Cdiscount Cron Settings section, do the following steps:
- In the Enable Order Cron box, select the Yes option to enable the order cron.
- In the Enable Inventory Sync Cron box, select the Yes option to enable the inventory cron.
- In the Inventory Cron Timming box, enter the expression for executing cron.
- In the Enable / Disable Shipment Cron box, select the Yes option to Ship Order with Tracking.
9. Click the Save Config button to save the entered values.


