
Configuration
To configure the extension,
- Go to the Magento 2 Admin panel.
- On the left navigation bar, click the Wayfair Integration menu.
The menu appears as shown in the following figure:
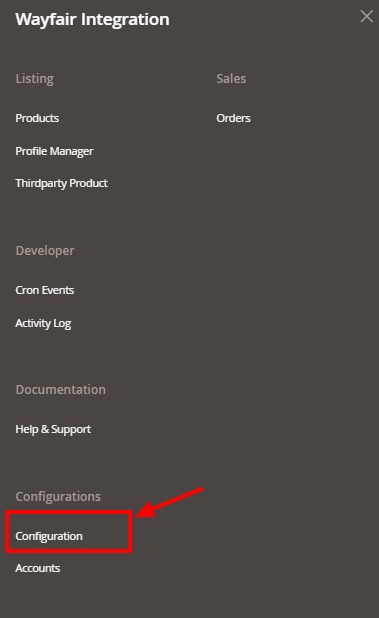
- Click on Configuration.
The Configuration page appears as shown in the following figure:
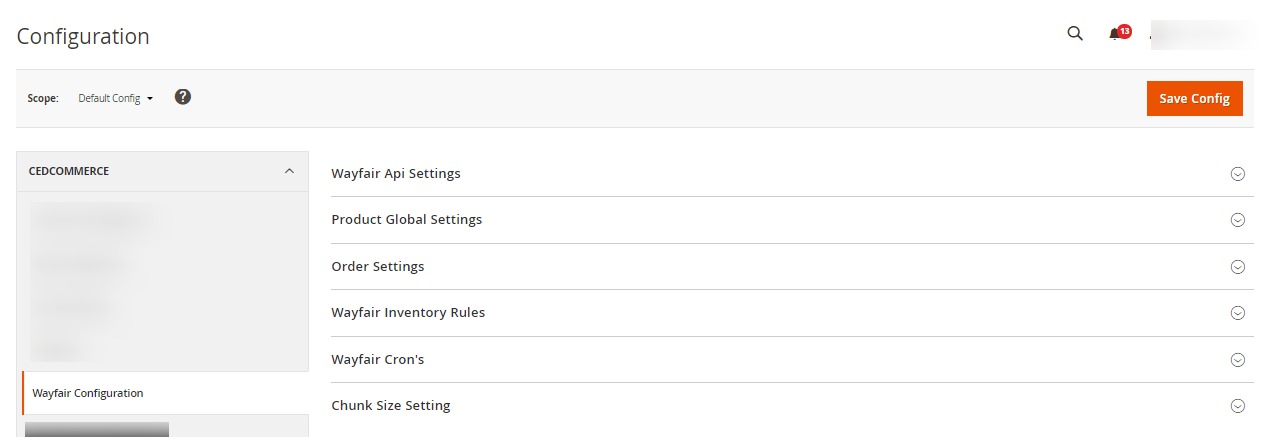
- In the right panel, click on Wayfair API Settings, and the section expands as:

- In the Enabled list, select Yes to enable the extension features.
- In the Debug Log list, select Yes to start Wayfair Integration in the debug mode.
- In the right panel, click on Product Global Settings, and the section expands as:

- In the Wayfair Product Price list, select one of the following options:
- Increase by Fixed Price: If selected, then the Modify by Fix Price field appears.
- Increase by Fixed Percentage: If selected, then the Modify by Percentage Price field appears. Enter the numeric value to increase the price of the Wayfair, product price by the entered value % of Magento price
For Example,
Magento price + 5% of Magento price.
Magento Price = 100
Select Increase By Fixed Percentage option
Enter Percentage = 5
100 + 5% of 100 = 100 + 5 = 105
Thus, Wayfair Product Price = 105 - Decrease by Fixed Price: If selected, then the Modify by Fix Price field appears.
- Decrease by Fixed Percentage: If selected, then the Modify by Percentage Price field appears.
Enter the numeric value to decrease the price of the Wayfair product price by the entered value % of Magento price.
For Example,
Magento price – 5% of Magento price.
Magento Price = 100
Select Decrease By Fixed Percentage option
Enter Percentage = 5
100 – 5% of 100 = 100 – 5 = 95
Thus, Wayfair Product Price = 95
- In the Wayfair Product Price list, select one of the following options:
- In the right panel, click on Order Settings, and the section expands as:
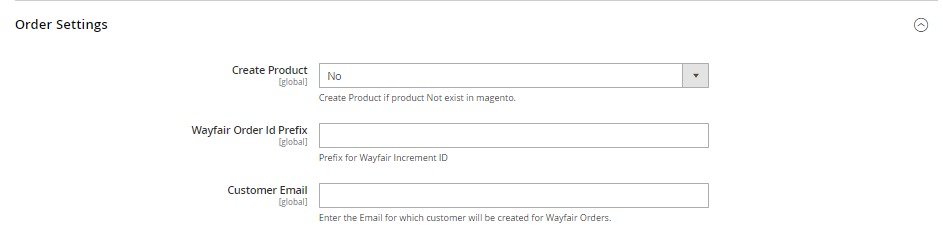
- In the Create Product field, select Yes if you want to create a product if it does not exist in Magento and yet has been ordered on Wayfair.
- In the Wayfair Order Id Prefix box, enter the text as a prefix for Wayfair Increment ID.
- In the Customer Email field, enter the email for which customer will be created for Wayfair Orders.
- In the right panel, click on Wayfair Inventory Rules, and the section expands as:

- In the Set Inventory on Basis of Threshold list, select Enable to send the inventory based on the threshold.
- In the Inventory Threshold Value box, enter the required value.
- In the Send Inventory for Lesser Than Threshold Case box, enter the required value.
- In the Send Inventory for Greater Than Threshold Case box, enter the required value.
- In the right panel, click on Wayfair Cron’s, and the section expands as:

- In the Order Cron list, select Enable to enable the order fetch cron.
- In Inventory/Price Cron, select Yes to synchronize inventory and price through crons.
- In the right panel, click on Chunk Size Setting, and the section expands as:
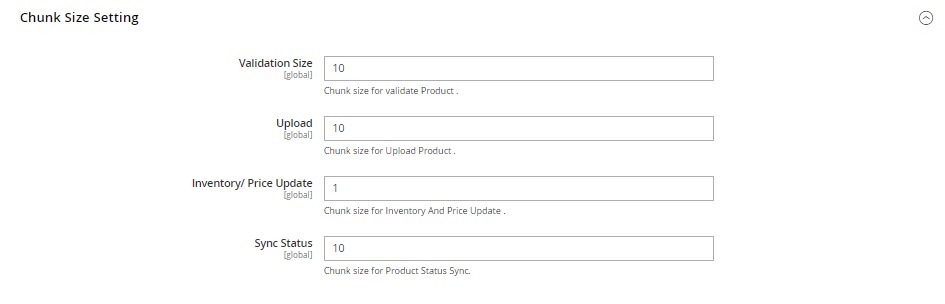
- In the Validation Size field, enter the chunk size for the products. The products that will get validated before being uploaded on Wayfair would be the same as the number you enter in this field.
- In the Upload field, enter the number of products that you want to upload in one go from Magento to Wayfair.
- In Inventory/Price Update, enter the chunk size for inventory and price.
- In the Sync Status field, enter the chunk size of the products. The number of products that you will be able to sync the status for would be the same as the number that you enter in this field.
- Click on the Save Config button.
The configuration settings will be saved.
×


