3.Vendor Advance Transaction Configuration. ↑ Back to Top
Once the admin installs the Vendor Advance Transaction add-on on the Vendors/Sellers store, the admin has to set up the configuration required to enable the features of this add-on.
To configure the vendor advance Transaction system
- Go to the Admin Panel.
- On the left navigation bar, click the CED MARKETPLACE menu, and then click Vendor Configuration.
The Configuration page appears. - Scroll down on the same page to the Vendor Advance Transaction System tab on the panel.
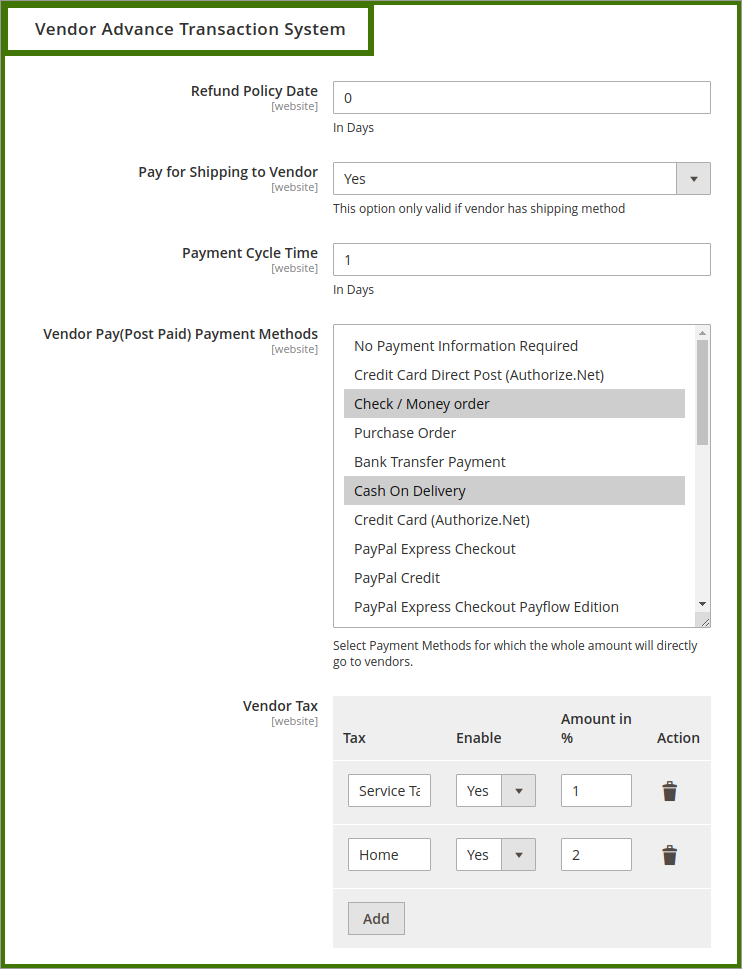
The Vendor Advance Transaction System section appears as shown in the figure below:

- Enter the number of days in the Refund Policy Date box. The number of days within which the refund needs to be cleared.
- On the Pay for Shipping to Vendor list, enable or disable the functionality by selecting Yes/No, This option is only valid if the vendor has a shipping method.
- Enter the number of days in the Payment Cycle Time box. Time required within days to make a payment to the vendor. The payment cycle starts from the time when the front-end user has placed the order for, purchase until the time when the user has made the payment to the vendor.
- On the Vendor Pay (Postpaid) Payment Methods list, select the required payment method.
The payment method that the admin wants to consider for the postpaid payment method. - Under the Vendor Tax section, add the vendor taxes as per the following steps:
- Click the Add button.
- In the Tax box, enter the type of tax.
- On the Enable list, select Yes to enable the corresponding tax.
- In the Amount in % box, enter the required value in percentage.
- Final Click on the Save Config button from the top right corner of the page.
×


